
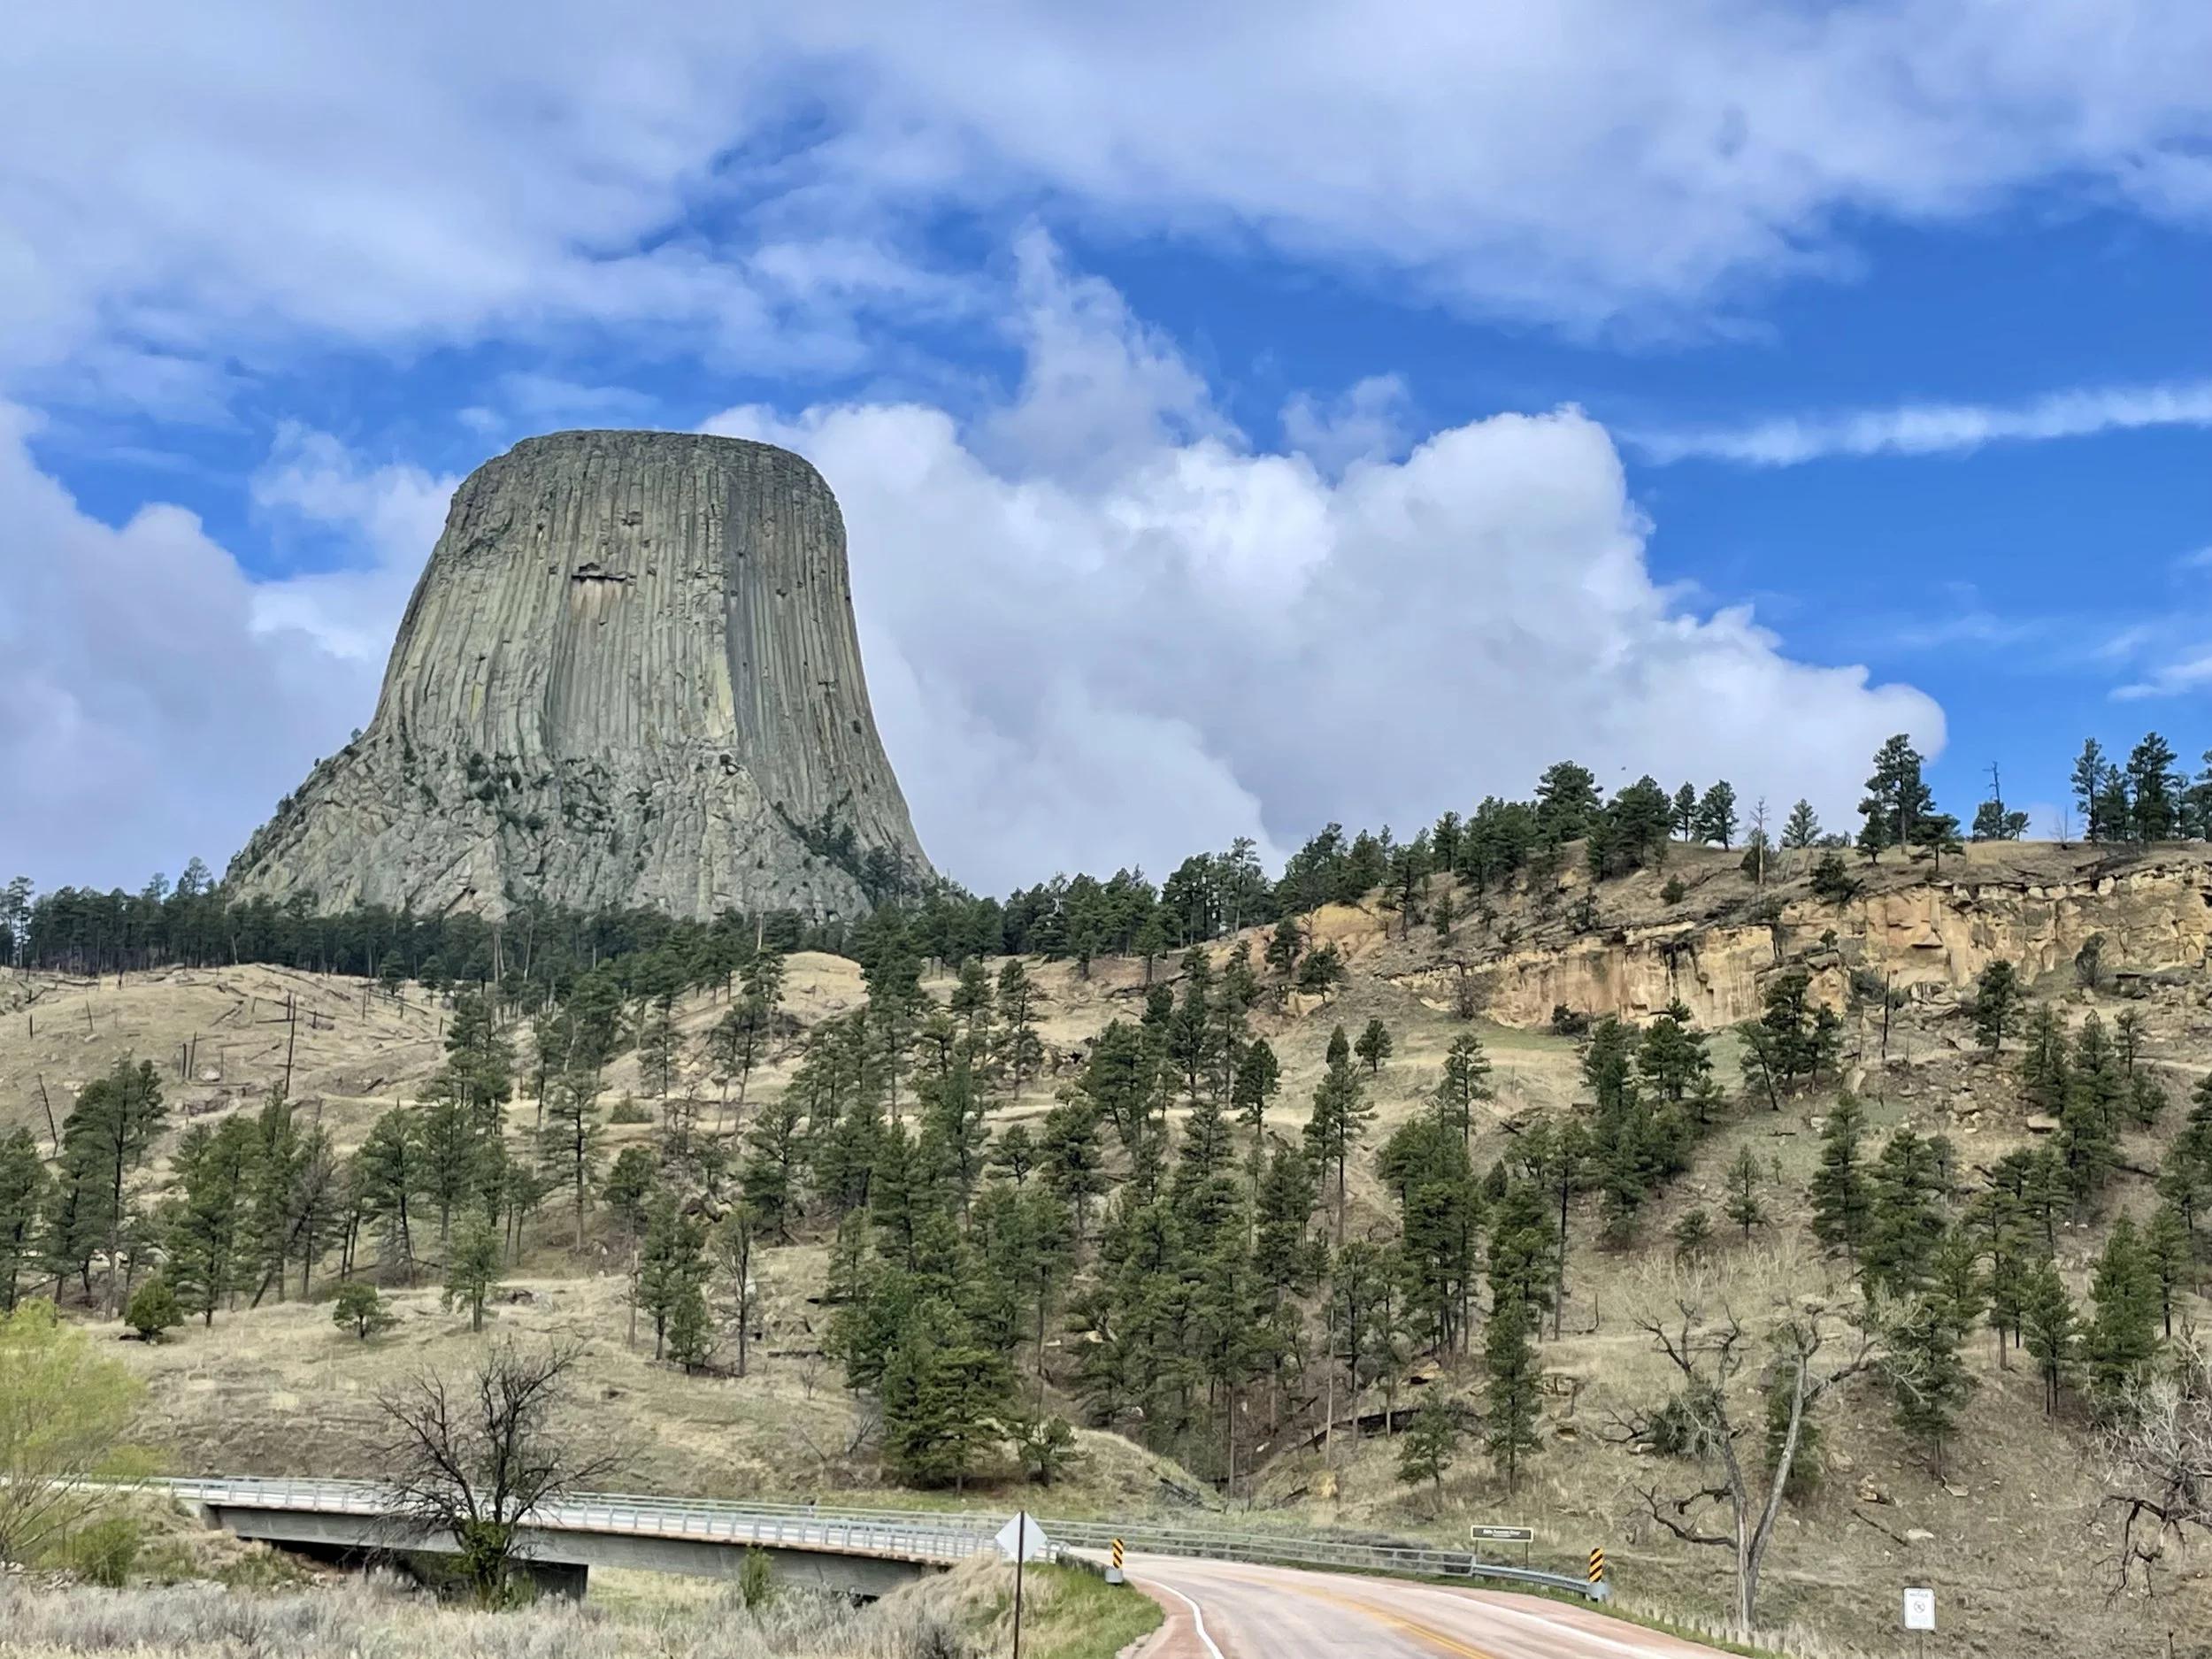


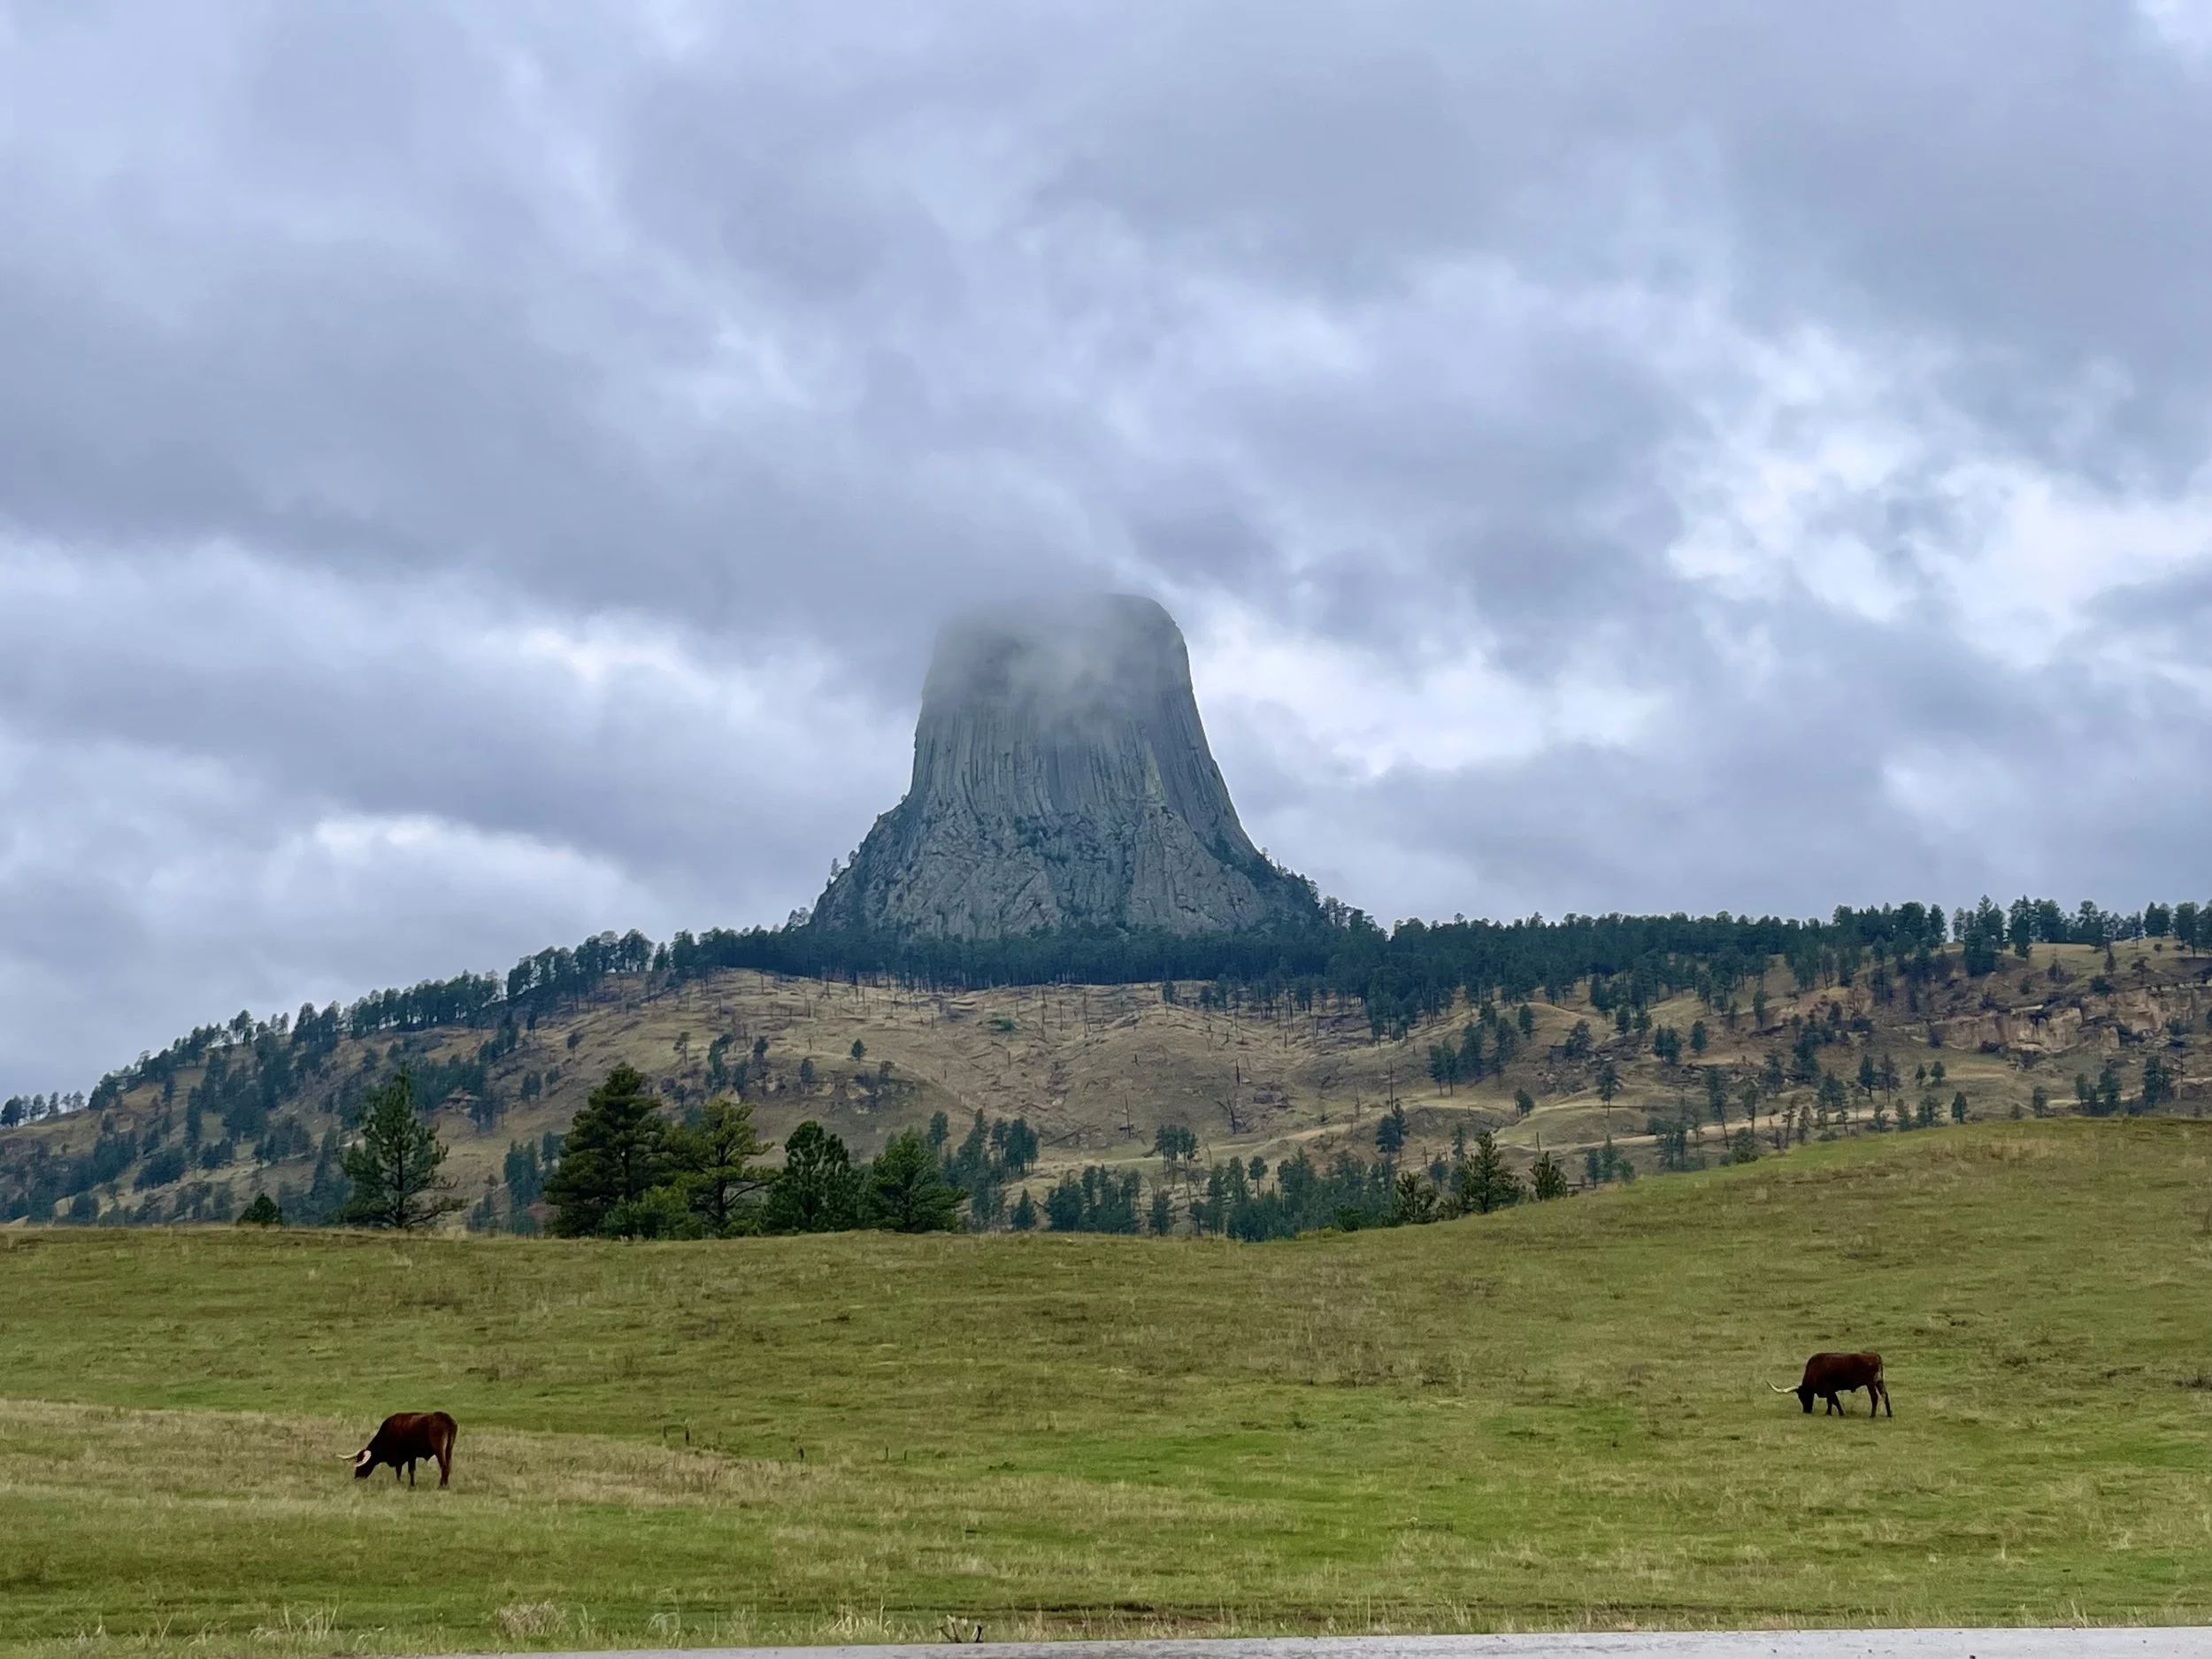
Devils Tower National Monument
My trip to Devils Tower started very early on a Wednesday morning in May. I was staying in Rapid City, South Dakota, and decided to make the day trip west into Wyoming. My first introduction to Devils Tower was through my mother, who showed me the 1977 film Close Encounters of the Third Kind. The tower is prominently featured in the movie, and my mother, who adores the film, had always dreamed of seeing it in person.
The drive from Rapid City took about two and a half hours. Rain followed me almost the entire way, turning the hills and pastures a silver-washed green. Even through clouds, the landscape was striking, and I imagined how much sharper it would look on a clear day.
The Drive from Rapid City
From Rapid City, I took I-90 west through the Black Hills, passing Sturgis, a town best known for its massive annual motorcycle rally. Farther along is Spearfish, where the rolling plains start to meet the first dramatic cliffs of the Black Hills. I exited at Sundance, Wyoming, then followed Highway 14 north before turning onto Highway 24, which leads directly to the monument.
The route winds through small Wyoming towns and wide stretches of ranch land. Along the way, you see cattle grazing, red rock outcrops, and distant ridge-lines. The farther you go, the more isolated it feels until suddenly the tower rises above the horizon. It is impossible to miss. A solitary giant standing against the sky.
First Impressions
At the entrance, I stopped at the fee station and FaceTimed my mother. It felt wrong to see the tower without her, so sharing that moment virtually was the next best thing. From there, I drove the short winding road up to the visitor center at the base. Because it was still early and the visitor center doors weren’t open yet, I picked up my National Park Passport stamp from the small booth outside.
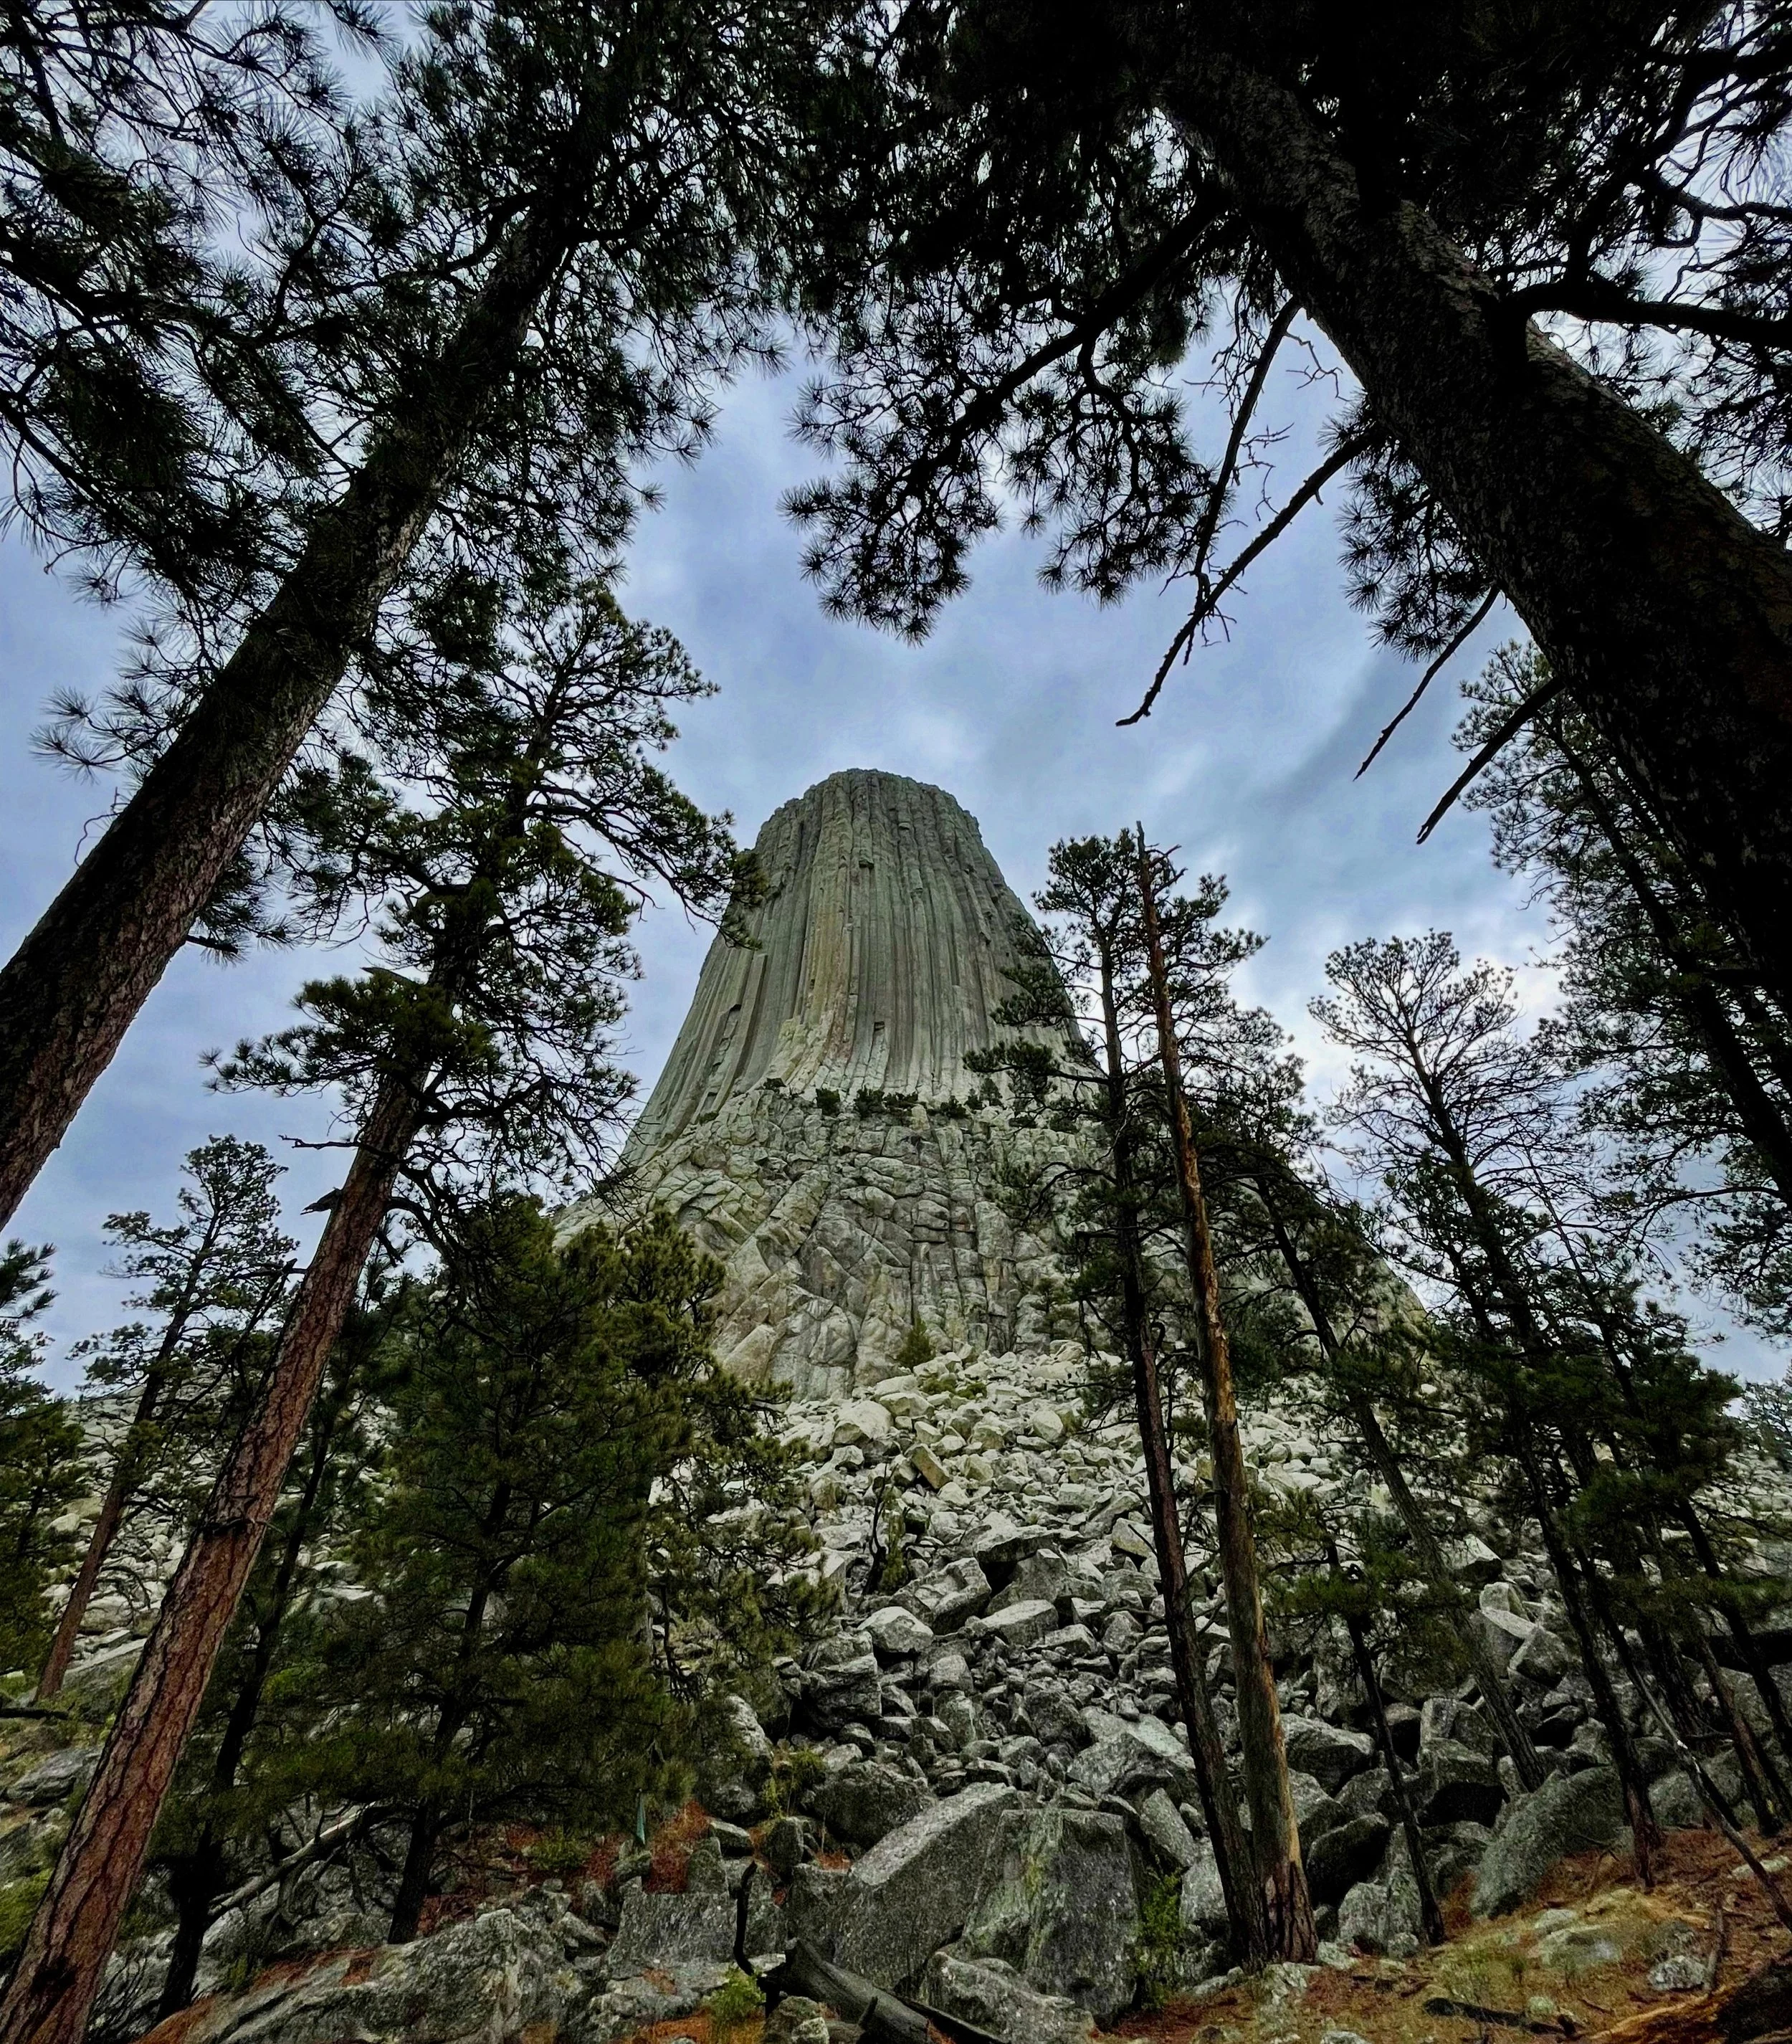
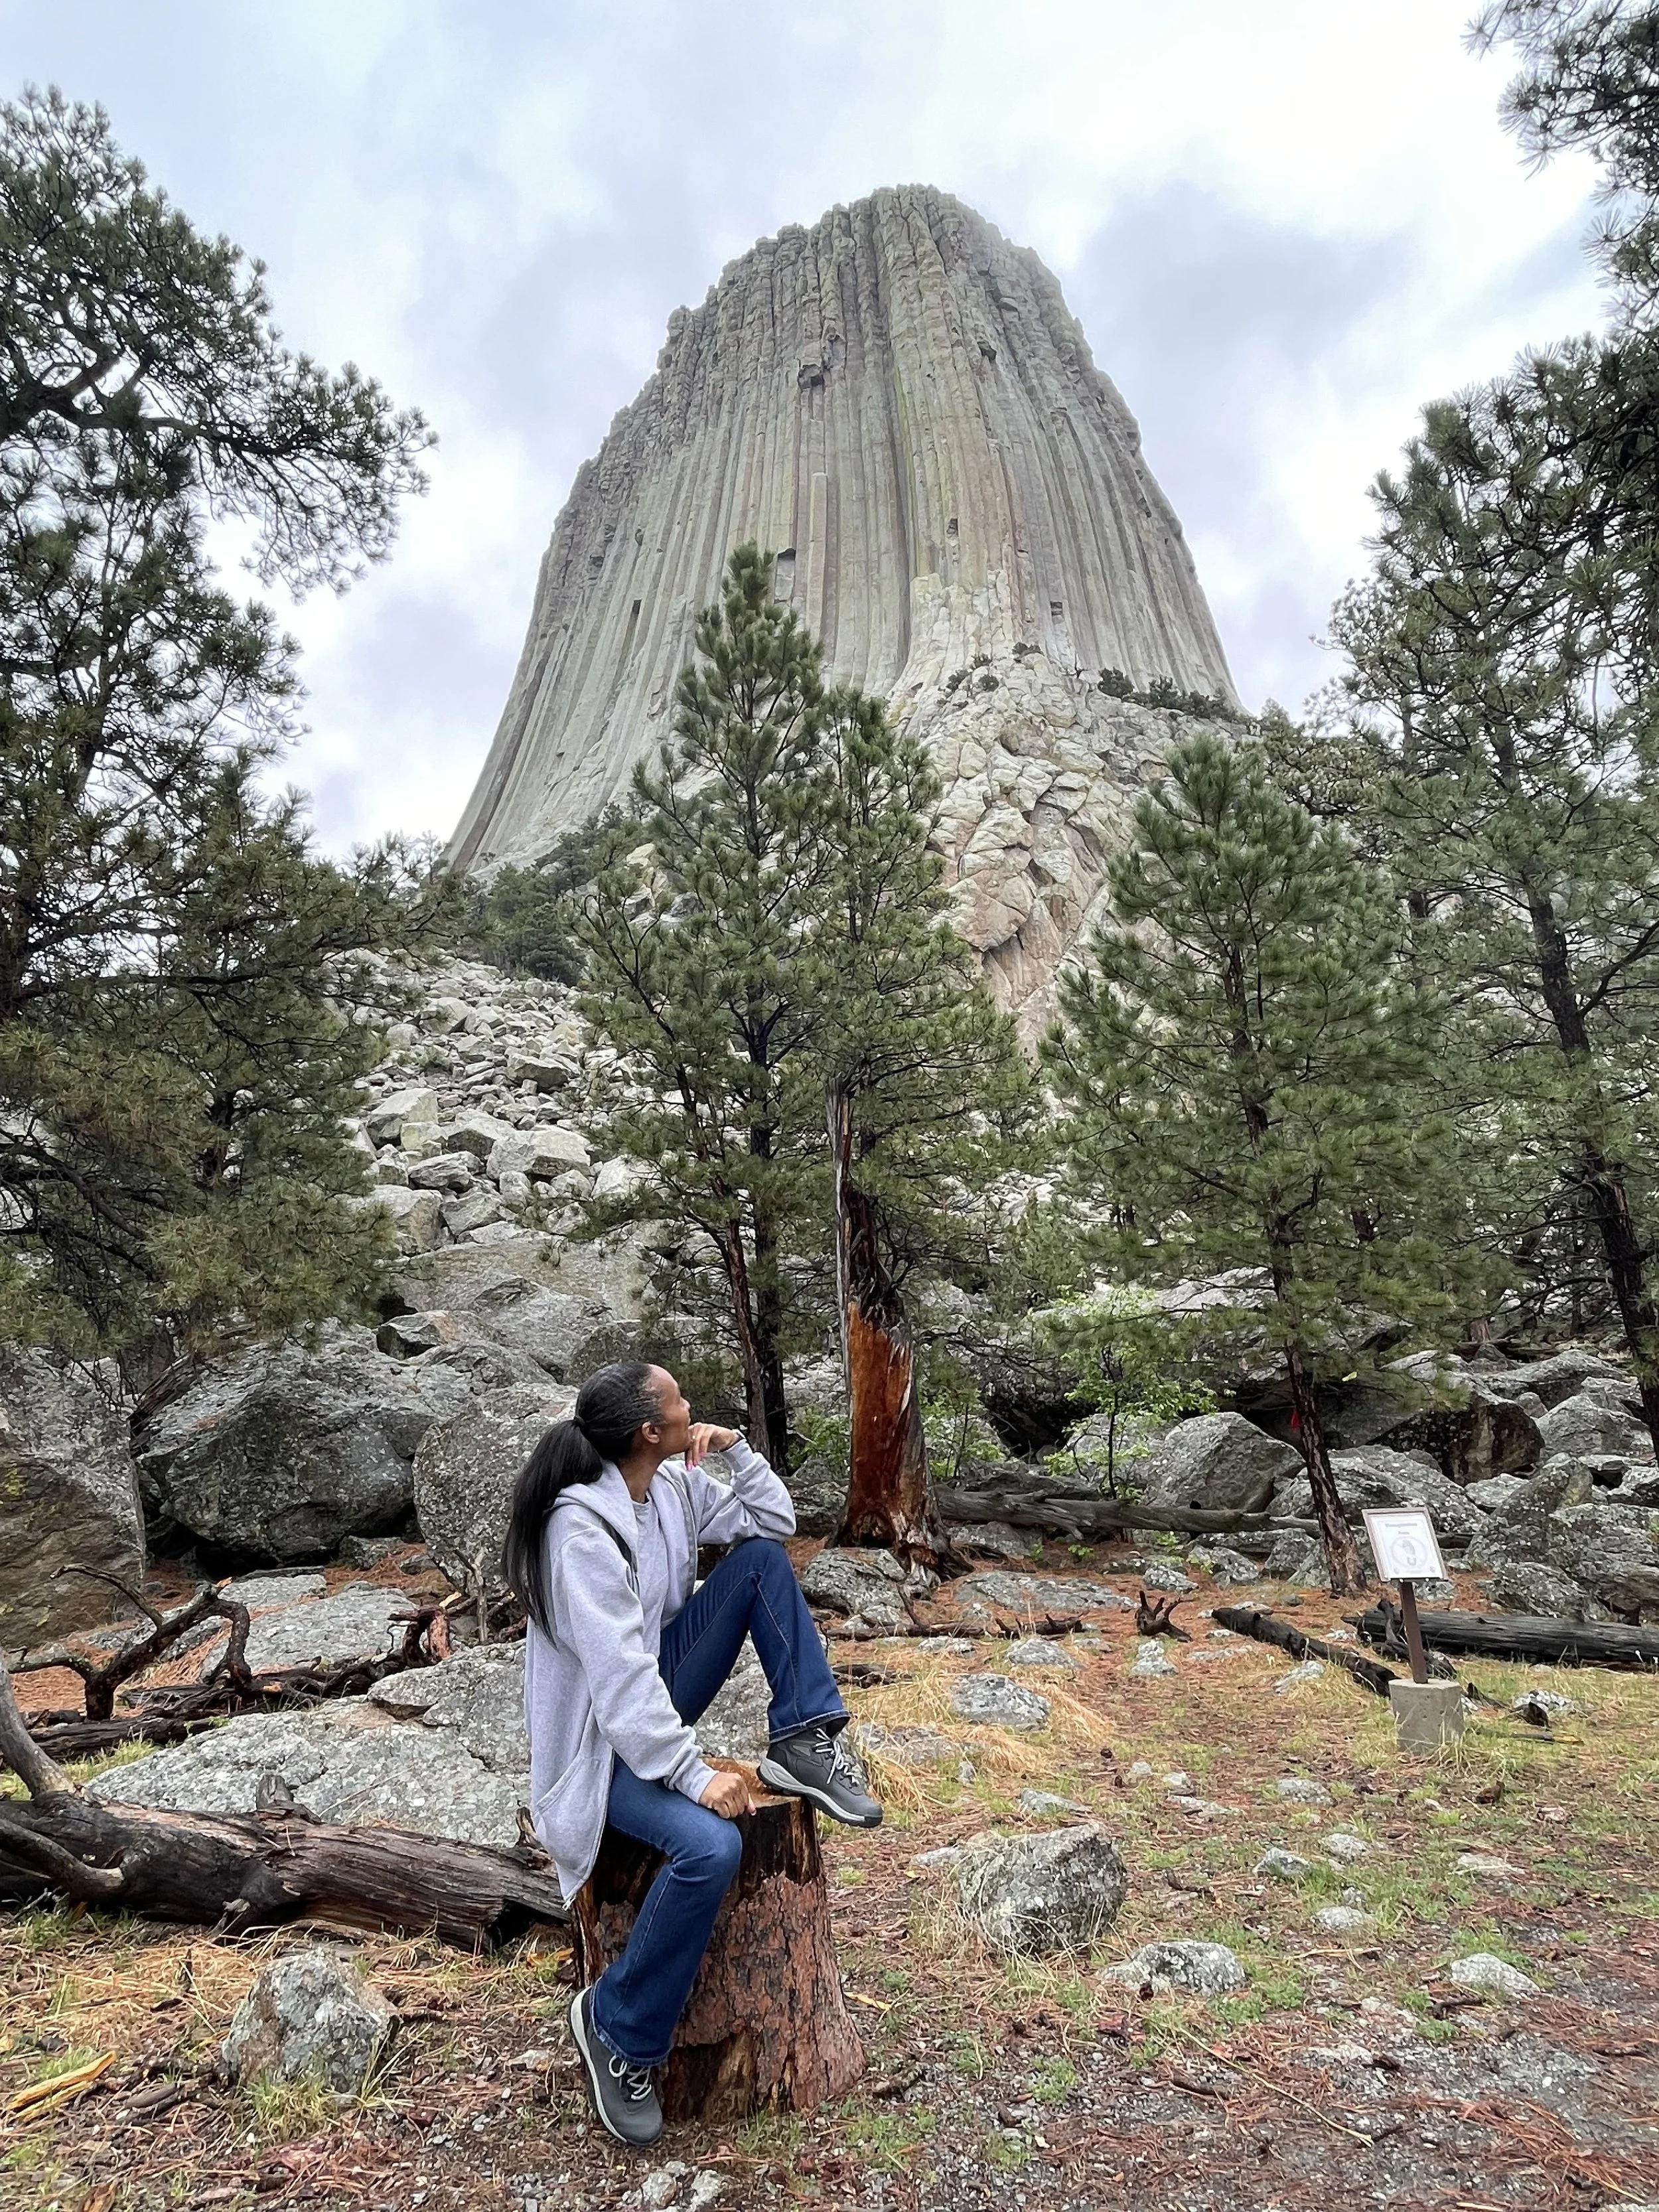
Devils Tower holds deep cultural significance to many Native American tribes, and the site is treated with respect. I walked the paved trail circling the base, stopping often for photos. The low clouds gave the columned rock a moody, dramatic look. By the time I left around 10 a.m., the sky had begun to clear just as the first tour buses arrived. Watching the tower shift from shrouded gray to set against a bright blue sky felt like two visits in one.
It was well worth the drive.
A Bit About The Park
• First U.S. National Monument (1906): Devils Tower was designated by President Theodore Roosevelt as the very first U.S. National Monument under the Antiquities Act. This decision set an important precedent for preserving natural and cultural landmarks across the nation.
• Geology: The tower rises 867 feet from base to summit, with striking vertical columns that make it one of the most recognizable geologic features in North America. Scientists describe it as an igneous intrusion, formed when magma cooled and hardened underground about 50 million years ago. Over time, softer rock eroded away, leaving the dramatic hexagonal columns we see today.
• Sacred Site: For many Native American tribes including the Lakota, Cheyenne, Crow, Arapaho, Kiowa, and Shoshone, Devils Tower has long been a place of deep cultural and spiritual significance. Visitors often notice prayer cloths and ceremonial bundles tied to trees near the base, symbols of ongoing traditions and reverence.
• Legends and Stories: Tribal oral histories offer different explanations for the tower’s creation. A well-known legend tells of children pursued by a bear. The Great Spirit lifted the ground to save them, and the bear’s claws left the vertical grooves along the sides of the tower. Other stories describe it as a place of refuge, transformation, or spiritual testing, each reflecting the tower’s enduring role in Native culture.
• Wildlife and Surroundings: The monument protects not only the tower but also the surrounding pine forests, prairies, and the Belle Fourche River. Prairie dogs, deer, and wild turkeys are commonly seen, and bald eagles can sometimes be spotted circling overhead.
• Climbing and Respect: Devils Tower is internationally known for climbing. The many parallel cracks make it an ideal location for the sport, attracting climbers from around the world. In June, a voluntary climbing closure is observed to honor Native ceremonies, a practice that highlights the balance between recreation and respect.
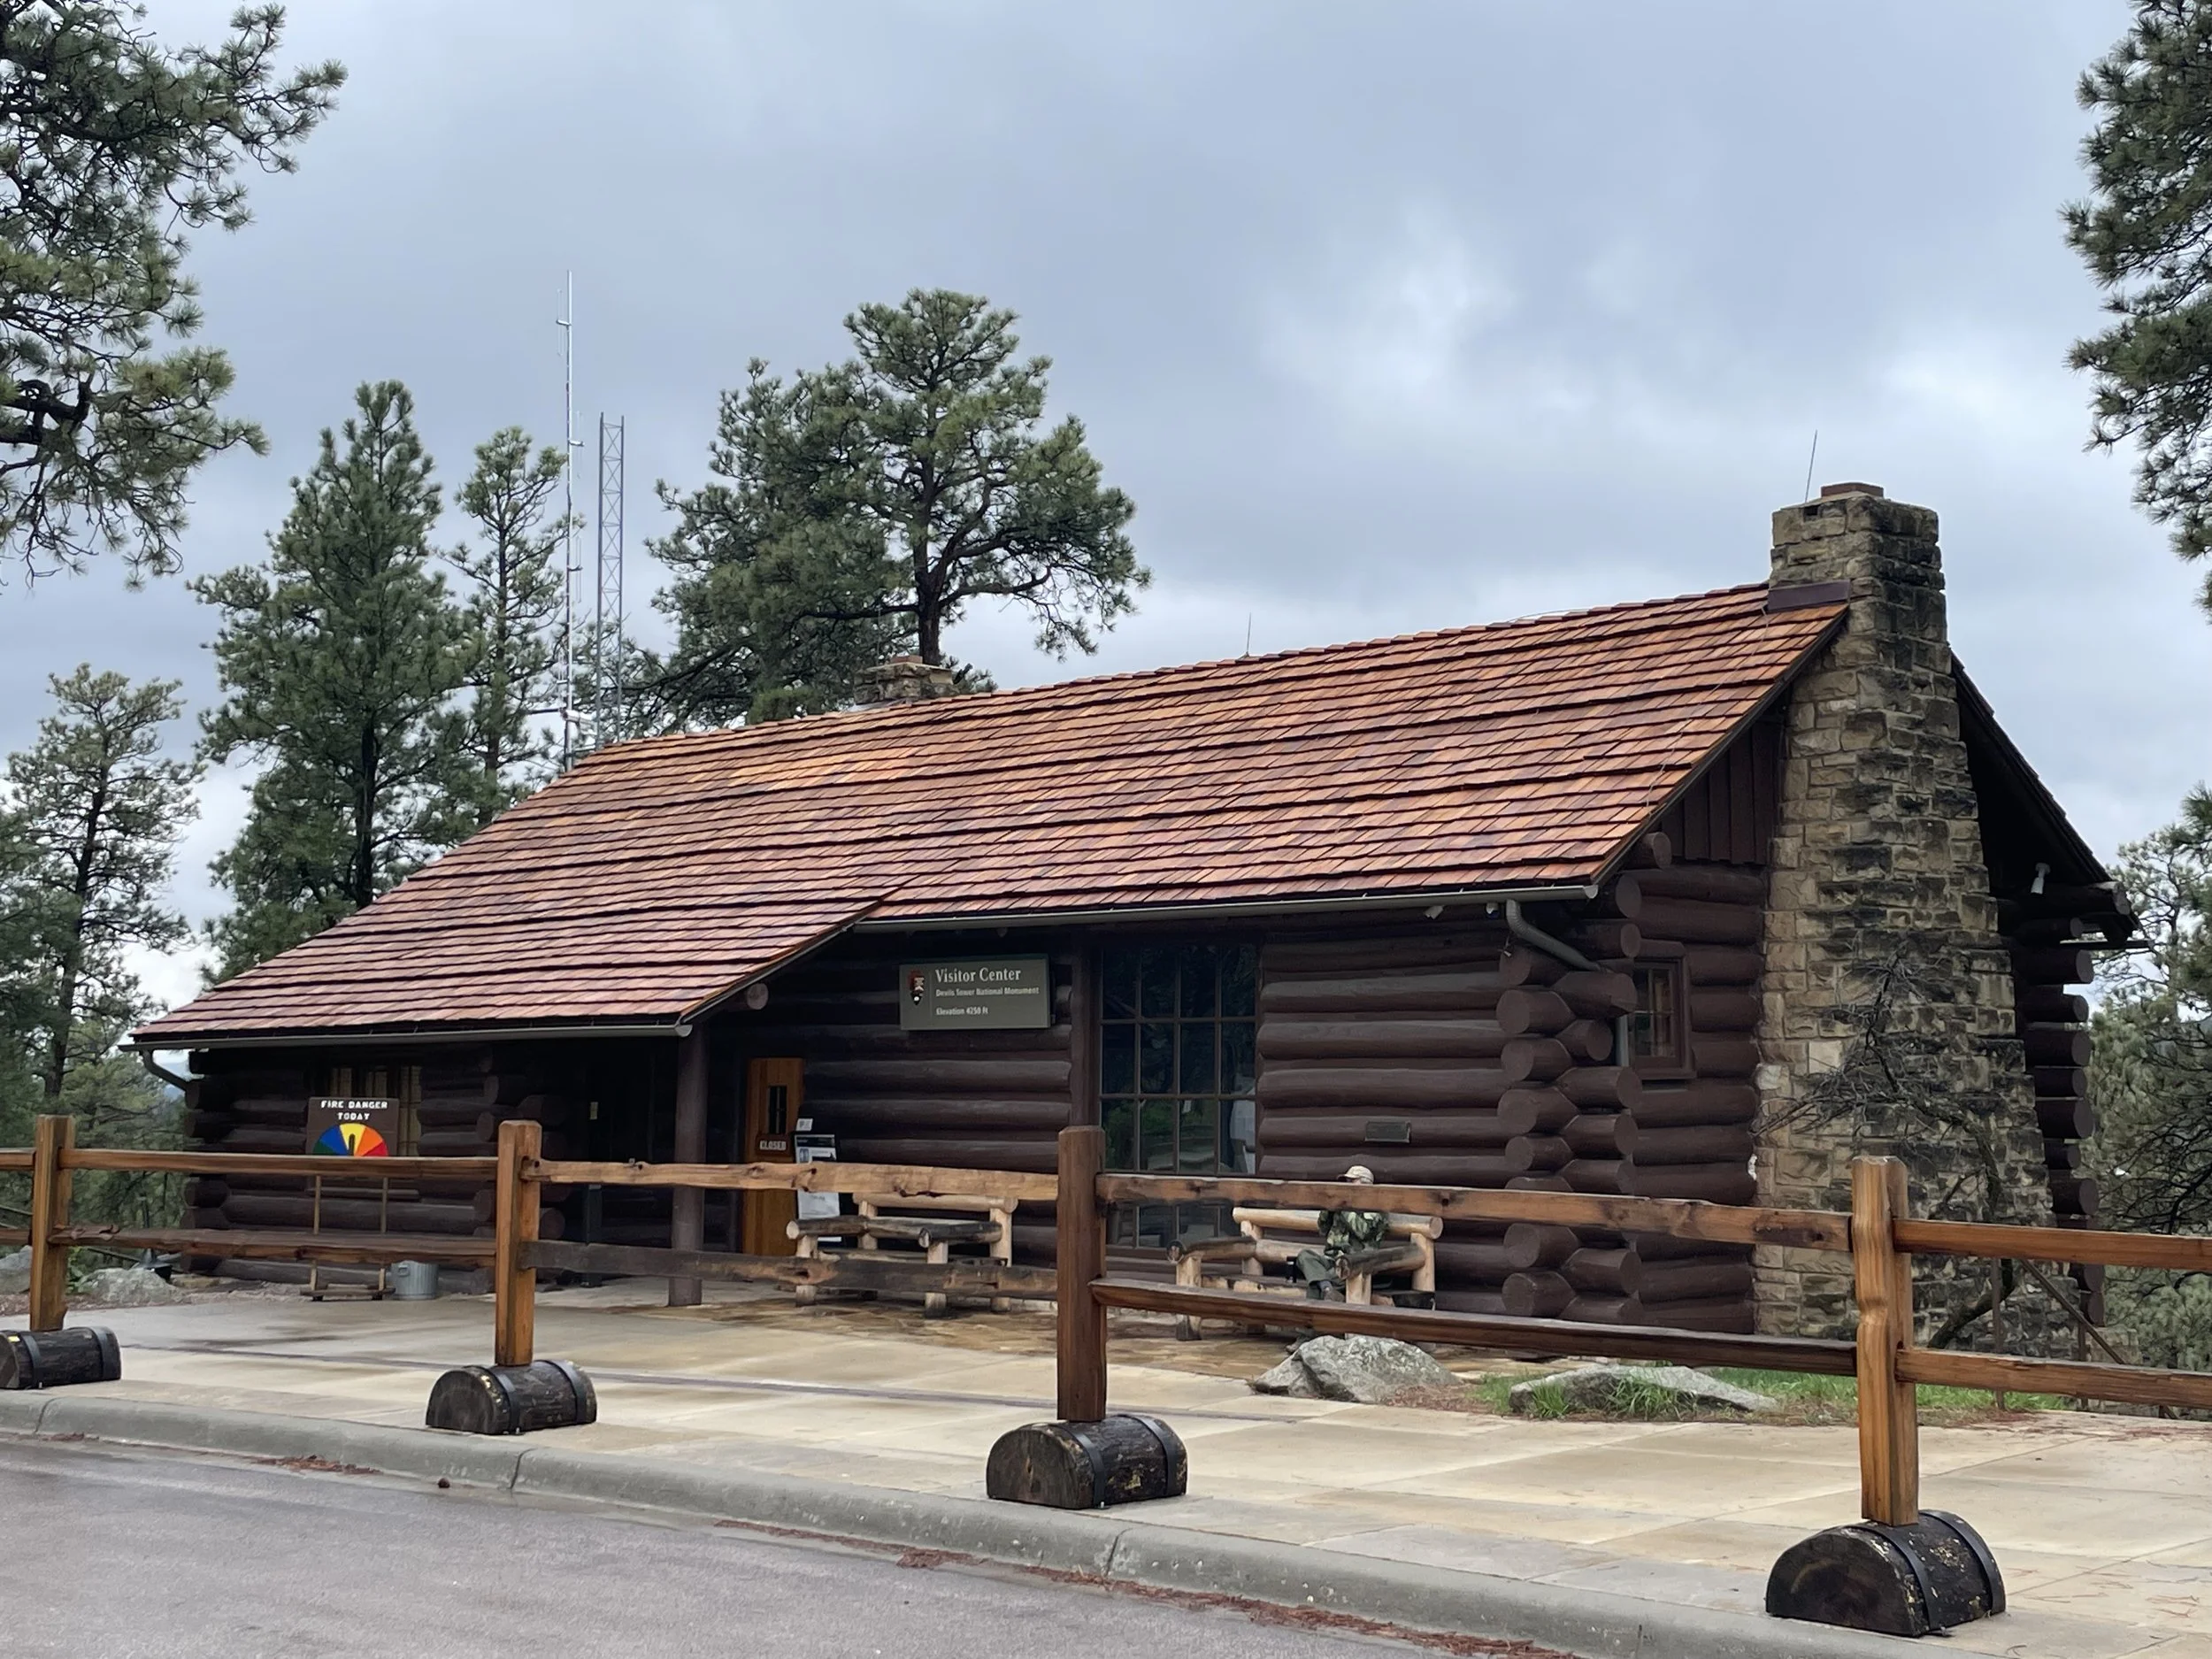
Devil’s Tower Visitor Center
Devils Tower Visitor Center
WY-110, Devils Tower, WY 82714
• Built in the 1930s by the Civilian Conservation Corps.
• Offers exhibits on geology, history, and Native significance.
• Passport stamps available.
• Open daily spring through fall; reduced hours in winter (typically 9 a.m. – 4 p.m.).
Passes and Fees
• Entrance Fee: $25 per vehicle (valid for 7 days)
• America the Beautiful Pass: Accepted
• No reservations required for general entry
Most Visited Places in the Monument
• Tower Trail (1.3 miles) — Main paved loop circling the base.
• Joyner Ridge Trail (1.5 miles) — Quieter loop with expansive views from a distance.
• Prairie Dog Town — Easy roadside stop to watch prairie dogs pop in and out of burrows.
Best Hikes
• Tower Trail (1.3 miles) — Paved and easy, circling the tower itself.
• Joyner Ridge Trail (1.5 miles) — Short, scenic, and especially good at sunrise or sunset.
• Red Beds Trail (2.8 miles) — Loops around with sweeping views of the tower and Belle Fourche River valley.
Best Photo Spots
• Entrance Road Pullouts — Classic view of the tower rising above the trees.
• Tower Trail — Close-up perspective on the massive vertical columns.
• Joyner Ridge — Wide-angle views, golden hour perfection.
Accessibility
• Visitor Center and Tower Trail are accessible, though the trail has some incline.
• Prairie Dog Town viewable from the car.
• Red Beds and Joyner Ridge are natural-surface trails, not wheelchair-friendly.
Other Helpful Info
• Weather: Summers hot, winters icy; spring and fall are mild.
• Food & Gas: Limited near the monument; stock up in nearby Sundance, WY.
• Cell Service: Good near the visitor center, weaker farther out.
• Climbing: Allowed, but there is a voluntary June closure to honor tribal ceremonies.
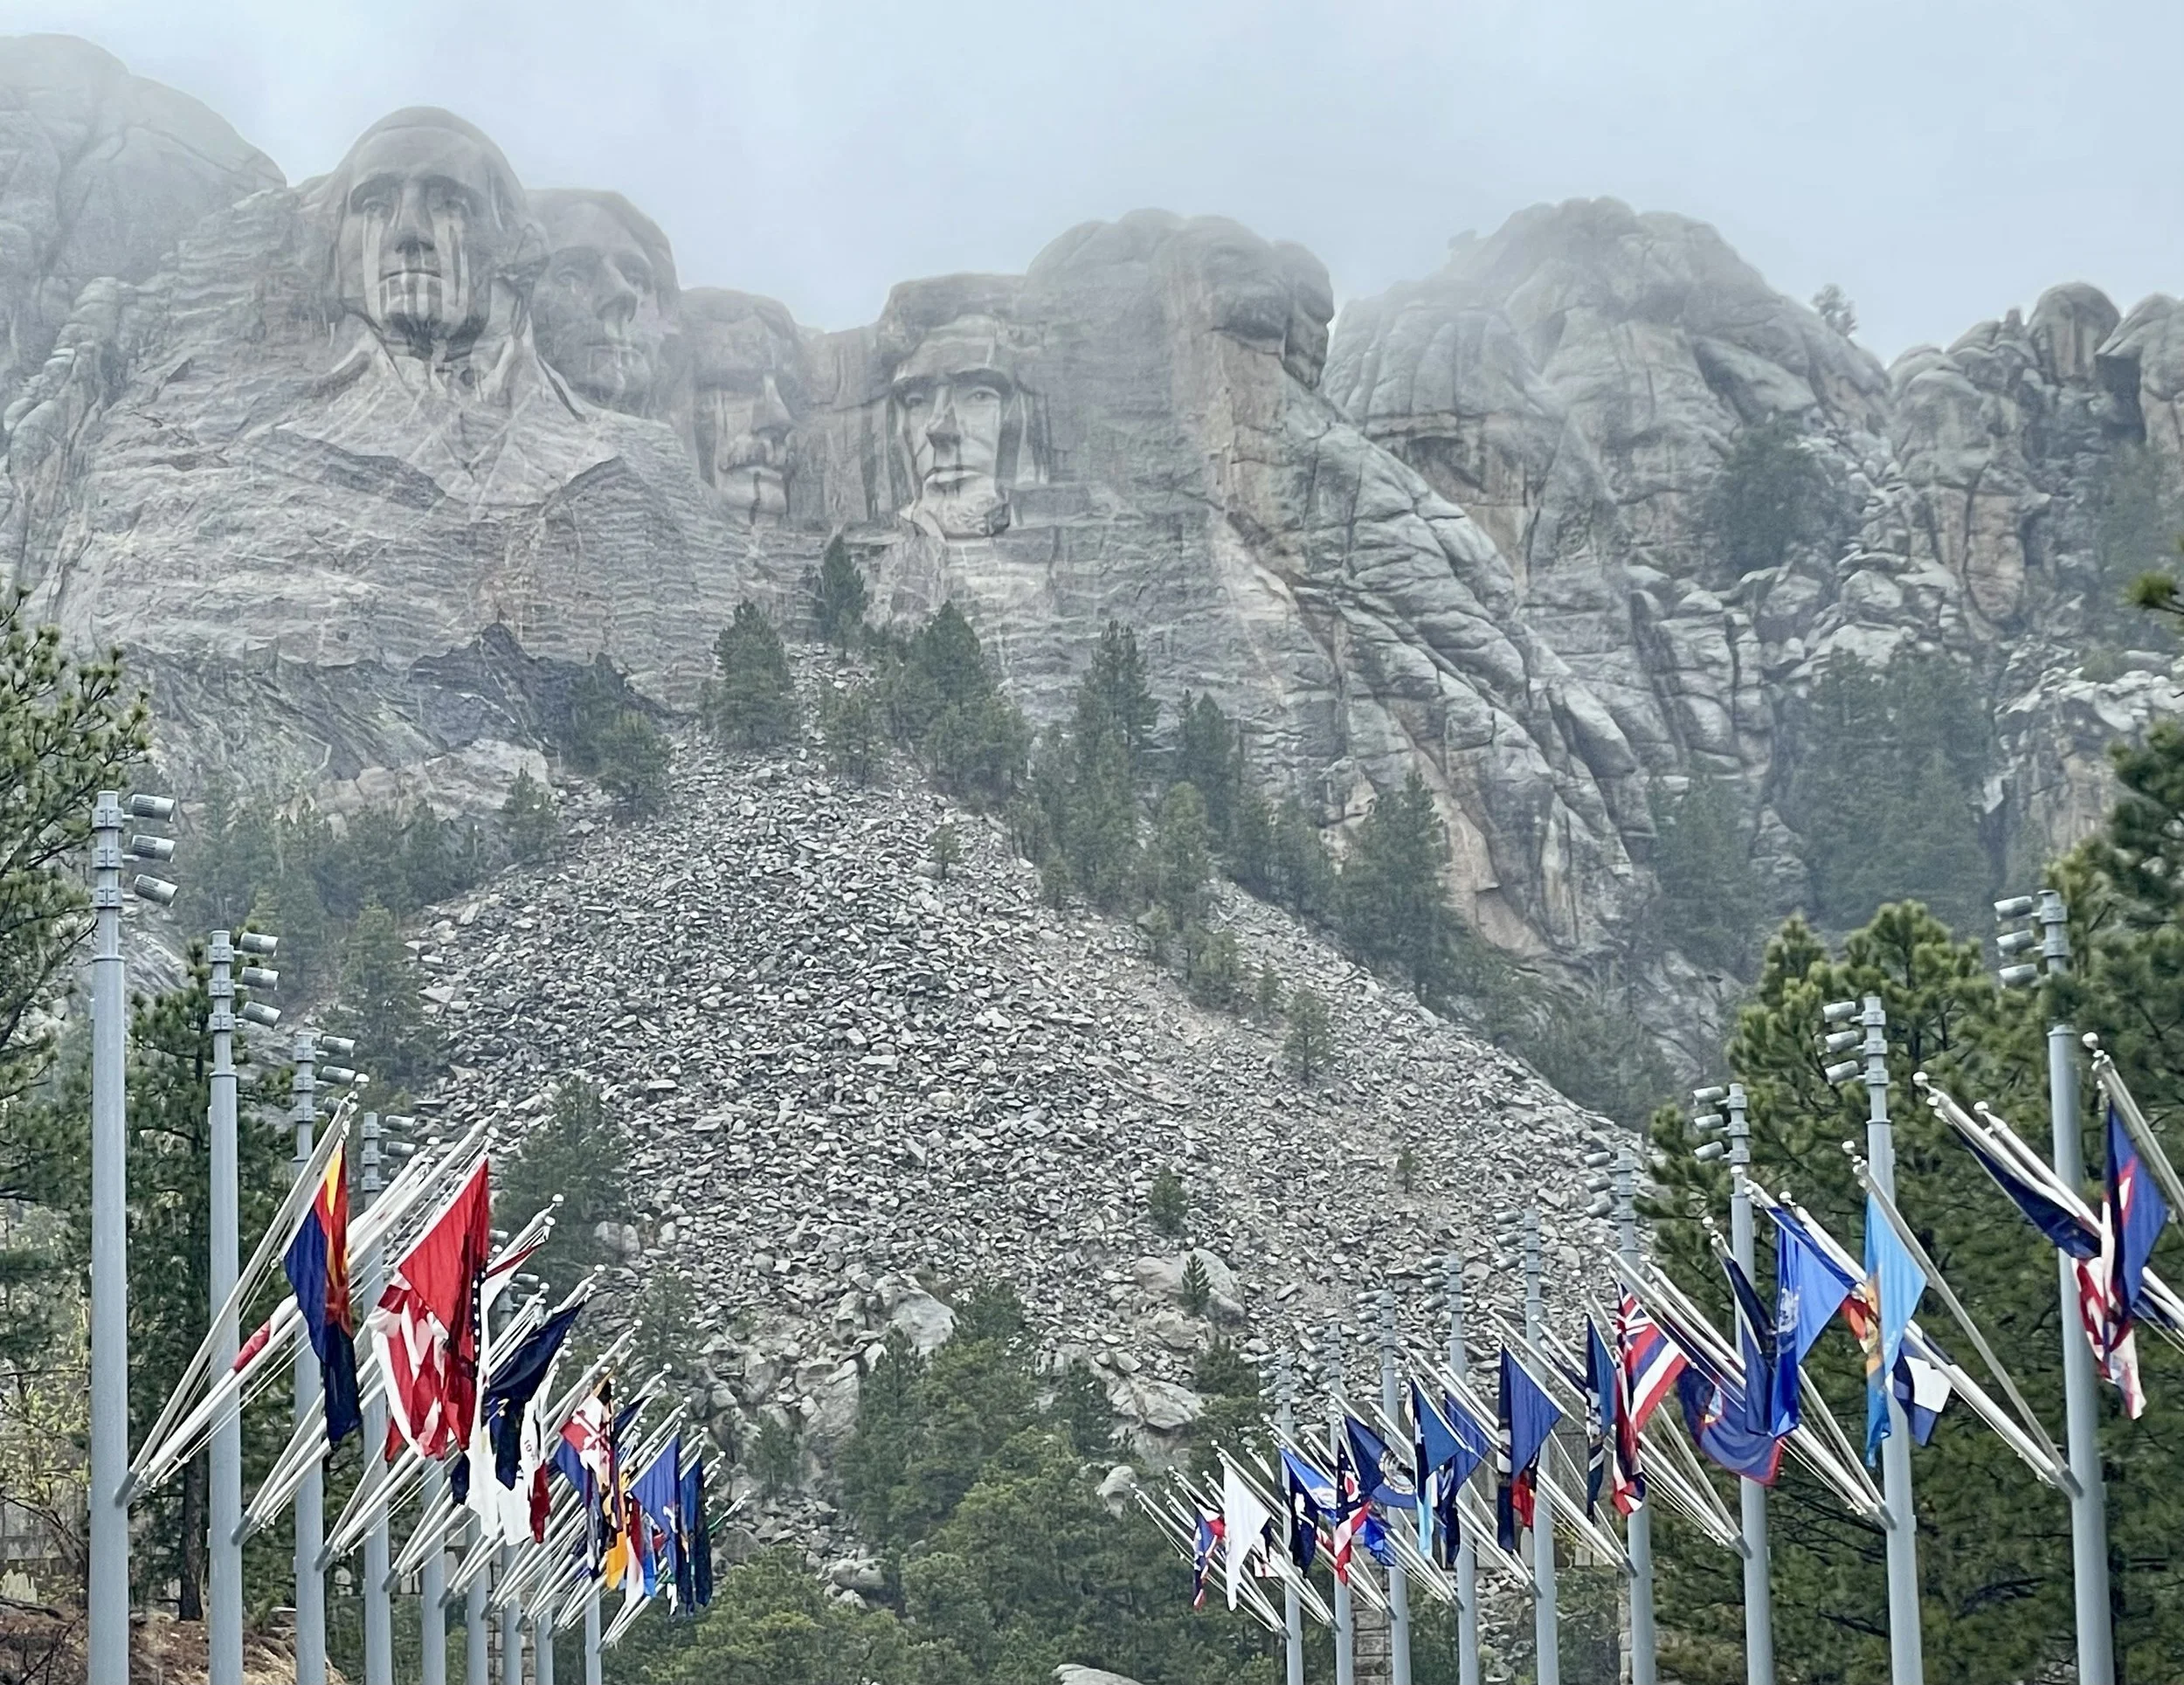
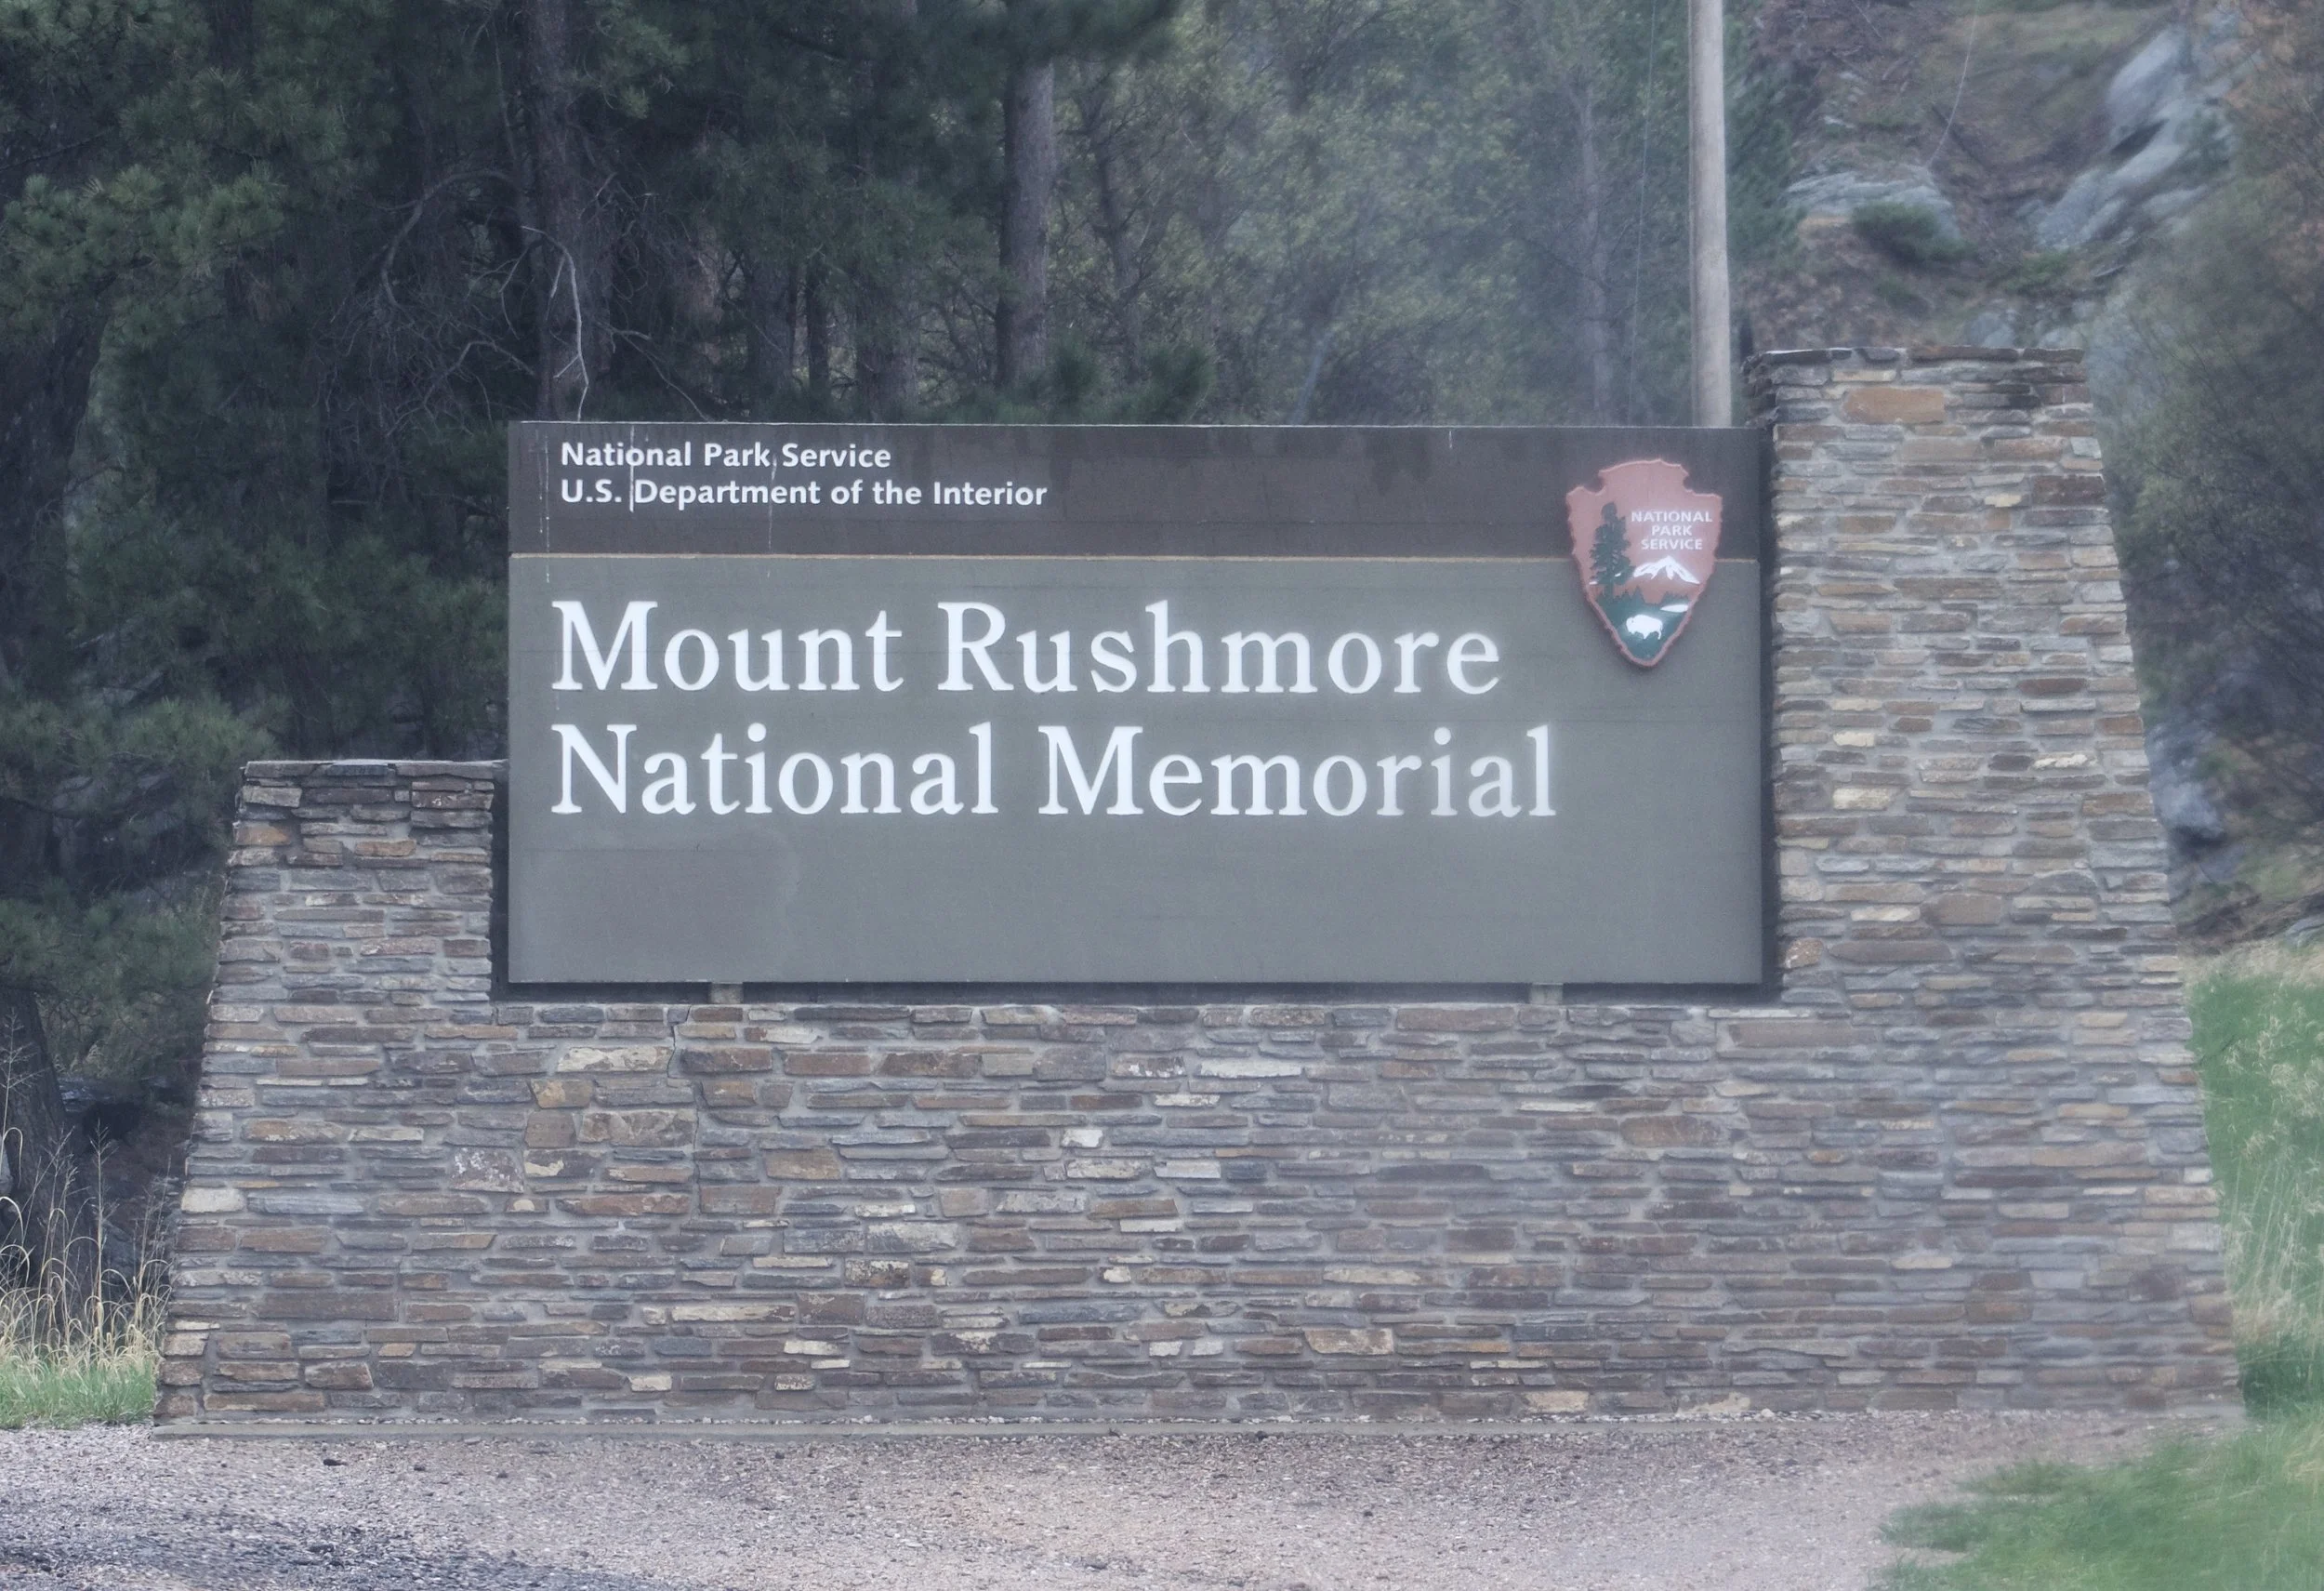
Mt. Rushmore National Monument
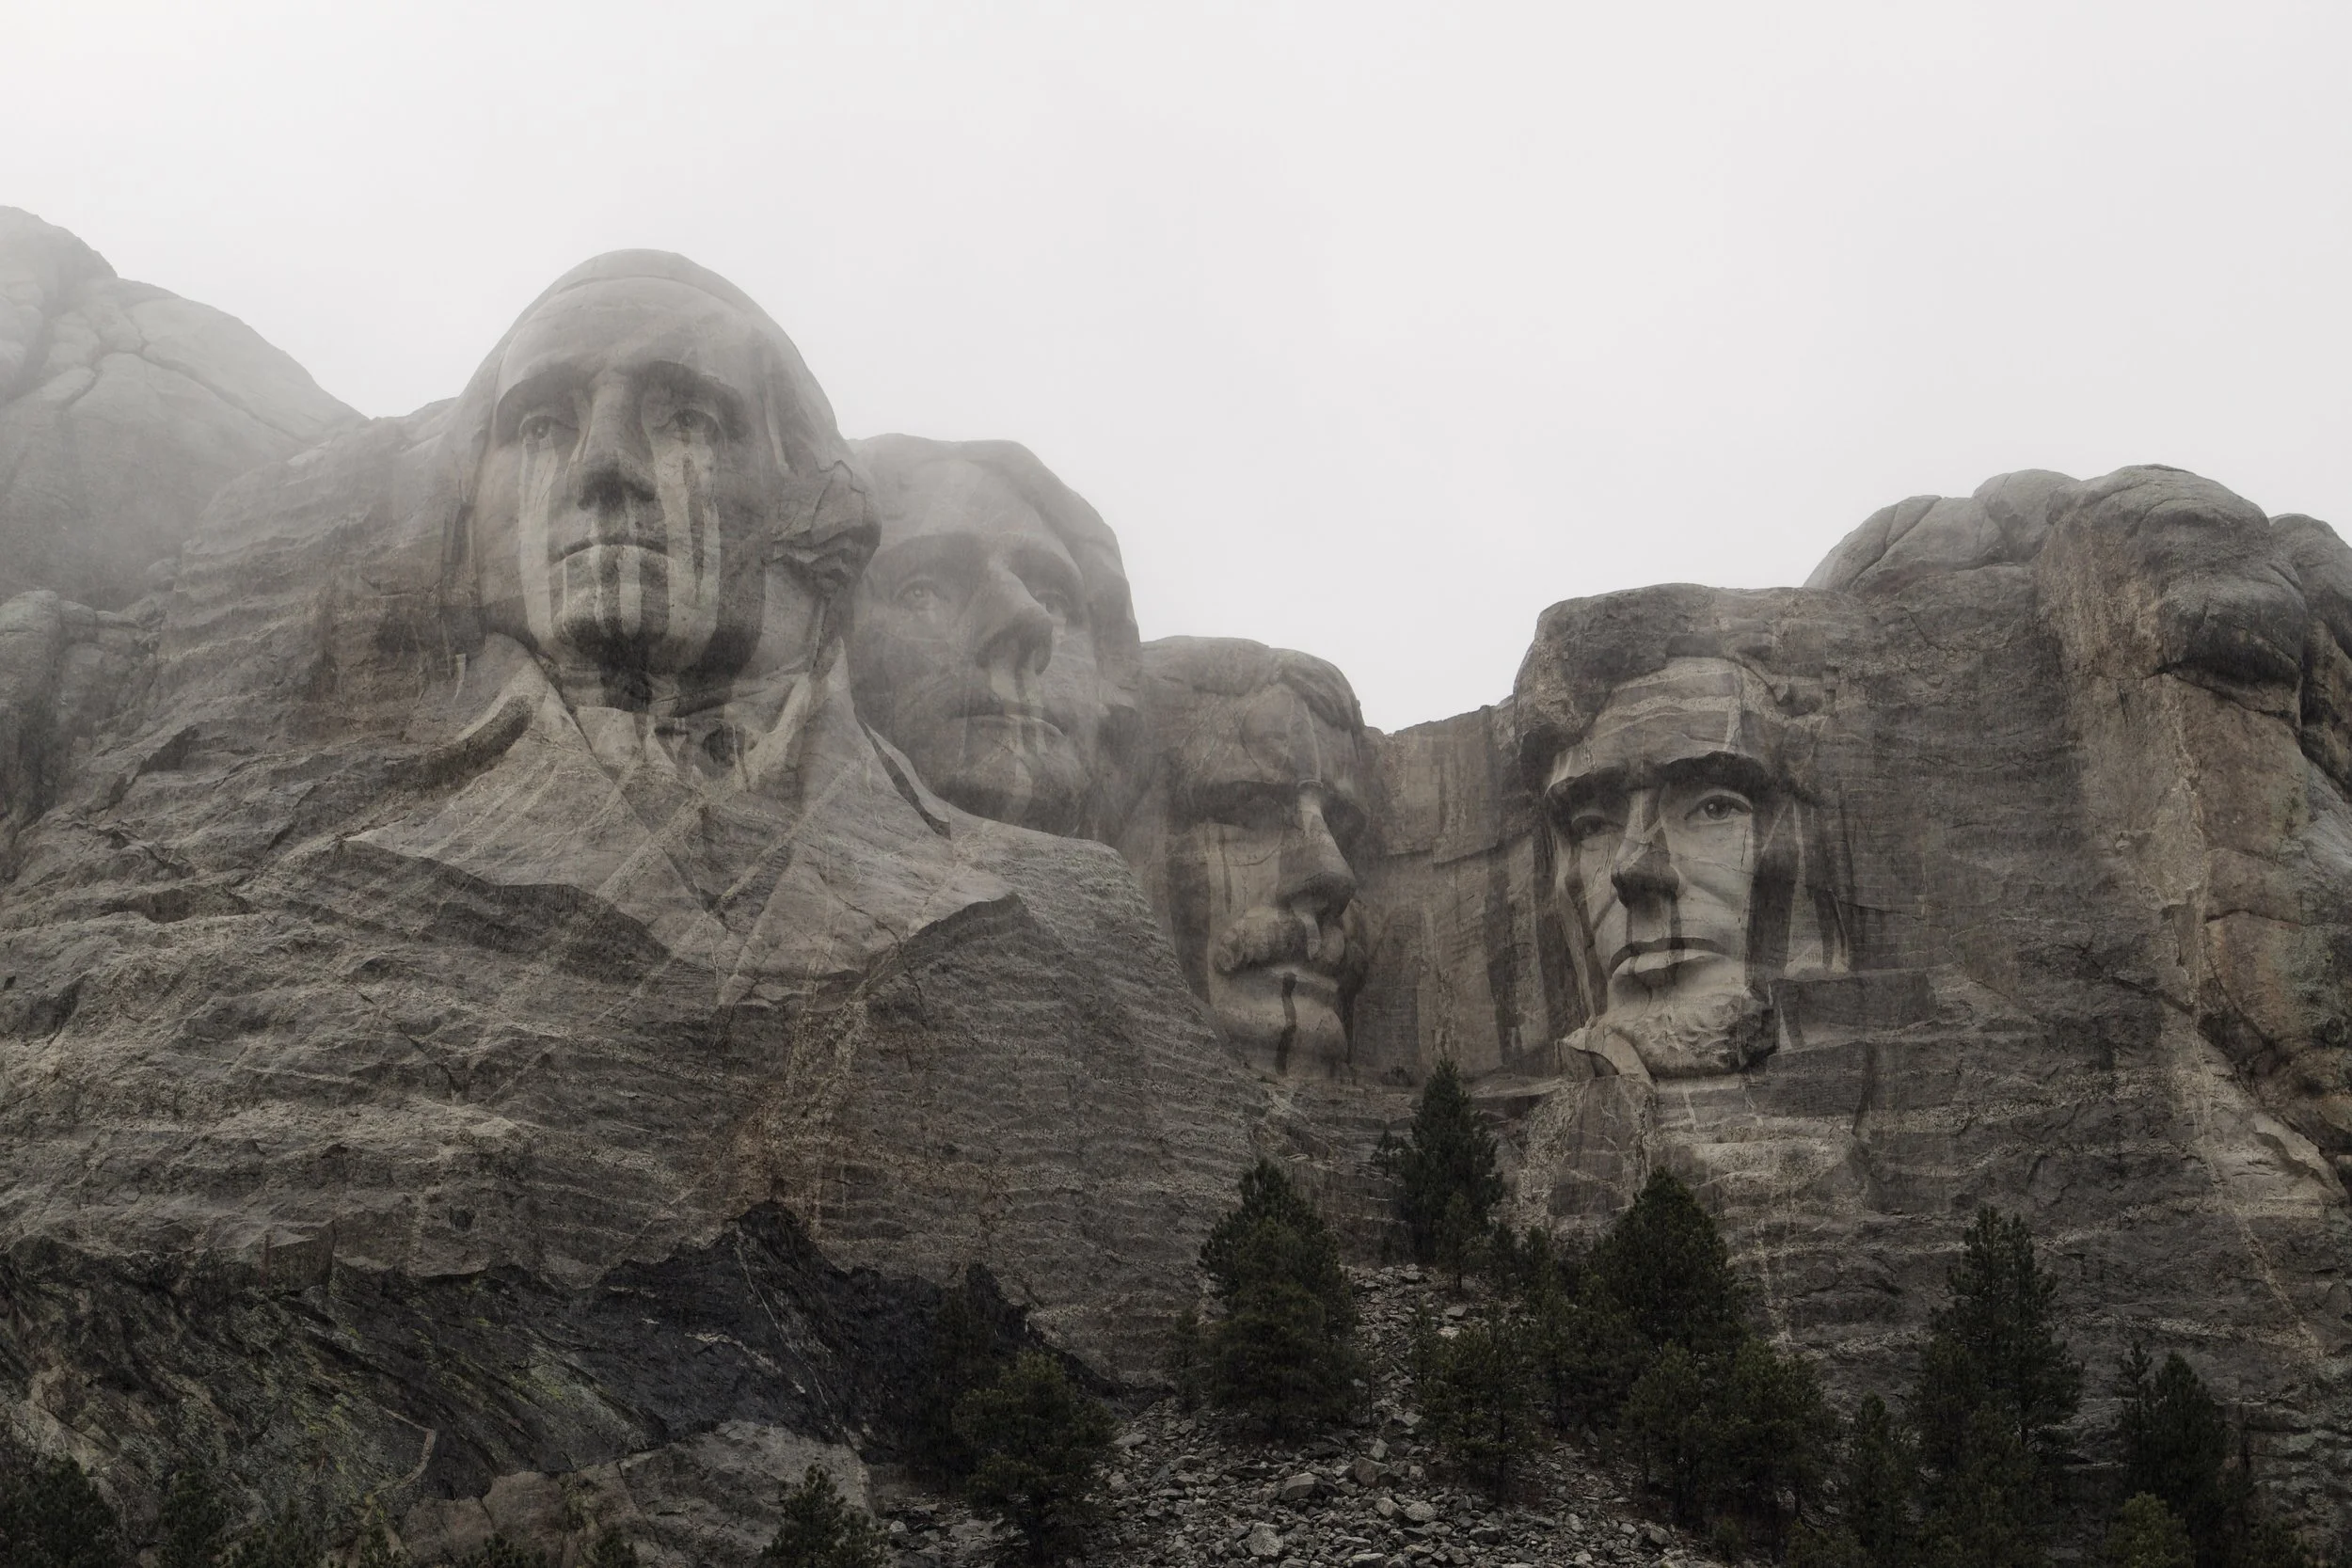
Mt. Rushmore in the Rain
I visited Mount Rushmore on a rainy Tuesday afternoon. The day started off overcast, and I was hopeful the rain would hold until I wrapped up my visit. It did not. The drive up the winding road should have been pleasant, but instead I found myself clenching the steering wheel and squinting through a rain-covered windshield.
When I arrived, I pulled a parking ticket and found a spot under a very leaky section of the garage. Umbrella in one hand and camera in the other, I made my way toward the gift shop to grab my passport stamp. Most of the crowd had the same idea—people huddled under overhangs or clustered inside the shop, waiting for a break in the weather.
Even with the steady rain, the monument was still striking. The faces emerged through the mist, and while I’m sure the view is beautiful on a clear day, the rain made them look like they were sweating, which honestly made me laugh.
About the Monument
Mount Rushmore is one of the most recognizable landmarks in the United States. Set in the Black Hills of South Dakota, the 60-foot granite carvings of George Washington, Thomas Jefferson, Theodore Roosevelt, and Abraham Lincoln symbolize leadership and the American story. For many, it’s a bucket-list stop on a Great Plains or Dakotas road trip.
History
The monument was conceived in the 1920s to boost tourism in the region and was sculpted by Gutzon Borglum between 1927 and 1941. Its creation has always been controversial, particularly because it was carved into land sacred to the Lakota Sioux. Despite this, it remains one of the most visited memorials managed by the National Park Service.
Visitor Center & Facilities
The main visitor center sits just beyond the Avenue of Flags, with exhibits about the carving process, the sculptor, and the workers who spent years blasting granite from the mountain. The Lincoln Borglum Visitor Center also includes a short film and museum. A gift shop, café, and covered walkways round out the facilities—on rainy days, they become the main gathering spots.
Fees & Passes
There’s no admission fee, but there is a parking fee (currently $10 for cars, $5 for seniors, and free for active-duty military). Parking is managed by a concessionaire, so the America the Beautiful Pass does not apply here.
Best Views & Trails
The Grand View Terrace gives the classic head-on perspective of Washington, Jefferson, Roosevelt, and Lincoln. If the weather cooperates, the Presidential Trail offers a closer look and different angles framed by the surrounding pines. On my visit, the rain made lingering outdoors a quick exercise in patience, but on a clear day the views would be worth the walk.
Best Photo Spots
Grand View Terrace – the iconic full view of all four presidents.
Presidential Trail – closer angles of Washington and Jefferson in particular, with trees framing the faces.
Avenue of Flags – frames the monument with the 50 state flags for a patriotic shot.
Evening Lighting Ceremony – during summer months, the illuminated faces of Washington, Jefferson, Roosevelt, and Lincoln create a dramatic nighttime photo.
Accessibility
The Avenue of Flags, main terrace, visitor center, and most facilities are wheelchair accessible. Elevators connect the parking areas to the terrace level, and accessible restrooms and seating are available throughout the site.
#31 Isle Royale National Park, Michigan
My trip to Isle Royale started in Chicago. A friend and I decided to take a summer road trip through northern Wisconsin and the Upper Peninsula of Michigan. It took us about six and a half hours to get to Houghton, which is where we spent the night.
We stayed in Houghton, a small town that used to be a copper mining hub. I booked a regular hotel there since Copper Harbor—where the ferry leaves from—is tiny and has pretty limited lodging. After checking in, we stopped by the Isle Royale Visitor Center, which was closed (of course). But we did catch a glimpse of the Ranger III, one of the ferries that goes out to the island. Naturally, I took my usual sign photo while we were there—gotta keep the collection going.
The next morning, we made the 45-mile drive to Copper Harbor to catch the Isle Royale Queen IV. That’s the only ferry that allows day-trippers, which worked perfectly for our plans. The boat was comfortable, but just a heads up—there’s no cell service, and the little snack bar on board only takes cash. The ride took about three hours. Luckily, Lake Superior was calm and the weather was cool, so the trip was smooth sailing.
When we got to the island, a ranger gave a short orientation—basic info, a few rules, and then we were off. We had about two hours to hike before heading back to the dock to catch the return ferry.
One thing that really stood out on this trip was how quiet and spread out everything felt once we hit the Upper Peninsula. You won’t find many chain restaurants or big stores up there—just trees, water, and long stretches of road that feel like they go on forever. It all added to the experience in a way I didn’t expect.
A Bit About the Park
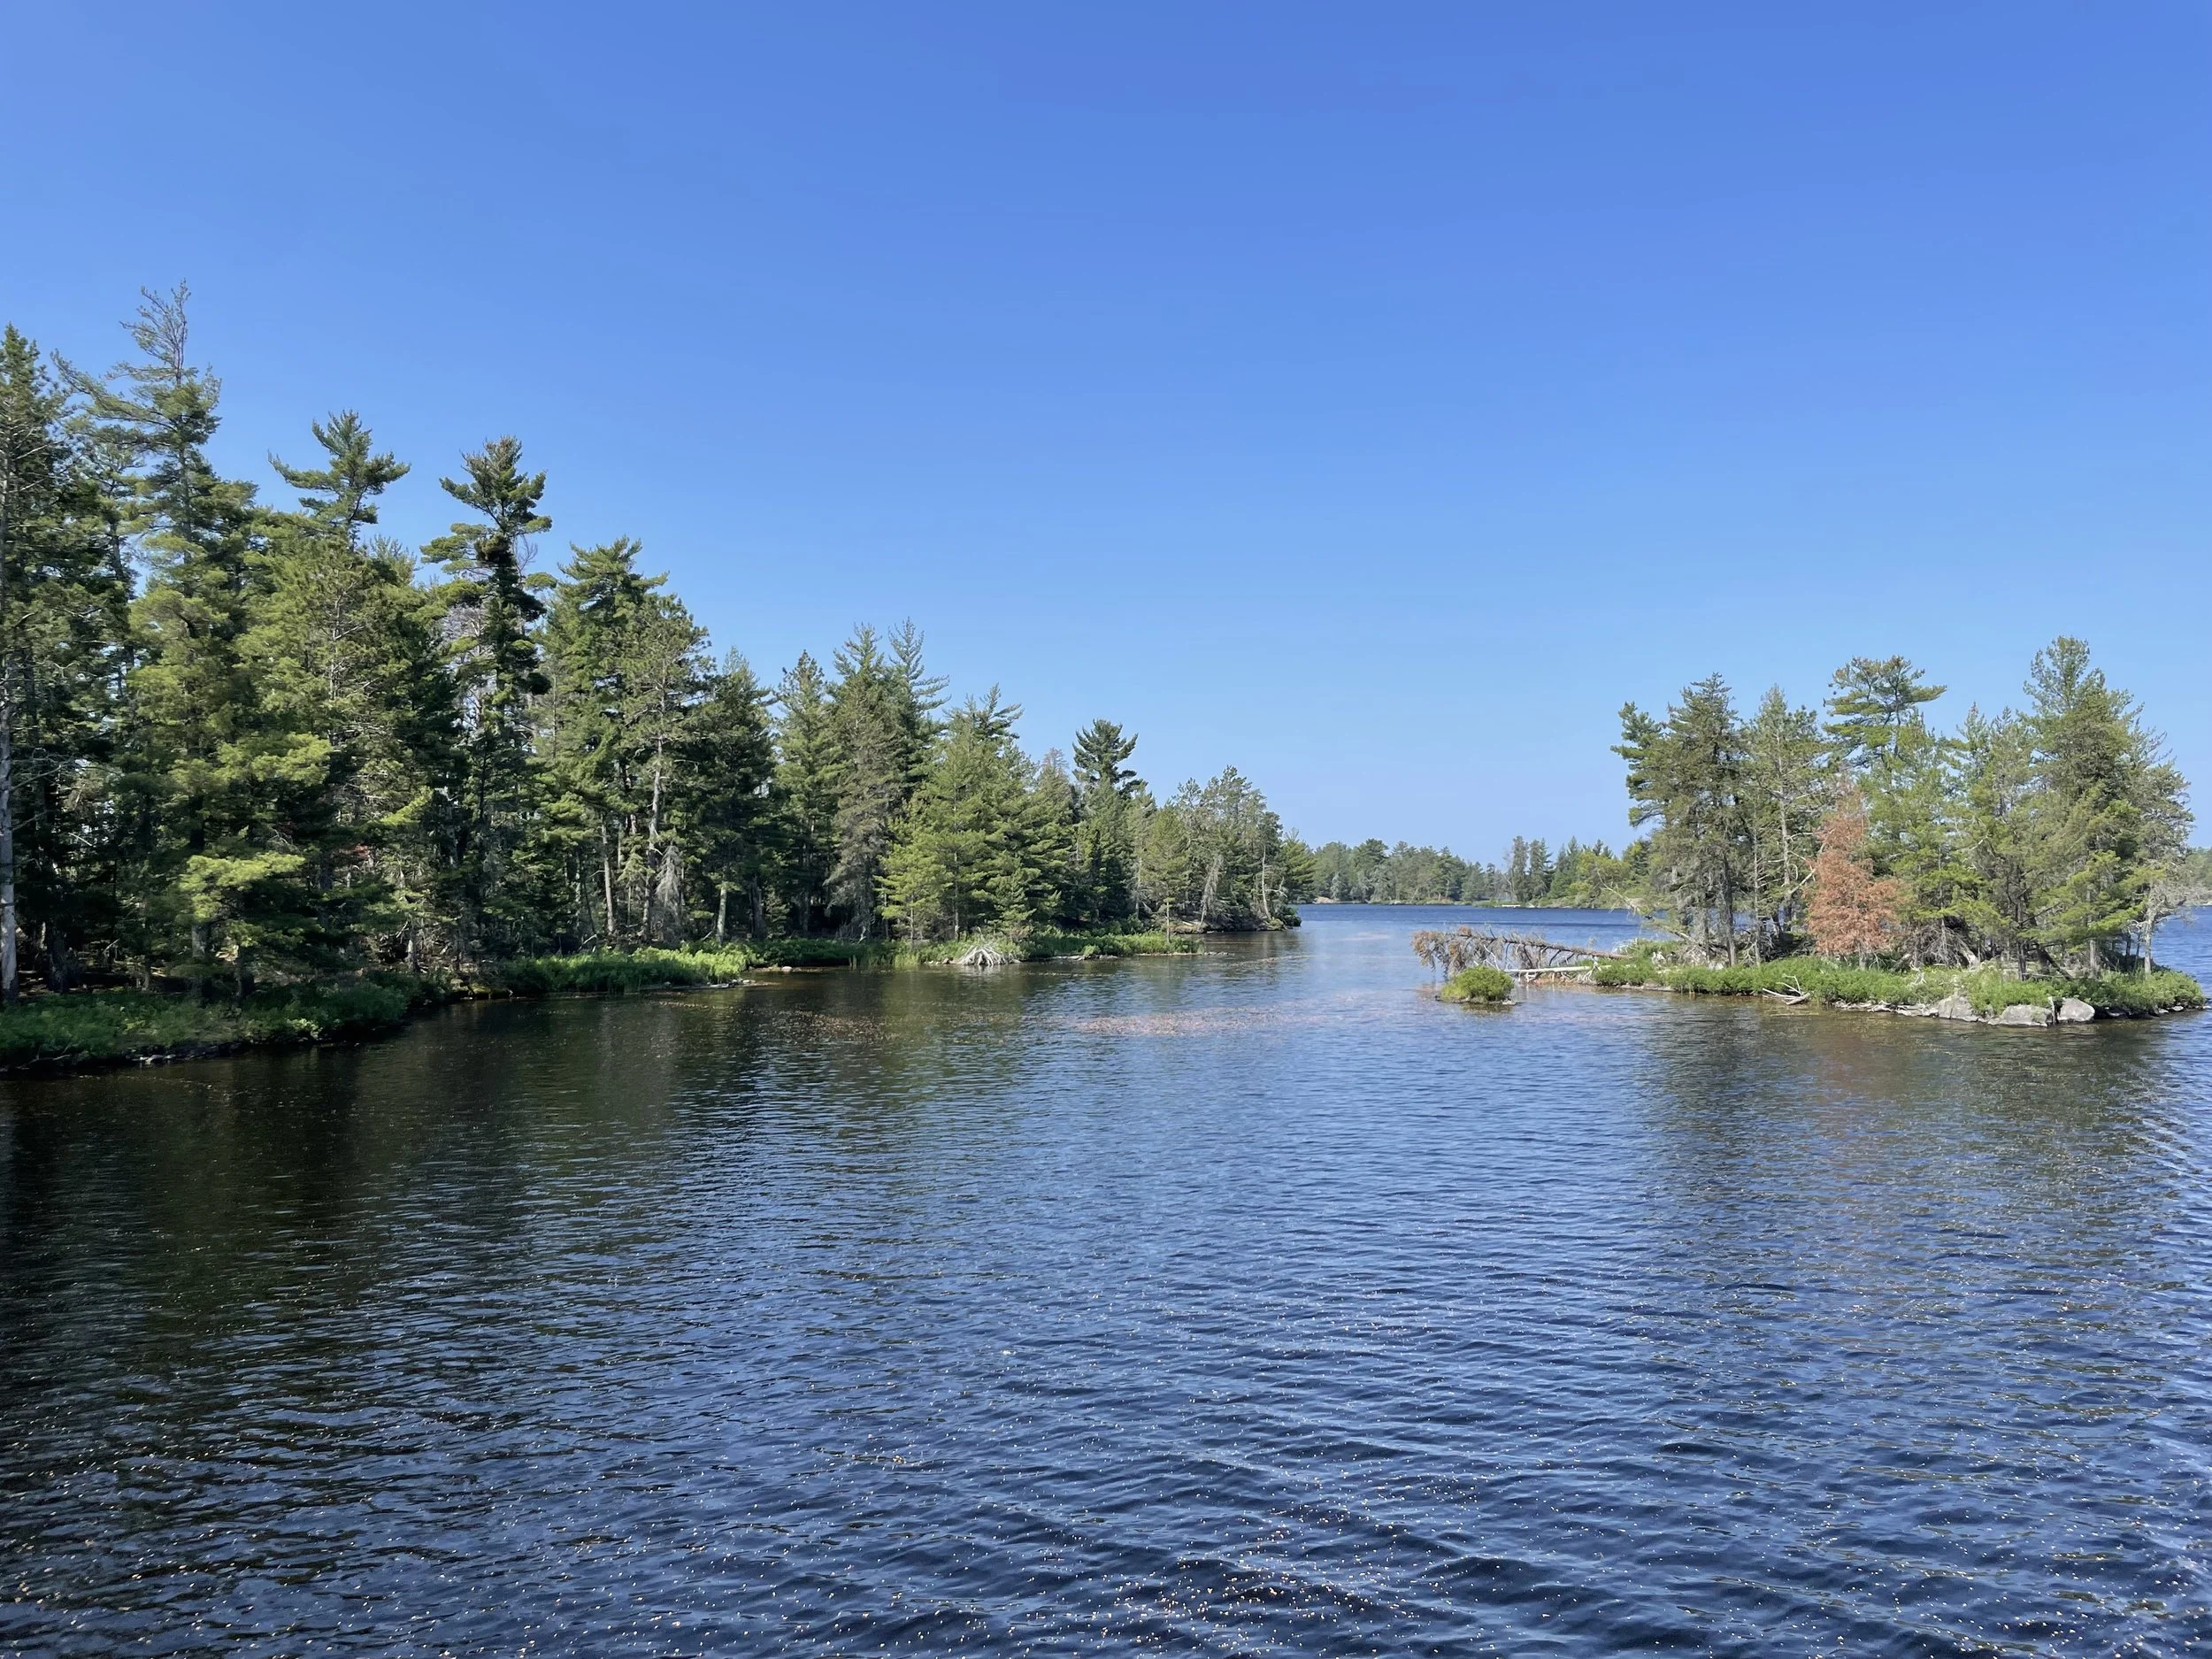
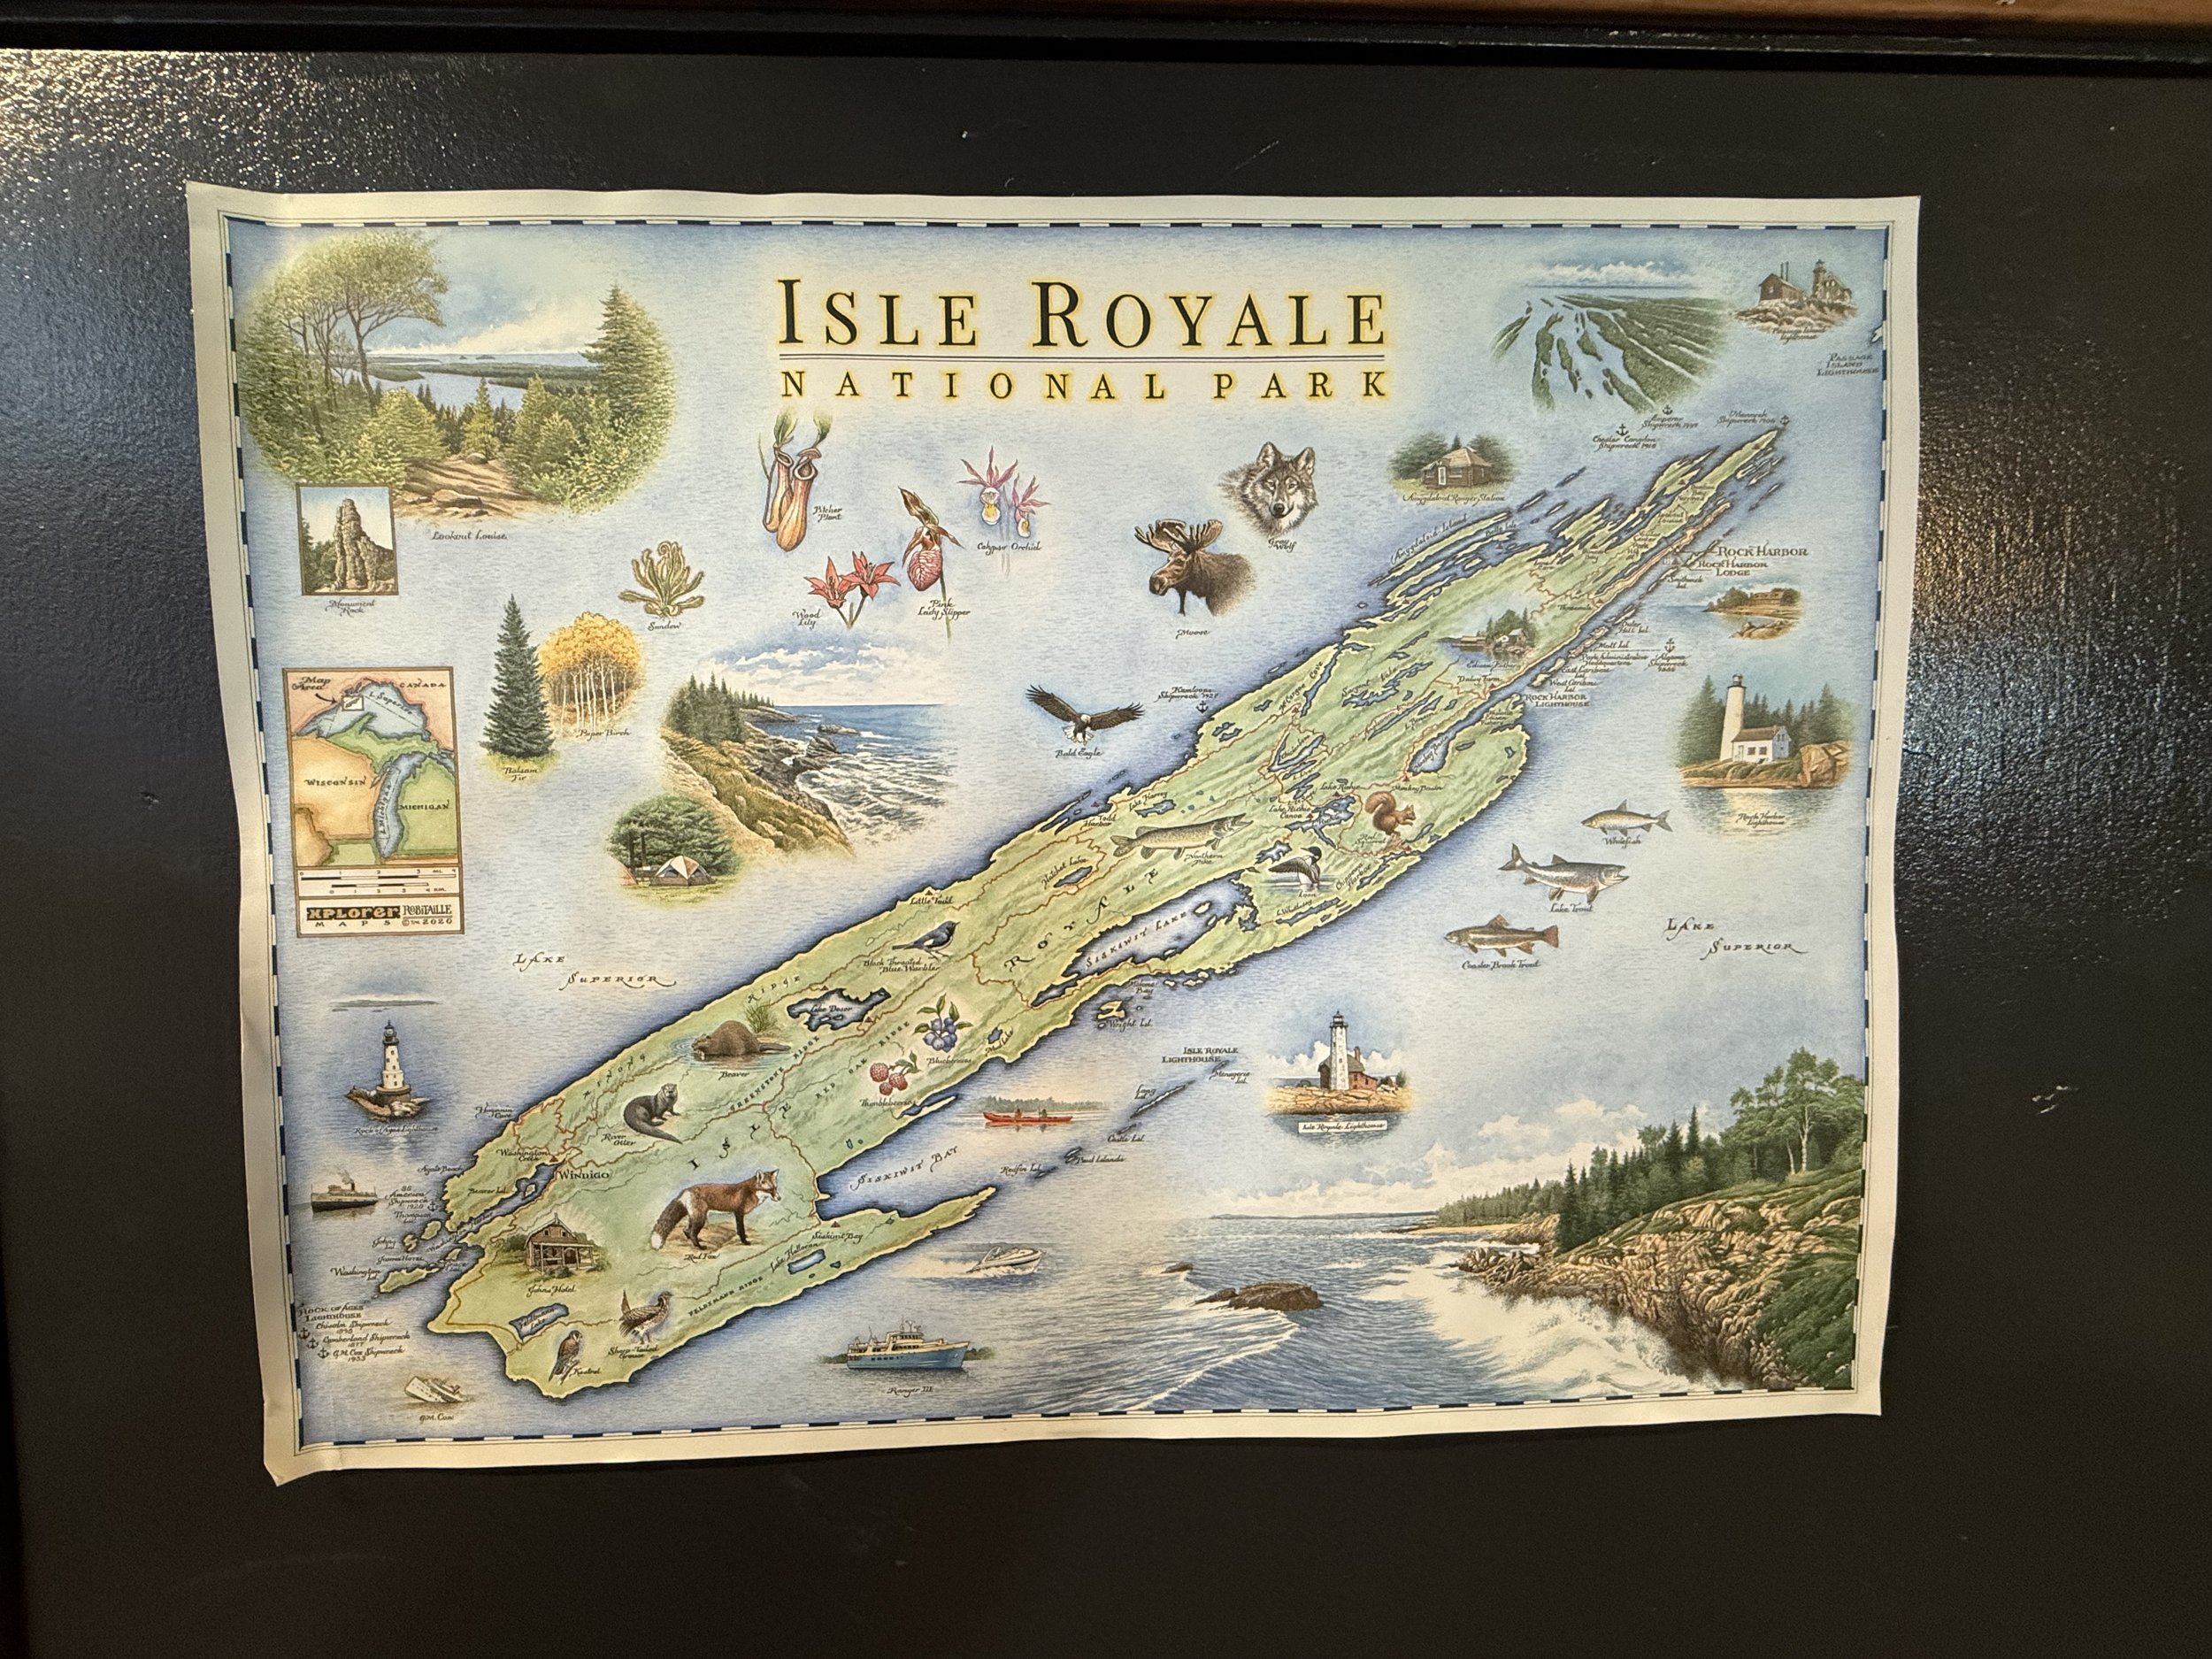
Designated a national park in 1940, Isle Royale protects one of the most isolated and least visited park units in the continental U.S. It’s a rugged wilderness made up of one large island (Isle Royale itself) and over 400 smaller surrounding islands, all carved by ancient glaciers and surrounded by the deep, cold waters of Lake Superior.
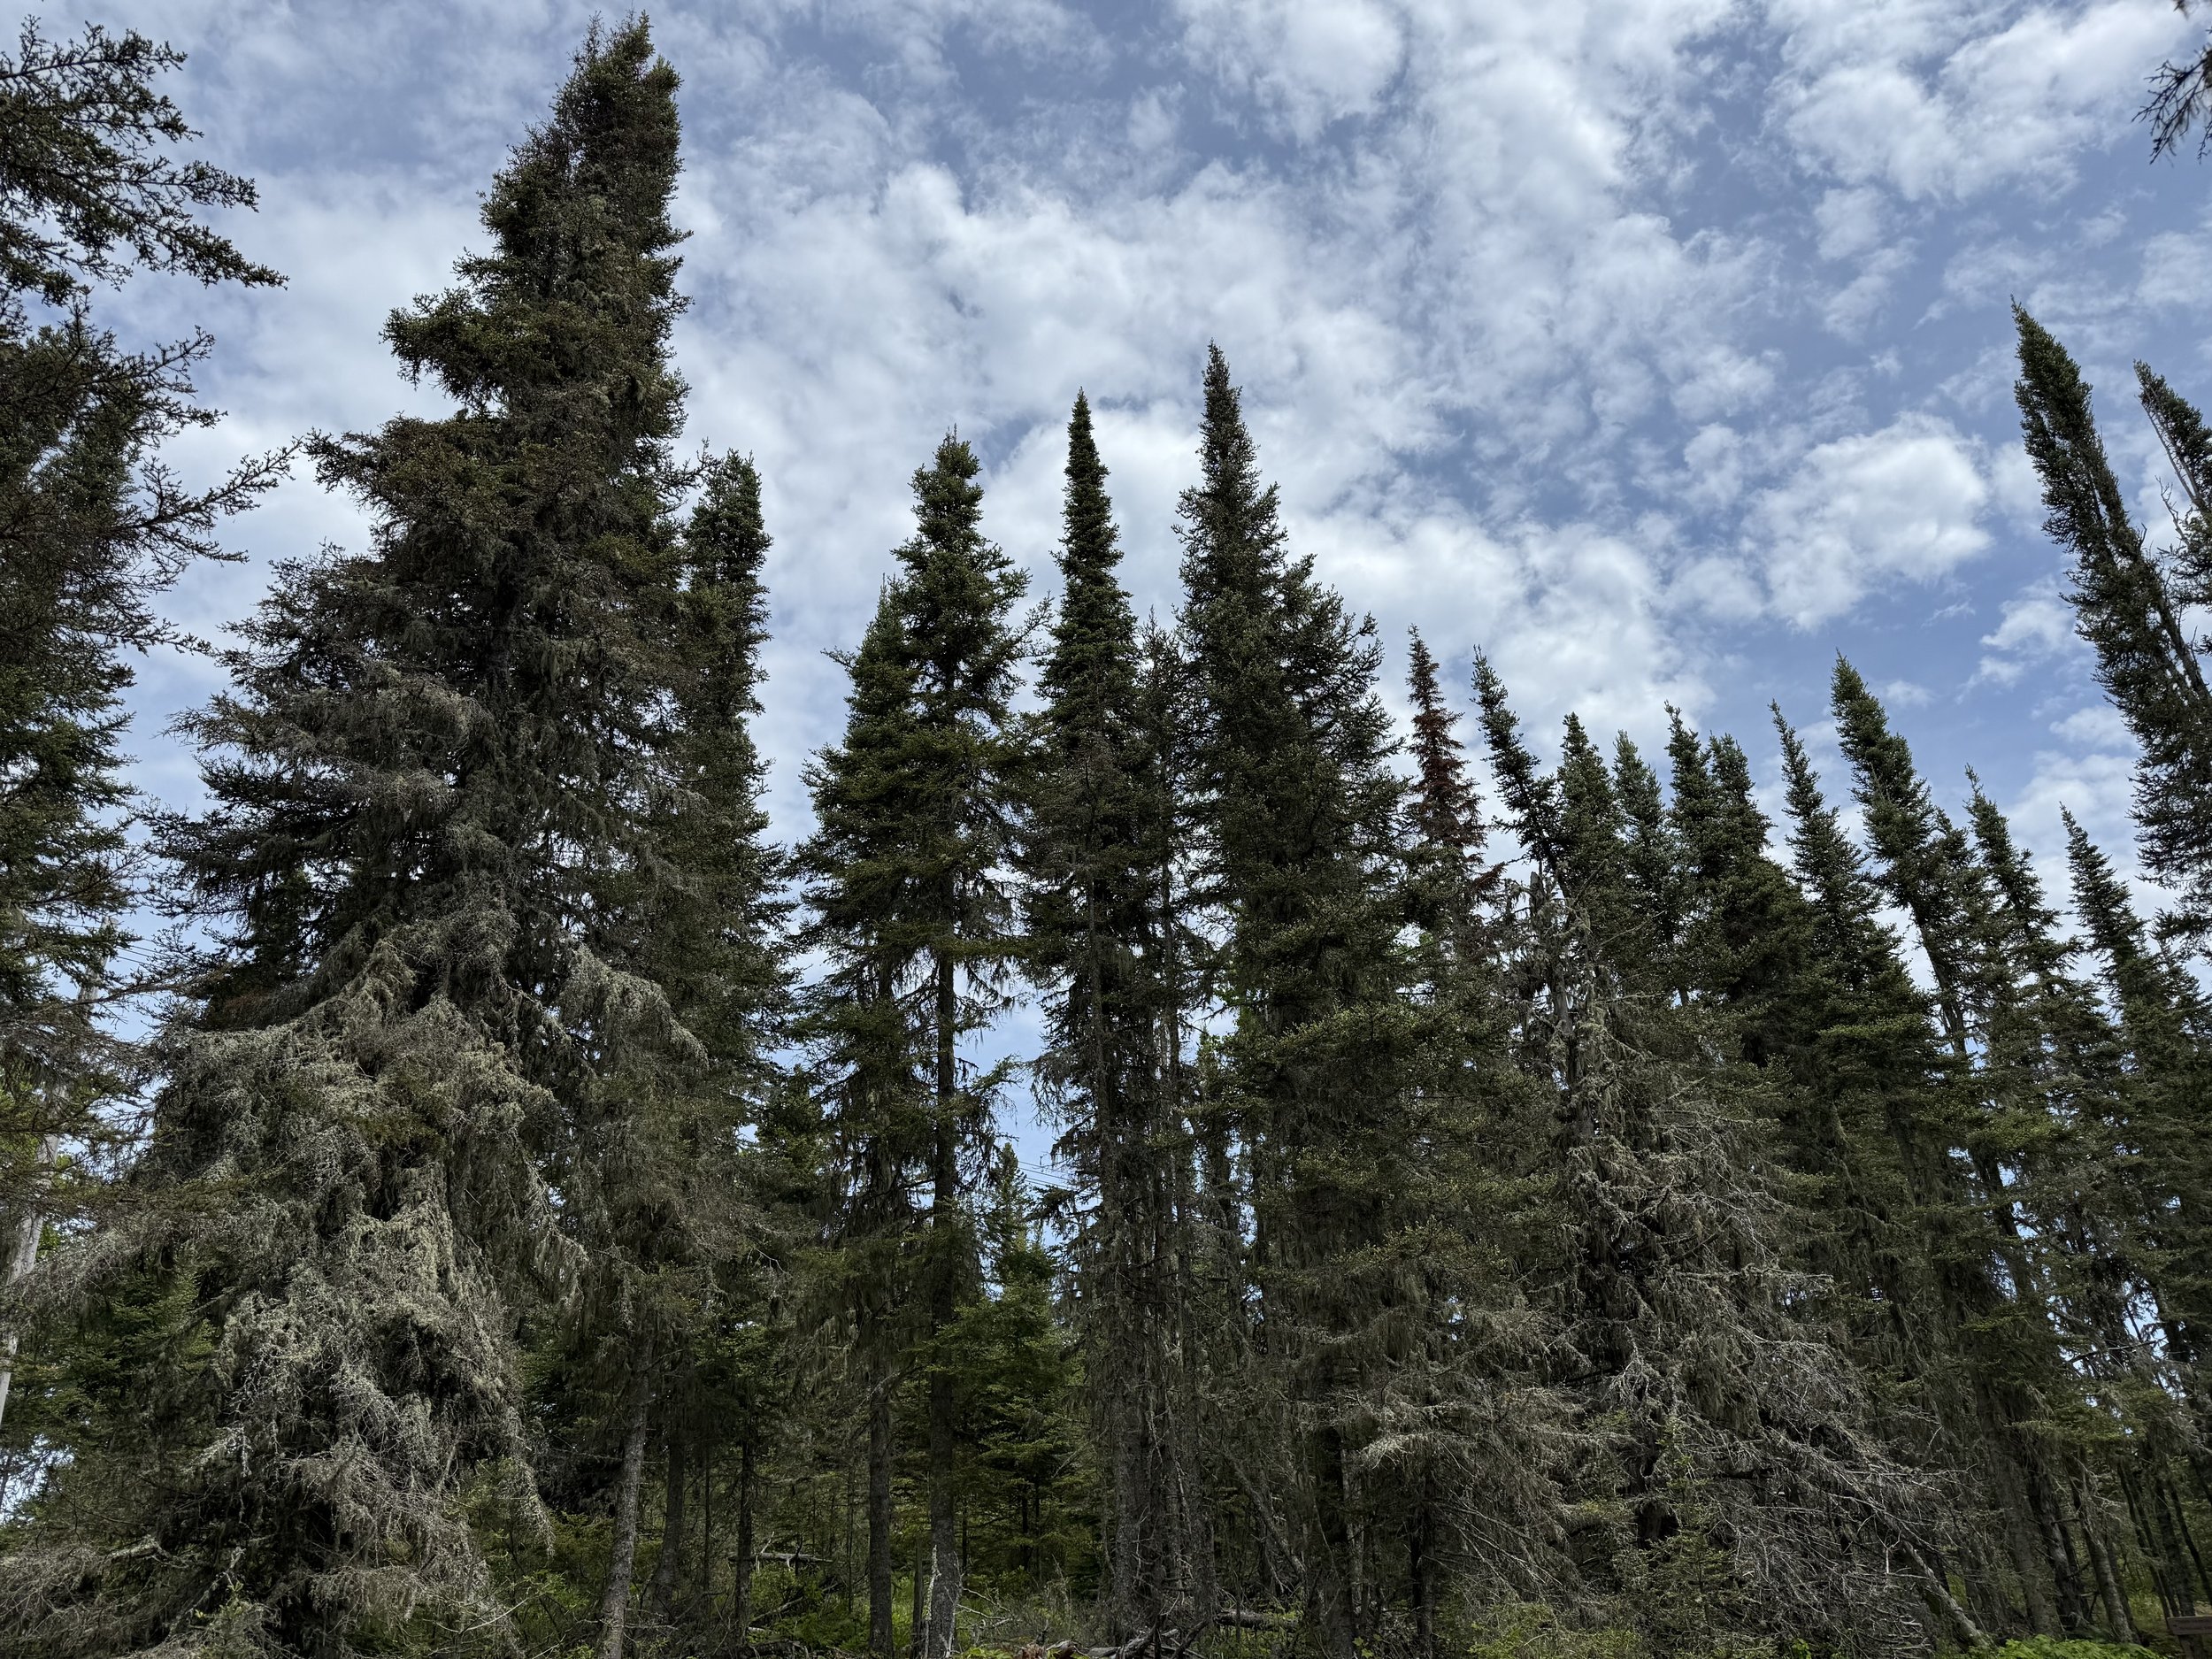
The park is known for its pristine boreal forests, rocky shorelines, inland lakes, and the fascinating predator-prey relationship between its isolated populations of moose and wolves — one of the longest-running wildlife studies in the world has been conducted here since the 1950s.
Because of its remote location and the short summer season (the park is closed in winter), Isle Royale gets fewer visitors in an entire year than Yellowstone might get in a single day, making it a true haven for solitude seekers and wilderness lovers.
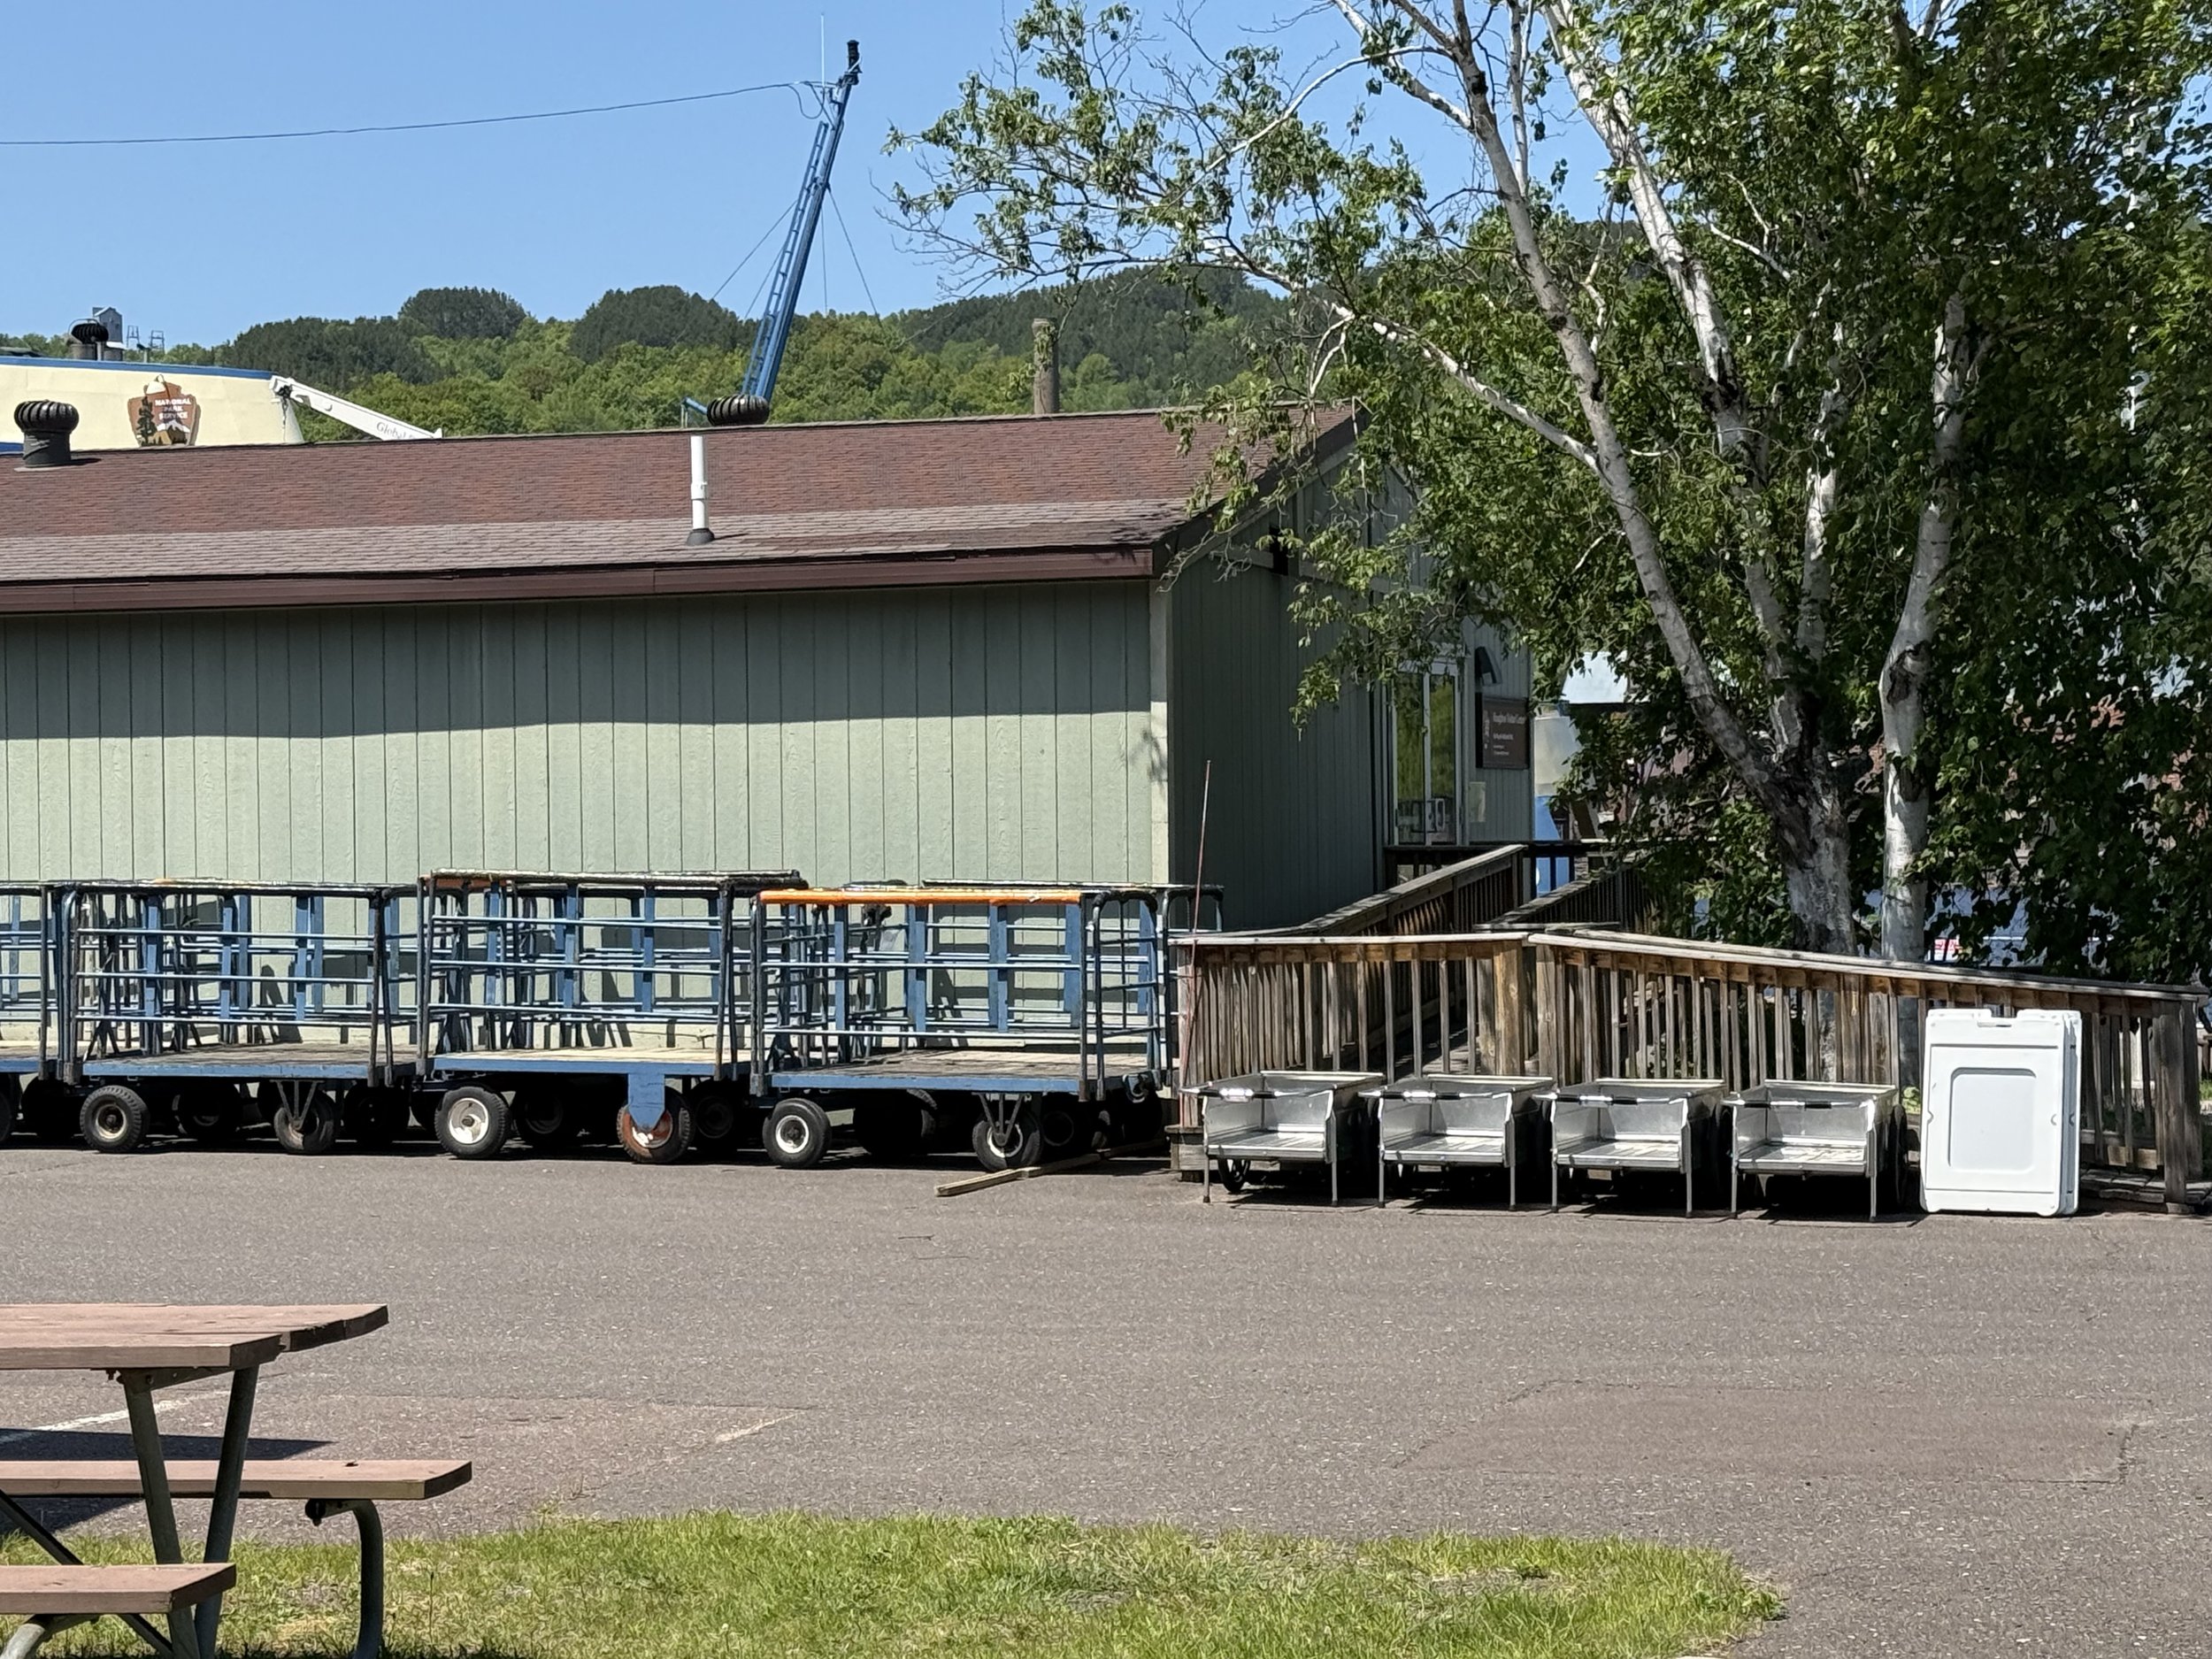
Houghton Visitor Center
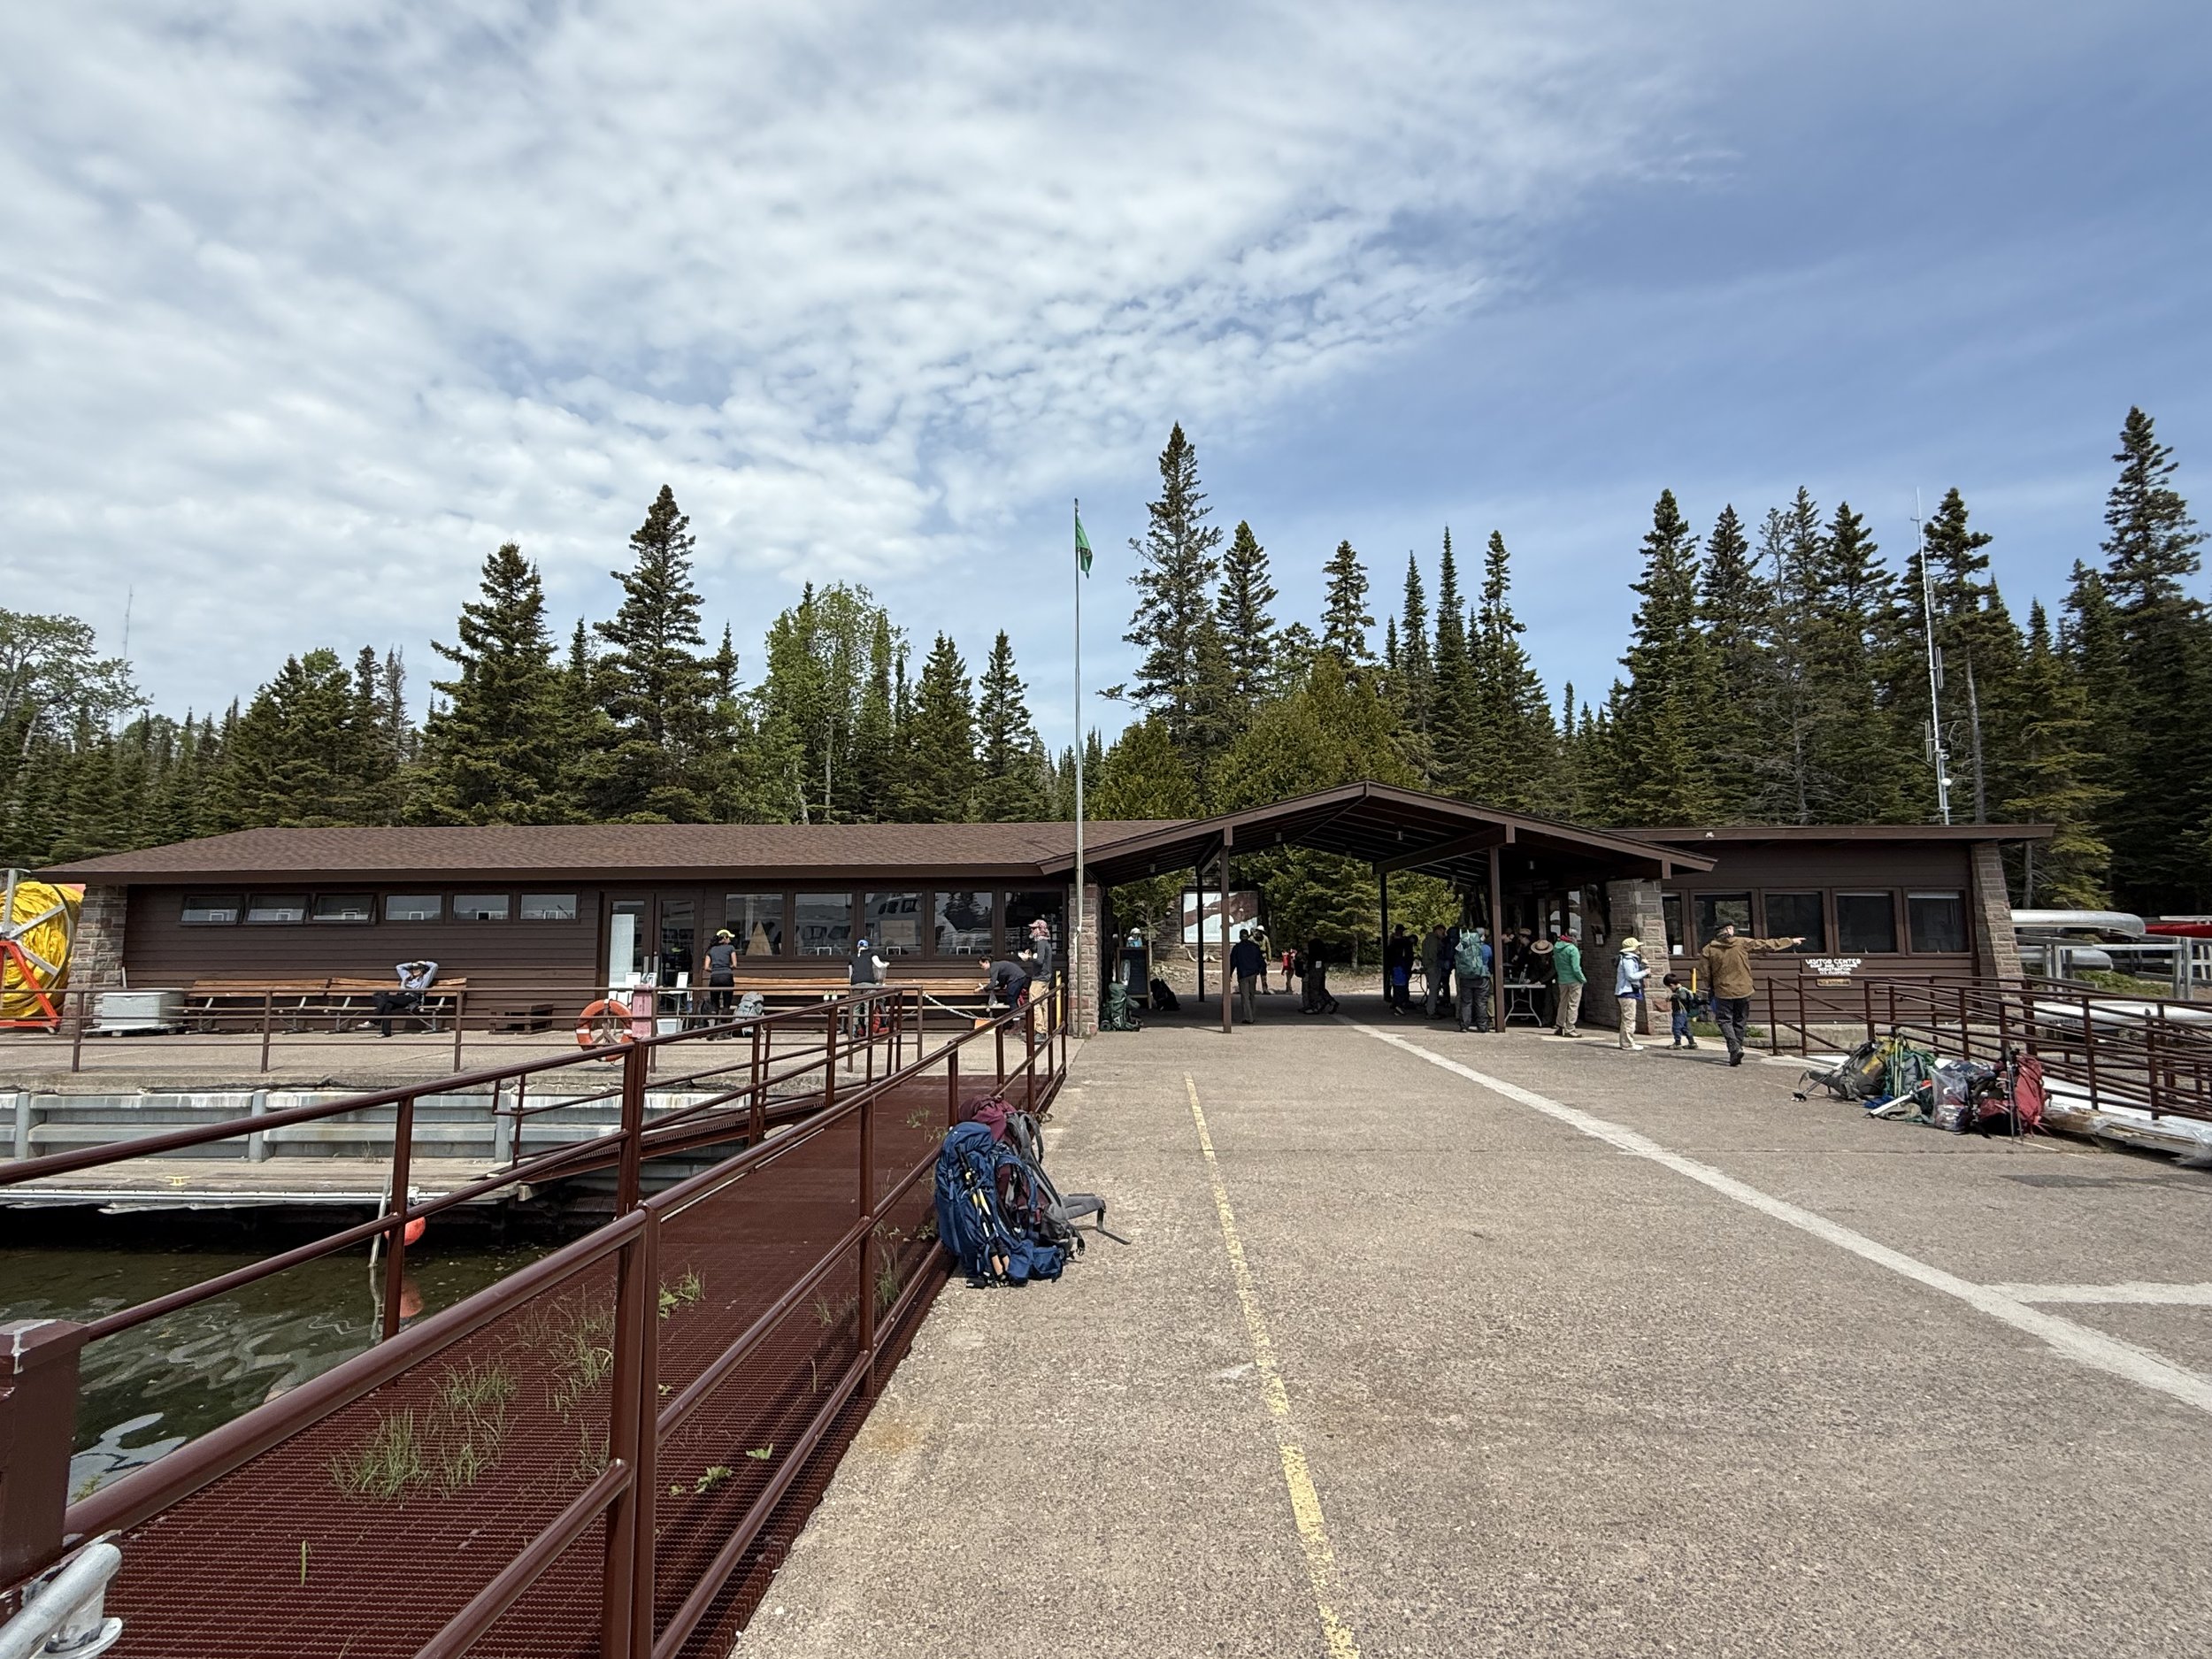
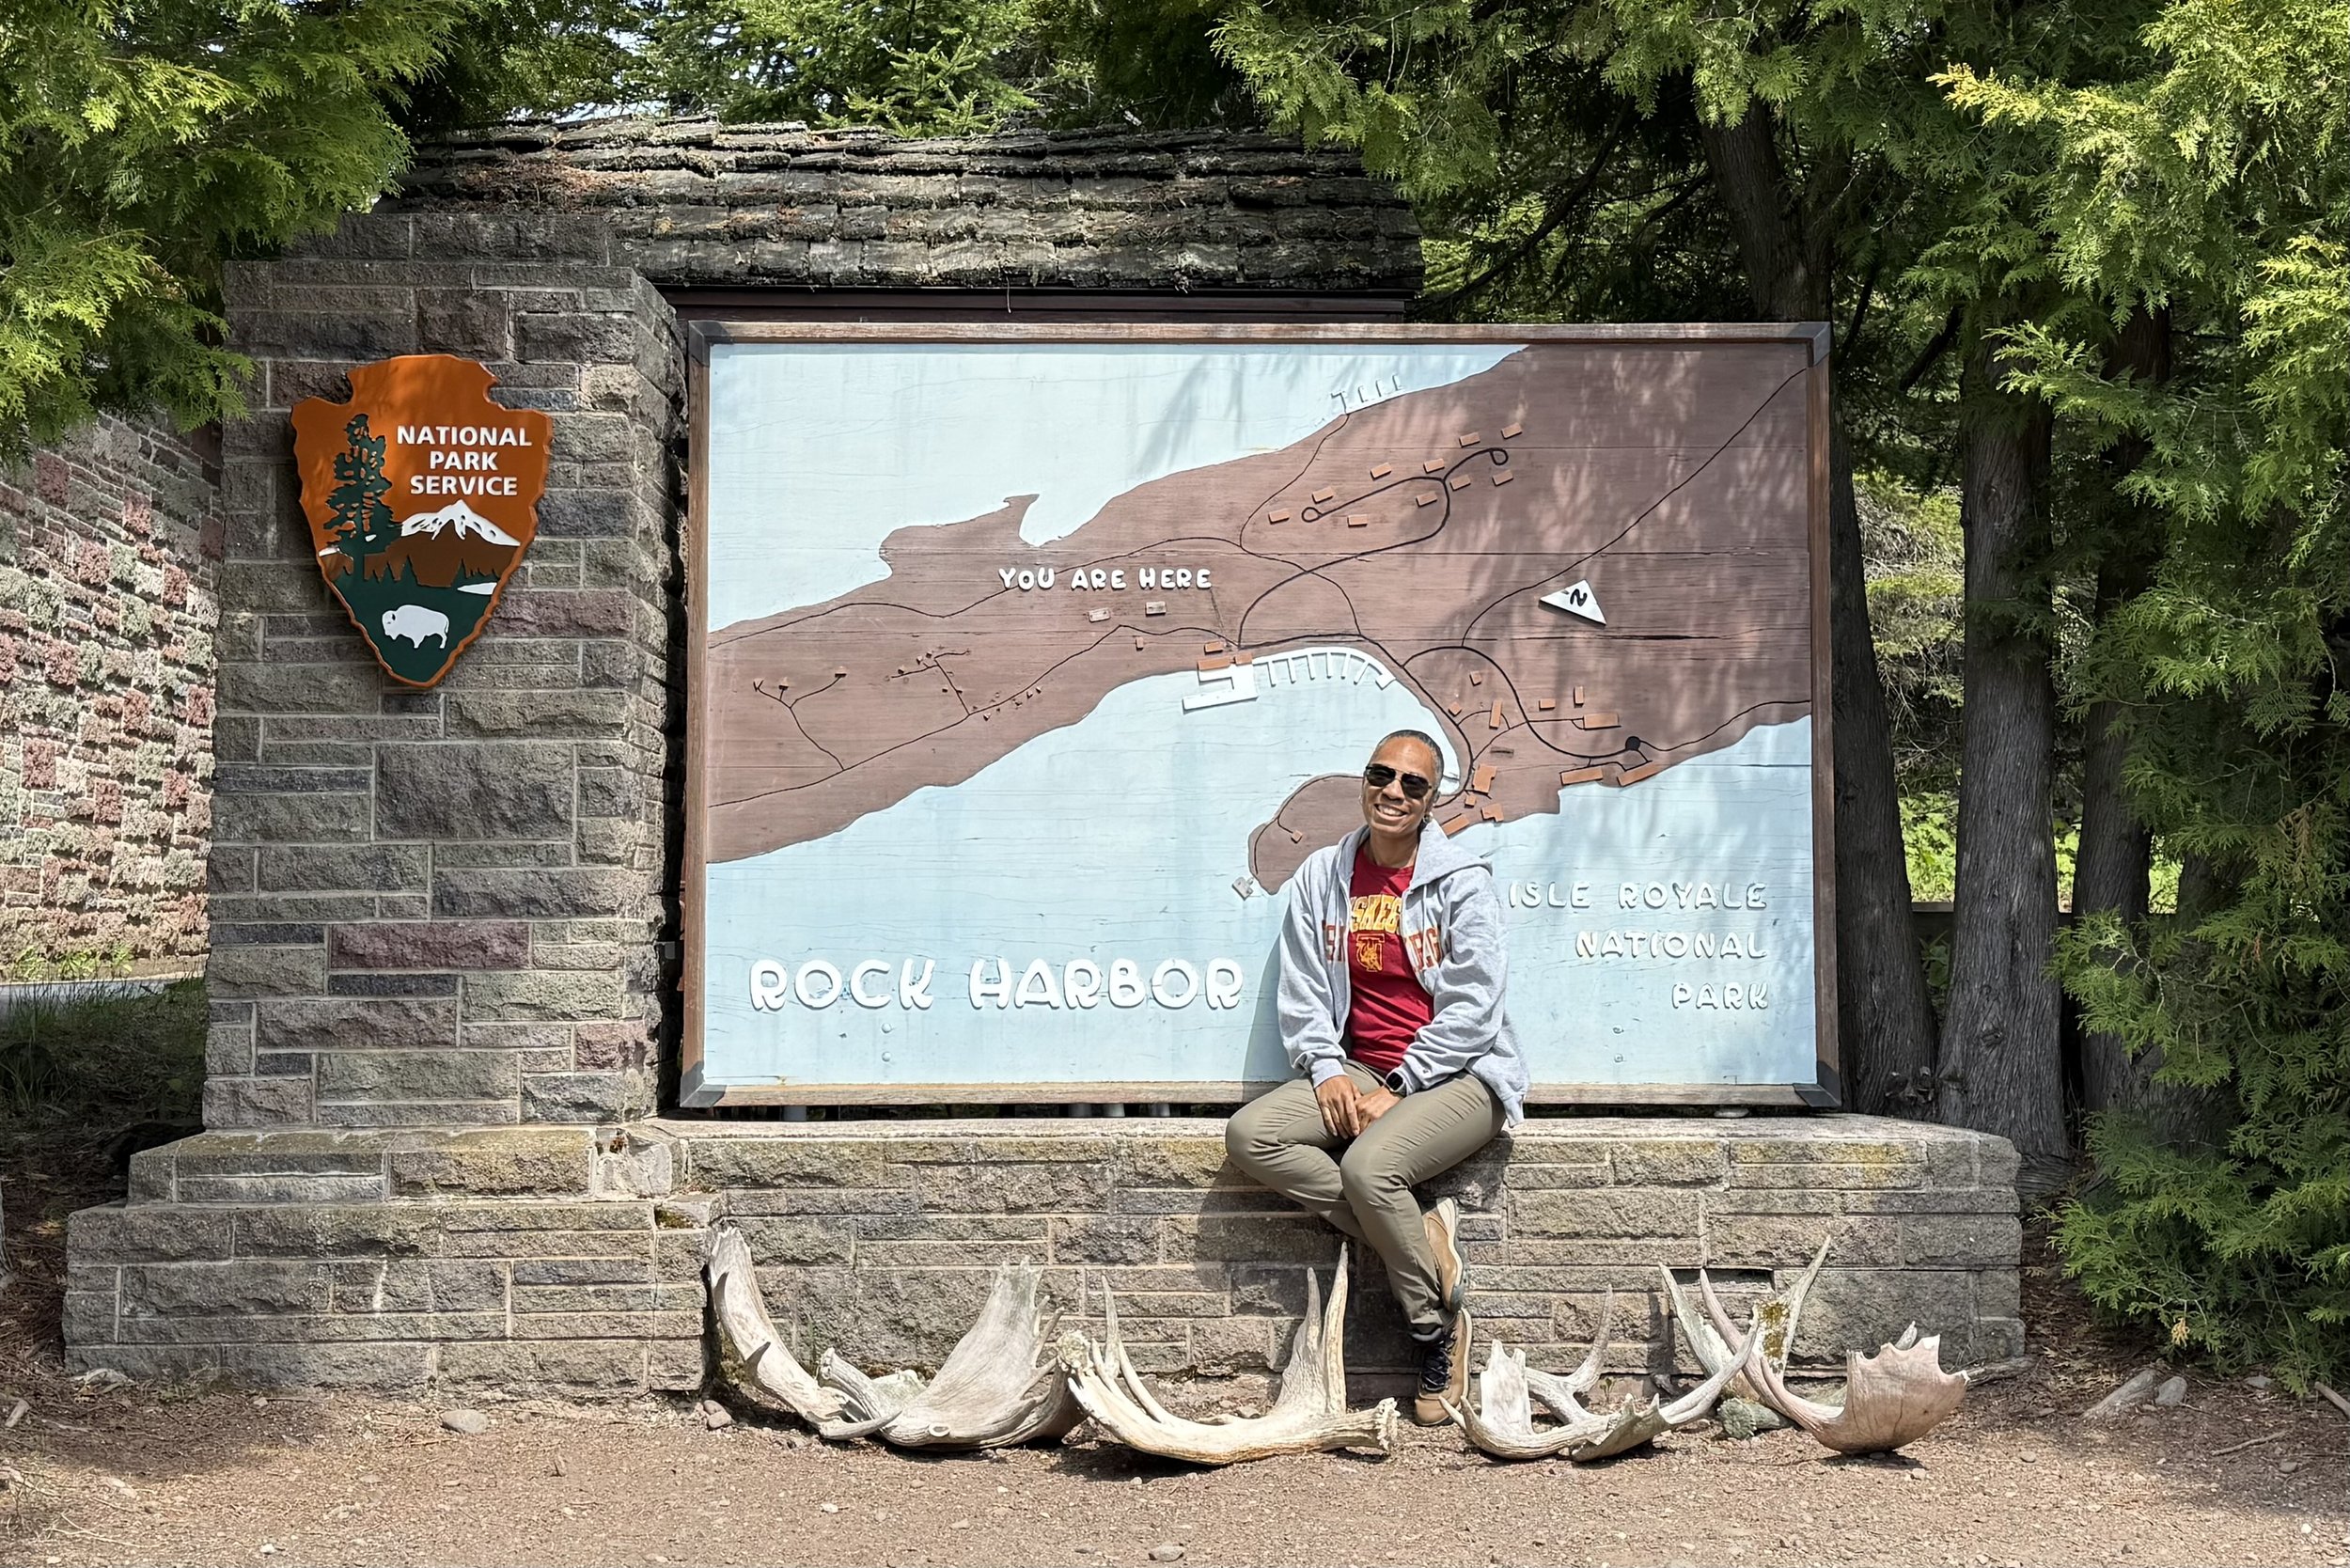
Rock Harbor Visitor Center
Visitor Centers
There are several visitor centers spread across Isle Royale and the mainland access points:
Houghton Visitor Center (Houghton, MI) — This is the mainland visitor center, where you can pick up maps, get your park passport stamp, and learn about ferry options before boarding.
Rock Harbor Visitor Center (Rock Harbor, Isle Royale) — Located at the Rock Harbor dock on the eastern end of the island, this is the primary visitor center once you arrive. It offers trip planning help, ranger programs, exhibits, restrooms, and a camp store.
Windigo Visitor Center (Windigo, Isle Royale) — Located on the southwest end of the island, this smaller visitor center serves visitors coming in from Grand Portage, Minnesota.
Edisen Fishery (near Rock Harbor) — A historic fishery site with ranger-led tours that share the history of fishing on Isle Royale.

Ranger III
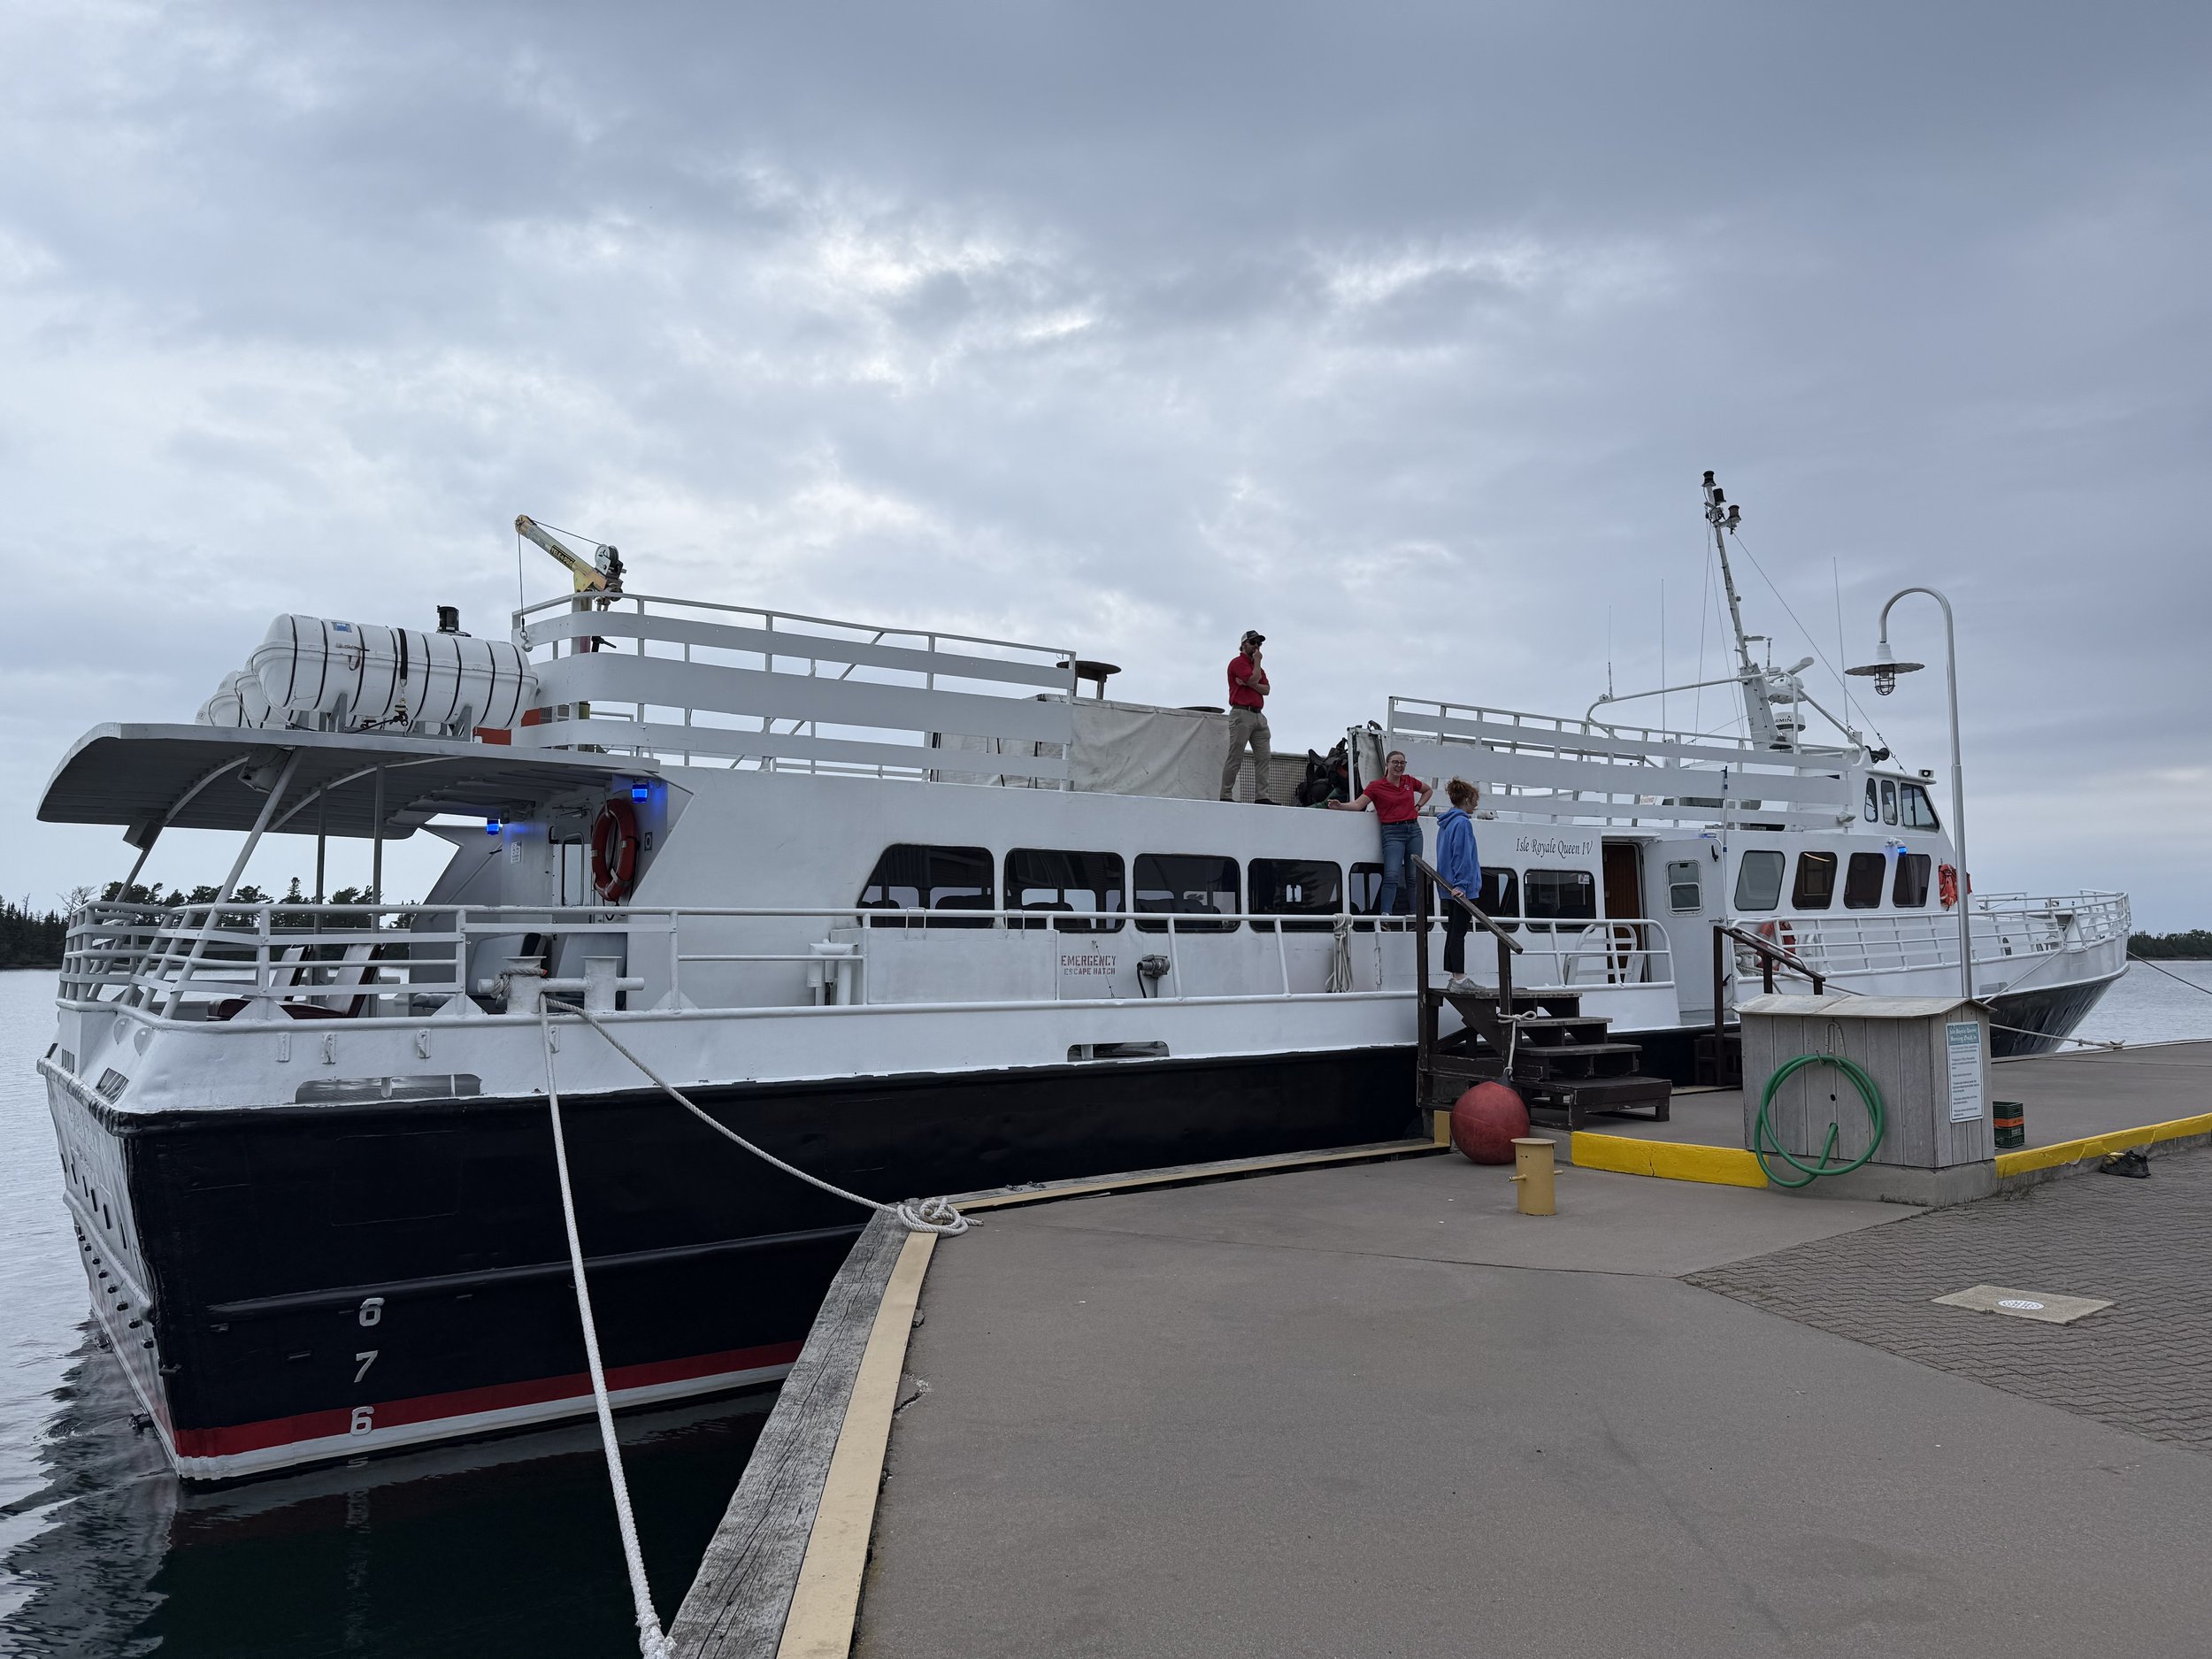
Isle Royale Queen IV
Getting There
There are three main ways to reach Isle Royale:
Ferry Services
From Copper Harbor, MI— The Isle Royale Queen IV ferry departs here, making the ~3–3.5 hour crossing to Rock Harbor. This is the most popular option for day-trippers, as the crossing is shorter and the schedule is designed for same-day returns. At the time of my visit, the ferry cost $87 each way, so keep that in mind when budgeting your trip.
From Houghton, MI — The Ranger III is a larger ferry, taking about 6 hours one way. It’s best suited for multi-day visitors or those looking for a slower, more scenic journey.
From Grand Portage, MN — The Voyageur II or Sea Hunter III depart from here, taking 1.5–2 hours depending on the docking point, usually arriving at Windigo on the island’s west end.
Seaplane
Seaplane service is available from Hancock, Michigan, and Grand Marais, Minnesota. Flights typically take 45–60 minutes and offer stunning aerial views of Lake Superior. This is the fastest (and most expensive) way to get to the island.
Important: Reservations are highly recommended for both ferries and seaplanes, especially in peak summer. Schedules vary by season and are weather-dependent, so always confirm details ahead of time.
Entrance Fees and Passes
As of now, Isle Royale charges a $7 per person, per day entrance fee (for visitors 16 and older). You can pay online ahead of time or upon arrival.
If you have an America the Beautiful annual pass, it covers the entrance fee — but keep in mind, transportation (ferry or seaplane) costs are separate.
Most Visited Places
Rock Harbor — The island’s main hub, with a visitor center, lodge, marina, and access to multiple trailheads.
Windigo — A quieter southwest entry point, popular among backpackers and paddlers looking for a more remote experience.
Scoville Point — A popular hiking destination near Rock Harbor, offering beautiful lake views and a chance to spot wildlife.
Lookout Louise — A slightly more strenuous hike with panoramic vistas over the inland lakes and surrounding islands.
Edisen Fishery & Rock Harbor Lighthouse — These historic sites, accessible by boat or water taxi, showcase the island’s cultural history.

Best Hikes
Scoville Point Loop (4.2 miles) — A stunning loop trail along the eastern edge, great for wildlife viewing and lake scenery.
Mount Franklin (10.4 miles round trip) — A longer, more challenging hike with sweeping views over Rock Harbor and the island’s interior.
Windigo to Huginnin Cove Loop (9.5 miles) — A scenic loop starting from Windigo, perfect for visitors seeking solitude on the island’s west end.
Best Places for Photos
Rock Harbor Marina at sunrise or sunset
Moose grazing in the shallows
The historic Rock Harbor Lighthouse
The rugged, rocky shoreline at Scoville Point
Aerial shots from the seaplane (seriously breathtaking!)
Accessibility
Isle Royale is a rugged, remote wilderness, and accessibility is limited. The Ranger III ferry has an elevator and accessible restrooms, and the Rock Harbor Visitor Center is wheelchair accessible. However, most of the island’s trails are rough and uneven, and they’re best suited to visitors who are comfortable with rocky terrain.
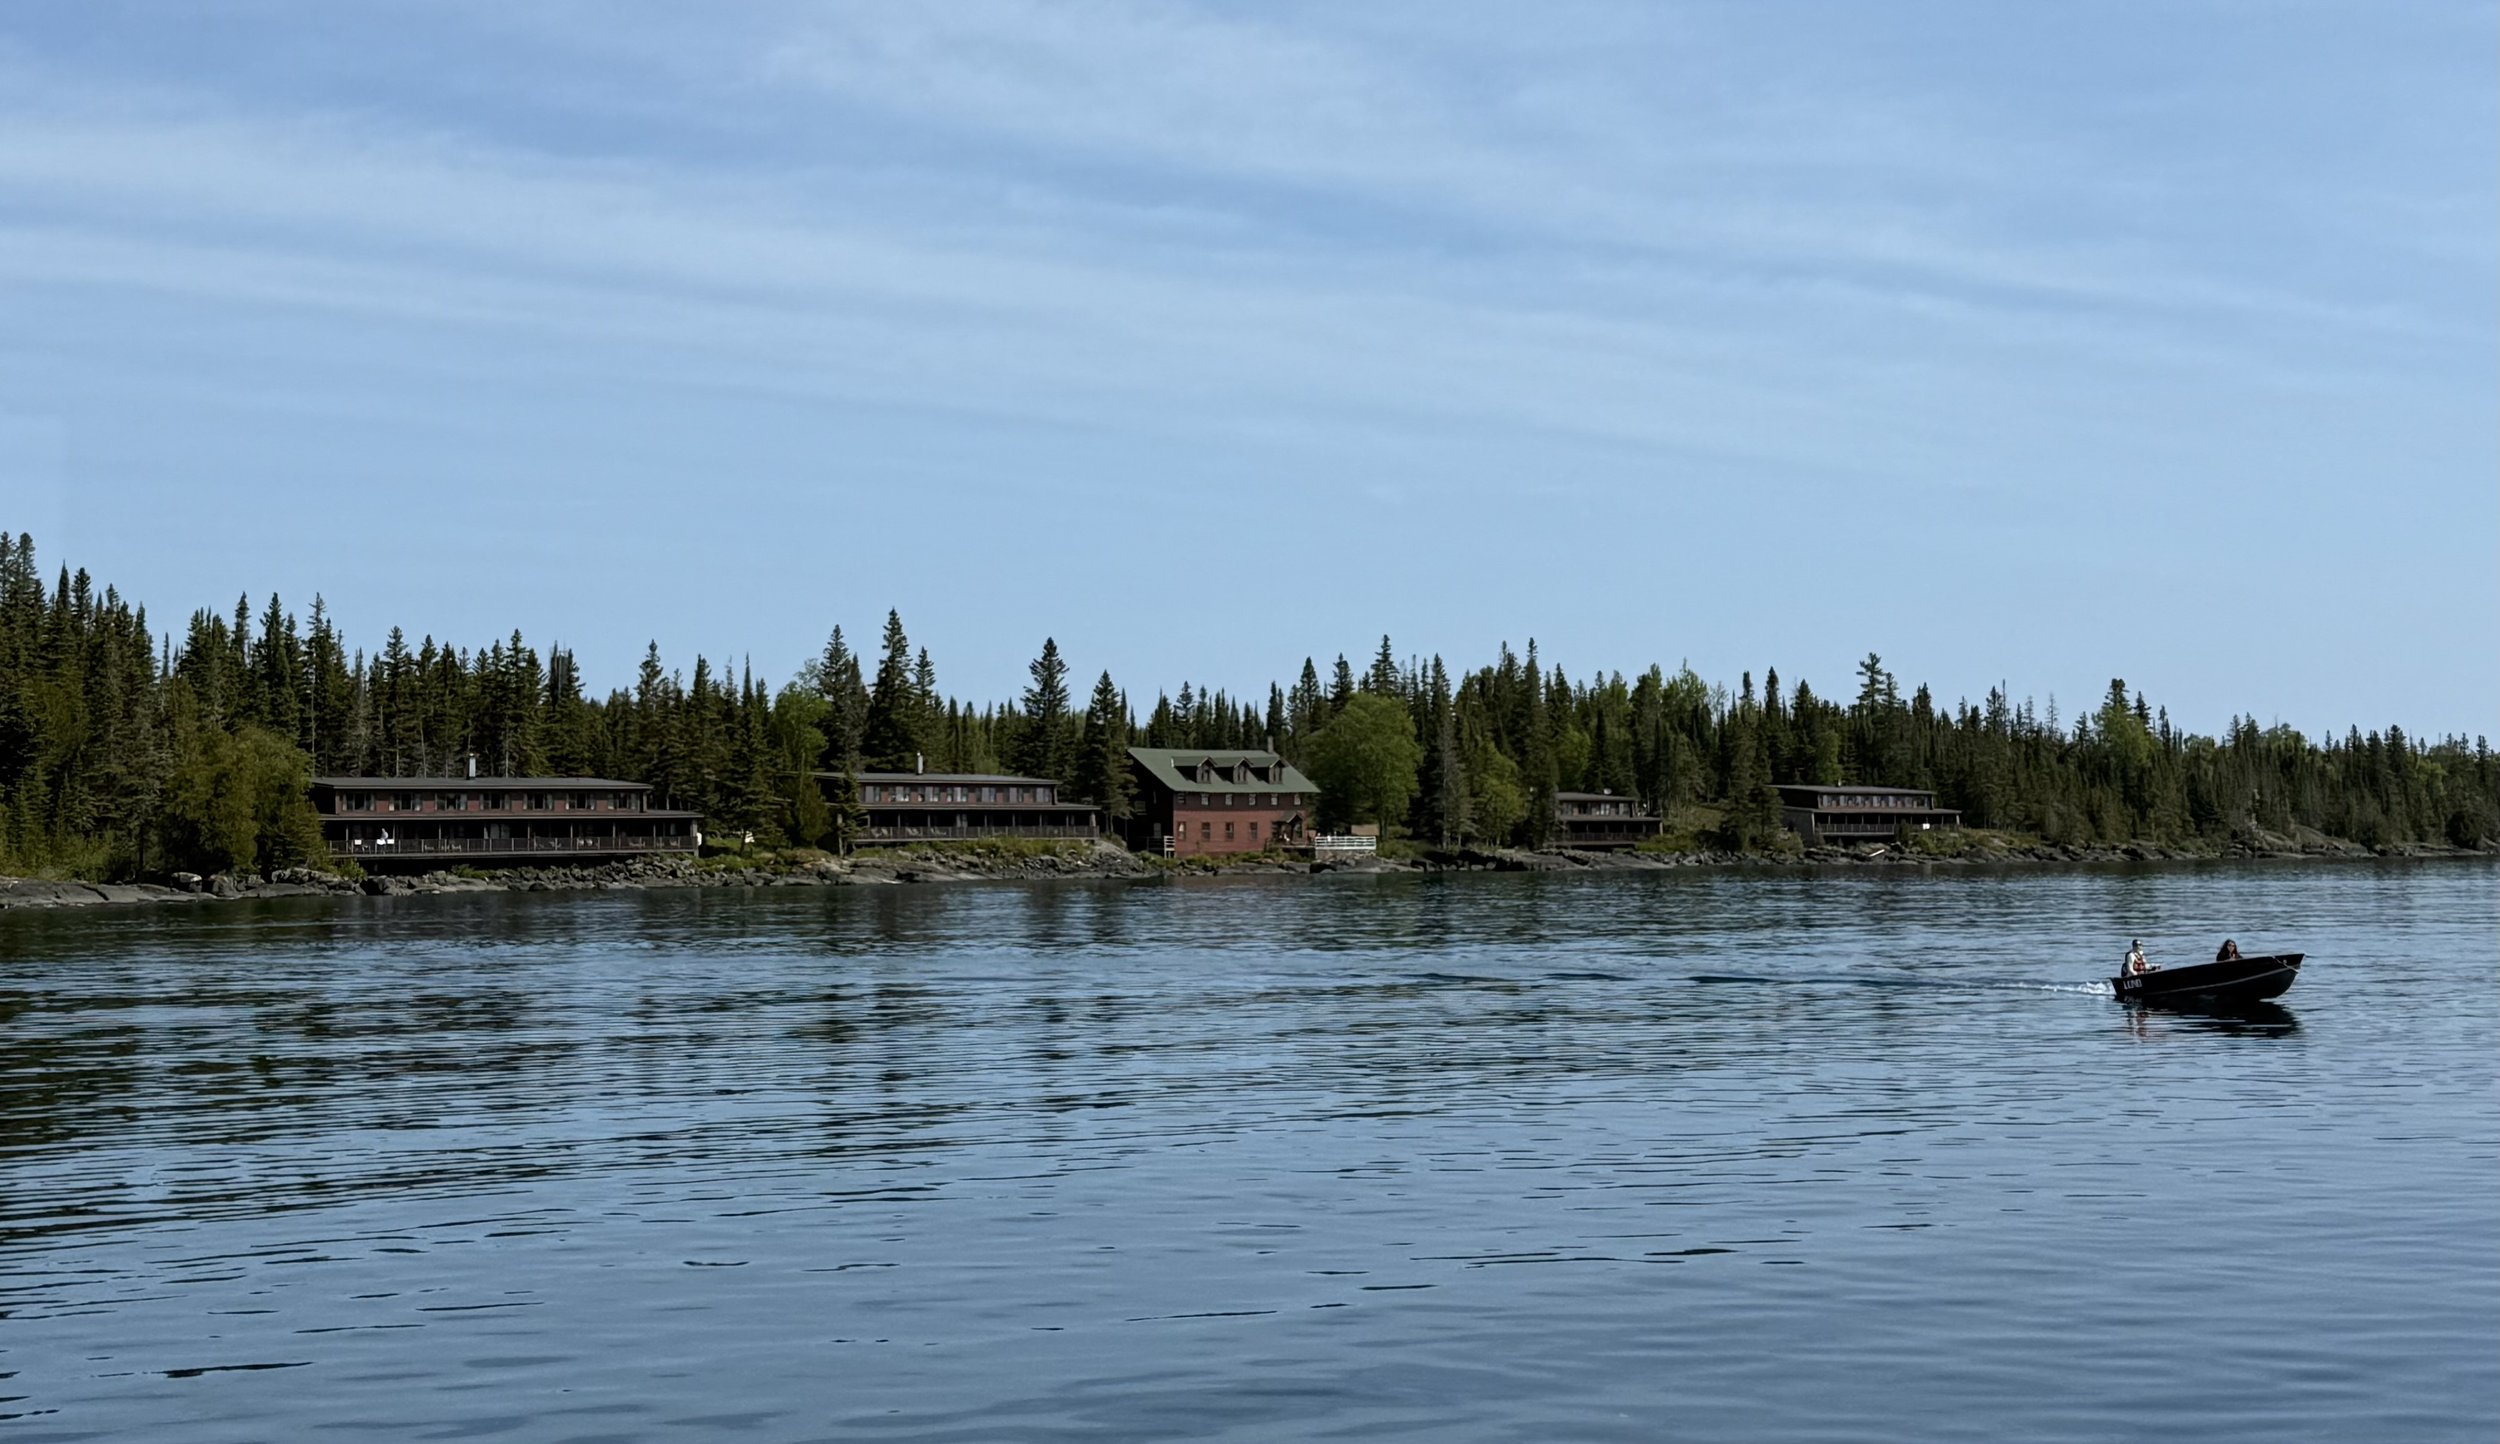
Rock Harbor Lodge
Other Helpful Info
Lodging — Rock Harbor Lodge offers rustic rooms and cabins; there are also multiple designated campgrounds across the island. Be sure to book early, as spots fill up fast.
Food — There’s a small camp store at Rock Harbor, but it’s smart to bring your own food and supplies, especially if you plan to hike or camp.
Weather — Pack for a range of conditions! Even in summer, the island can be chilly, foggy, or rainy thanks to Lake Superior’s cooling effect.
Cell Service — Expect very limited or no service — this is a true digital detox destination.
# 30 Olympic National Park, Washington
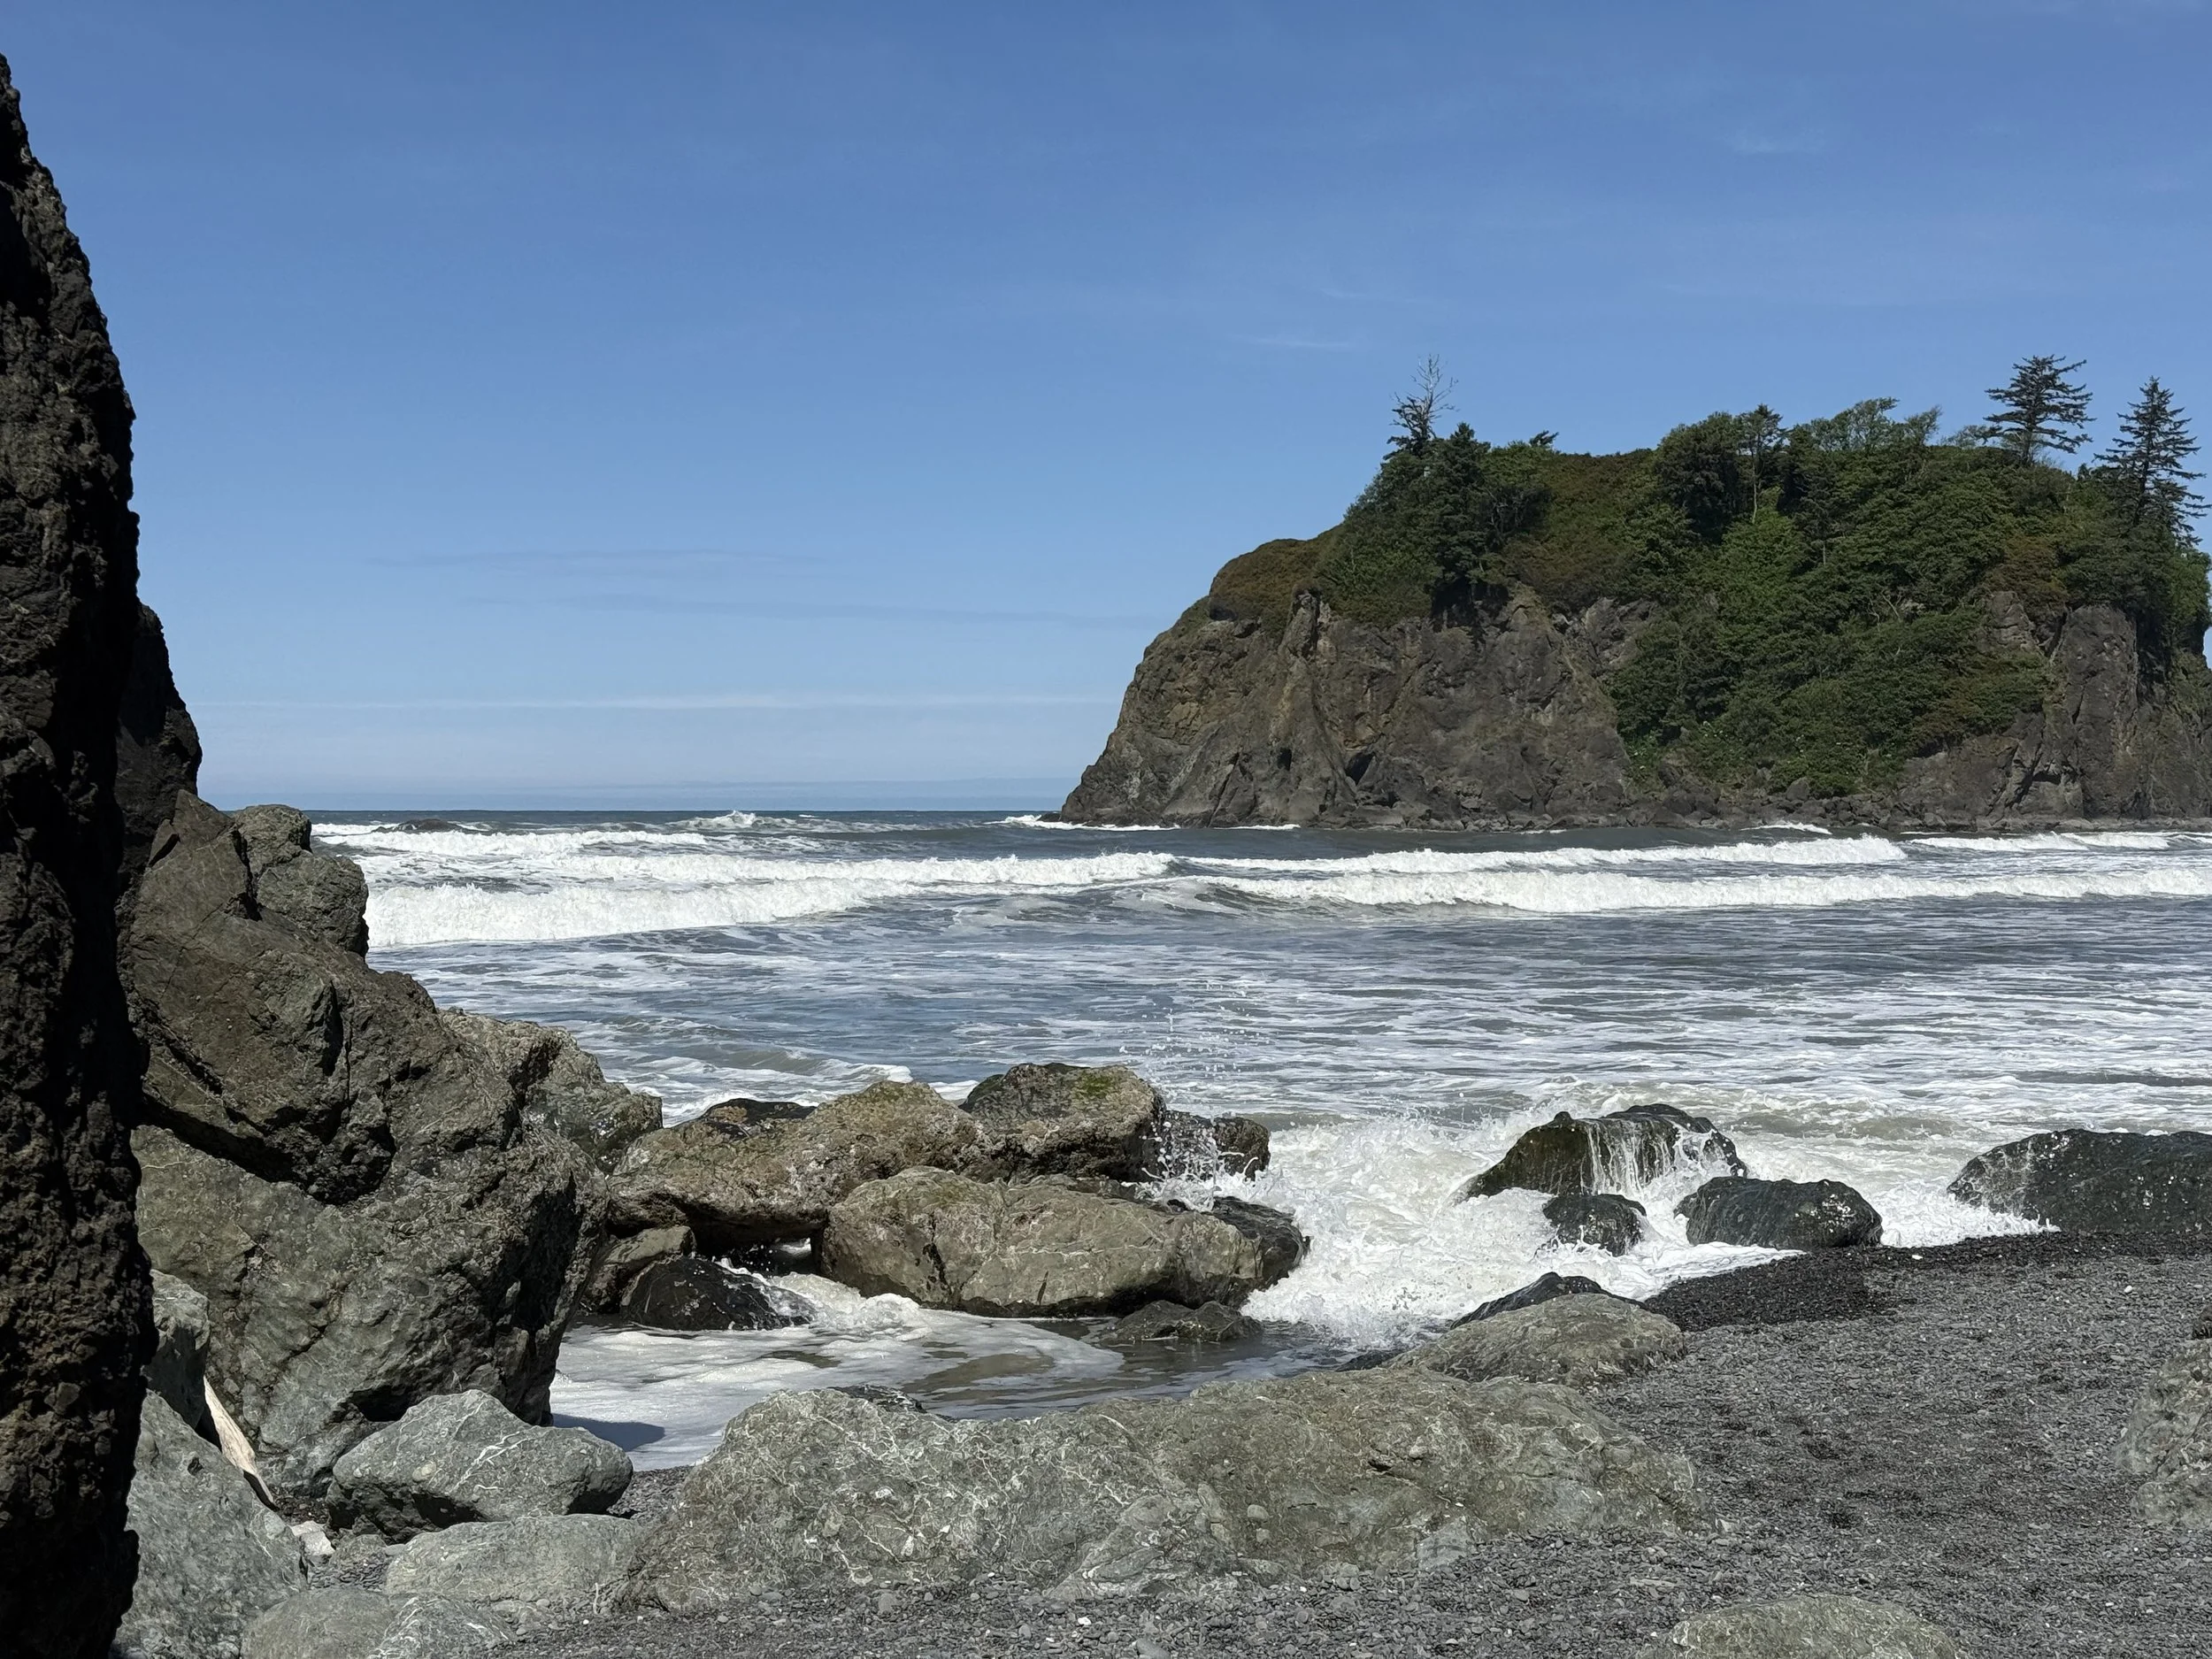
Ruby Beach
My trip to Olympic National Park kicked off on a crisp Wednesday morning in May, leaving from Seattle. The drive takes about 2.5 hours — not too bad, but here’s the thing: with a park as massive as Olympic, you really have to decide what you want to focus on before you even get there. You’ve got mountains, rainforests, and rugged coastline all packed into one park. It’s a lot to cover.
Since I’d spent the past few days surrounded by mountain scenery, I decided to switch things up and head for the coast. Ruby Beach was my pick.
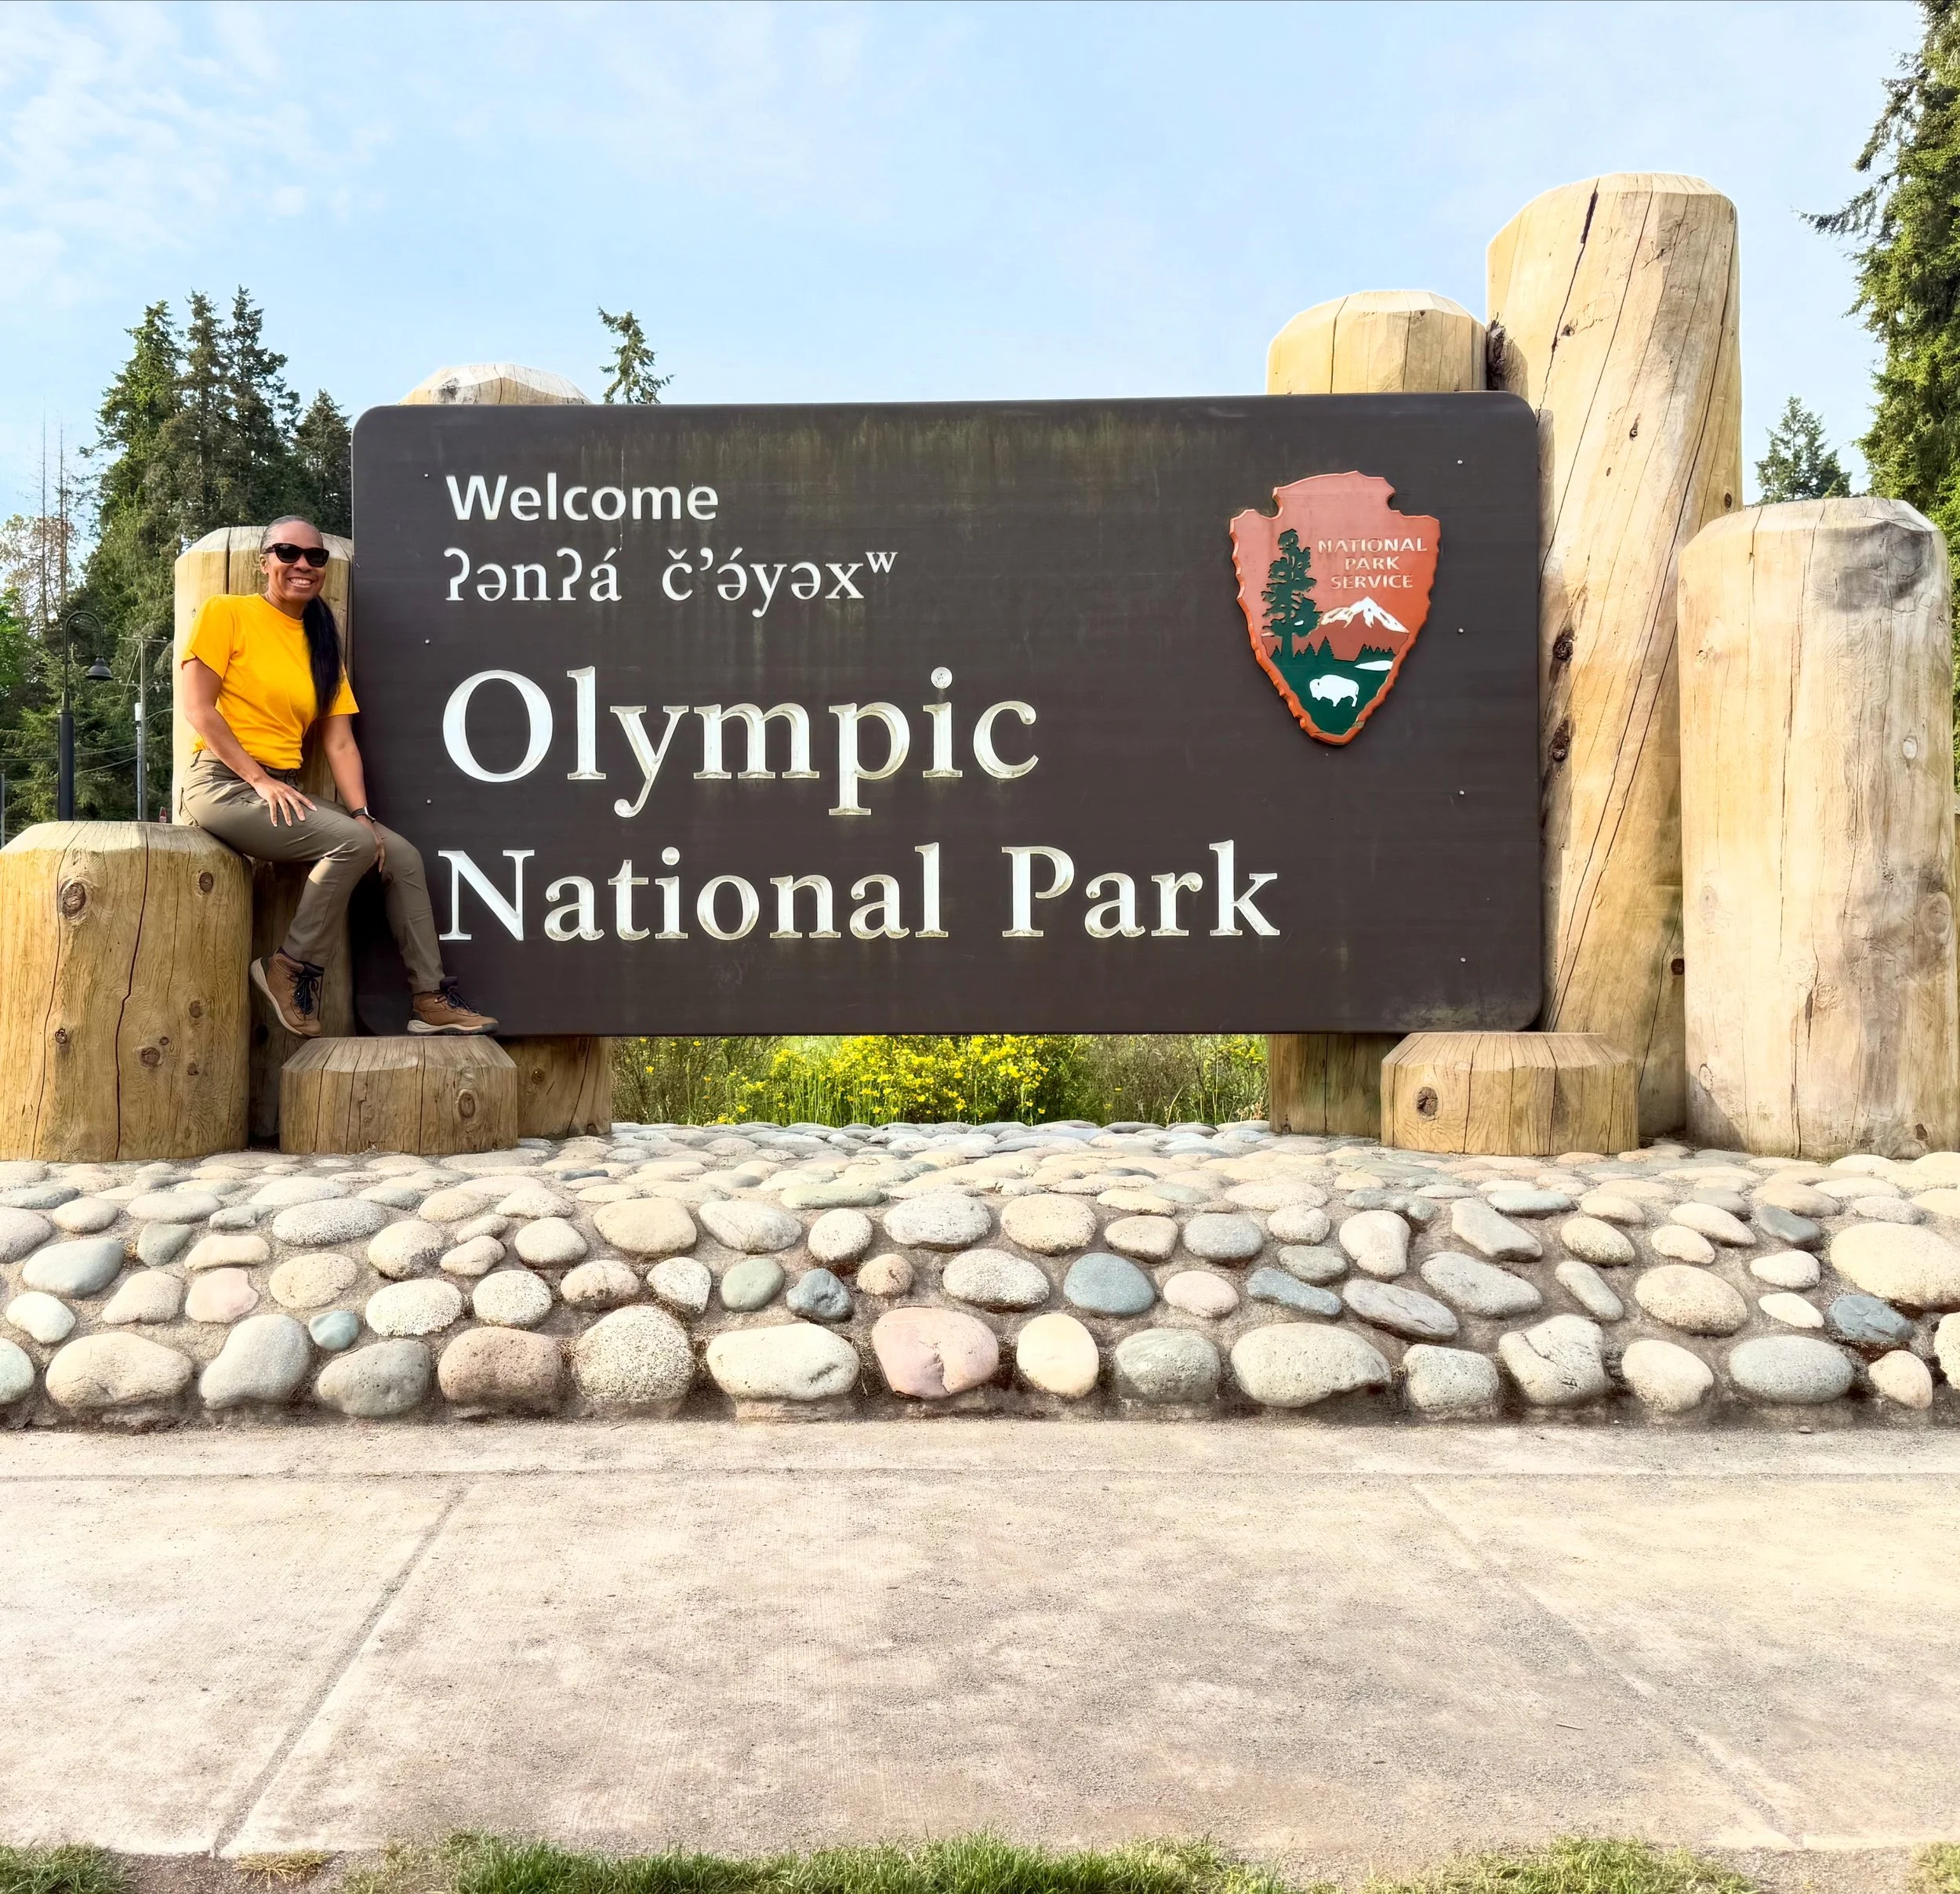
The drive in went smoothly, and I actually arrived before the visitor center opened. So I stopped, took my usual photo by the park sign, and then hung out in the car for about 45 minutes. Luckily, they had maps outside, so I grabbed one and sketched out my route. That’s when I realized Ruby Beach was still another two hours away. Oof. But by then, I was fully committed.
When the visitor center opened at 9 a.m., I went in, got my passport stamp, and hit the road. Along the way, I passed signs for all the major park highlights — Hurricane Ridge, Hoh Rainforest, Sol Duc — and even crossed out of the national park into the national forest for a stretch. Olympic is truly massive.
Because it was a weekday, the park wasn’t crowded at all. When I finally made it to Ruby Beach, I hiked the short trail down to the shore. The beach was littered with huge driftwood logs, turning the approach into a bit of an obstacle course. But honestly, the effort was worth it.
The beach itself was stunning — a rocky shoreline, dramatic sea stacks, and tidal pools perfect for exploring. I could’ve easily stayed there all afternoon, just wandering and soaking it in.
I had hoped to squeeze in a few other stops, maybe check out the rainforest or the alpine sections, but time wasn’t on my side. And that’s okay. Olympic is one of those places you know you’ll come back to. It’s not a one-and-done park — it’s a place that stays on your list, calling you back.
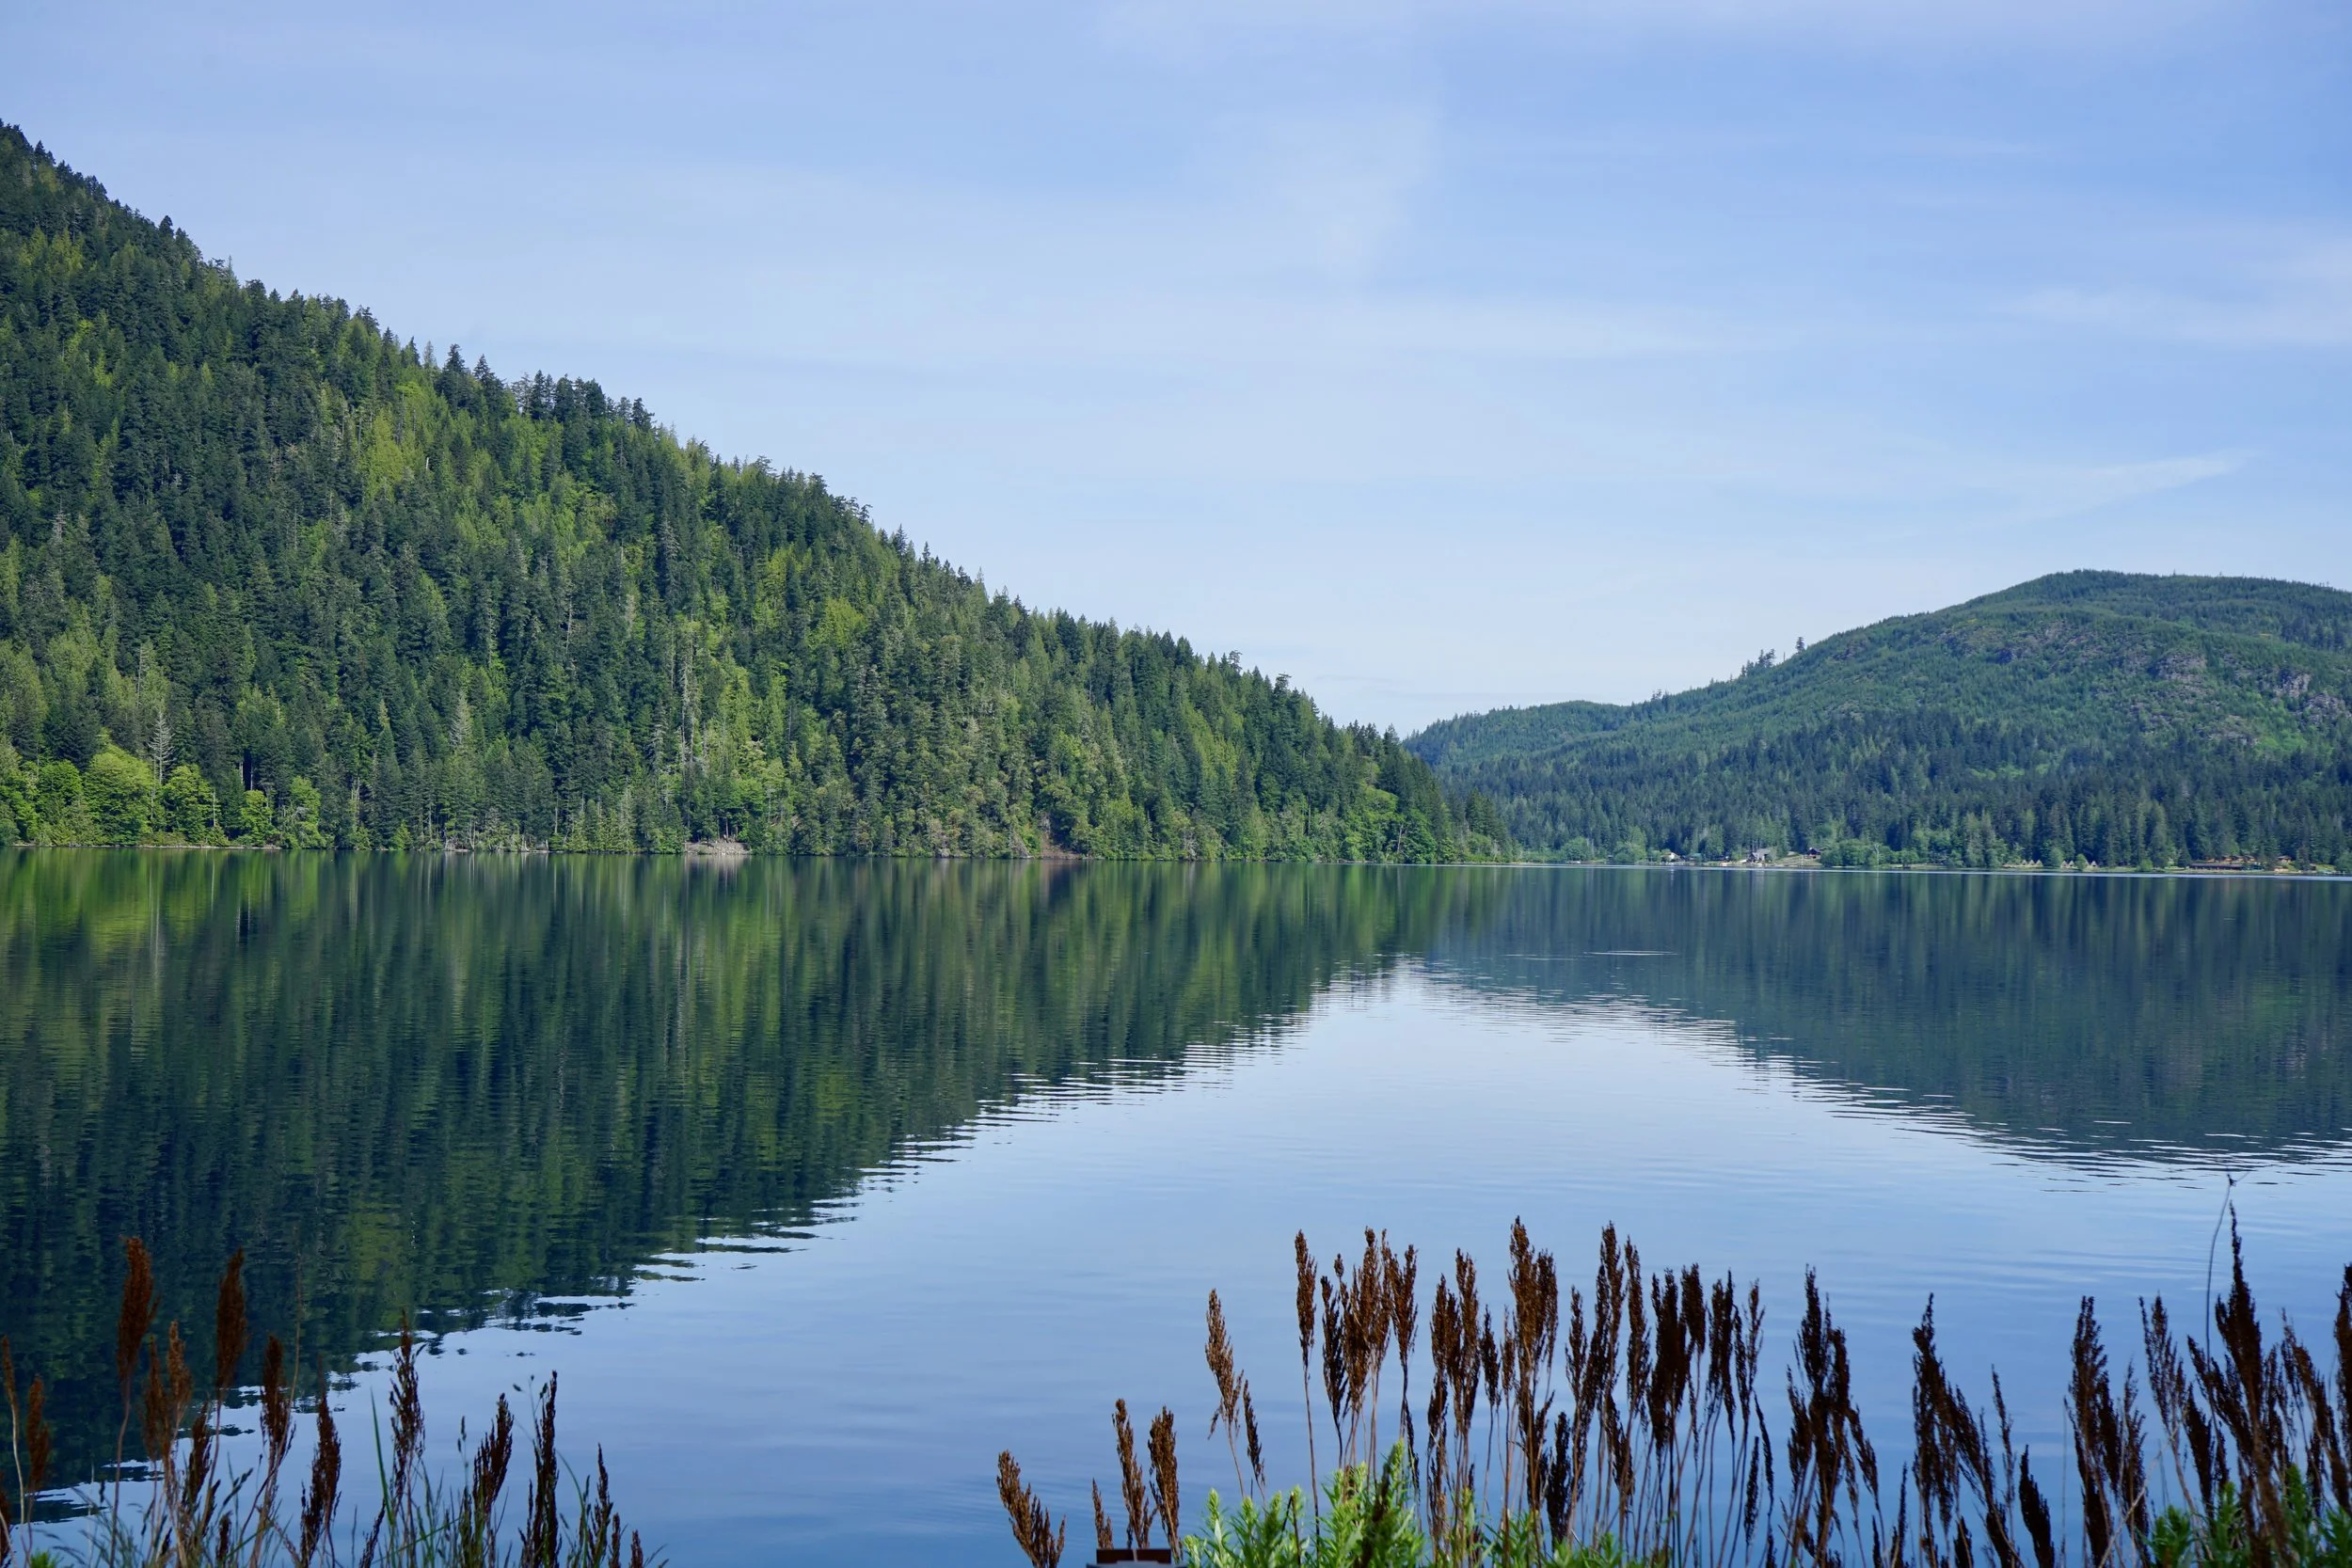
Lake Crescent
A Bit About the Park
Olympic National Park, established in 1938, is one of the most ecologically diverse parks in the United States. It protects nearly a million acres of wilderness on Washington’s Olympic Peninsula, covering everything from snowcapped mountains to old-growth rainforests to wild Pacific coastline. It’s been designated both a UNESCO World Heritage Site and an International Biosphere Reserve, thanks to its rare mix of ecosystems.
Fun fact: several species here are found nowhere else on Earth, thanks to the isolation of the Olympic Mountains.
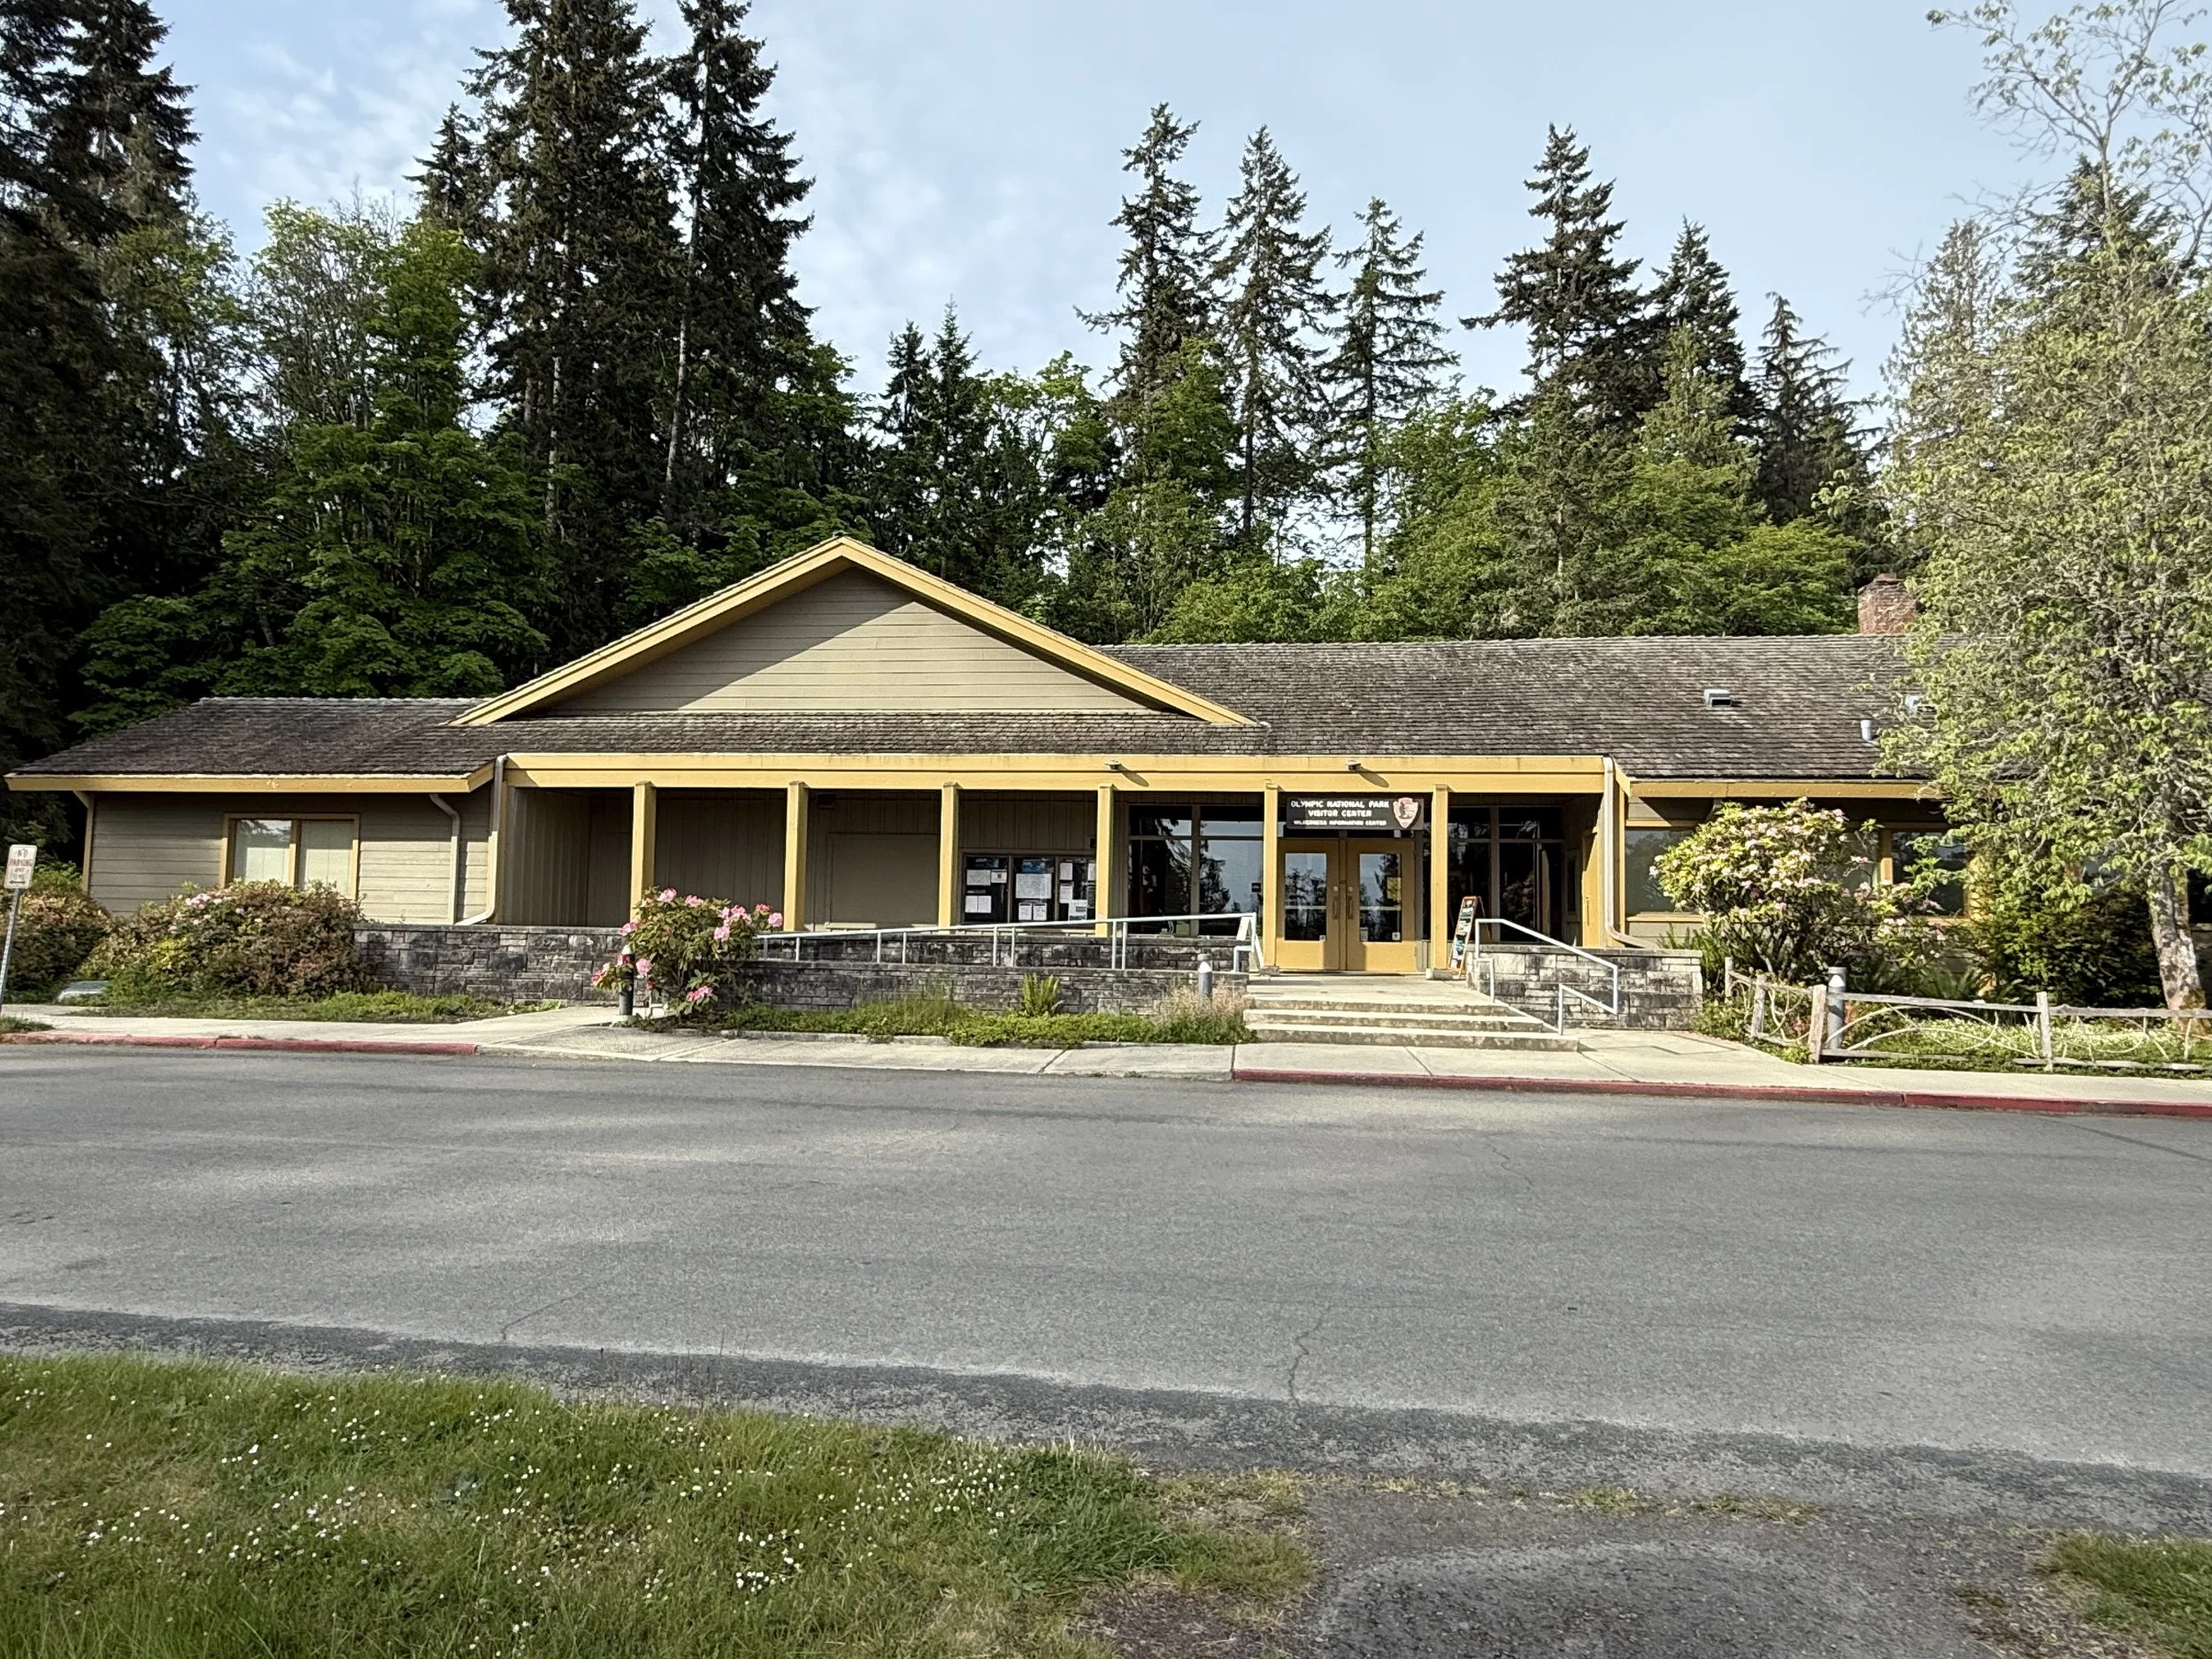
Main Visitor Center
Visitor Center Information
Here’s a full list of the visitor centers and ranger stations spread across the park:
Olympic National Park Visitor Center (Main)
3002 Mount Angeles Road, Port Angeles, WA 98362
• Main hub for maps, info, and ranger talks. Best first stop if you’re coming from Seattle or heading toward Hurricane Ridge.
Hurricane Ridge Visitor Center
Hurricane Ridge Road, Port Angeles, WA
• Seasonal visitor center up in the mountains. Check road status — it’s often snowed in outside summer.
Hoh Rain Forest Visitor Center
18113 Upper Hoh Road, Forks, WA 98331
• Focused on the temperate rainforest area. Good spot to pick up trail details for the Hall of Mosses and Spruce Nature Trail.
Passes and Fees
• Entrance Fee: $30 per vehicle (good for 7 days)
• America the Beautiful Pass: Accepted and covers entrance
• Reservations generally aren’t required to enter, but check the National Park Service website for any seasonal updates or alerts.
Most Visited Places in the Park
• Hurricane Ridge — Sweeping alpine views and hiking trails
• Hoh Rain Forest — Moss-draped trees and otherworldly greenery
• Sol Duc Valley — Waterfalls and natural hot springs
• Ruby Beach — Sea stacks, rocky shorelines, and dramatic Pacific scenery
• Lake Crescent — Glacier-carved lake with crystal-clear water
Best Hikes
• Hurricane Hill Trail (3.2 miles round trip) — Paved trail with panoramic mountain views
• Hoh Rain Forest Trail (up to 6 miles, with shorter loops available) — A walk through dense, mossy rainforest
• Sol Duc Falls Trail (1.6 miles round trip) — Quick hike to a powerful waterfall
• Second Beach Trail (4 miles round trip) — Coastal trail with tidepools and sea stacks
• Marymere Falls Trail (1.8 miles round trip) — Easy, family-friendly trail to a scenic waterfall

Best Photo Spots
• Ruby Beach at low tide, especially around sunset
• Hurricane Ridge viewpoints on a clear day
• Inside the Hoh Rain Forest, under the moss-hung trees
• Sol Duc Falls from the footbridge
• Lake Crescent, viewed from the shoreline or dock
Accessibility
Olympic’s accessibility varies depending on the area. Hurricane Ridge offers paved viewpoints and the Hurricane Hill trail, while the main visitor center is ADA-compliant. Some waterfall trails, like Sol Duc and Marymere, are relatively gentle but not fully paved. Coastal spots like Ruby Beach are trickier, thanks to the driftwood and rocky approaches. Always check the park’s accessibility page if you have mobility needs.
Other Helpful Info
• Weather: Expect everything — fog, rain, snow (even in late spring), and sun. Bring layers.
• Food & Gas: Limited services inside the park; stock up before you enter.
• Cell Signal: Spotty at best. Download maps or bring a paper backup.
#29 North Cascades National Park, Washington
Diablo Lake Overlook
My visit to North Cascades National Park kicked off straight off the plane. I landed at Seattle-Tacoma International Airport around 9:00 a.m., and since my hotel check-in wasn’t until 3:00 p.m., I figured — why waste the day? I picked up my rental car and headed for the park.
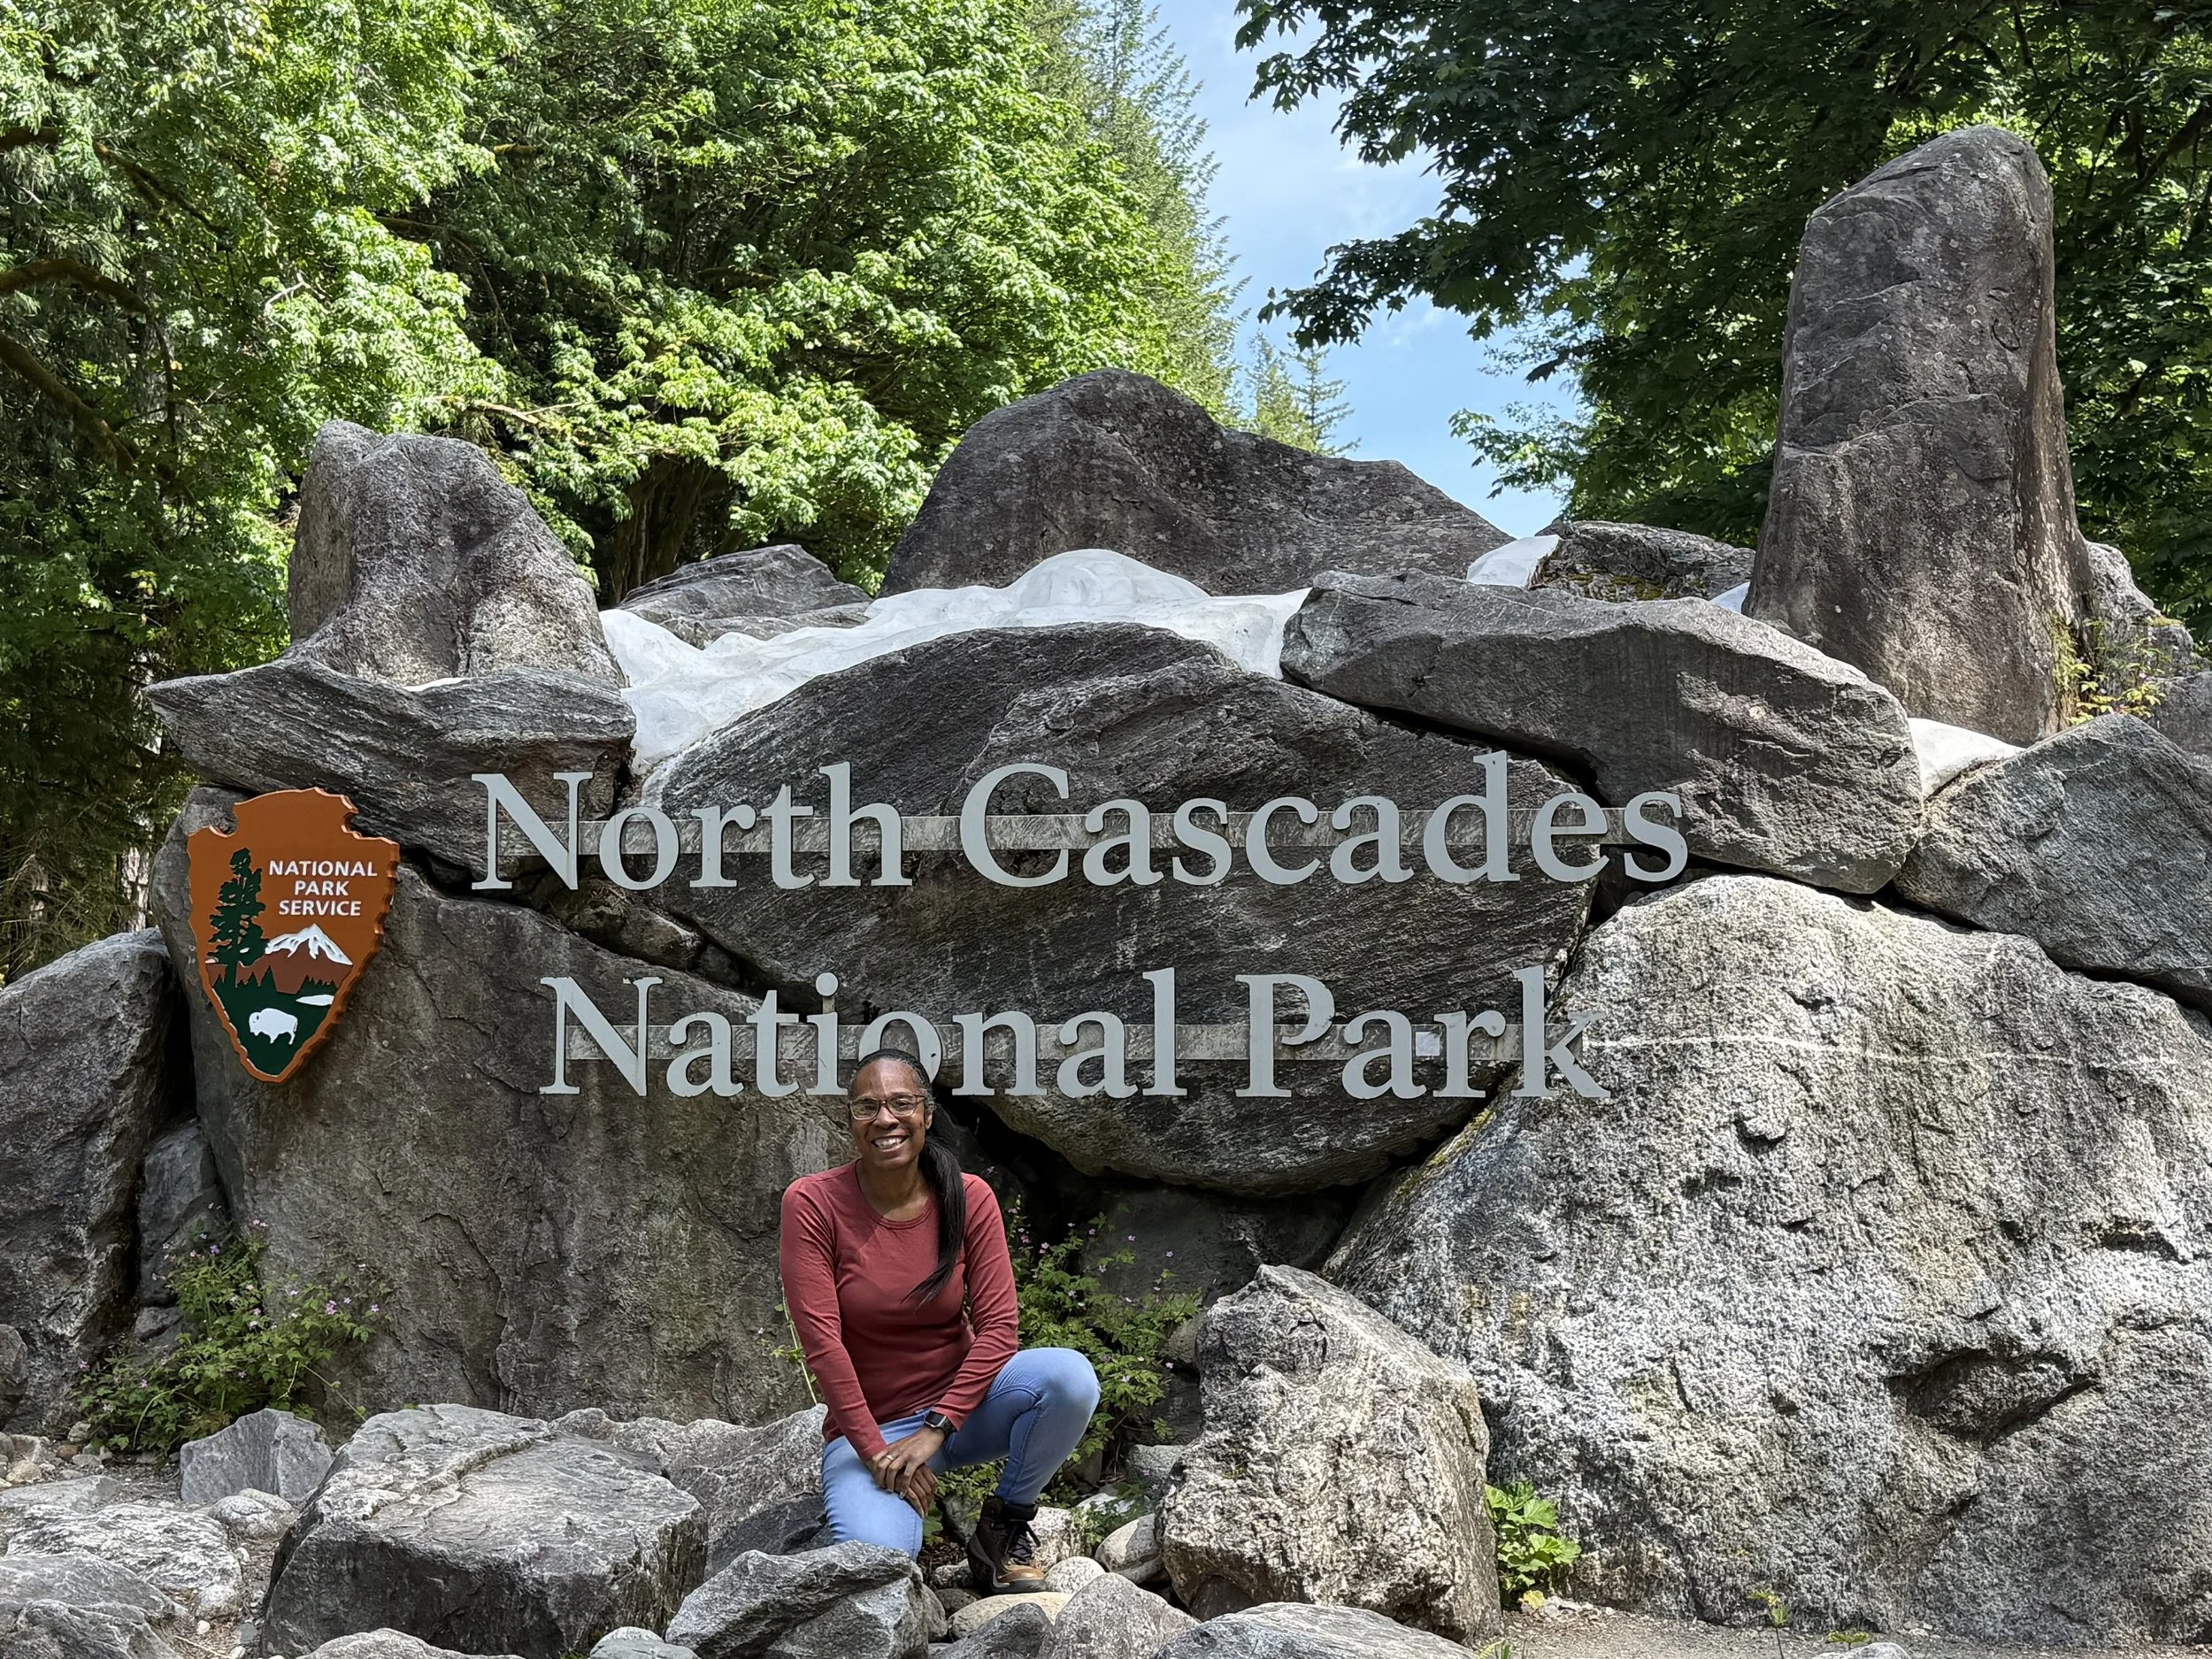
The drive along State Route 20 (also called the North Cascades Highway) was beautiful but a bit more crowded than usual — it was Memorial Day weekend, after all, and Sunday traffic was rolling. When I finally reached the North Cascades National Park sign, I was surprised to see a full line of people waiting to take their pictures. Usually, these sign spots are pretty quiet, but not today. I parked, joined the line, and when my turn came, the family behind me kindly offered to snap my photo (I took theirs too — park people helping each other out always makes me smile).
With my park sign photo done, I drove over to the North Cascades Visitor Center. To get there, you cross a narrow, single-lane bridge with a traffic light that tells you when it’s safe to go. I waited with a few other cars for the green light and then made my way across.
The visitor center felt like a cozy mountain lodge. The parking lot was busy, but cars were coming and going constantly, so I didn’t have to wait long for a spot. Inside, I grabbed my passport stamp (always a must), then dropped the book back off in the car before checking out the River Loop Trail, which starts just behind the building.
The loop took me about 45 minutes — a peaceful walk through the woods that gave me a nice first feel for the area. I even stopped by the river for a bit to enjoy the view and the sound of the water. After finishing up, I jumped back in the car and drove to the Gorge Overlook, where there’s a beautiful waterfall and a great spot for a few photos. From there, I made my way to the main event: Diablo Lake Overlook.
This is the spot you see in most photos of North Cascades — the brilliant turquoise lake framed by mountains. The parking lot was packed, but by some miracle, I managed to score a space by backing into one near the back. I walked up to the overlook and just stood there for a while, soaking in the view.
North Cascades is a great pick for either a day trip or a weekend getaway. As one of the least visited national parks, it offers a peaceful escape into nature — holiday weekends aside, you’re likely to find quiet trails and wide-open views without the crowds. To me, North Cascades feels like the quiet little brother of Olympic and Mount Rainier National Parks. It’s just as stunning, with jaw-dropping mountains and beautiful scenery, but it doesn’t sprawl quite as big or carry the same big-name buzz. That’s part of its charm — it’s a place where you can enjoy the beauty without the noise.
By now, it was getting later in the day, and the effects of my 3 a.m. wake-up were finally catching up to me. I made the 2.5-hour drive back to Seattle, ready to check into my hotel and get some much-needed rest.
Park History
North Cascades National Park was established on October 2, 1968, protecting over 684,000 acres of rugged alpine wilderness in northern Washington. But the human history here stretches back at least 10,000 years, with Indigenous communities like the Skagit, Upper Skagit, and Nlaka’pamux inhabiting and stewarding this landscape for generations.
In the late 19th and early 20th centuries, miners and loggers began working in parts of the region, though large-scale development remained limited. Big changes arrived in the 1920s, when hydroelectric dams were built in the Skagit River Valley, reshaping parts of the landscape and helping power the growing city of Seattle. Conservation efforts over the next several decades ultimately led to the park’s creation, preserving its rugged mountains, dense forests, and massive glaciers for future generations.
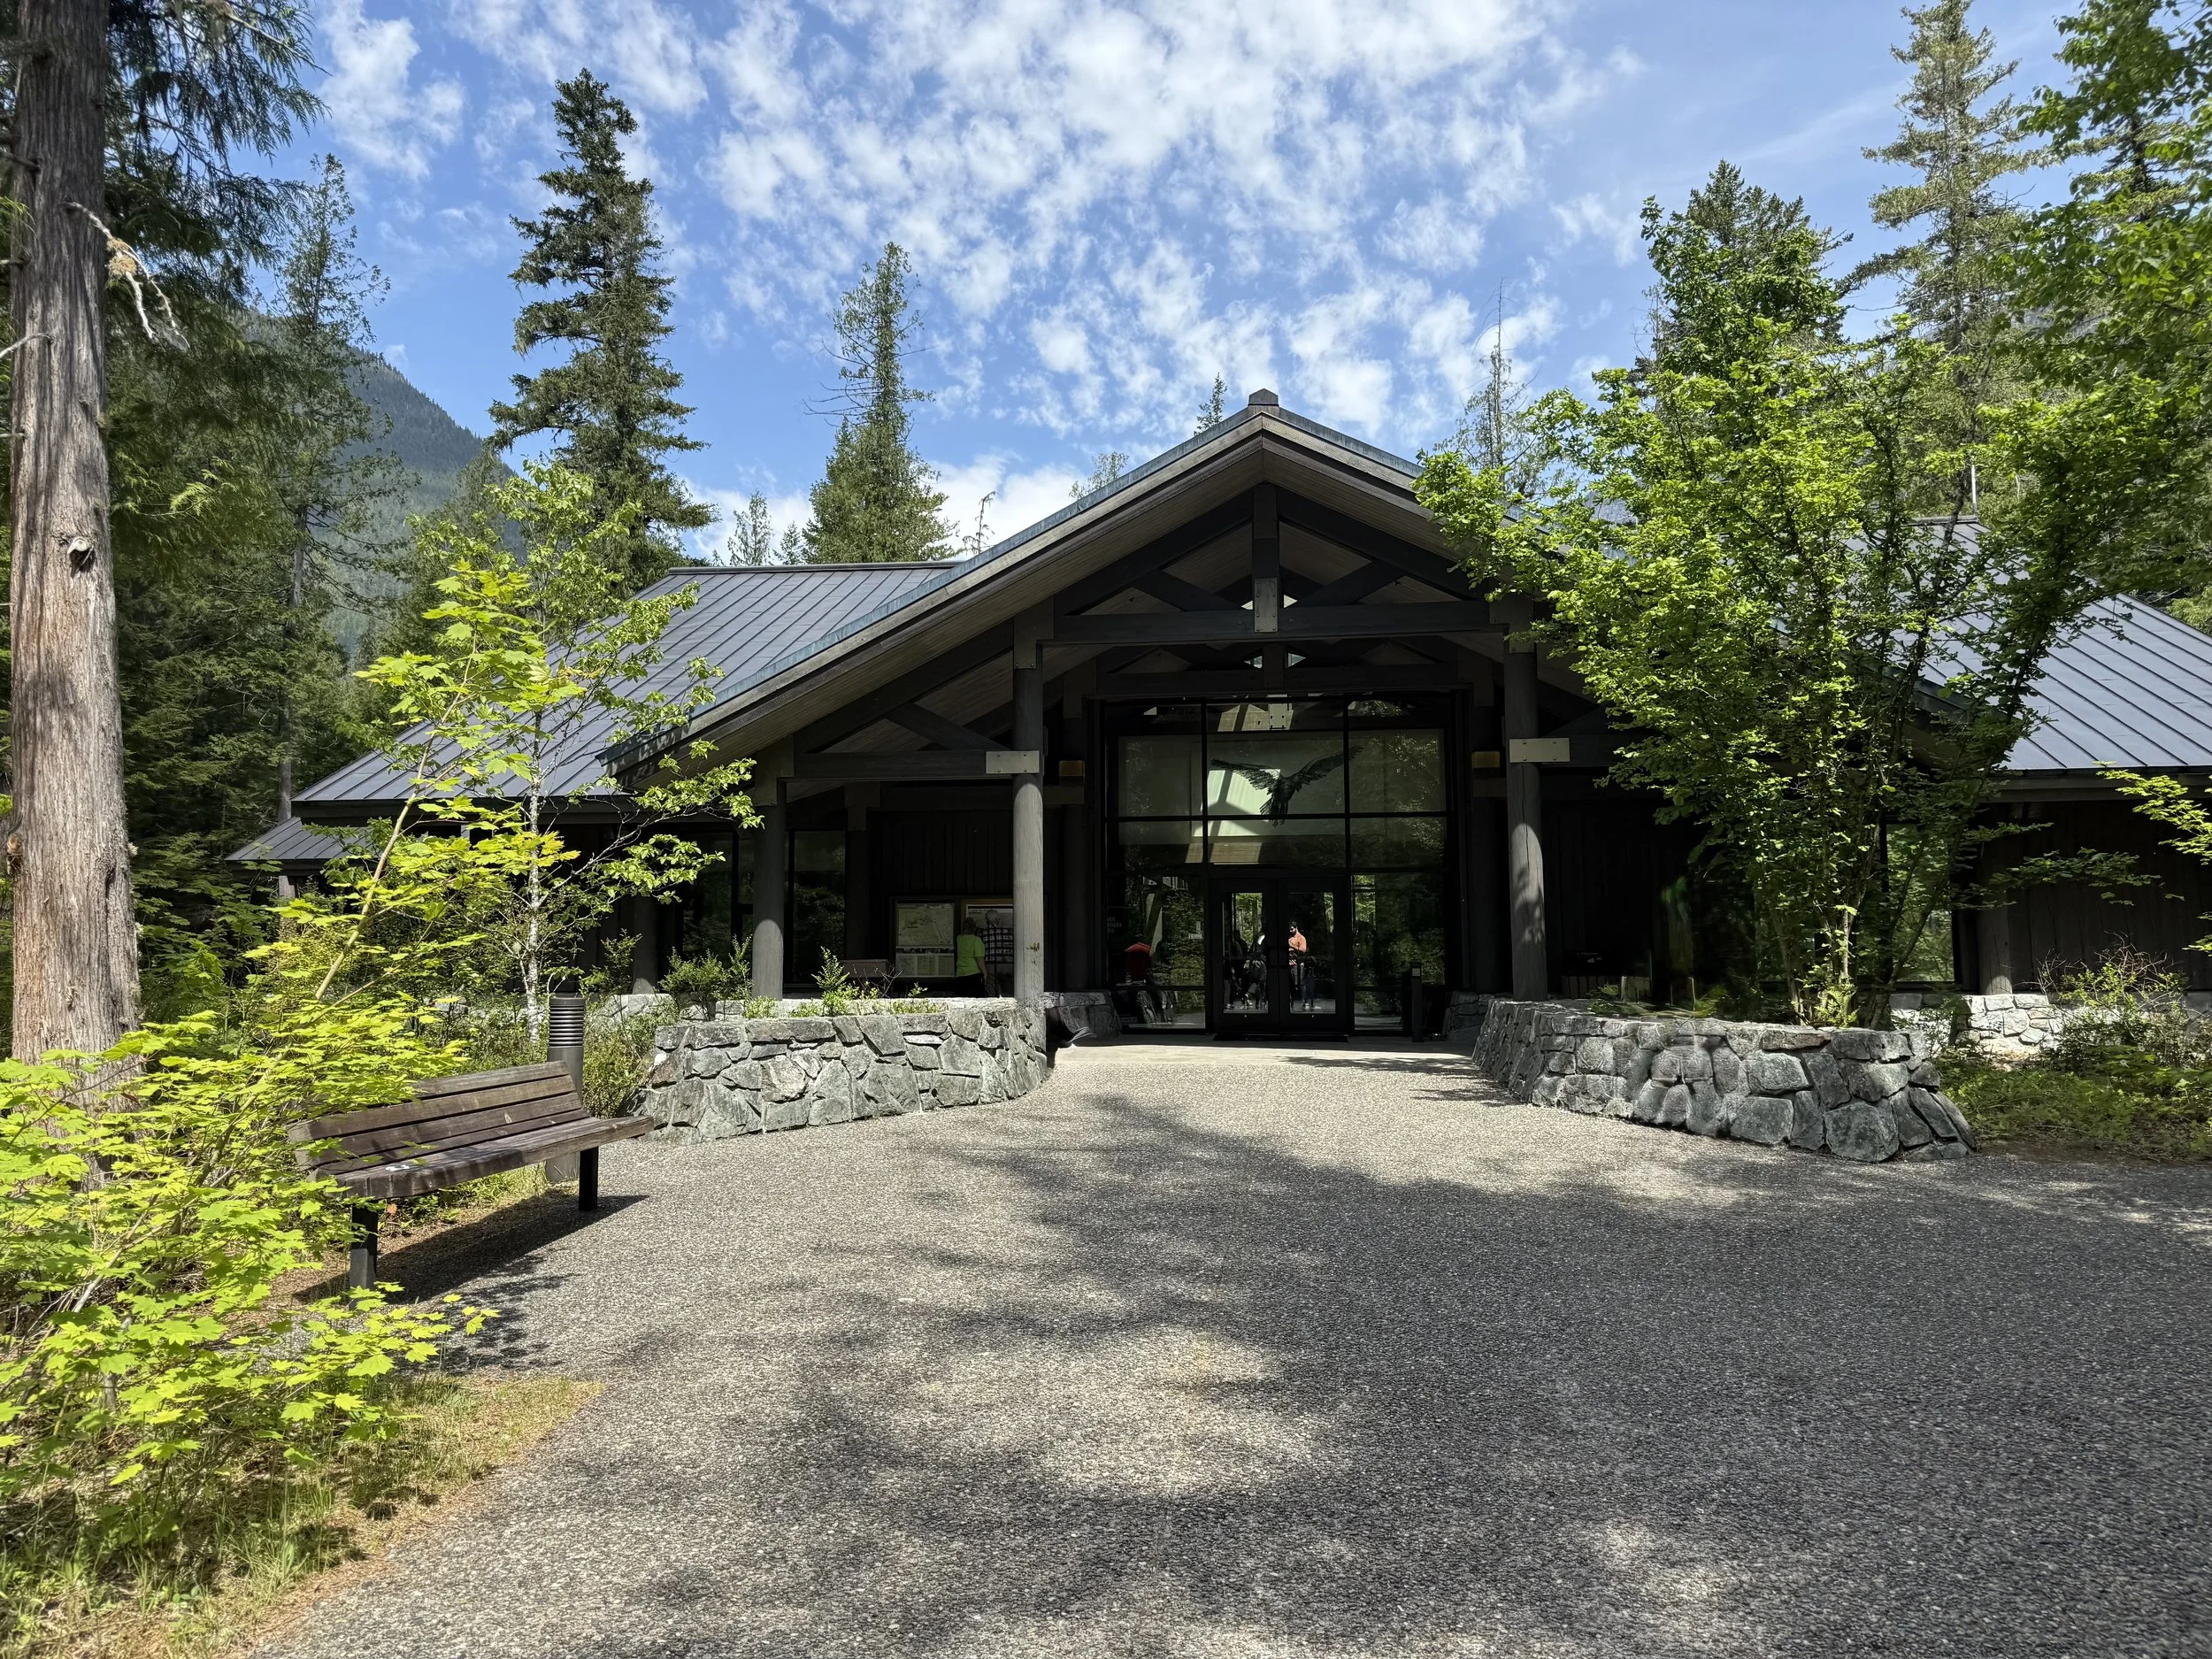
North Cascades Visitor Center
Visitor Center Information
The North Cascades Visitor Center is the main hub for visitors, located near Newhalem, just off State Route 20 at milepost 120.
📍 Address: 810 State Route 20, Sedro-Woolley, WA 98284
During the summer, it’s open daily from 9:00 a.m. to 5:00 p.m. Inside, you’ll find interactive exhibits on the park’s natural and cultural history, a big relief map of the region, and a small bookstore where you can pick up guides, maps, or souvenirs. Rangers are on hand to answer questions and offer tips on trail conditions, wildlife safety, and weather updates. If you want a quick nature fix, a few short interpretive trails — including the River Loop Trail — start just behind the center.
Entrance Fees and Passes
One of the best things about North Cascades National Park? There’s no entrance fee! You can drive in and explore without paying.
That said, if you plan to park at certain trailheads (especially those managed by the U.S. Forest Service just outside the park boundary), you might need a Northwest Forest Pass. Check ahead to avoid surprises.

Gorge Lake
Most Visited Places
Some of the most popular spots in the park include:
• Diablo Lake Vista Point — Known for its stunning turquoise water, this overlook is one of the most photographed spots in the park.
• Ross Lake Overlook — Gorgeous views of Ross Lake, especially at sunrise or sunset.
• Washington Pass Overlook — Dramatic views of Liberty Bell Mountain and the surrounding alpine terrain.
• Gorge Overlook — A short walk leads you to sweeping views of Gorge Creek Falls and the Skagit River Gorge.

River Loop Trail
Best Hikes
North Cascades offers trails for every skill level:
• Maple Pass Loop — A 7.2-mile loop with incredible alpine scenery, especially beautiful in the fall.
• Cascade Pass and Sahale Arm — A challenging 12-mile round trip with jaw-dropping views of glaciers, mountains, and wildlife.
• Blue Lake Trail — A moderate 4.4-mile round trip that leads you to a peaceful alpine lake surrounded by peaks.
• Rainy Lake Trail — An easy, paved 2-mile round trip great for families or anyone wanting a gentle walk with a scenic payoff.
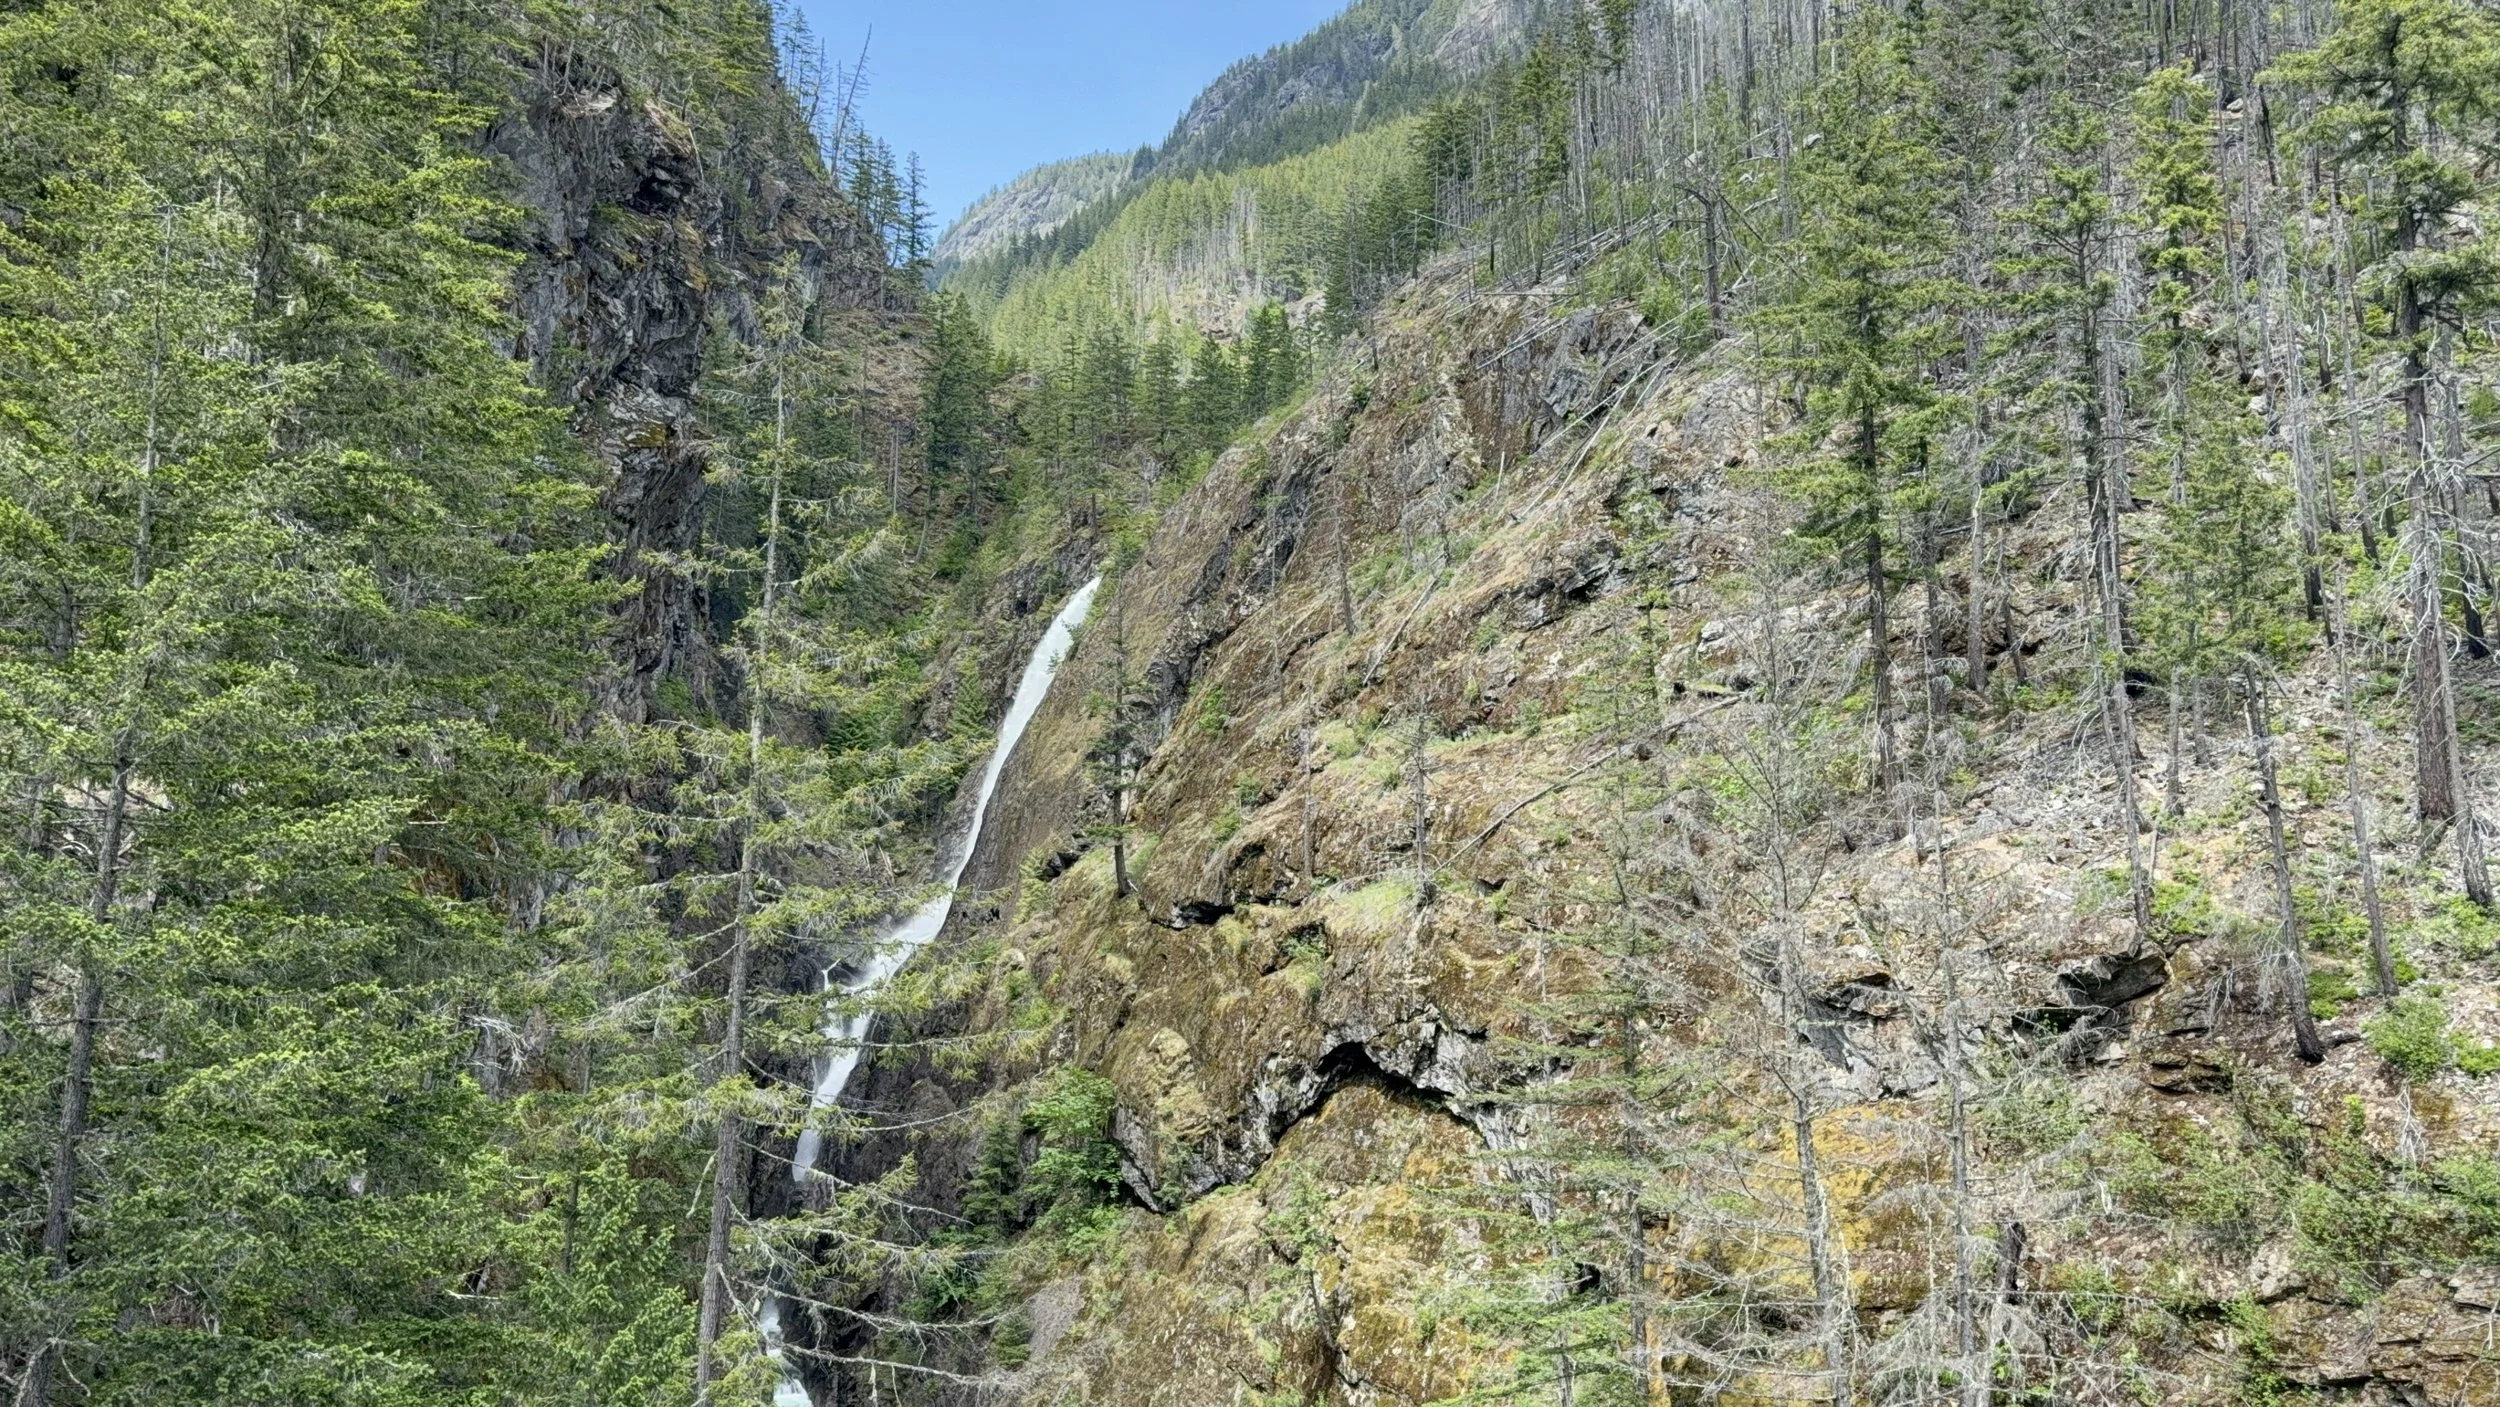
Gorge Overlook
Best Places to Take Photos
If you’re looking for photogenic spots, don’t miss:
• Diablo Lake Vista Point — That bright turquoise lake against the mountains is a must-capture shot.
• Maple Pass — Visit in autumn for golden larch trees lighting up the landscape.
• Sahale Arm — Panoramic glacier and mountain views.
• Cutthroat Pass — Wildflowers and expansive views, especially in summer.
• Slate Peak — One of the highest drivable points in Washington, with unbeatable 360-degree views.
Handicap Accessibility
Although much of the park is rugged, there are a few accessible options:
• North Cascades Visitor Center — Accessible parking, restrooms, exhibits, and nearby short trails.
• Rainy Lake Trail — A paved, wheelchair-friendly trail to a scenic lake.
• Gorge Overlook Trail — Partially paved, with waterfall views.
If you have specific needs, call ahead or check the park website for the most up-to-date accessibility info.
Other Helpful Information
• Weather — It can change quickly here. Even in summer, you might hit cool temps or sudden rain, so come prepared.
• Wildlife — Black bears, marmots, mountain goats — keep a safe distance, and make sure to store your food properly.
• Cell Service — It’s limited inside the park. Download maps or info ahead of time.
• Accommodations — There’s not much lodging inside the park, but you’ll find options in nearby towns like Marblemount and Winthrop.
• Permits — While you don’t need an entry pass, backcountry camping and certain activities do require permits — check with the Wilderness Information Center for details.
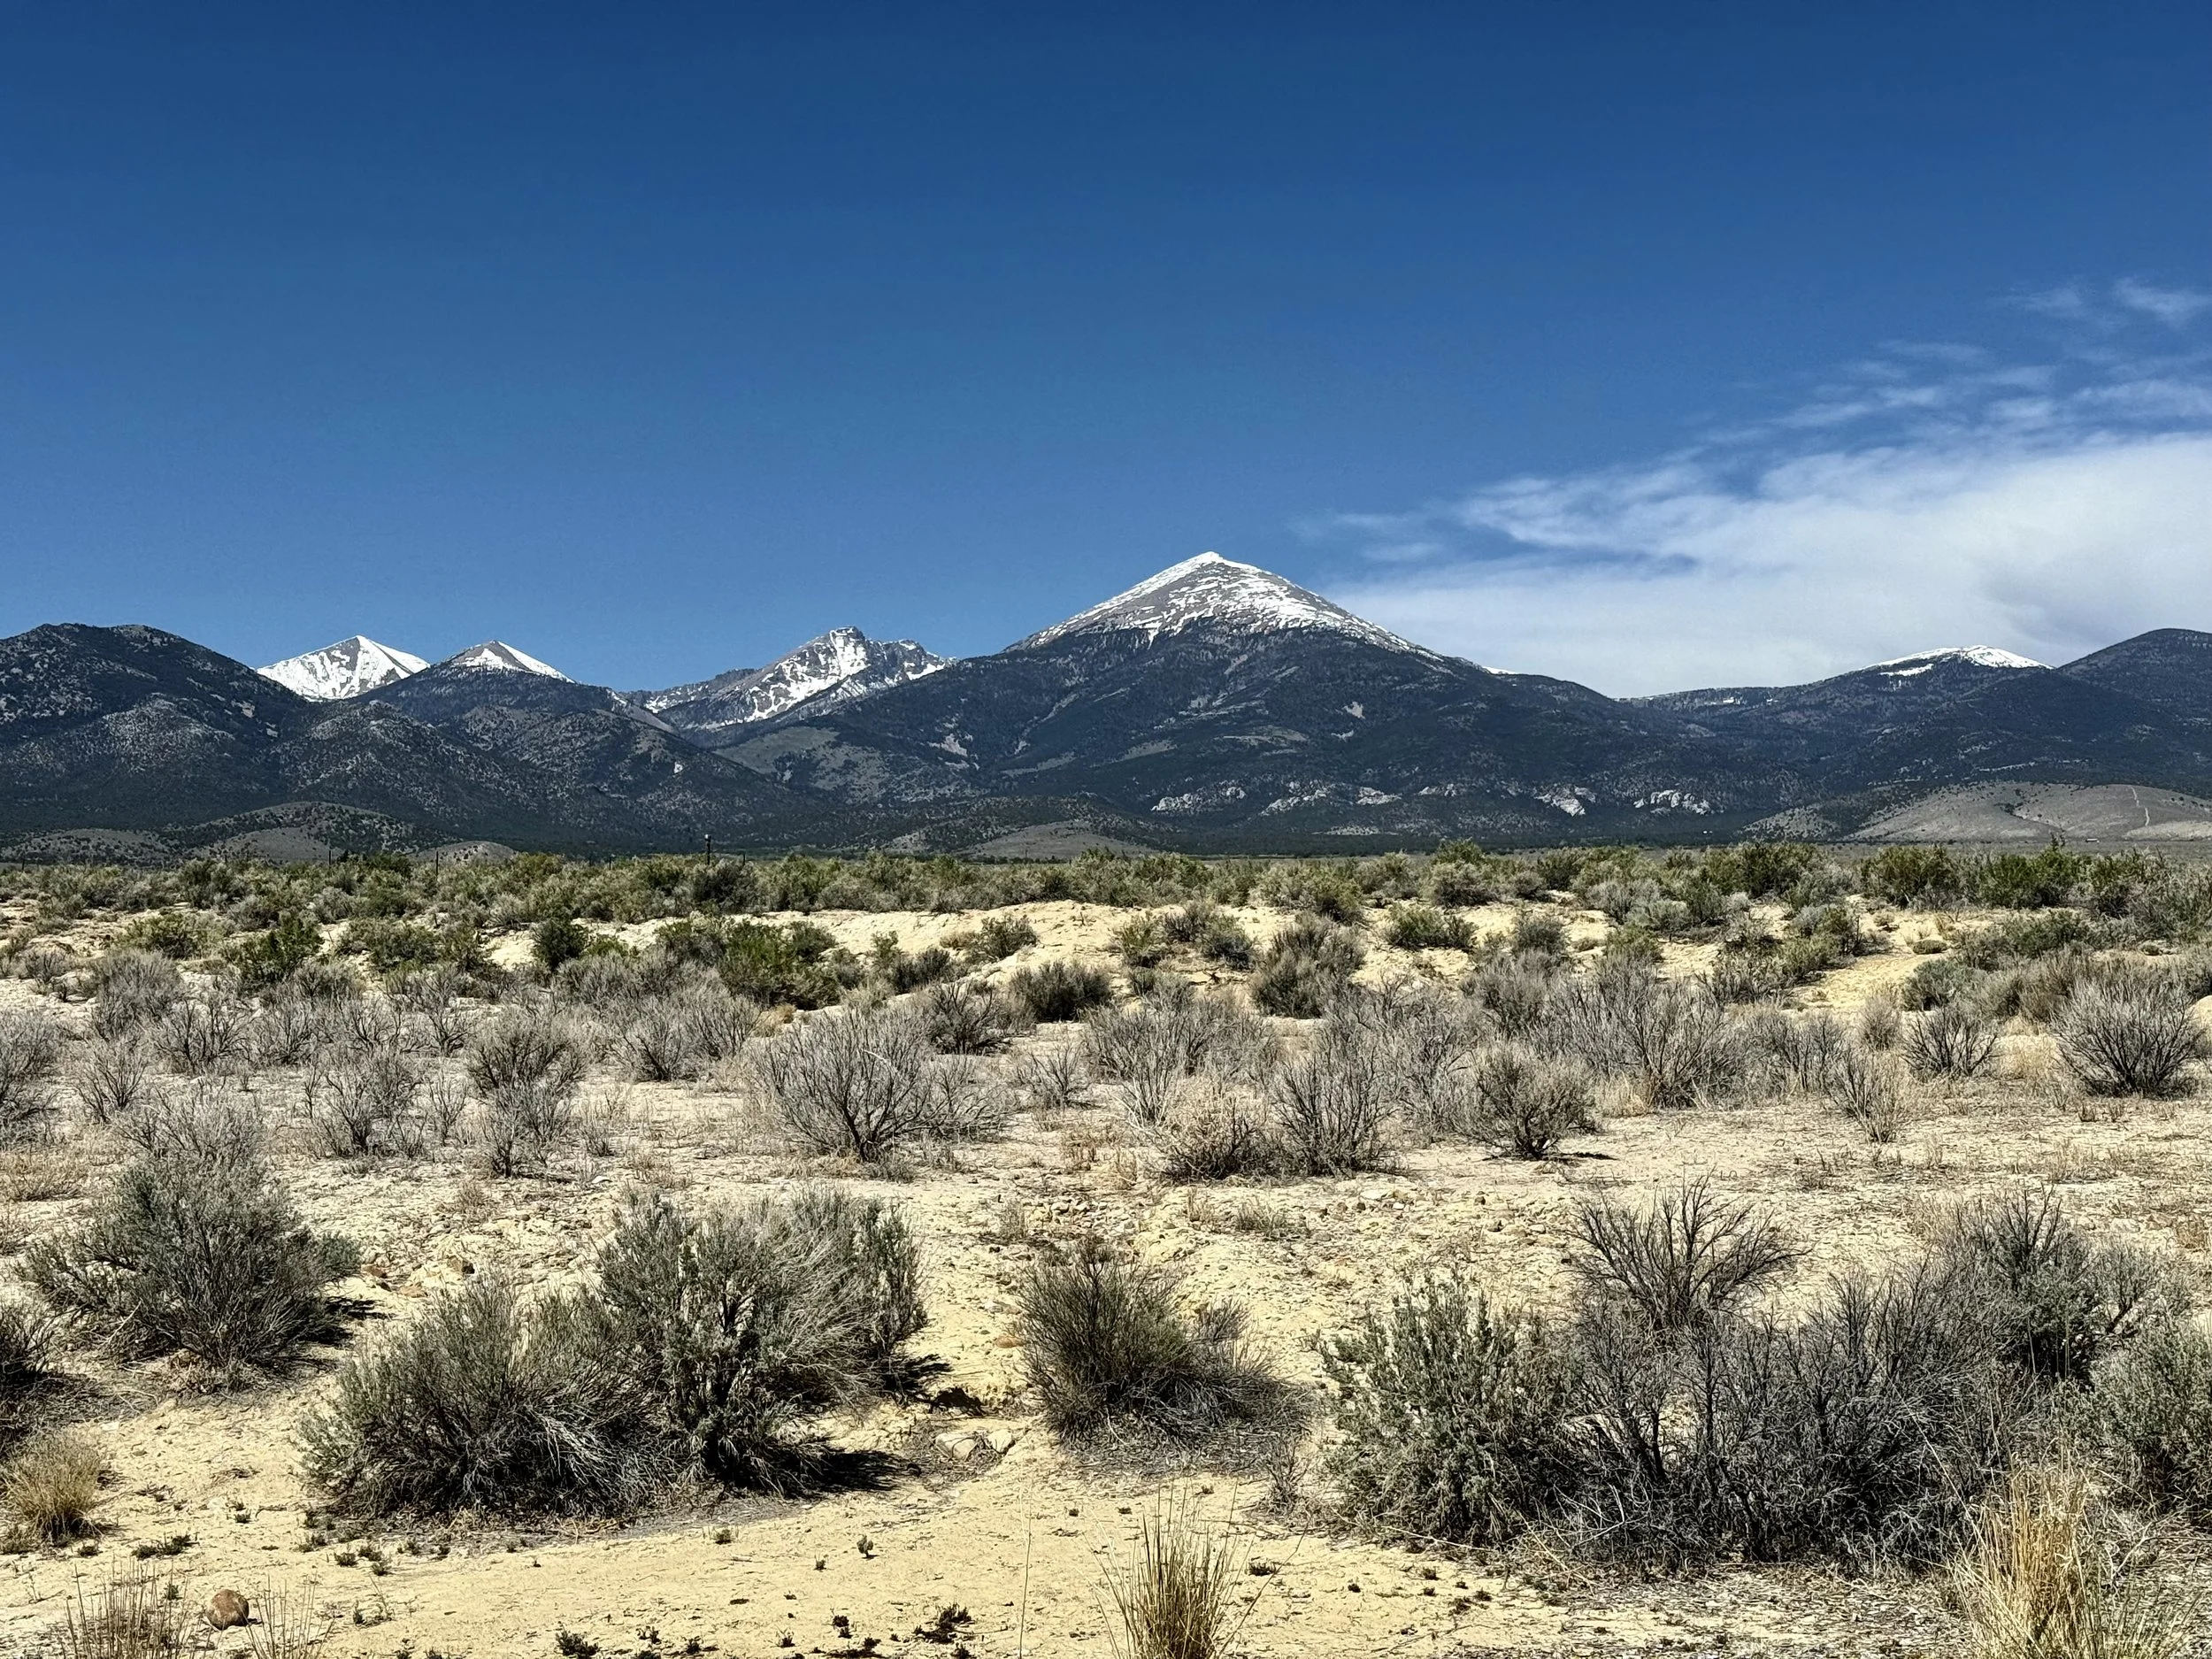
#28 Great Basin National Park, Nevada
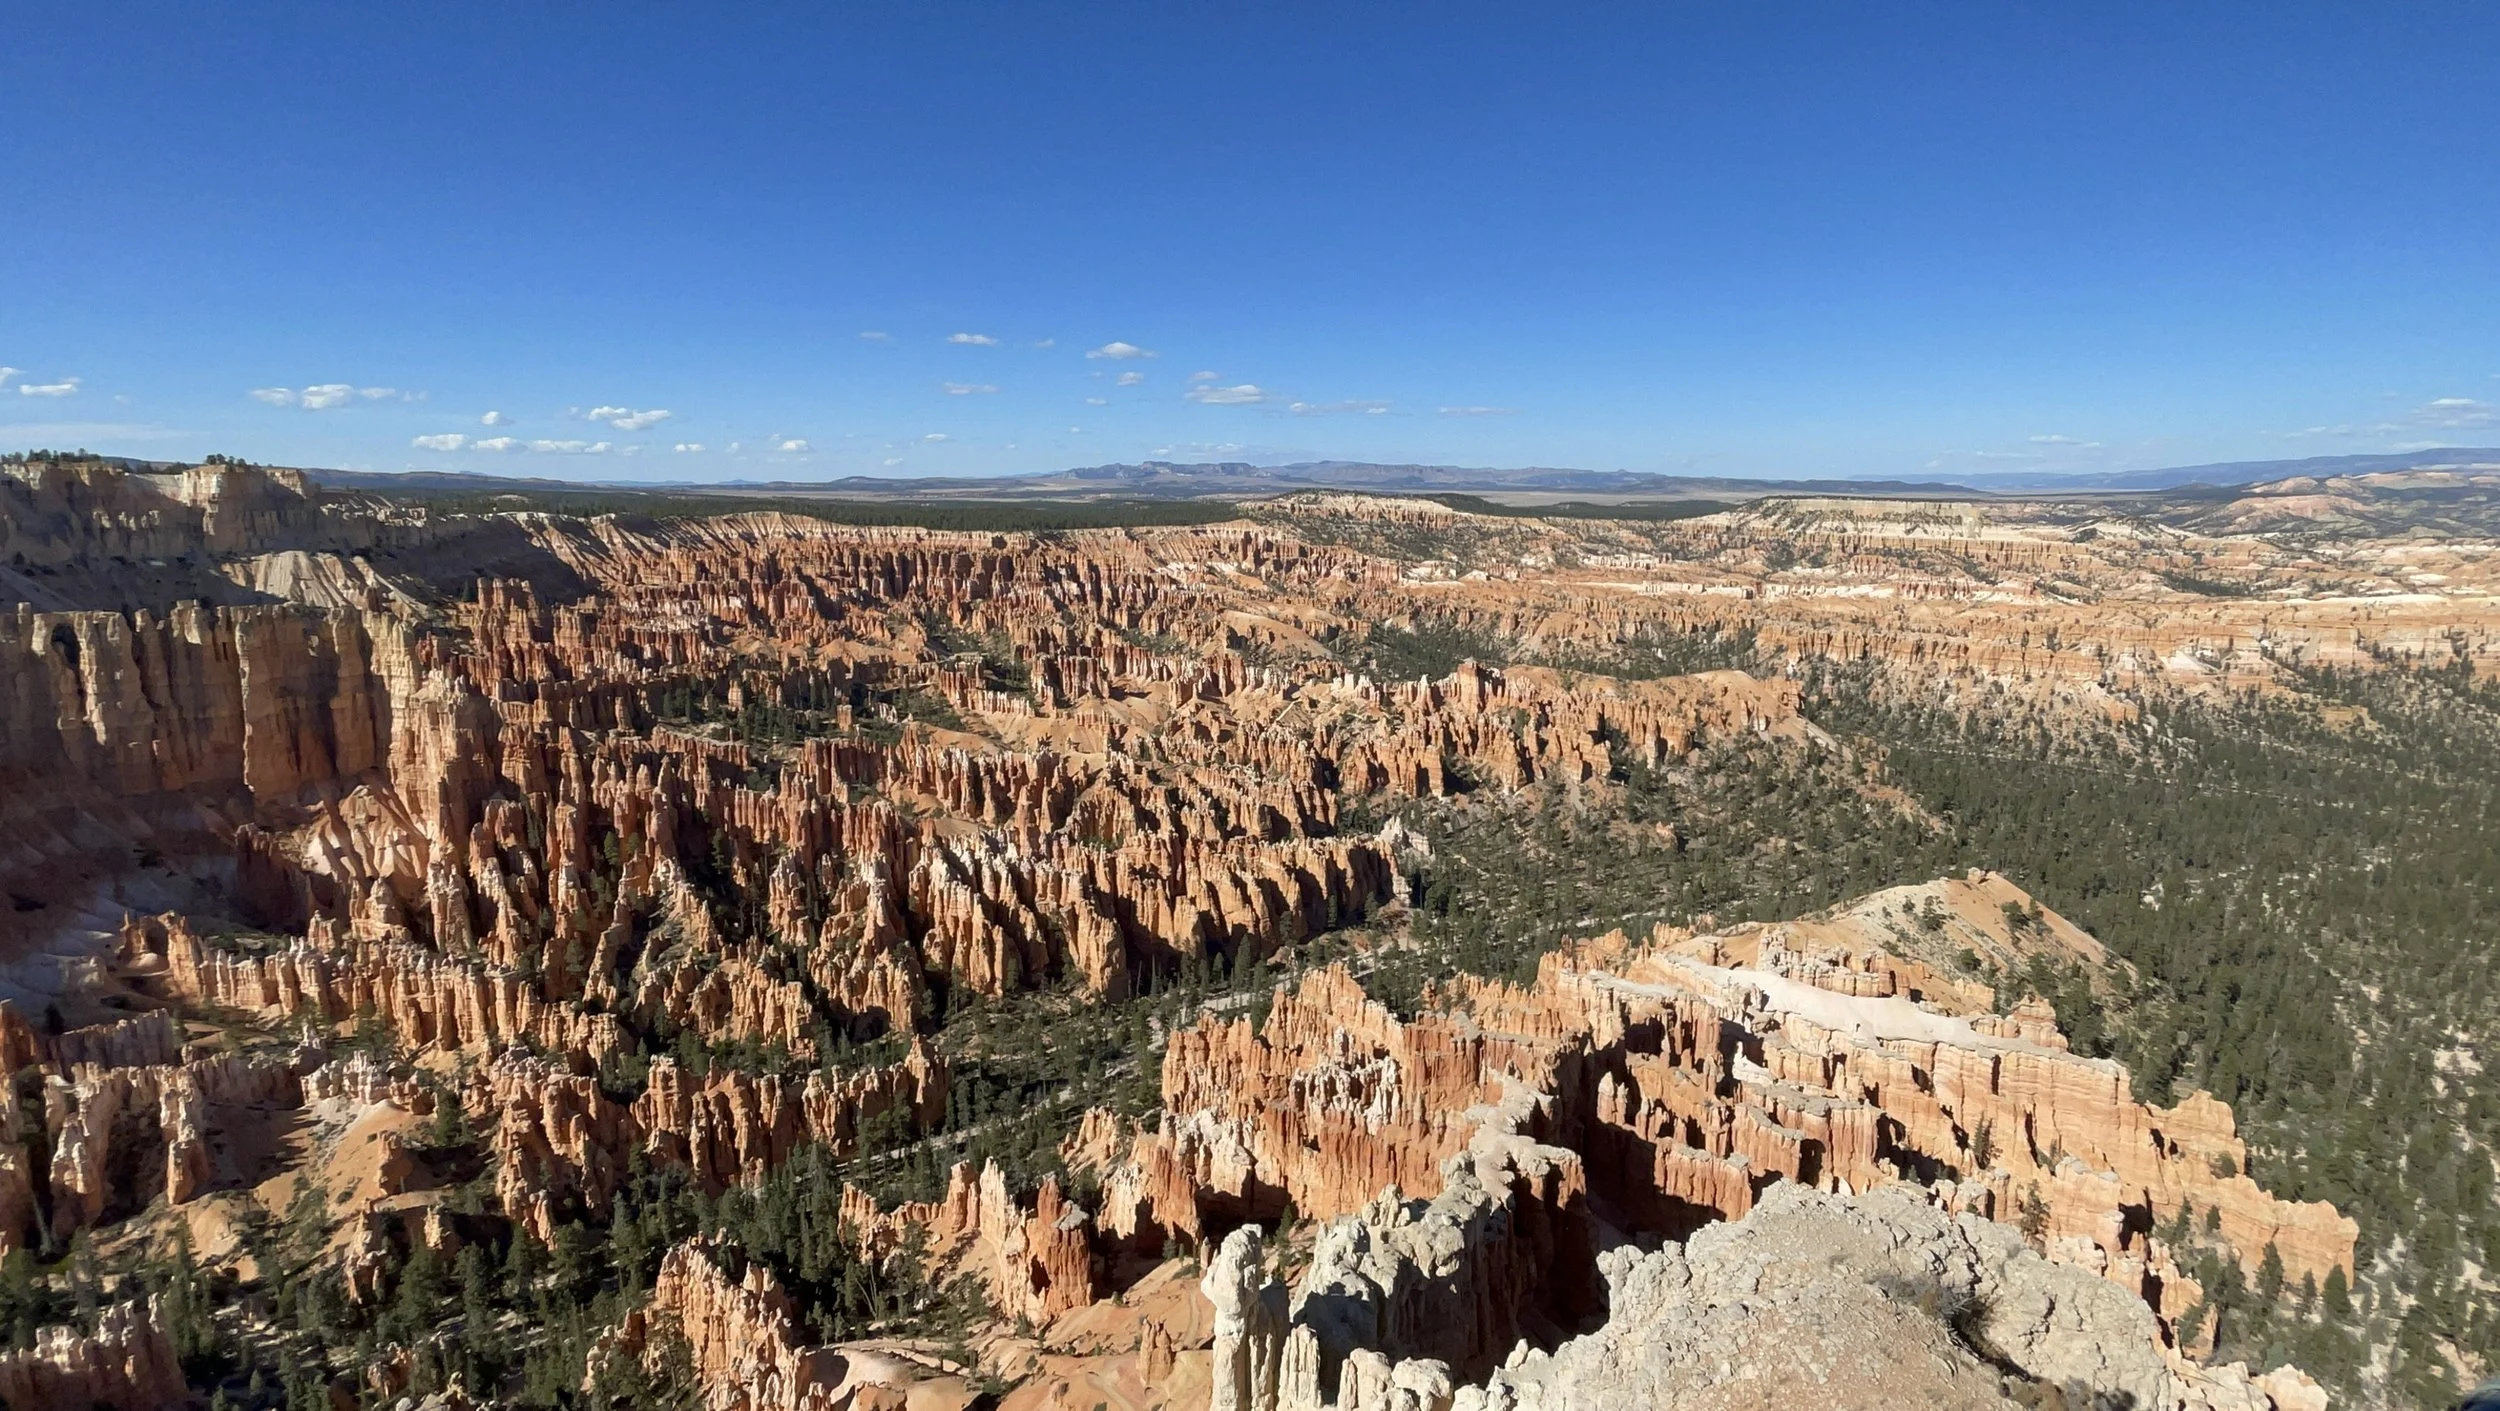
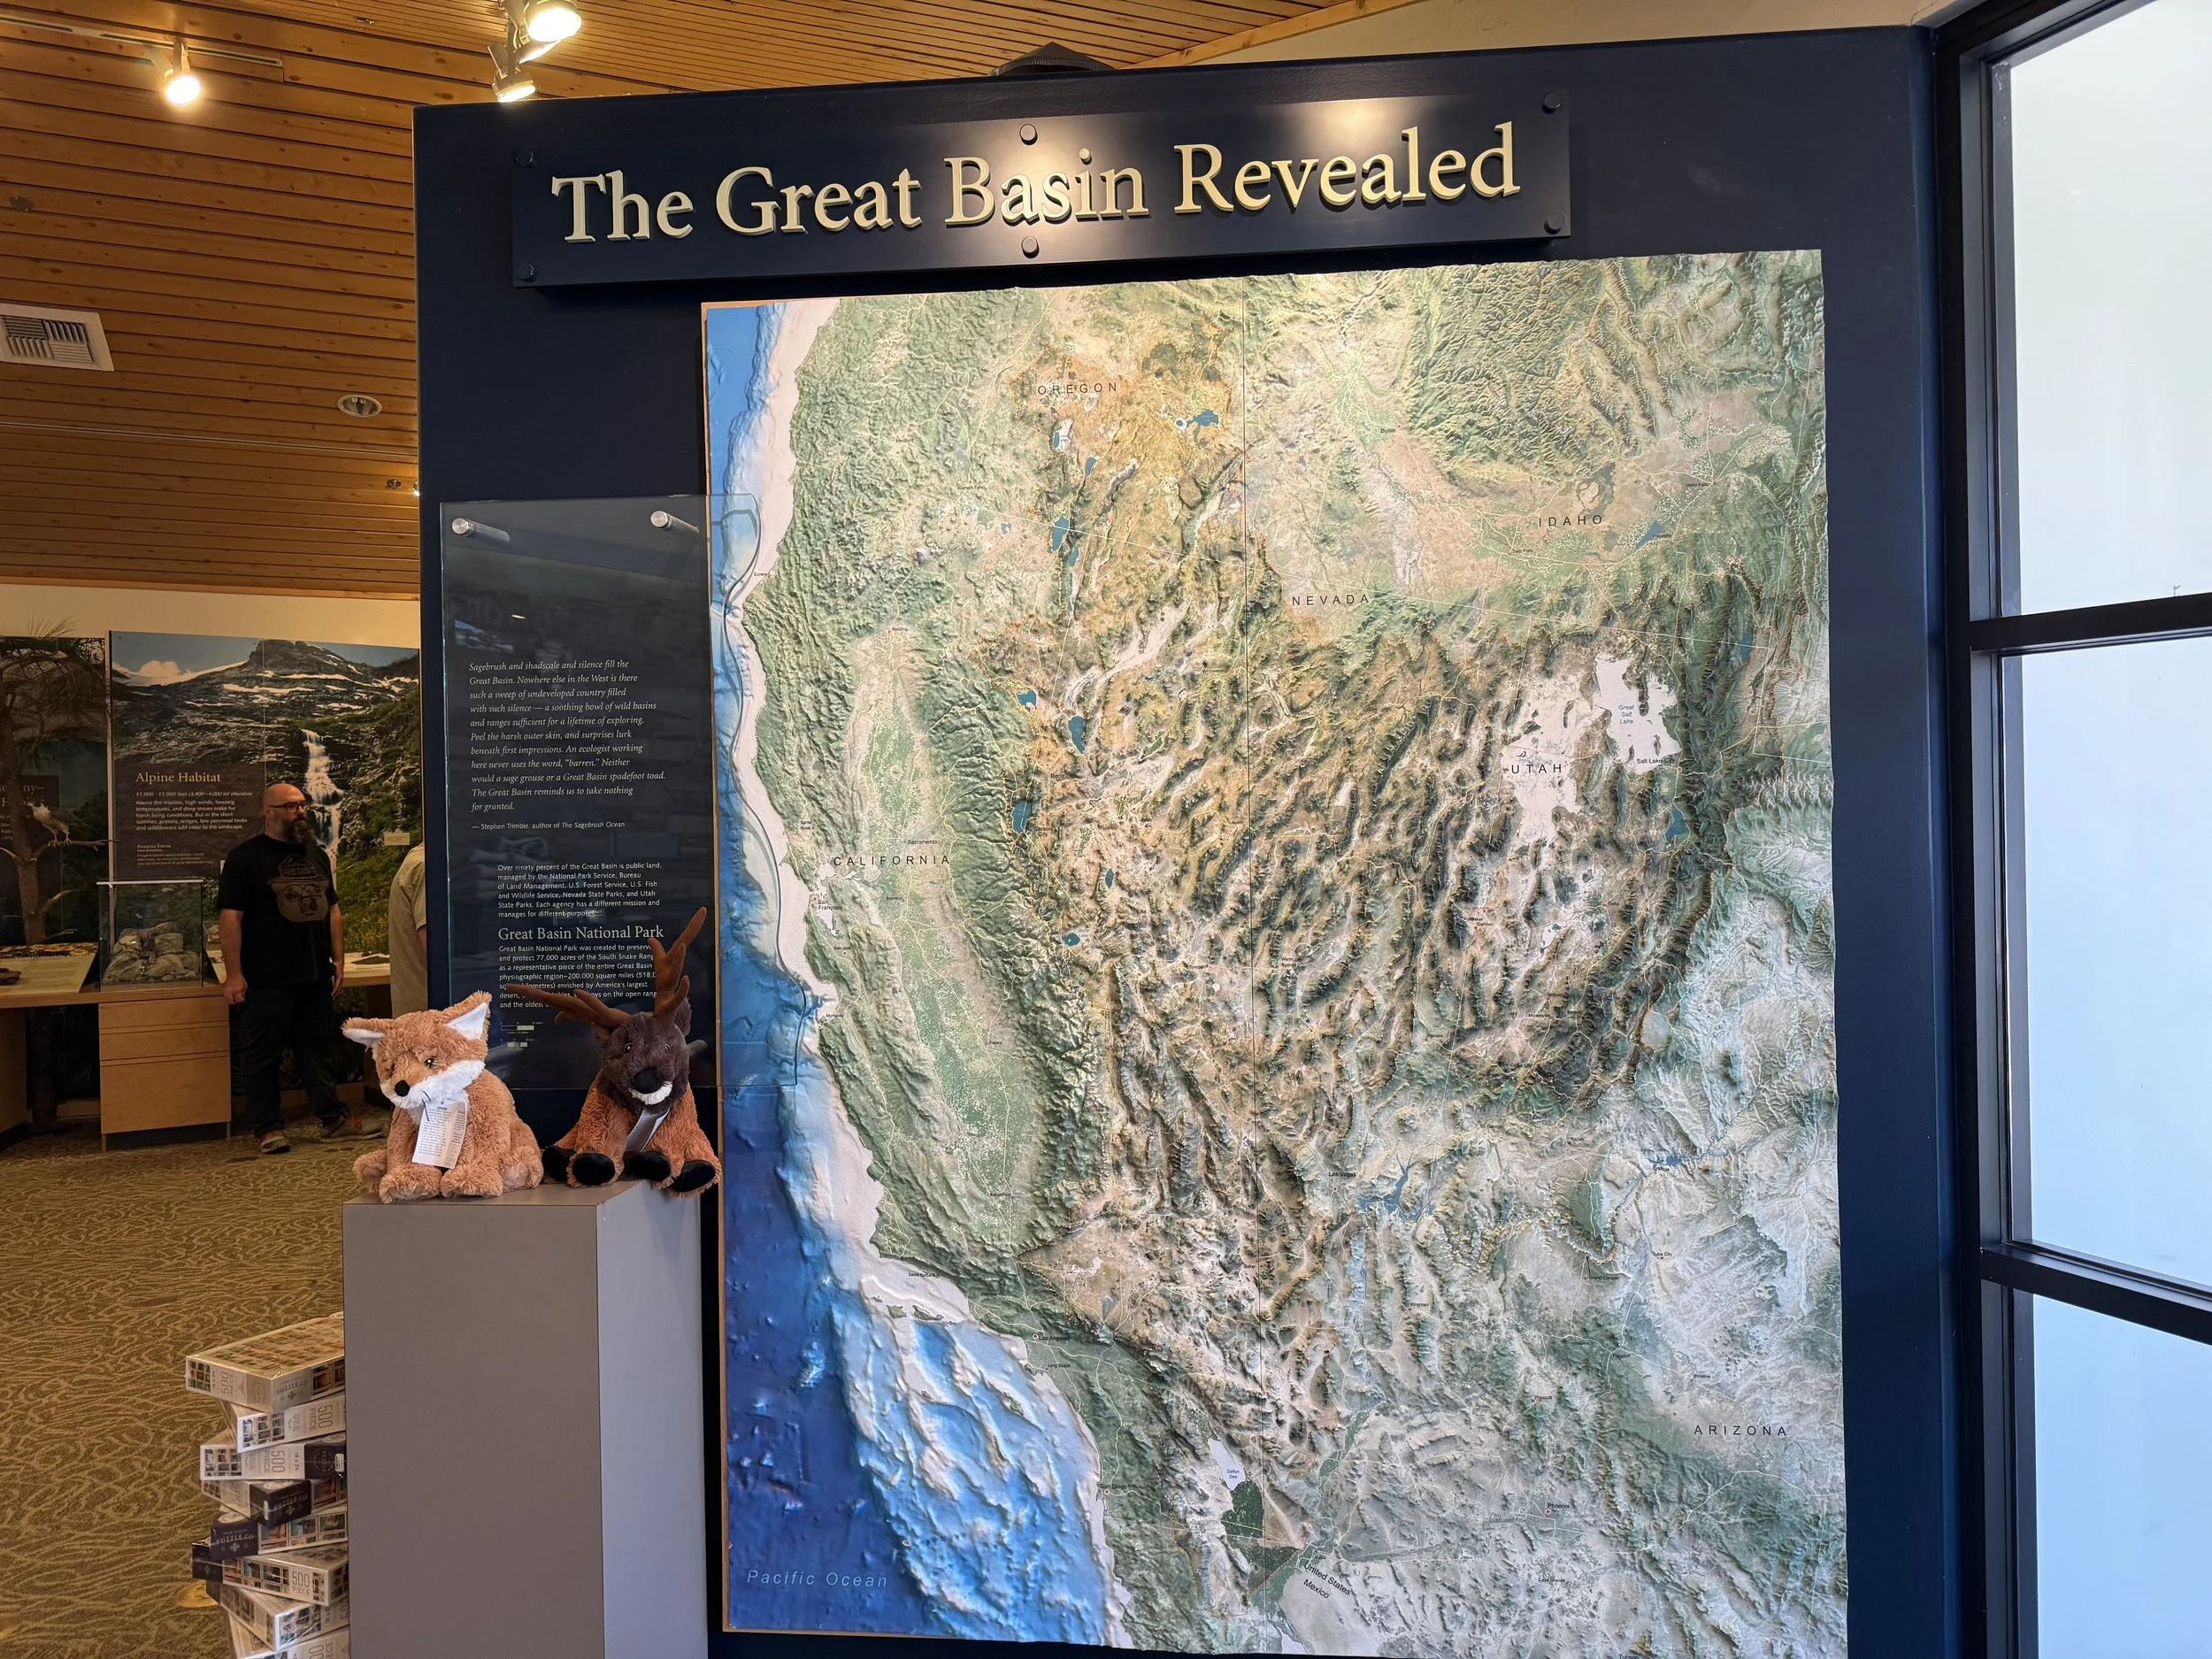
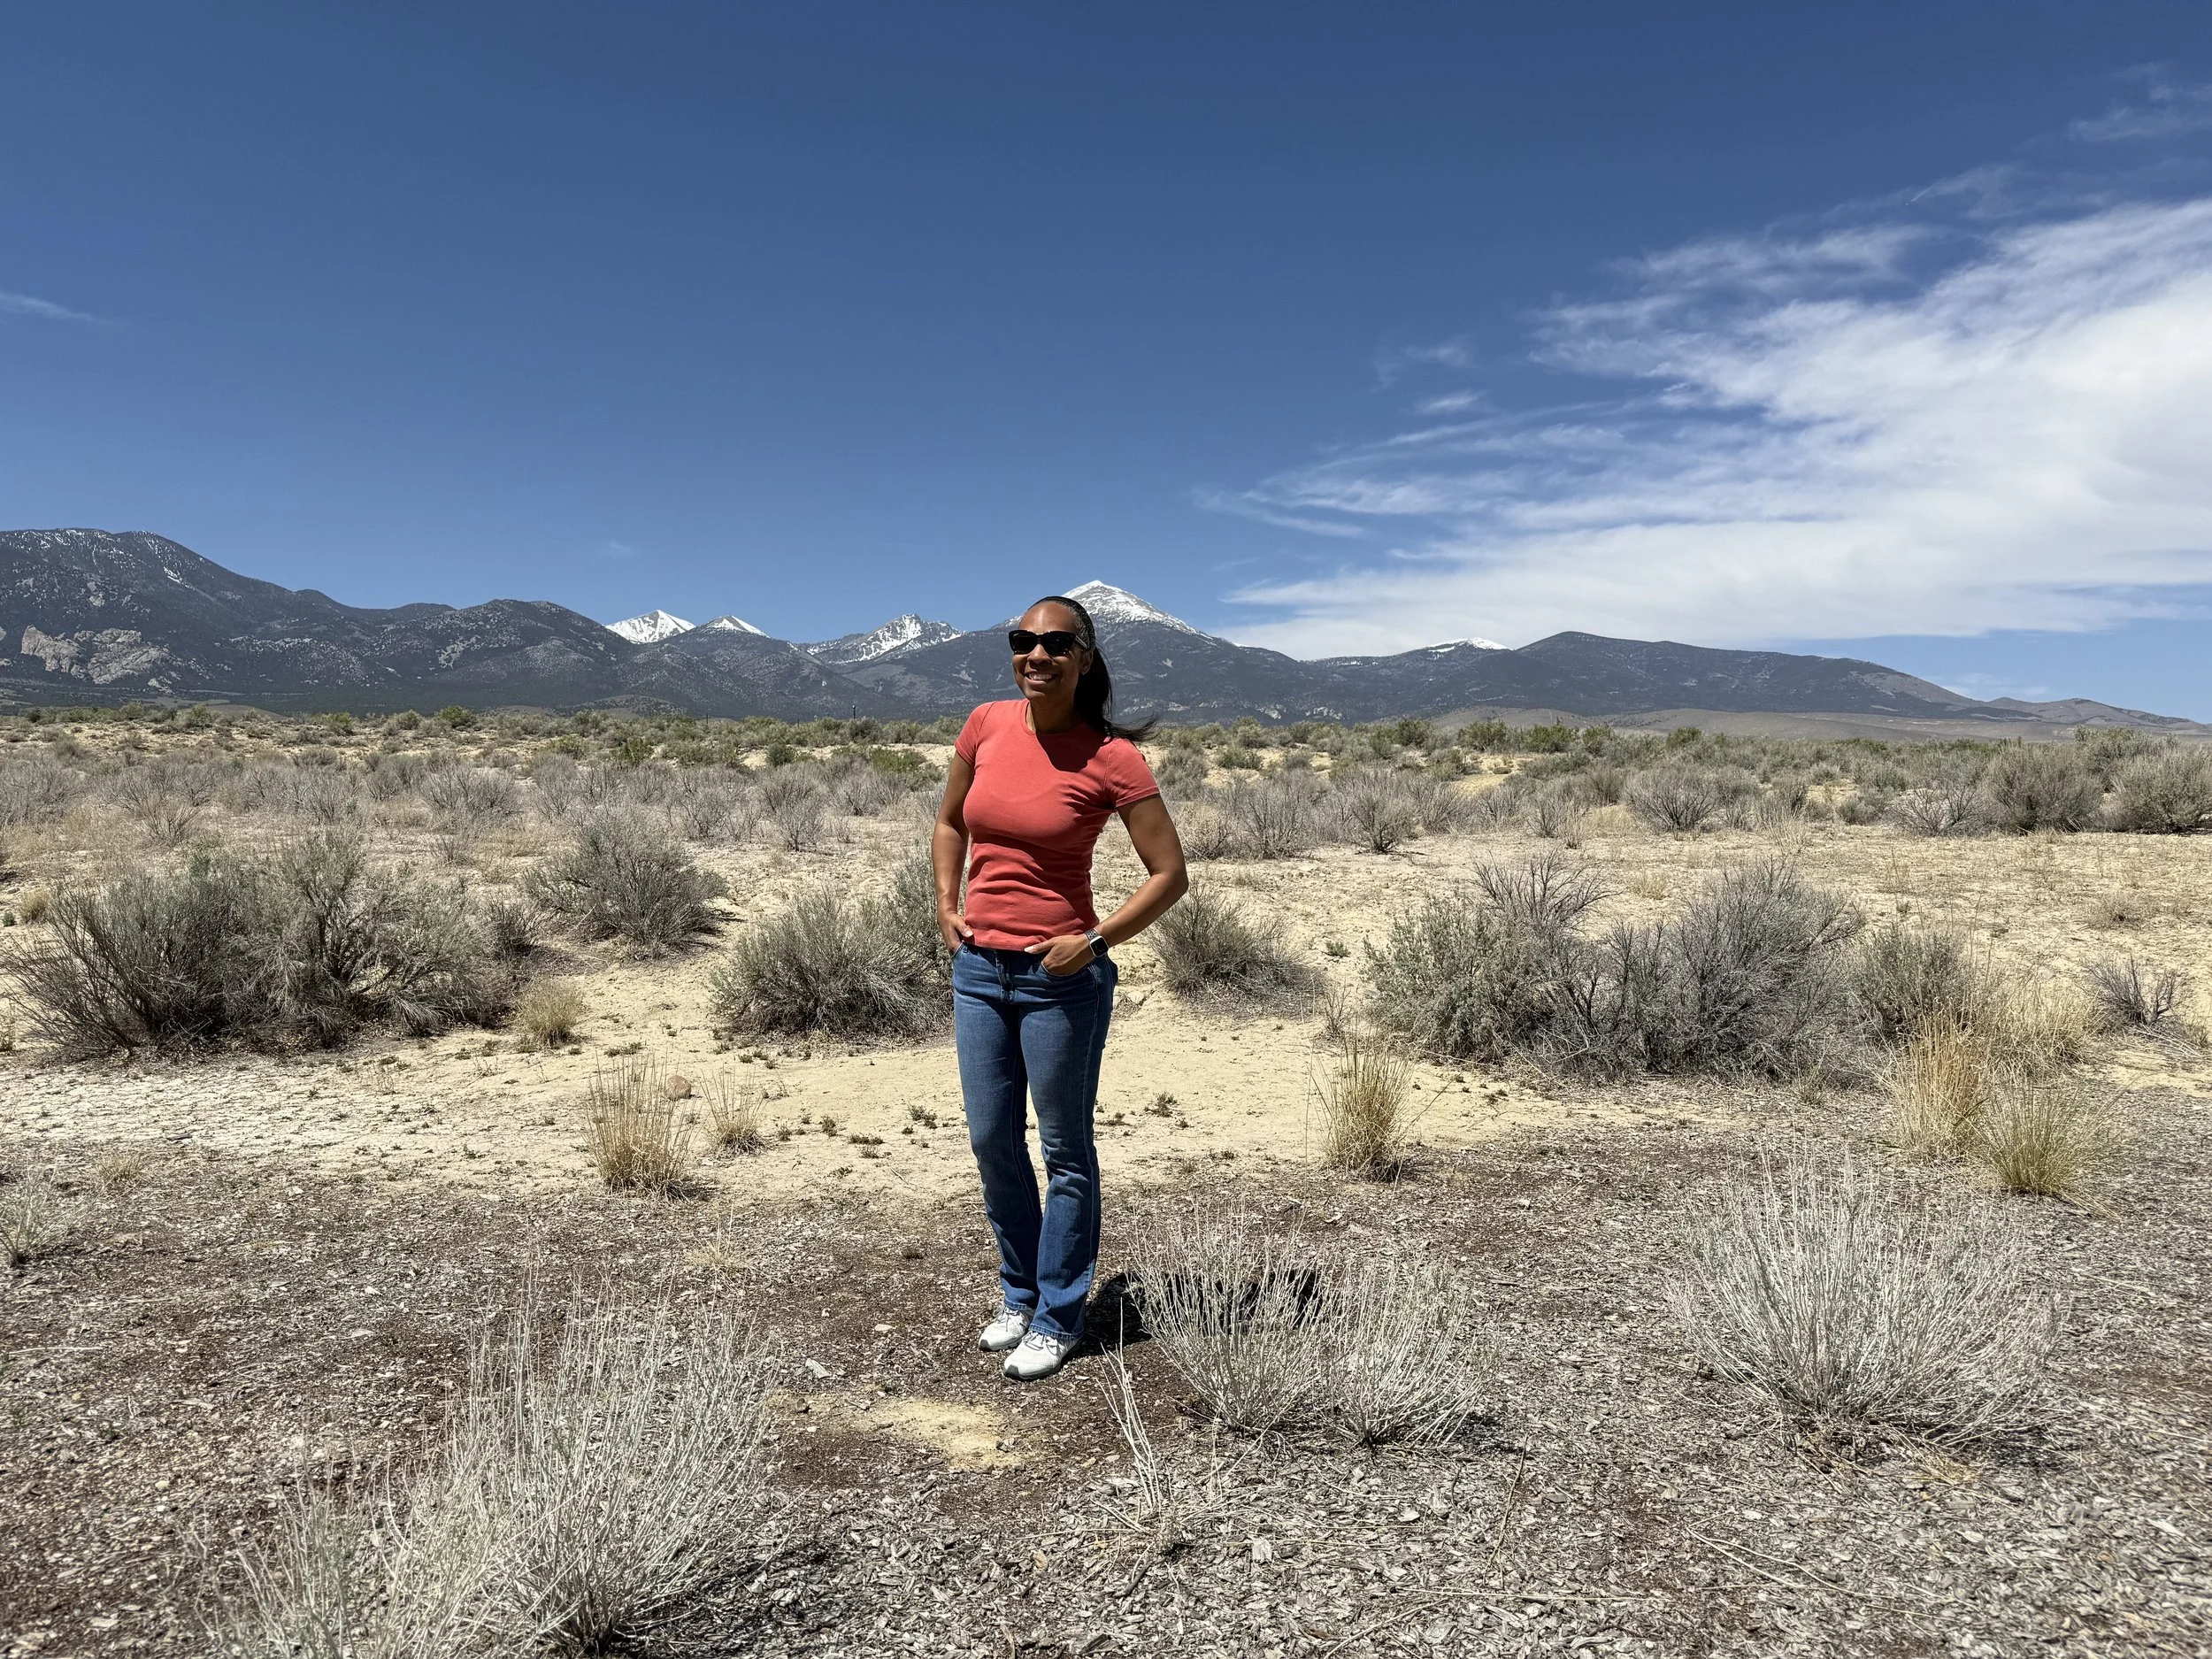
Tucked away in eastern Nevada, Great Basin National Park often flies under the radar — and that’s exactly what makes it so special. It’s one of the least visited national parks in the country, but for those who make the journey, it offers a rare kind of solitude and wonder. Here, you’ll find some of the darkest night skies in the U.S., a massive limestone cave system, and ancient bristlecone pines — some of the oldest living trees on Earth.
Like my trip to the Grand Canyon, my Great Basin adventure began in Las Vegas. The drive to the park is long (about 4 hours and 45 minutes), but it’s a lovely one. You watch the landscape transform as you go: dry desert plains slowly give way to green hills, and eventually, snowcapped mountains rise on the horizon. Along the way, you pass through wildlife refuges, small towns, and long stretches of empty highway where you feel like the only car for miles.
A word to the wise: get gas when you can. Because of the park’s remote location, gas stations are few and far between — and you don’t want to risk running low.
When I arrived, I did what I always do at every national park: I got my National Parks Passport stamped at the visitor center and made sure to take a photo by the park sign. It’s a little ritual, but one that makes each visit feel official.
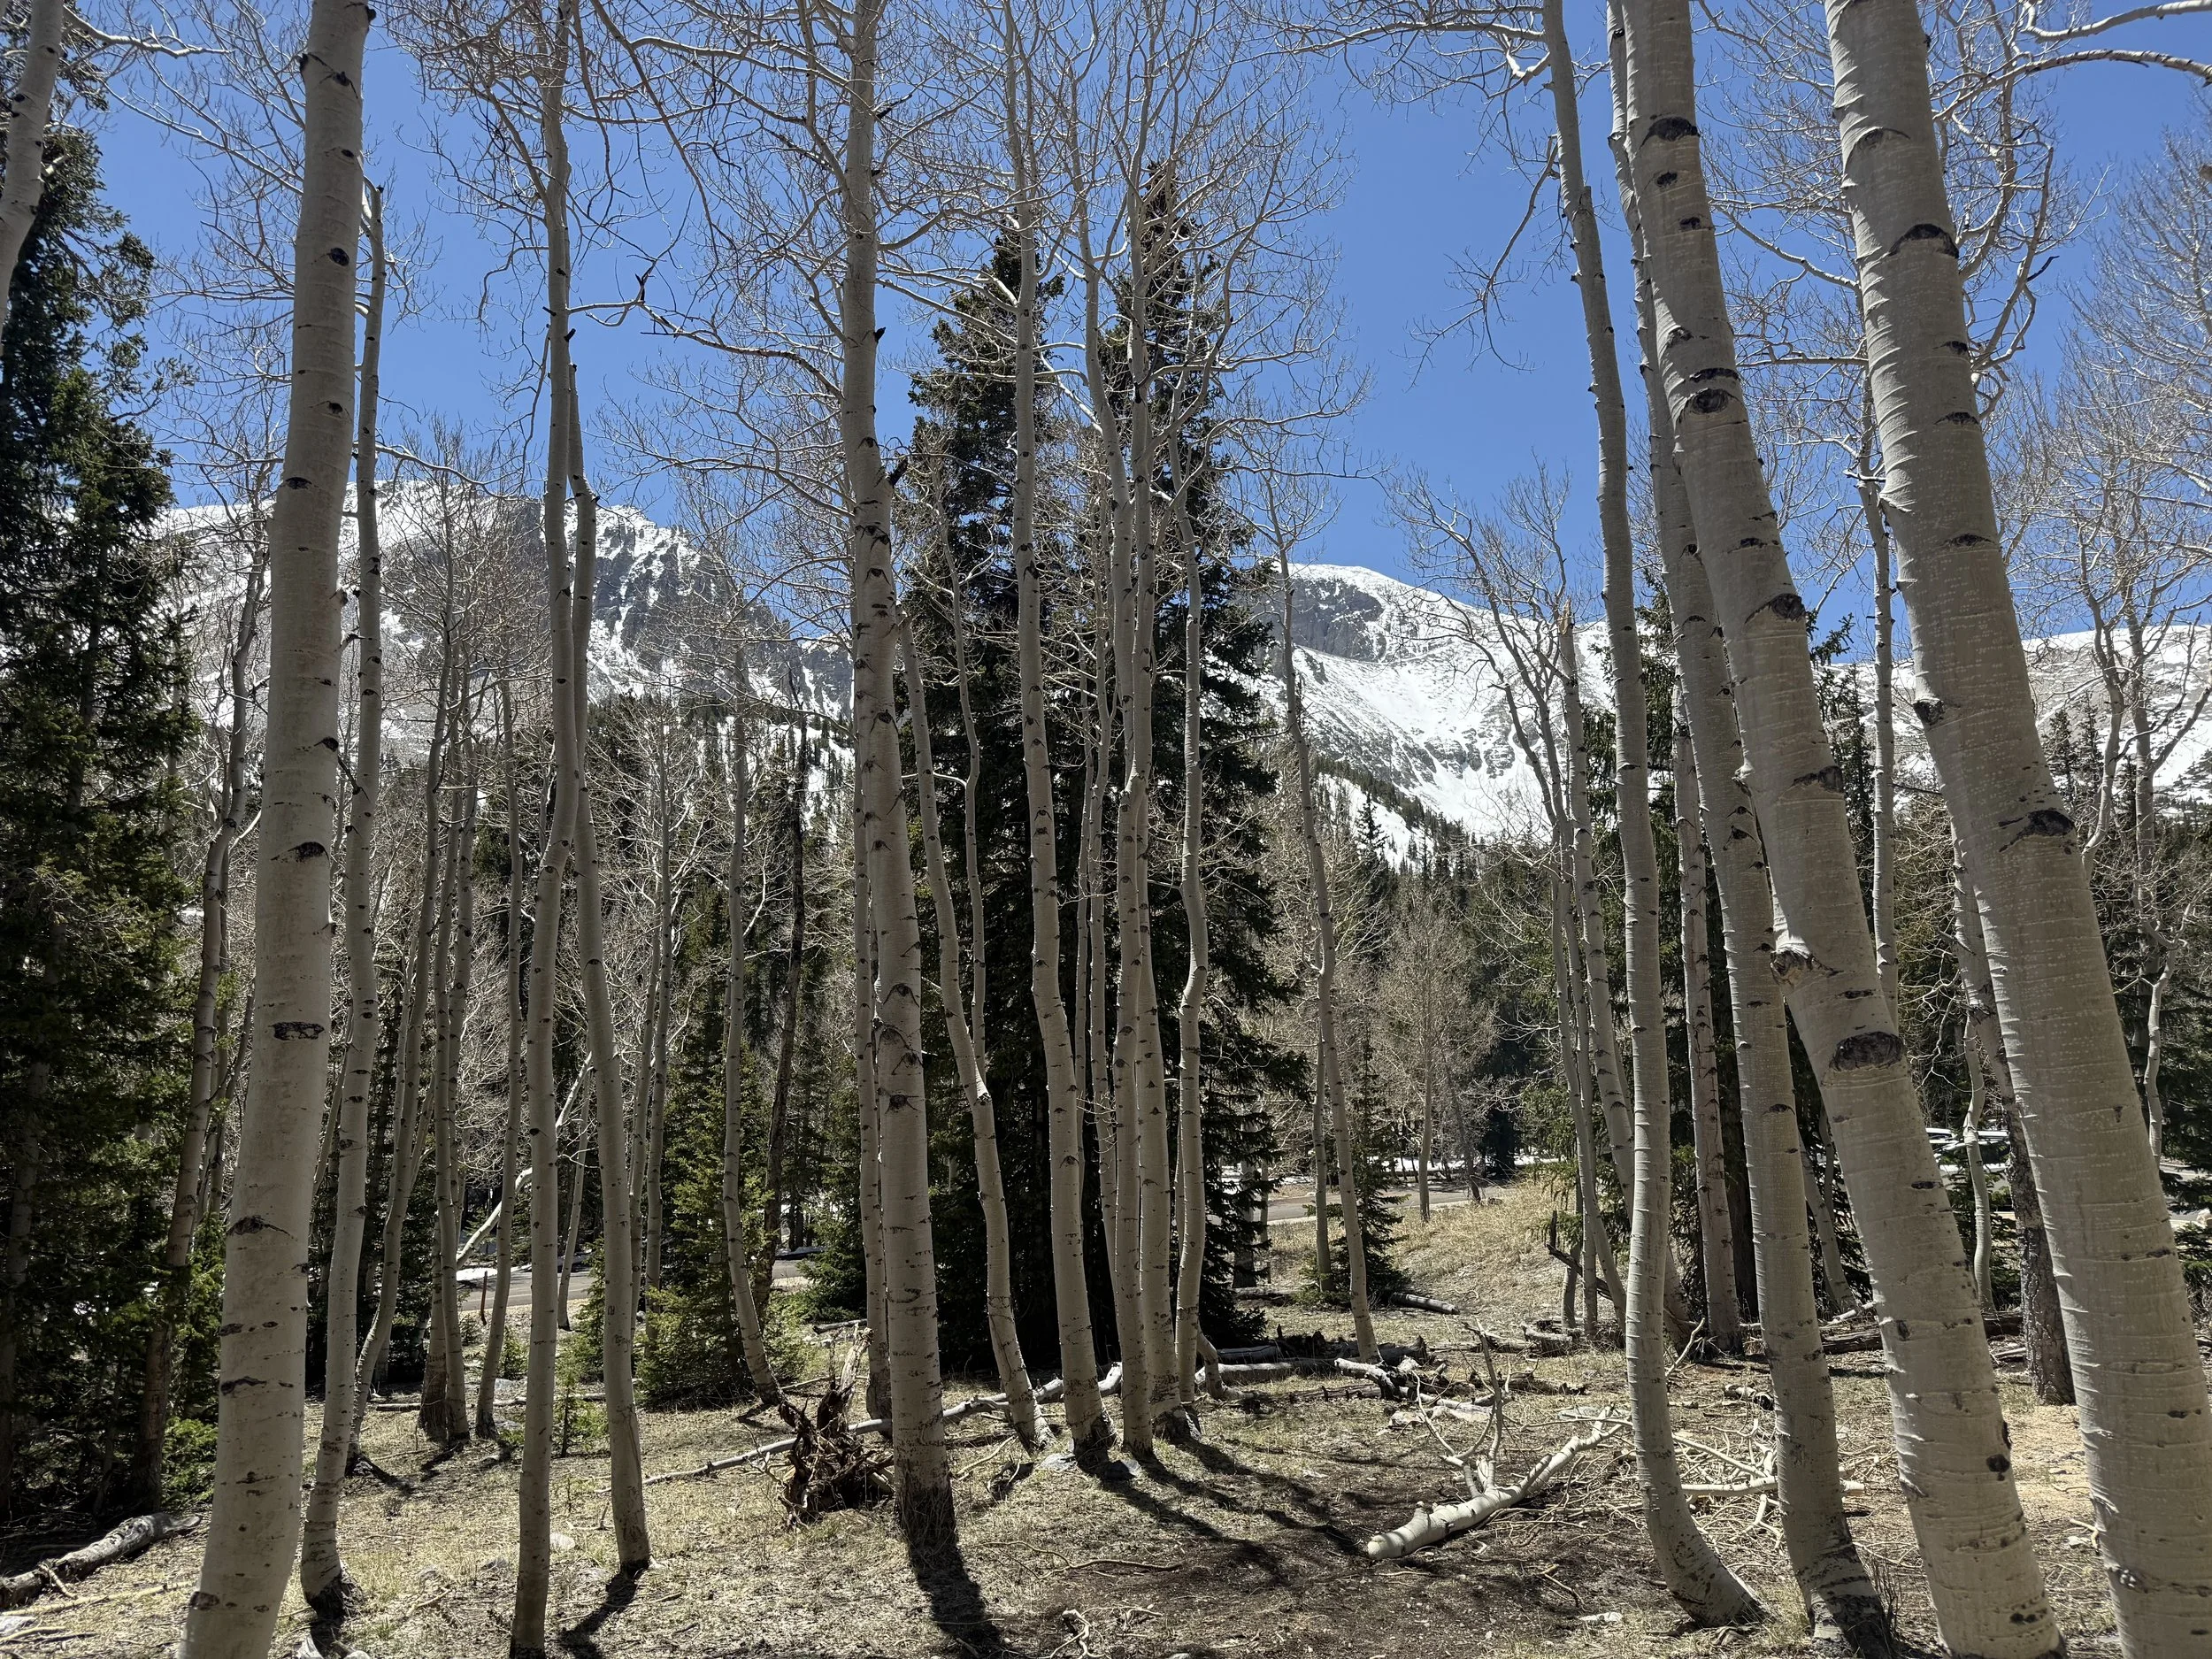
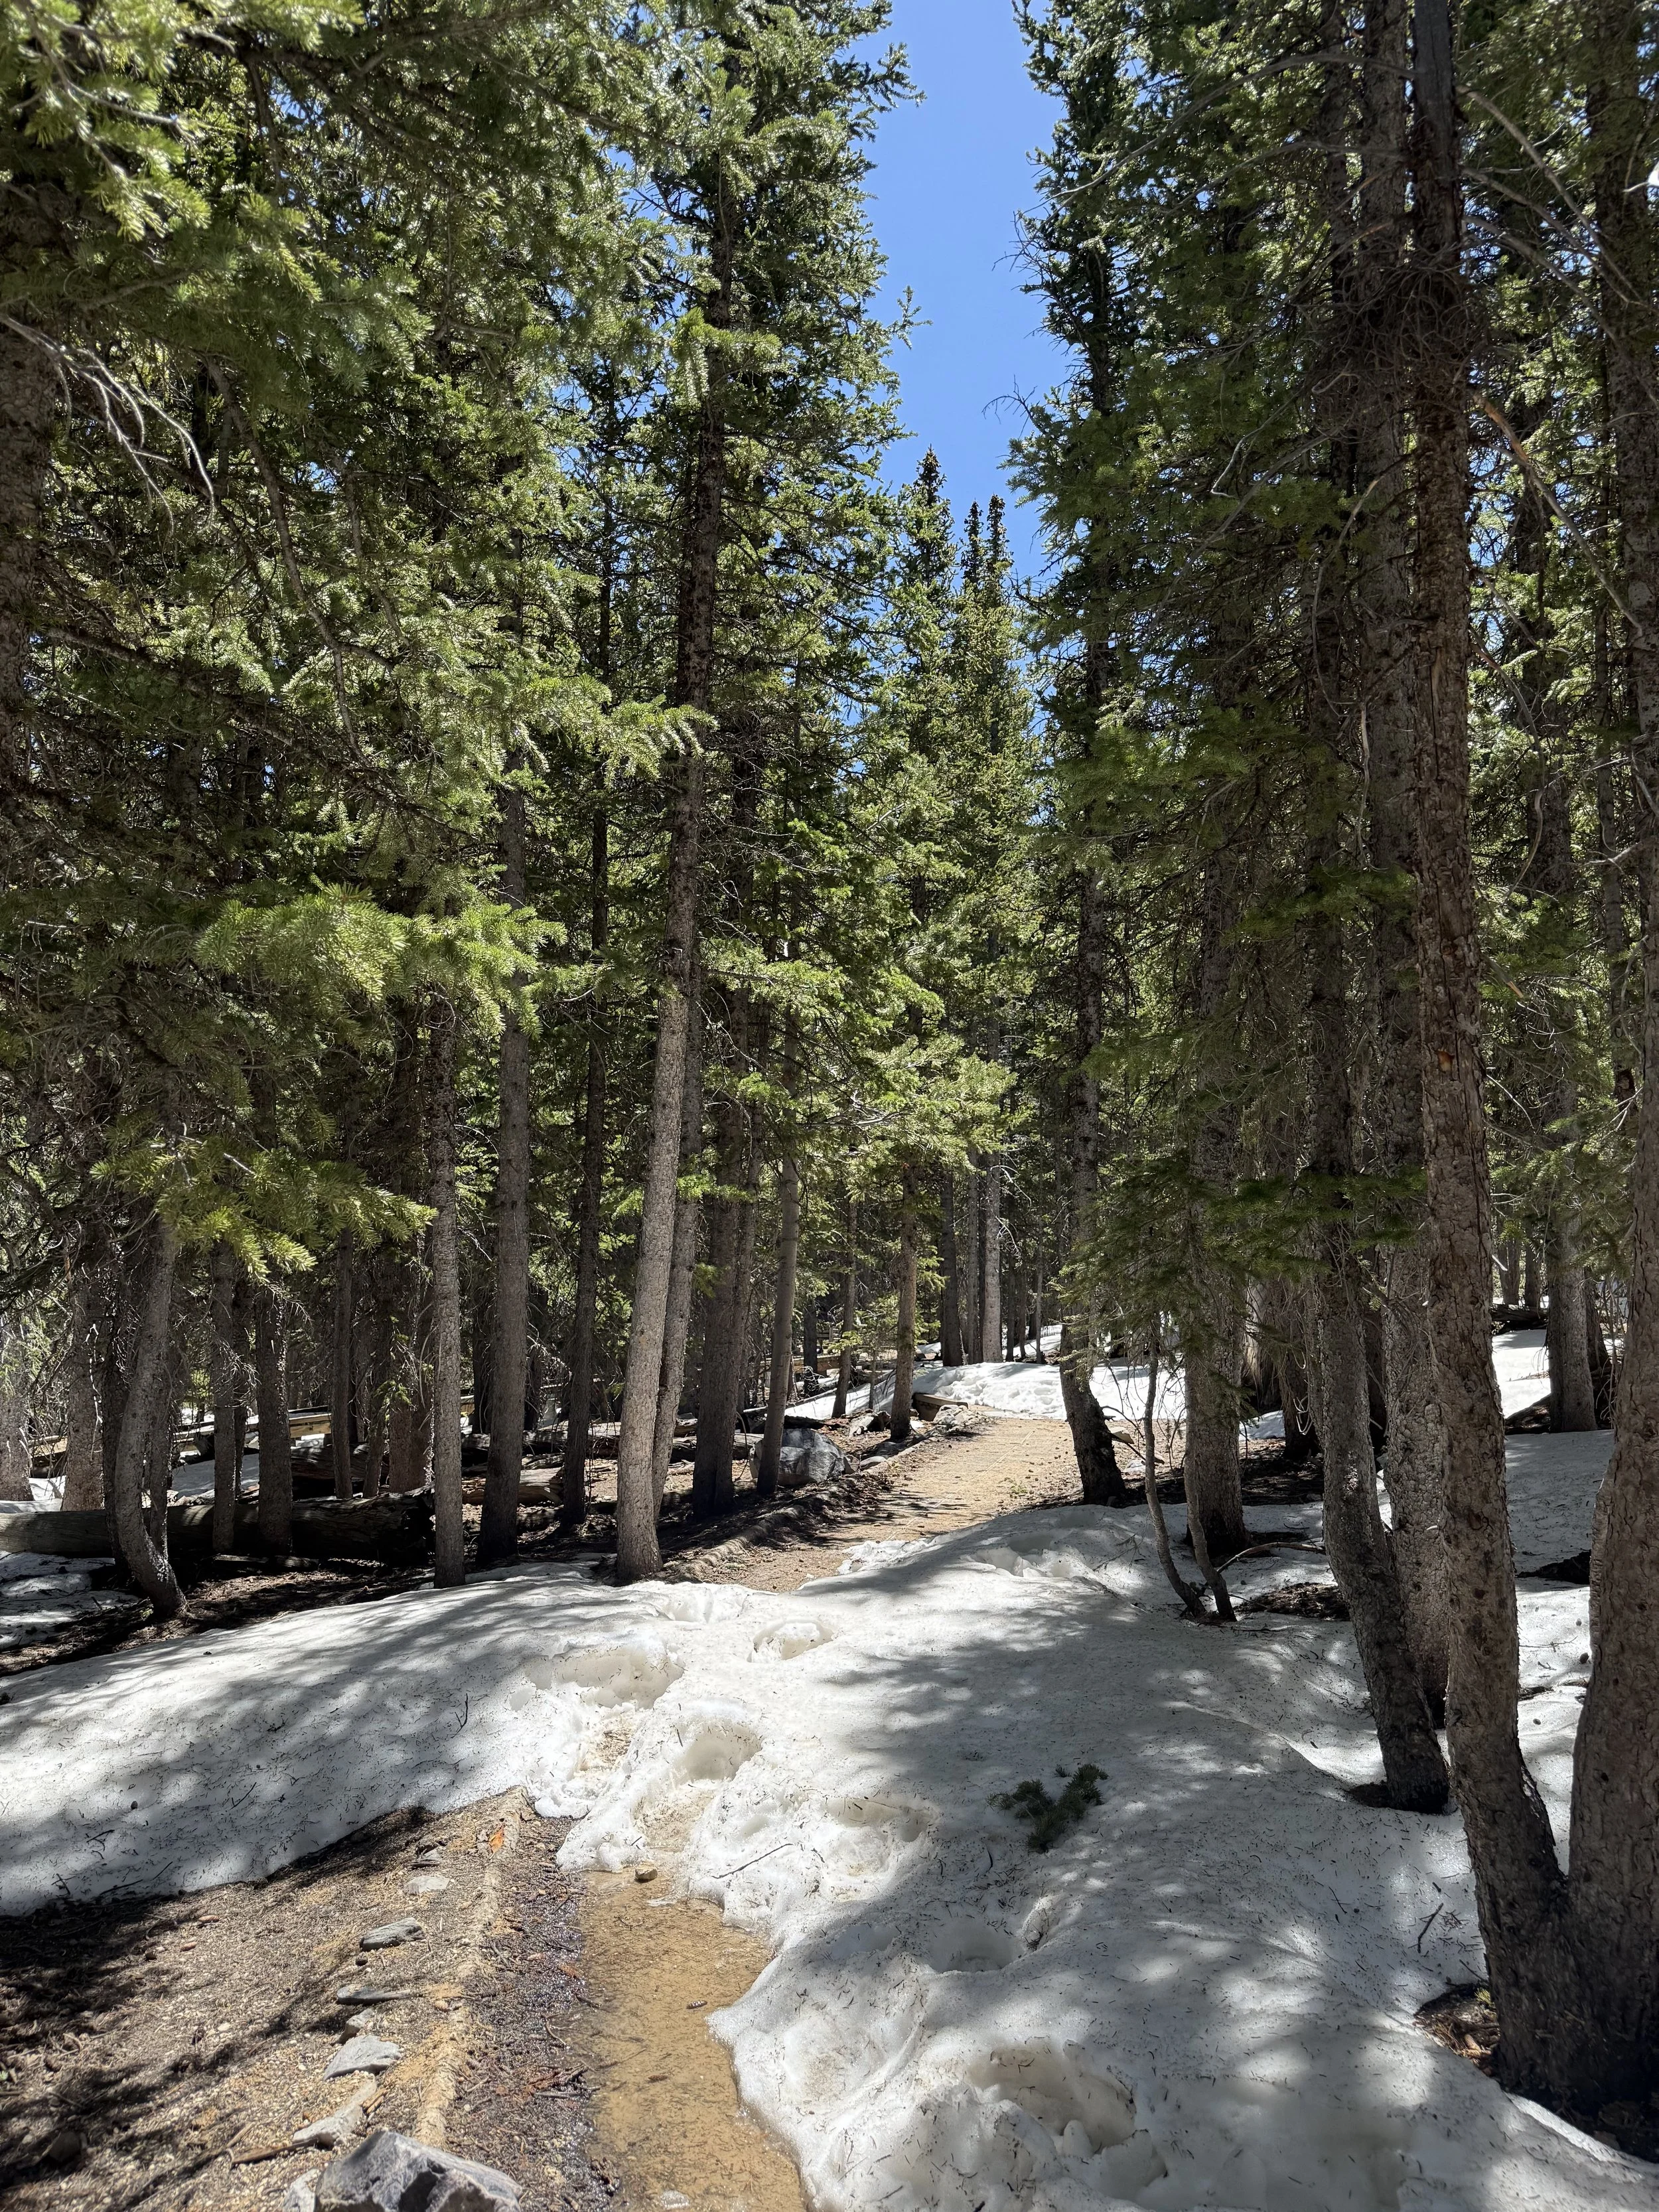
Next came the drive up Wheeler Peak — a 12-mile switchback road that was both beautiful and, honestly, a bit nerve-wracking. As I climbed up to 10,000 feet, the landscape changed dramatically. The desert faded away, replaced by a lush green forest, cold mountain streams, and patches of snow still clinging to the ground even in late spring. The air shifted too, from dry and dusty below to crisp and cool up high. It was like watching the seasons change right in front of me.
A Bit of History
Great Basin National Park was officially established in 1986, but its natural story spans millions of years. The “Great Basin” refers to a massive stretch of the western U.S. where water doesn’t drain to the sea but evaporates or seeps underground. Indigenous peoples, including the Shoshone and Paiute, have called this region home for thousands of years, leaving behind rock art, tools, and cultural traditions still honored today.
One of the park’s standout features, Lehman Caves, was discovered in the late 1800s by Absalom Lehman. Tourists quickly became fascinated with its dramatic underground rooms, packed with rare shield formations, stalactites, and stalagmites. Today, the caves remain a top visitor draw, but above ground, the park offers even more: alpine lakes, ancient bristlecone pine groves, and the rugged summit of Wheeler Peak, Nevada’s second-highest mountain.
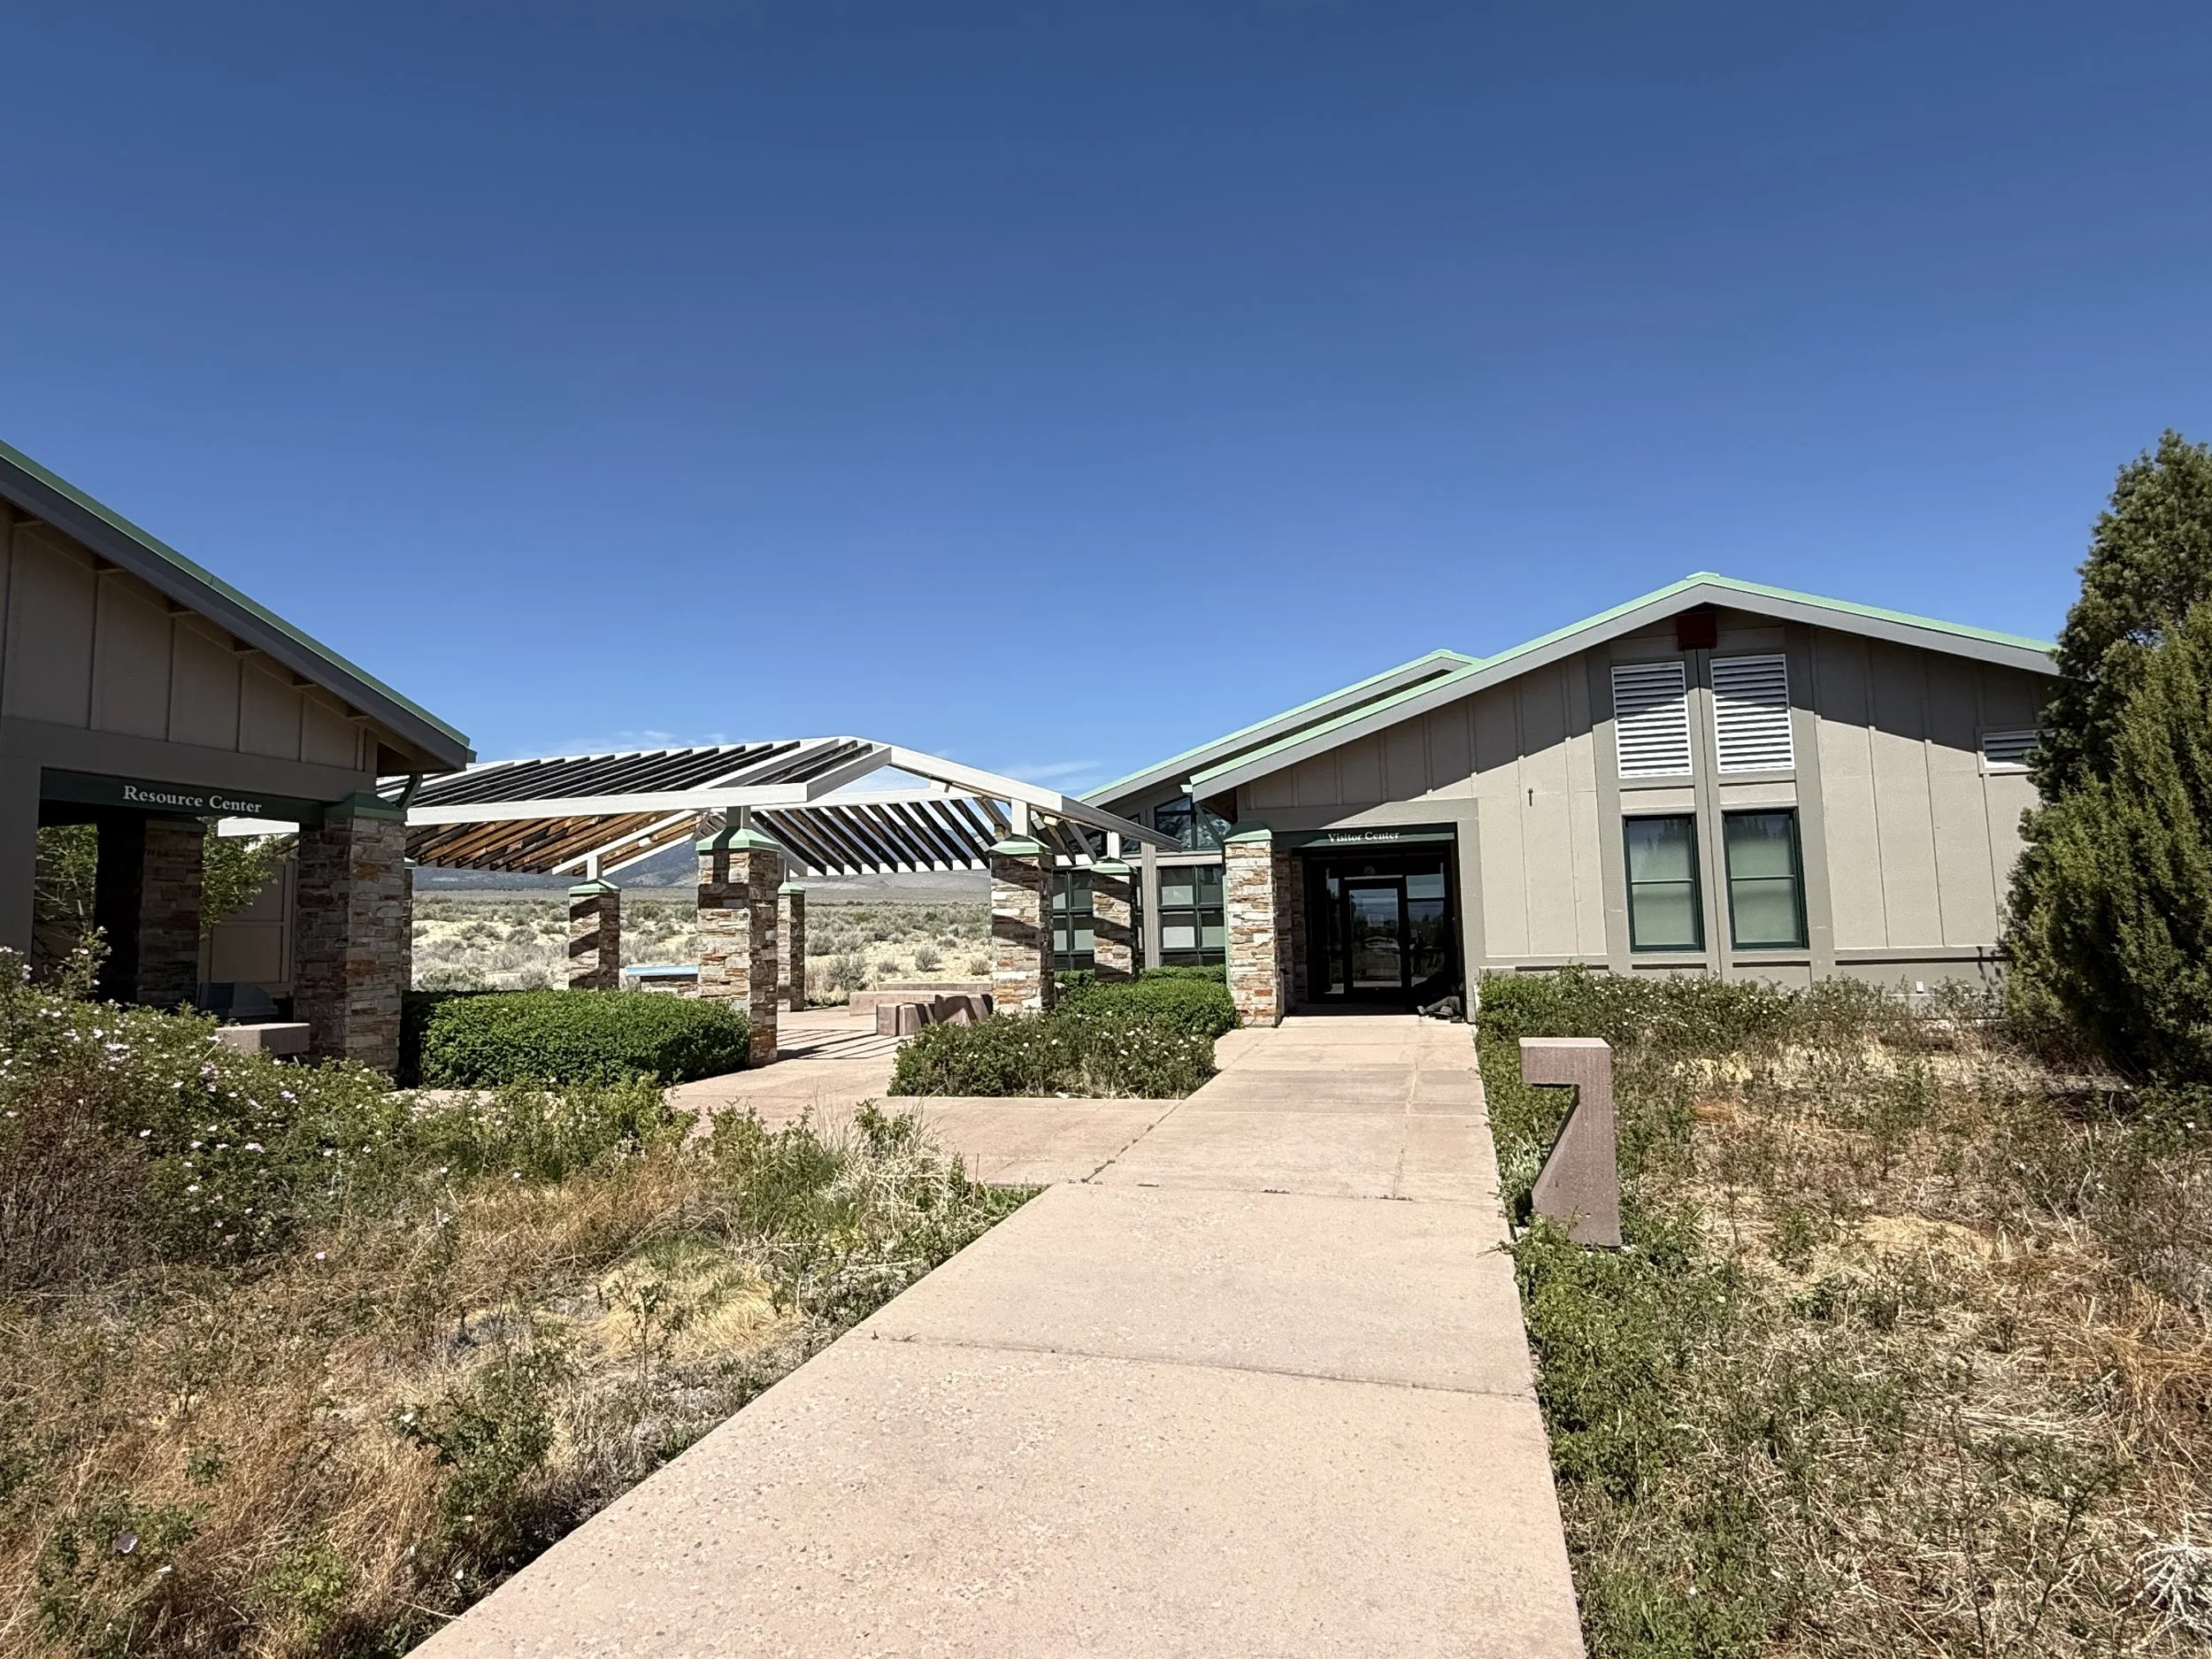
Visitor Center Information
📍 Great Basin Visitor Center
5500 NV-488, Baker, NV 89311
The main visitor center is located just outside the park in the small town of Baker. This is where you’ll want to stop first — grab a map, talk to a ranger about trail conditions, browse the exhibits, and (if you’re like me) get your National Parks Passport stamped.
There’s also the Lehman Caves Visitor Center inside the park, which handles cave tour tickets and ranger-led programs. If you want to explore the caves, book your tour in advance — spots fill up, especially during peak season.
Entrance Fees and Passes
Here’s a pleasant surprise: entry to Great Basin National Park is free.
The only thing you’ll pay for is cave tours, which usually cost between $12–$15 per adult depending on the tour length and type. Reservations are highly recommended.
Top Sights and Highlights
Lehman Caves — The most popular attraction in the park, these marble caves are packed with rare and delicate formations you can only see on a guided tour.
Wheeler Peak Scenic Drive — This 12-mile drive climbs dramatically from the desert floor to the alpine zone, offering panoramic views and access to top trailheads.
Stargazing Areas — As an International Dark Sky Park, Great Basin is one of the best places in the U.S. to see the Milky Way, meteor showers, and countless stars.
Bristlecone Pine Groves — These trees are among the oldest living organisms on Earth, some over 5,000 years old.
Wheeler Peak Campground — A beautiful high-altitude basecamp perfect for campers, hikers, and anyone wanting to soak in the cool mountain air.
Best Hikes
Bristlecone Pine Trail (2.8 miles roundtrip, moderate)
Hike through a grove of twisted, ancient bristlecone pines — a truly humbling experience.
Alpine Lakes Loop (2.7 miles roundtrip, easy-moderate)
A beautiful loop that visits Stella and Teresa Lakes, two serene alpine lakes tucked beneath Wheeler Peak.
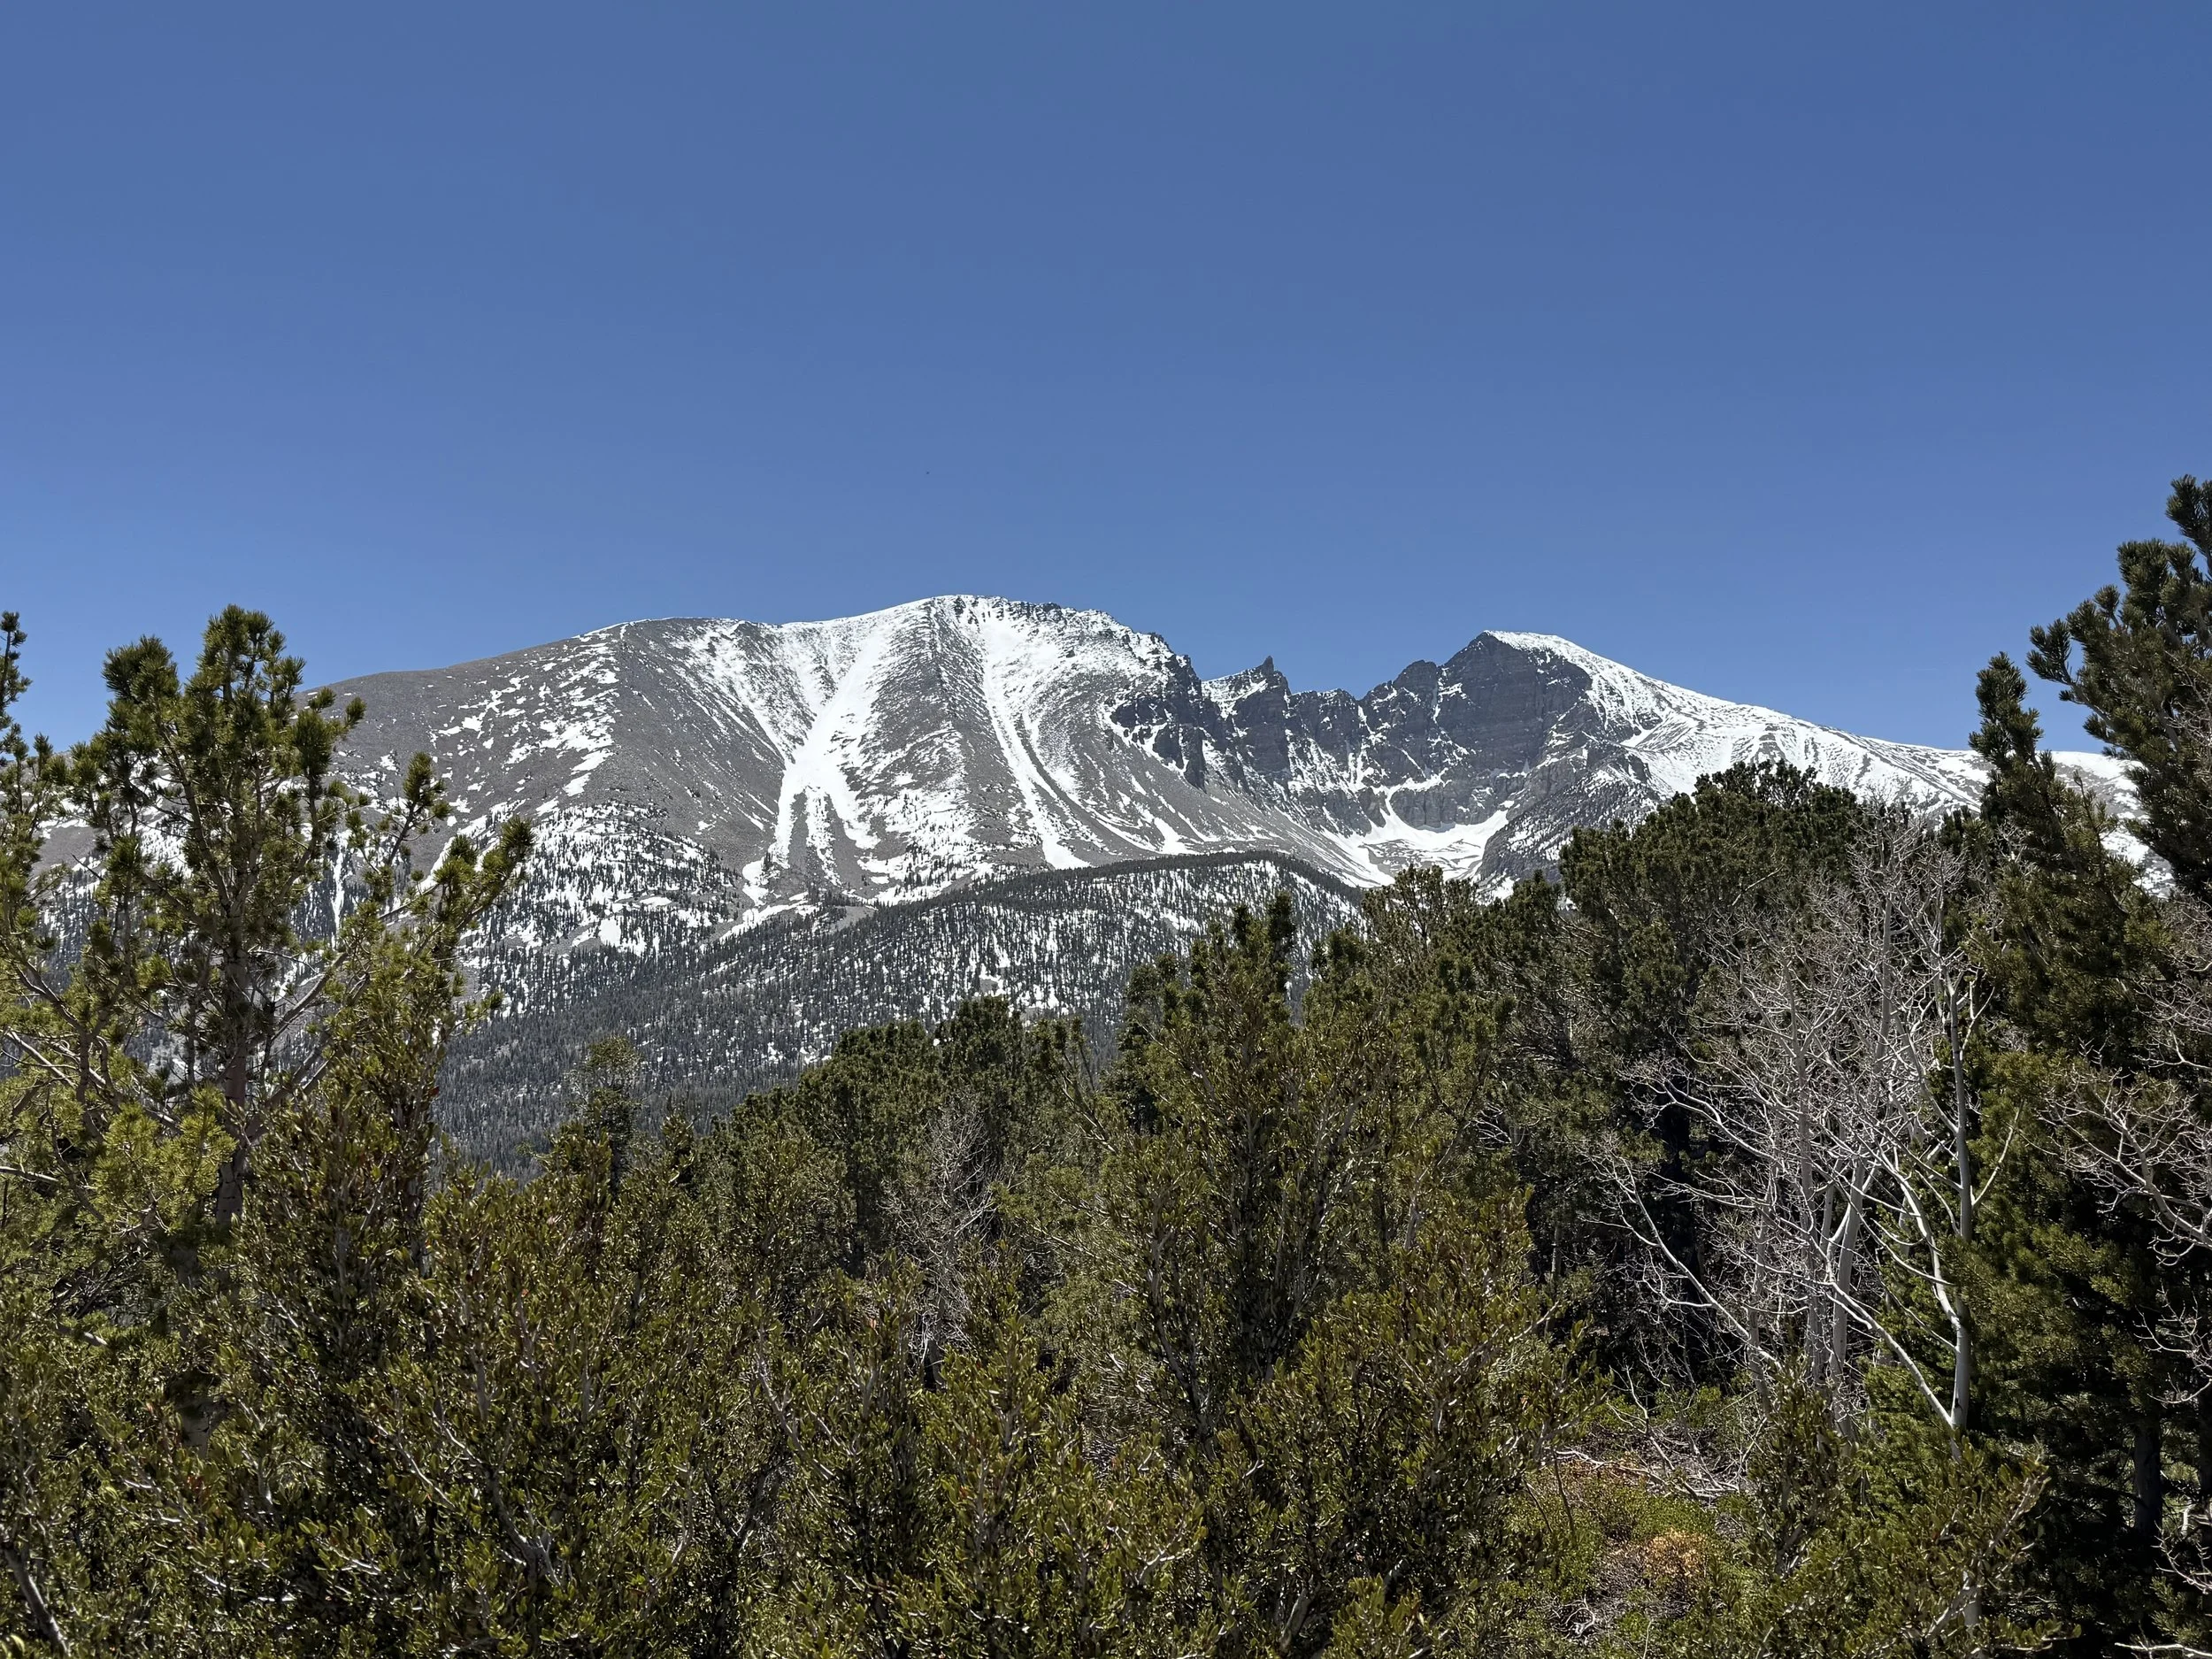
Wheeler Peak Summit Trail (8.6 miles roundtrip, strenuous)
For those wanting a challenge, this hike takes you to the summit of Wheeler Peak at 13,065 feet. Expect breathtaking panoramic views — and thinner air!
Lehman Creek Trail (6.8 miles roundtrip, moderate)
A quieter trail that follows Lehman Creek through meadows and forest, perfect if you want to avoid the crowds.
Best Places for Photography
Lehman Caves — Capture the surreal beauty of the underground formations.
Alpine Lakes — Reflective, peaceful, and ringed with pine trees.
Bristlecone Pines — Gnarled, twisted trees that seem to defy time.
Mather Overlook — A stunning roadside viewpoint with wide-open views of the mountains and desert.
Night Skies — On a clear night, the Milky Way steals the show — bring a tripod!
Accessibility Notes
• Both visitor centers are wheelchair accessible.
• Some sections of the Lehman Caves tours are accessible; call ahead to check which tours work best.
• The Wheeler Peak Scenic Drive offers several accessible viewpoints without needing to hike.
• Most trails are rugged and not suitable for wheelchairs or strollers, but there are short, flat walks near the visitor centers.
Tips
Best Season: Late spring through early fall — keep in mind, snow often lingers on higher elevations even into early summer.
What to Pack: Bring water, snacks, layers (it can be cold up high), and sun protection.
Supplies: Stock up before you get to Baker; it’s a tiny town with very limited services.
Cell Service: Expect little to no reception in the park — download maps and plan ahead.
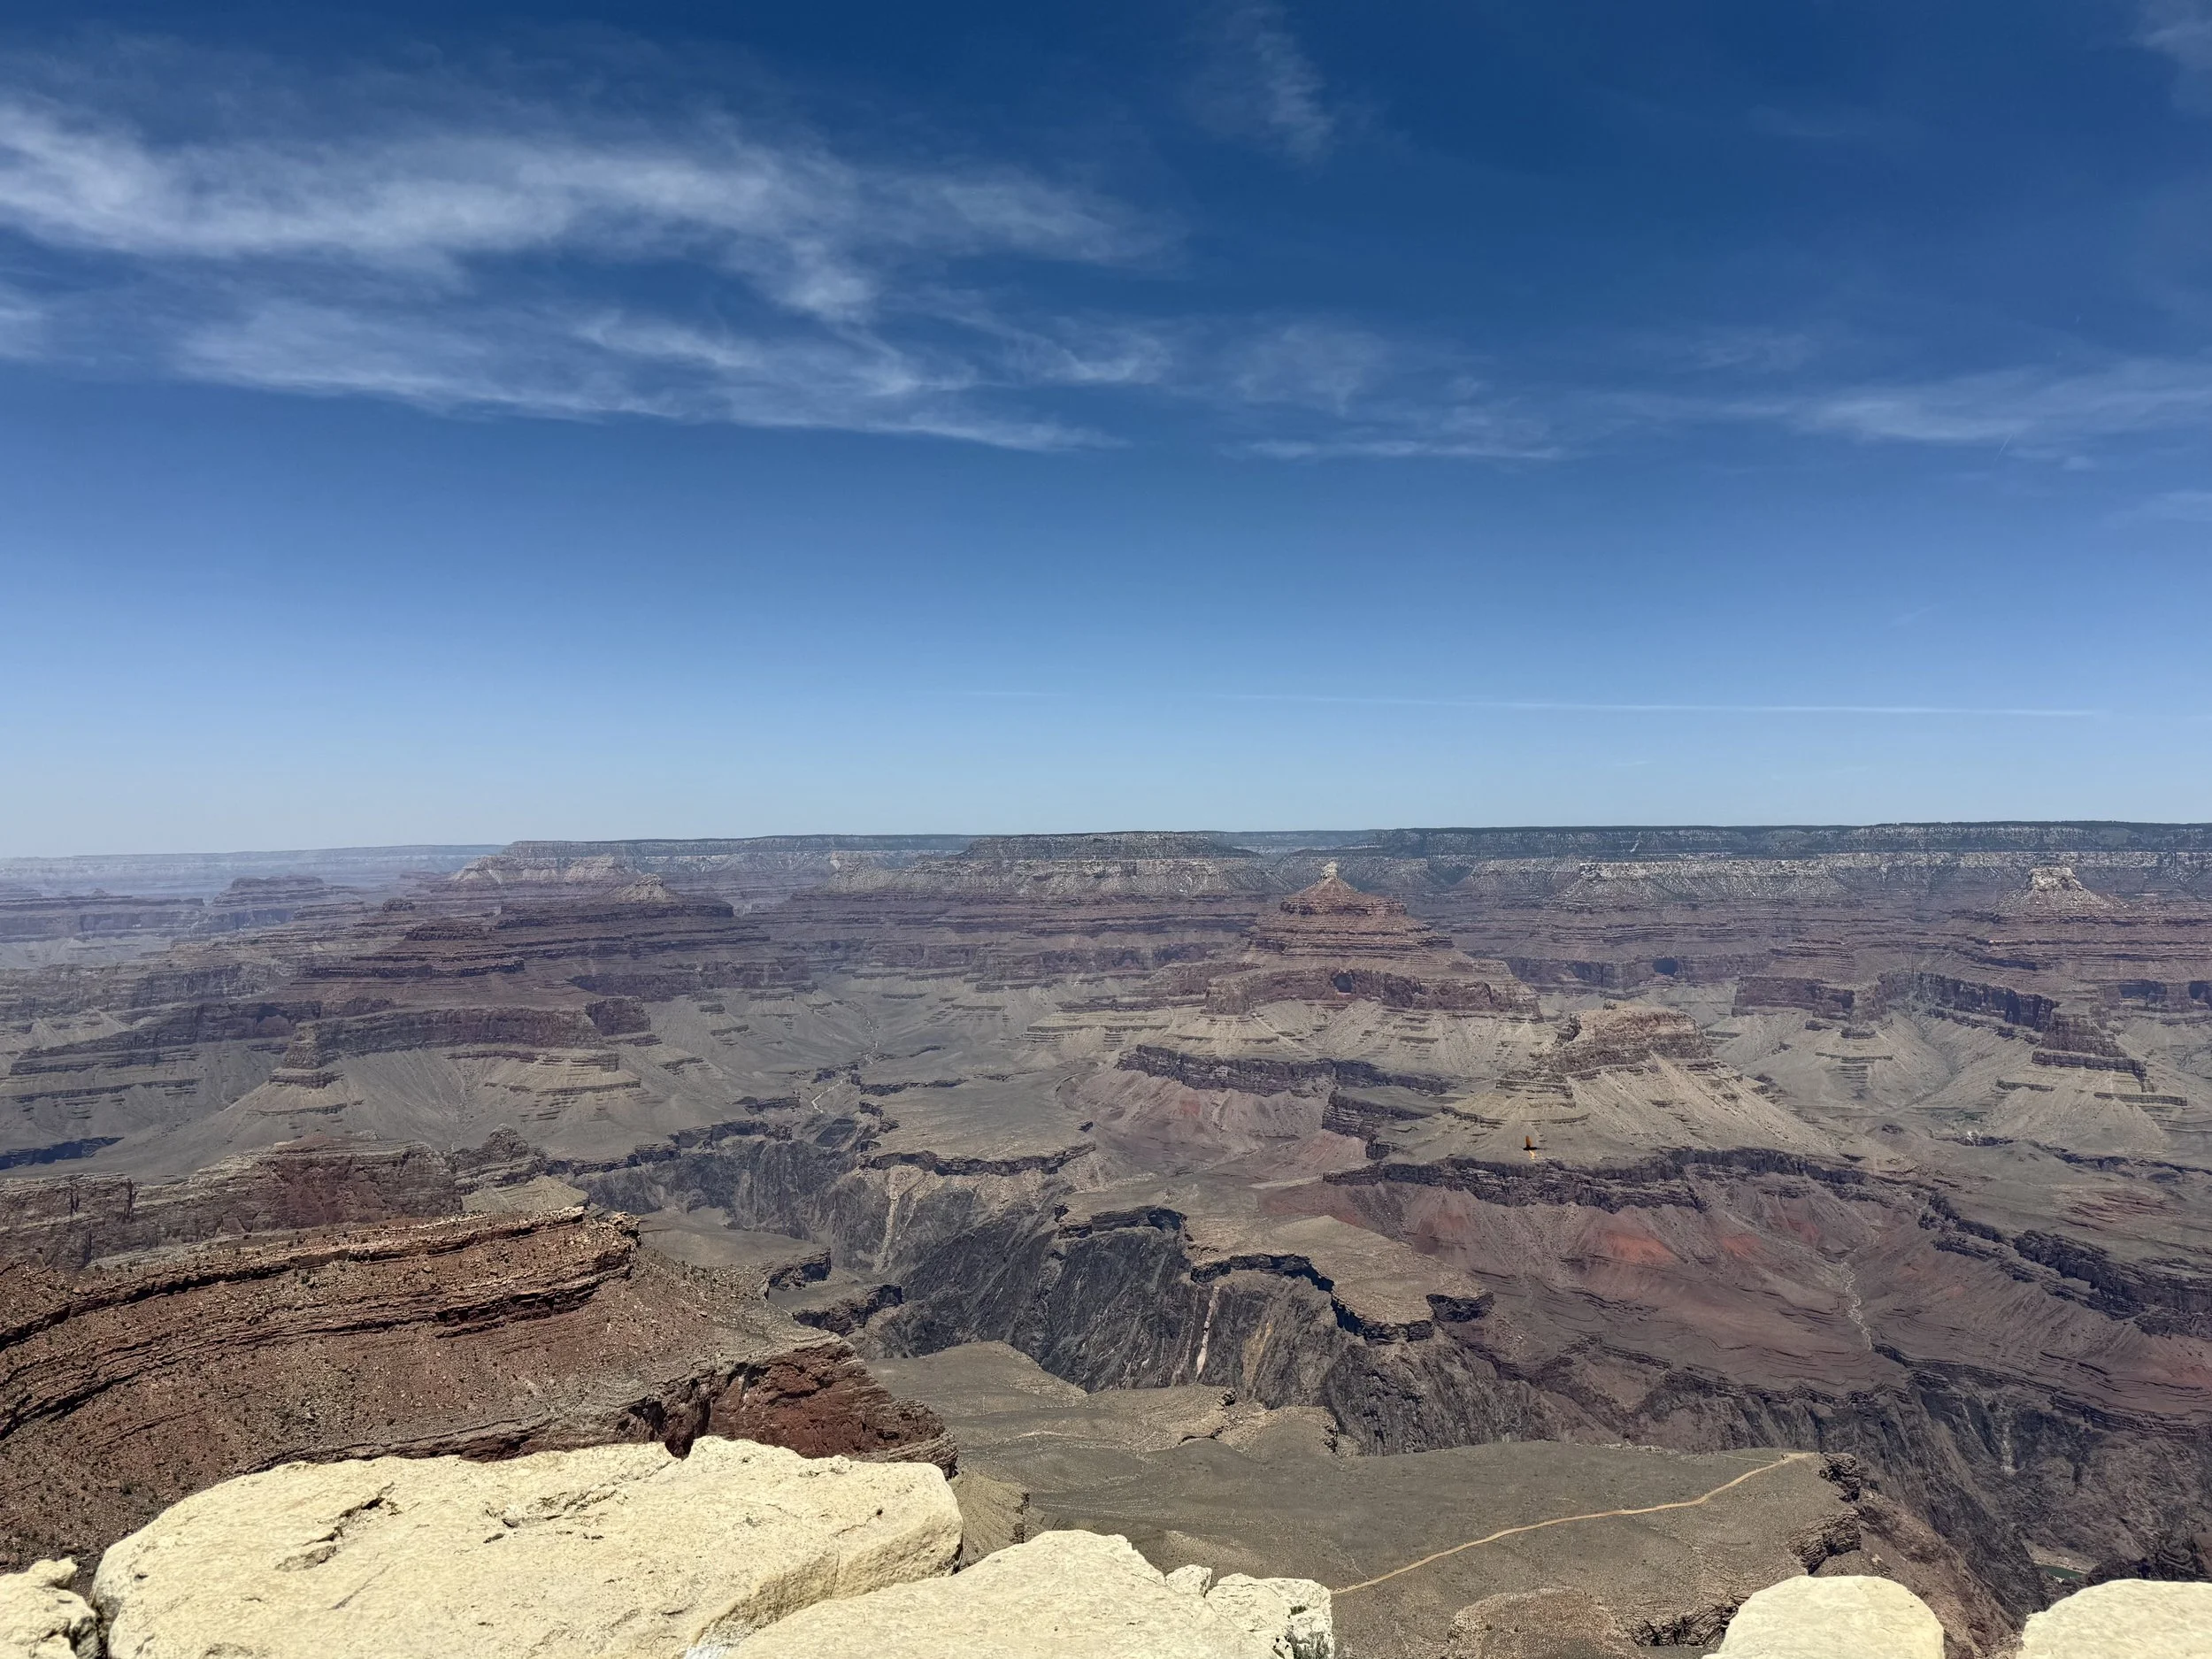
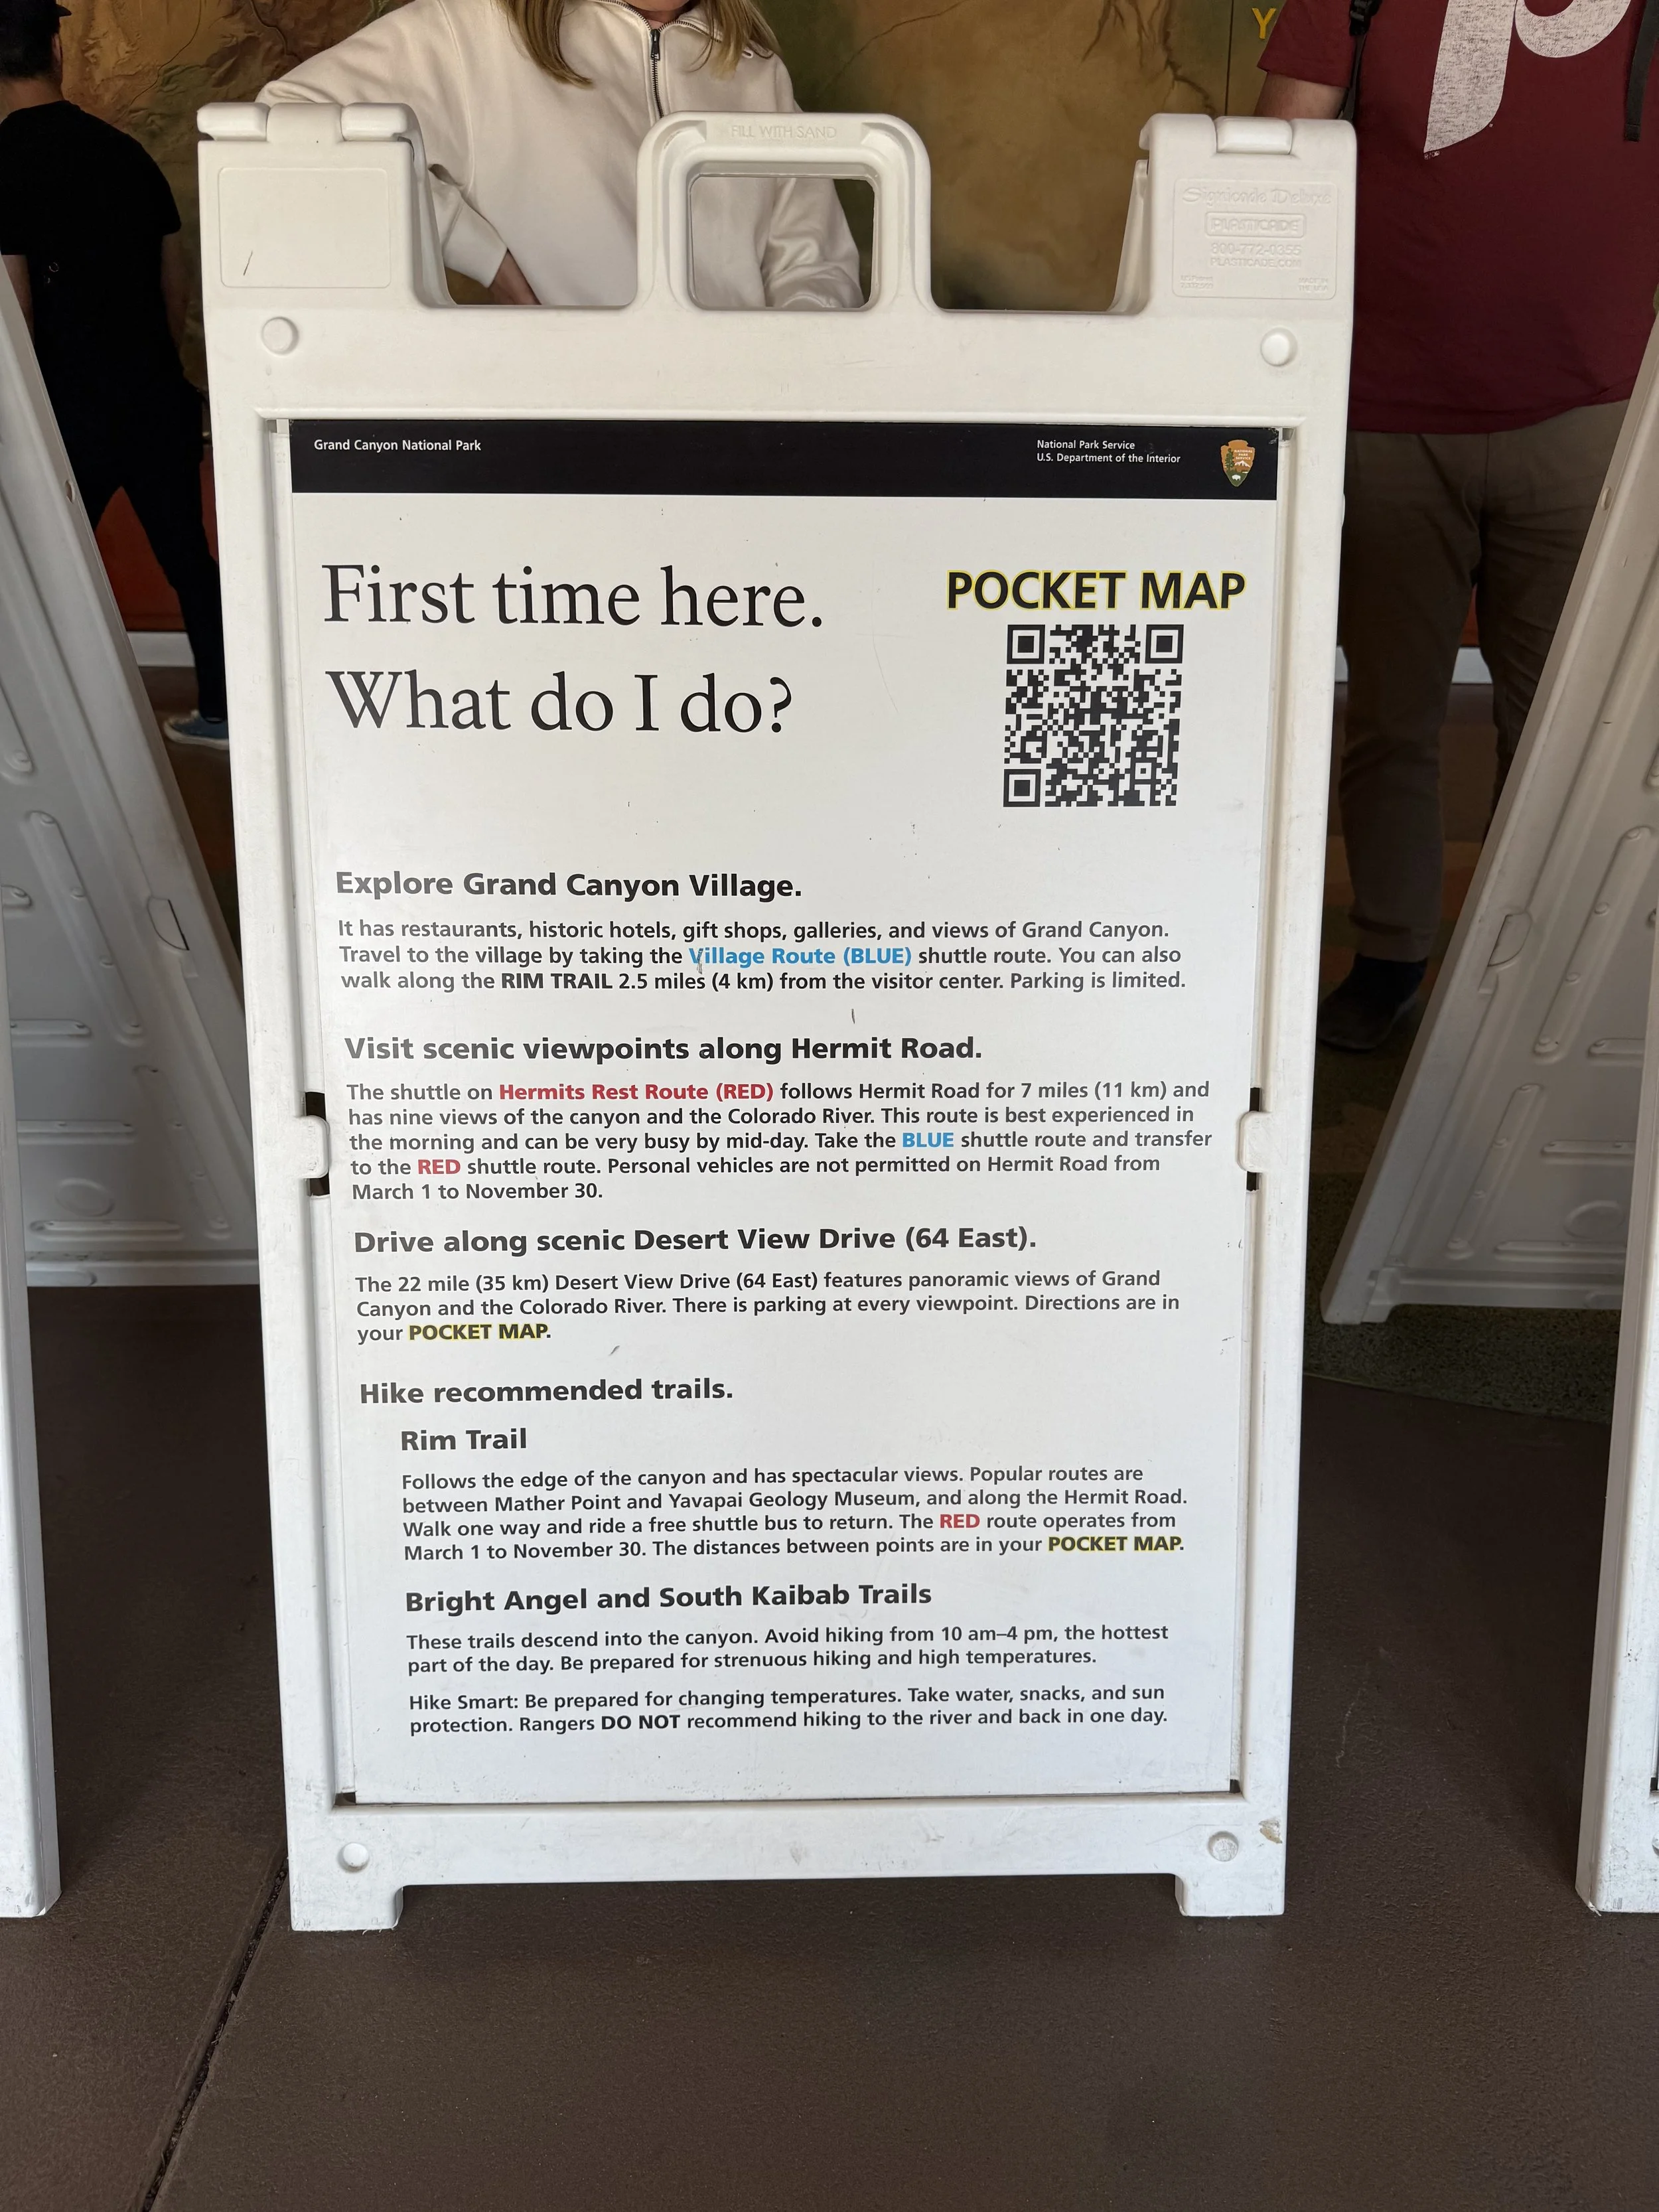
#27 Grand Canyon National Park, Arizona
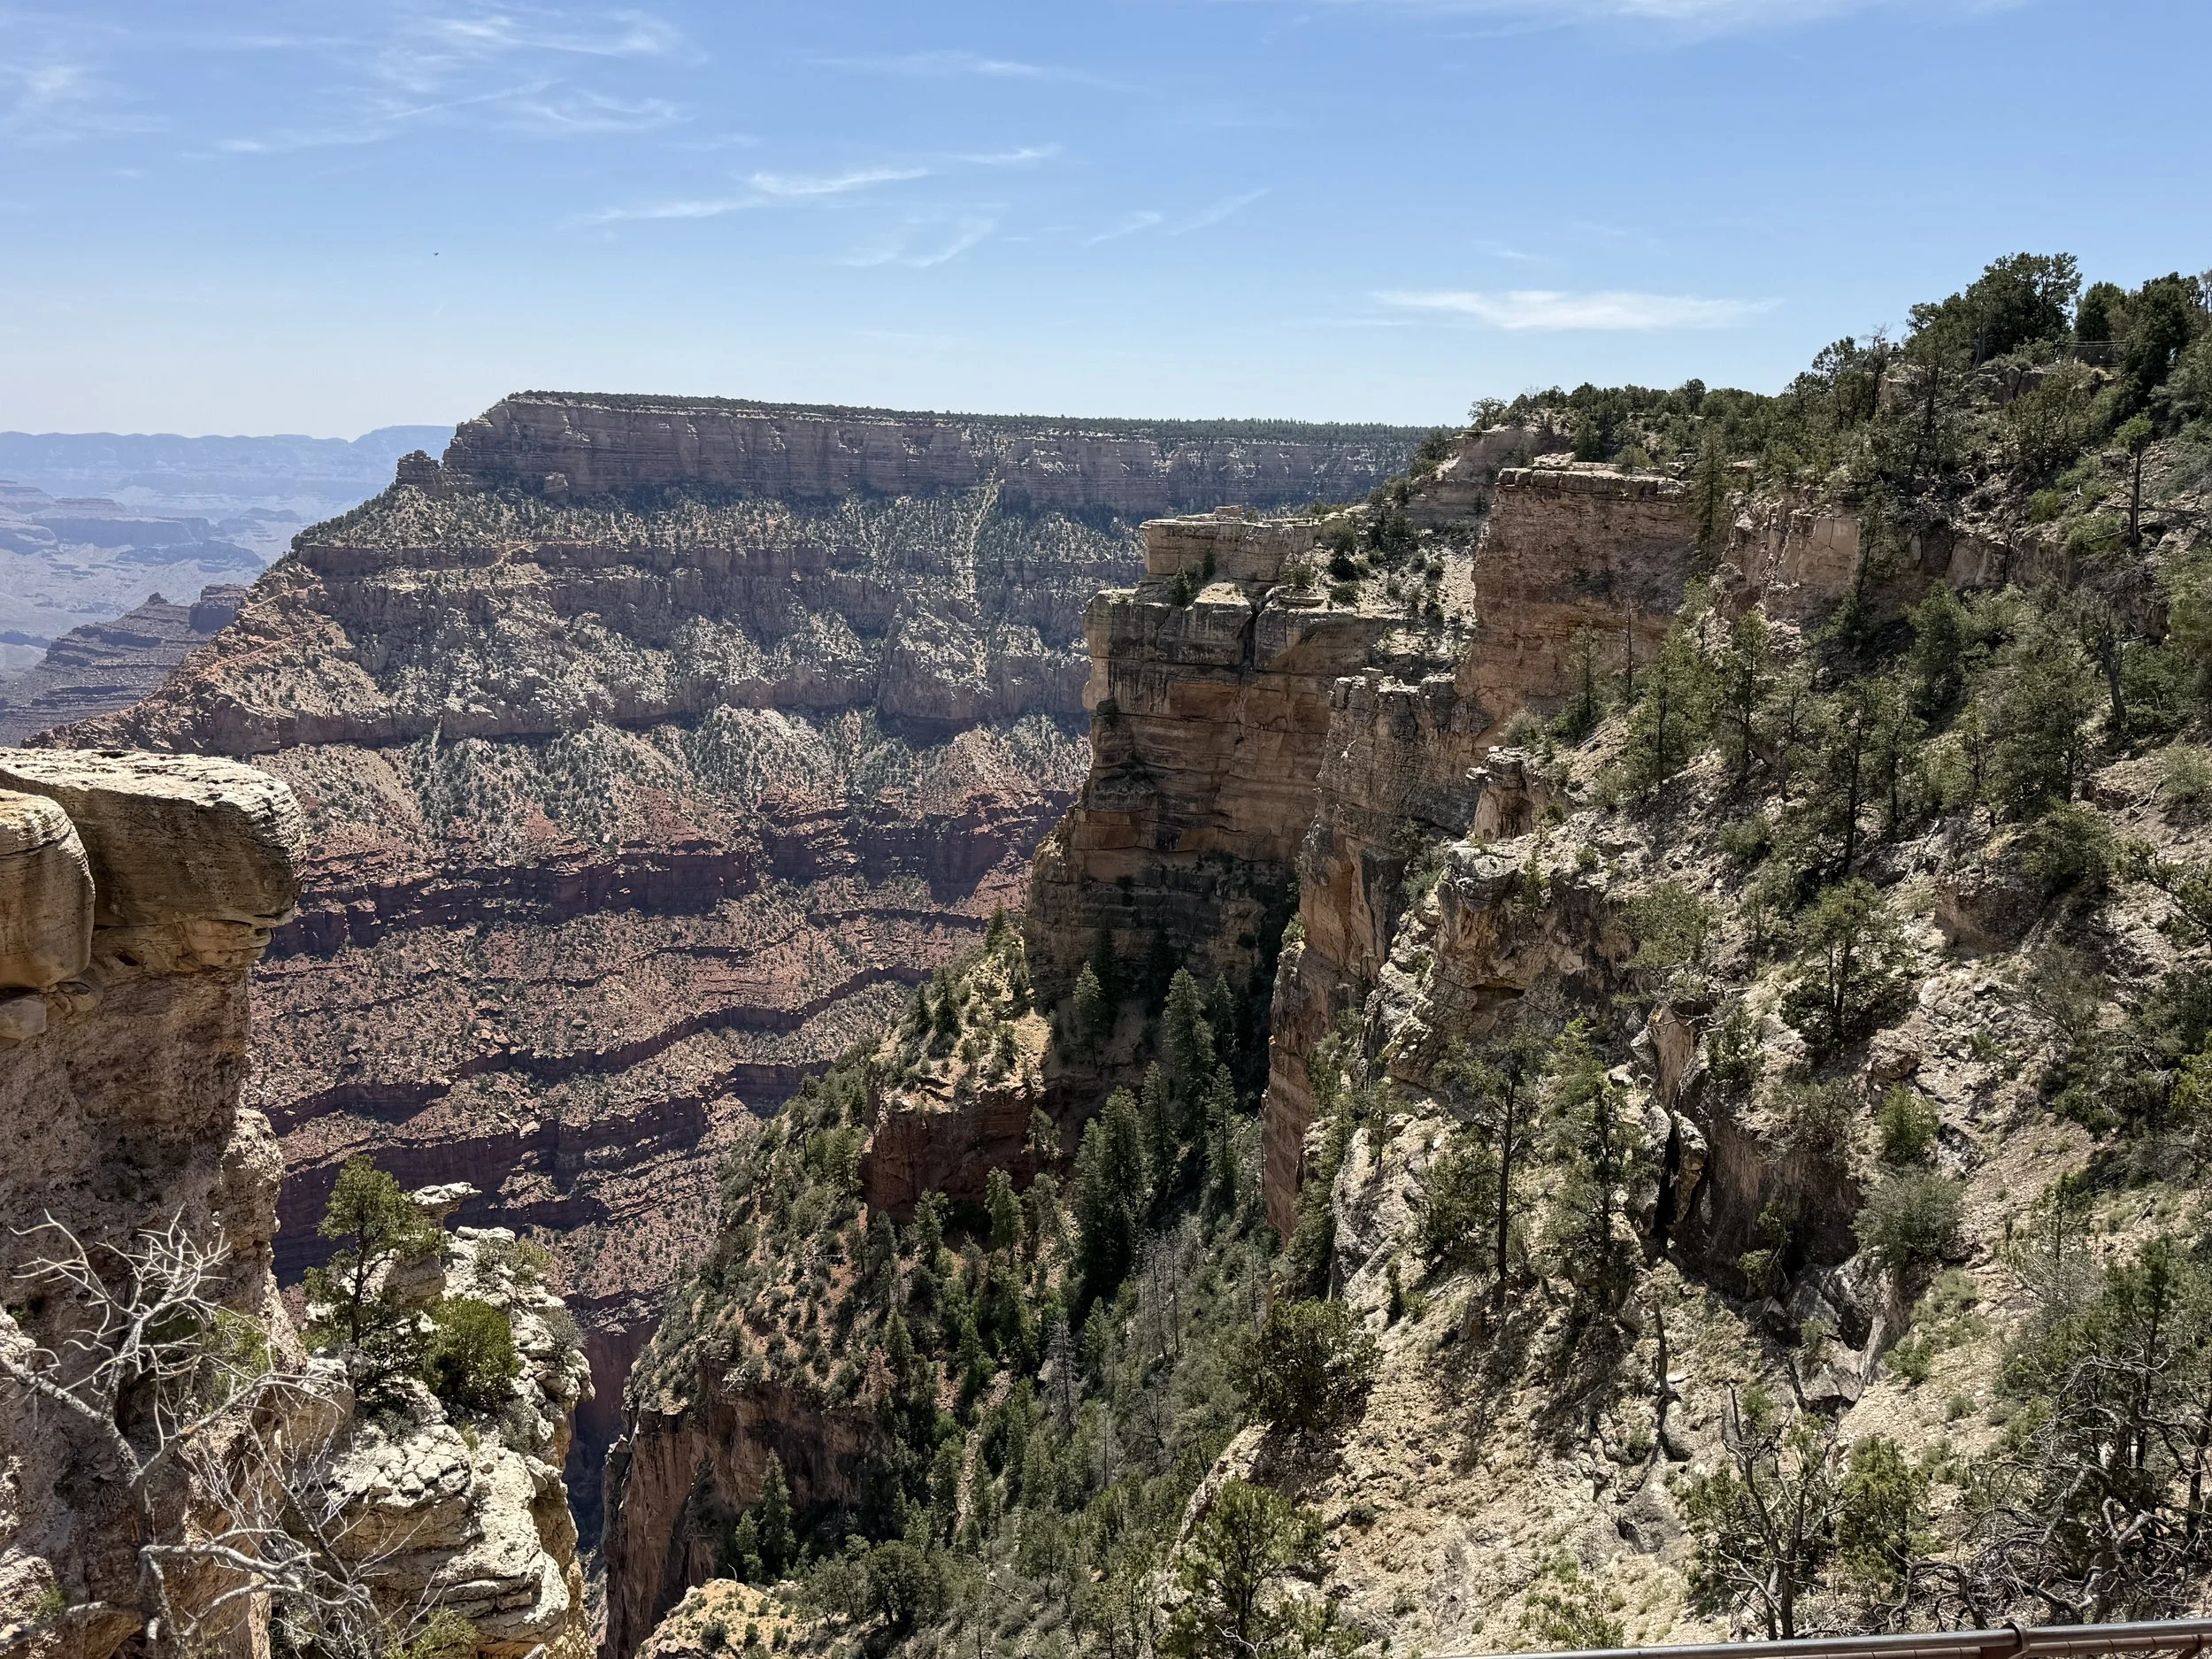
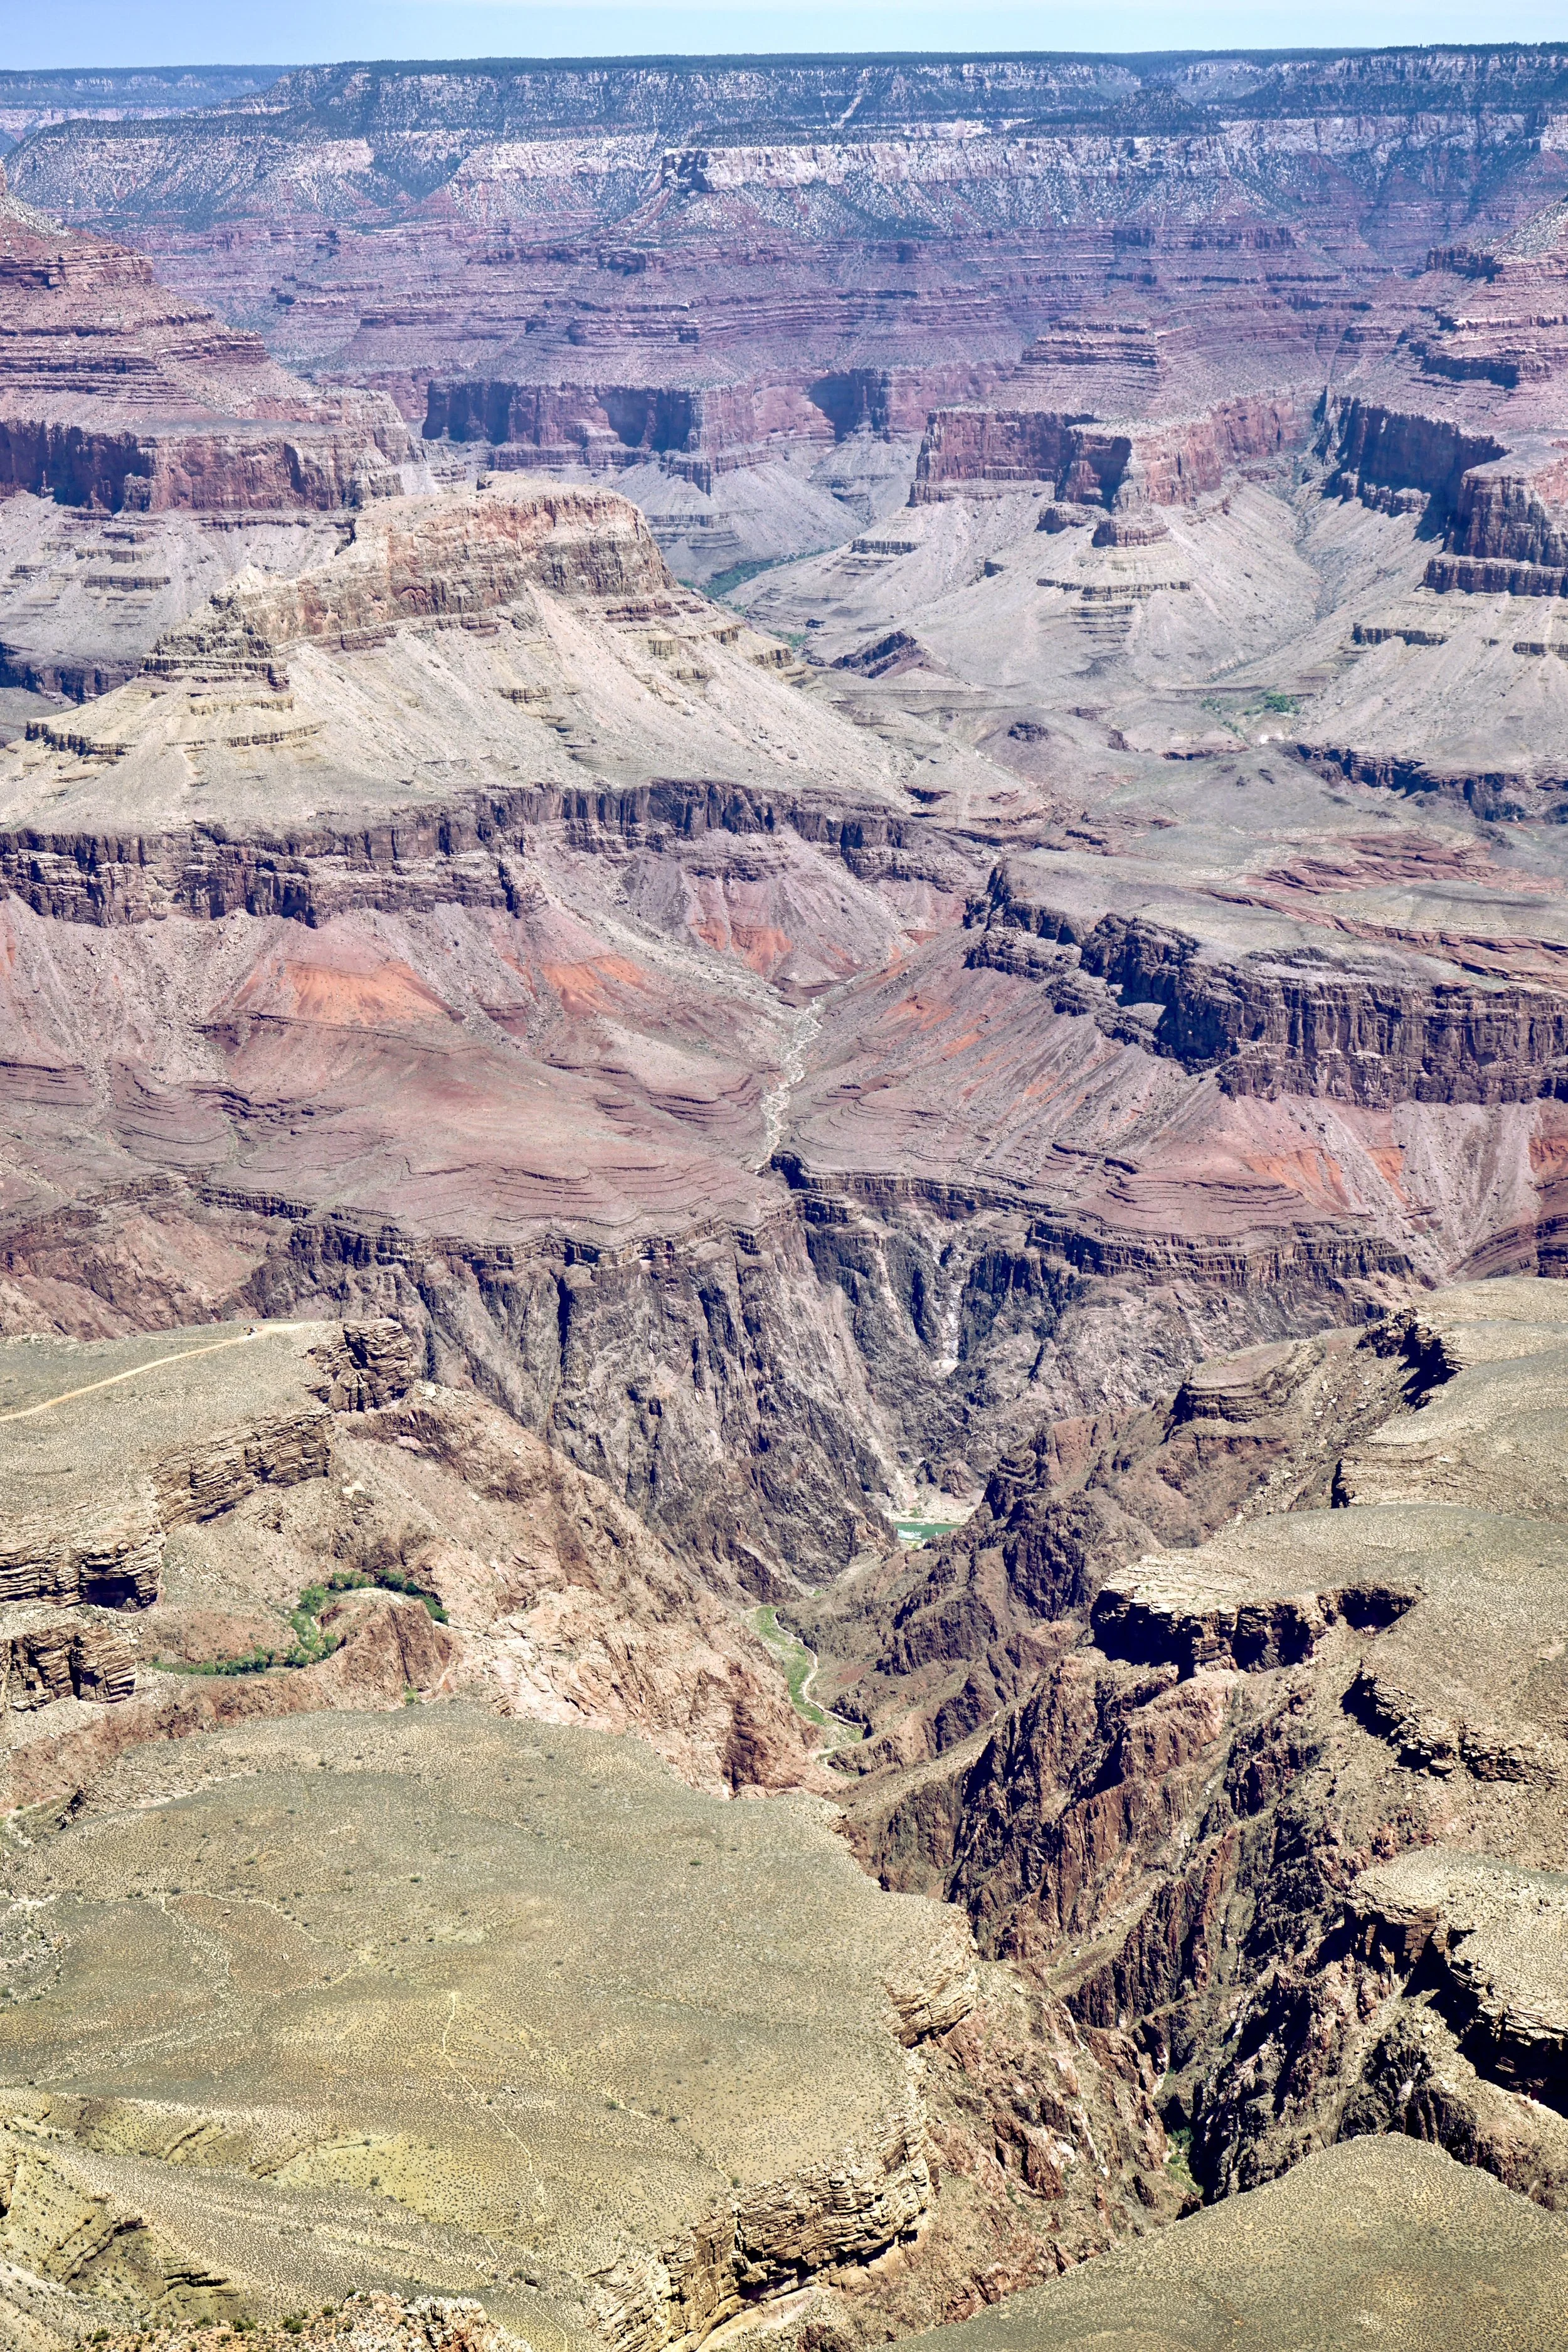
Grand Canyon from the South Rim
My trip to Grand Canyon National Park started with a simple question: Which rim should I visit? North, South, or West?
Each rim offers its own unique perspective. The South Rim is the most popular, with the largest visitor center and the most developed infrastructure. The West Rim, located on Hualapai tribal land, is home to the famous glass Skywalk — the see-through observation deck you’ve probably seen in photos. The North Rim is less visited but, from what I hear, offers some of the most breathtaking views (it’s also only open seasonally).
After weighing my options, I decided on the South Rim. Once that was set, I hit the road out of Las Vegas and headed toward Arizona. The drive takes about 3.5 to 4 hours — all classic desert scenery, with wide-open views, rocky landscapes, and that distinctive dusty palette.
I knew I was getting close when the traffic suddenly backed up. After miles of open highway, I found myself in a long, crawling line of cars approaching the South Entrance. Signs along the roadside gave rough wait-time estimates from each point, which helped set expectations.
While we were inching forward, I spotted the iconic Grand Canyon National Park entrance sign. Since I was traveling with my dad, I hopped out, handed him the driver’s seat, and jogged over to grab my usual sign photo. The line was moving so slowly that by the time I walked the short distance back — maybe 20 feet — the car had barely advanced.
Thankfully, all three entrance gates were open, which helped keep traffic flowing once we got to the front. We presented our America the Beautiful pass (which saved us the $35 vehicle fee) and headed into the park.
The South Rim has several large parking lots, but thanks to its popularity, most were full — and this was just a regular Wednesday in May. I eventually found a spot in Lot 3 and walked over to the visitor center complex. I call it a complex because it’s made up of multiple buildings, each serving different functions.
Inside the visitor center, I made my way to the stamp station (you know I had to get my National Park Passport stamped), grabbed a few maps, and headed back outside. It was a beautiful but hot day, so I decided to keep the hiking light.
From the visitor center, it’s about a five-minute walk to the main observation area, where you get your first proper view of the canyon. And let me tell you — the Grand Canyon really is grand. Several walkways and viewing platforms let you take in the landscape from different angles, each one as jaw-dropping as the last.
Because my dad has some mobility limitations, we took advantage of the free park shuttle system. The shuttles loop through many of the popular stops, letting you hop on and off without worrying about parking or walking long distances. It was an easy and relaxed way to explore more of the park.
After the shuttle loop, we returned to the car for some off-the-map exploring. My dad took me to one of his favorite lesser-known spots — a quieter area with access right up to the canyon’s edge. No guardrails, no crowds — just you, the rock, and a very long drop if you’re not careful. Standing there, looking out over that vast expanse, was nothing short of awe-inspiring.
A Bit About Grand Canyon National Park
Grand Canyon National Park is a UNESCO World Heritage Site and one of the most iconic natural landmarks on Earth. Over millions of years, the Colorado River carved the 277-mile-long canyon, exposing colorful rock layers that span two billion years of geologic history.
The area was first protected as a forest reserve in 1893, became a national monument in 1908, and officially became a national park in 1919. Today, it draws more than 4.7 million visitors annually and remains one of the most photographed and visited sites in the U.S.
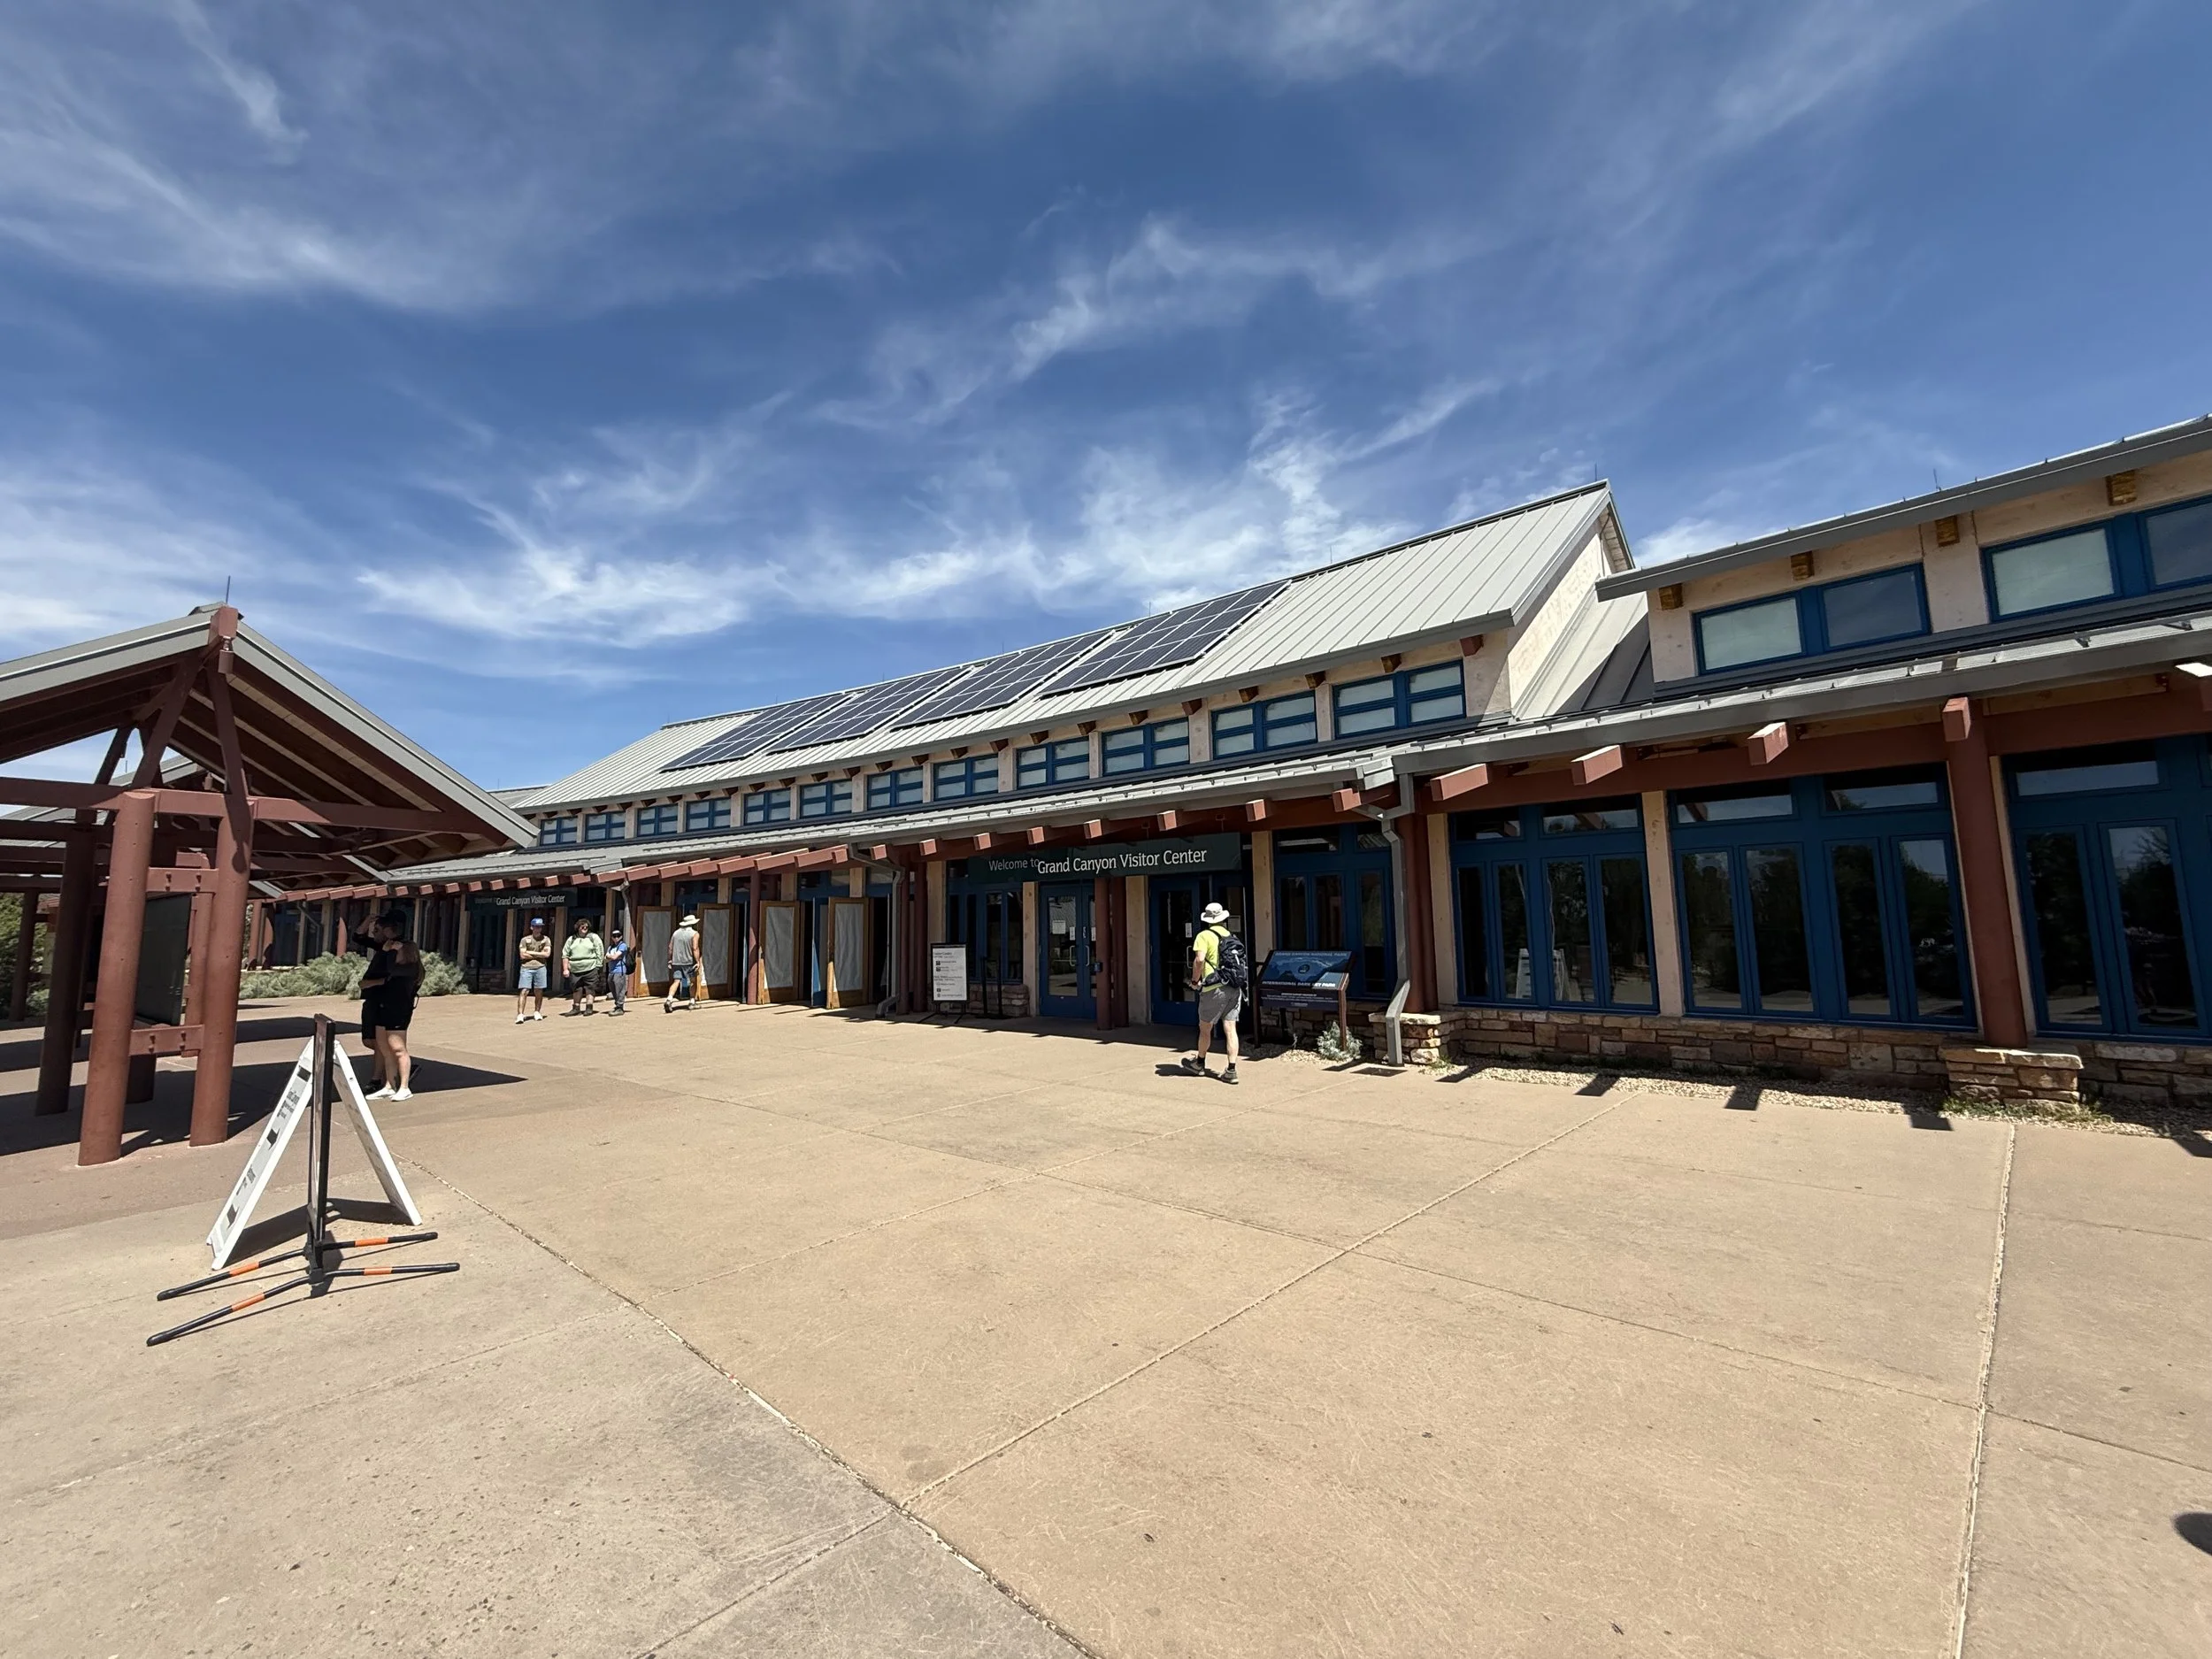
South Rim Visitor Center
Visitor Centers
📍 South Rim Visitor Center (Main Complex)
20 South Entrance Road, Grand Canyon Village, AZ 86023
• Hours: 8:00 AM – 6:00 PM (seasonal; check before visiting)
• Features: Park information desk, interactive exhibits, 20-minute park film, bookstore, outdoor plaza, restrooms, water refill stations, bicycle rentals, and access to Mather Point overlook
• Notes: This is the main hub for visitors, where you can get maps, current trail and shuttle information, and ranger advice.
📍 Yavapai Geology Museum
• Location: Yavapai Point
• Features: Detailed geologic displays explaining the canyon’s formation, panoramic canyon windows, and one of the best sunset viewpoints
• Hours: 8:00 AM – 6:00 PM (check seasonally)
📍 Verkamp’s Visitor Center
• Location: Grand Canyon Village (near El Tovar Hotel)
• Features: Historic building with cultural exhibits about Grand Canyon Village history, small bookstore, ranger talks
• Hours: 8:00 AM – 6:00 PM (seasonal)
📍 Desert View Visitor Center (East Entrance)
•Location: 25 miles east of Grand Canyon Village
•Features: Near Desert View Watchtower, offers park info, small shop, and spectacular views from the tower
•Hours: Varies; often closed in winter
Tip: The South Rim Visitor Center is the best place to start if you’re new to the park, want to use the shuttles, or need detailed hiking advice. That’s where I picked up my National Park Passport stamp and grabbed all the maps and info I needed.
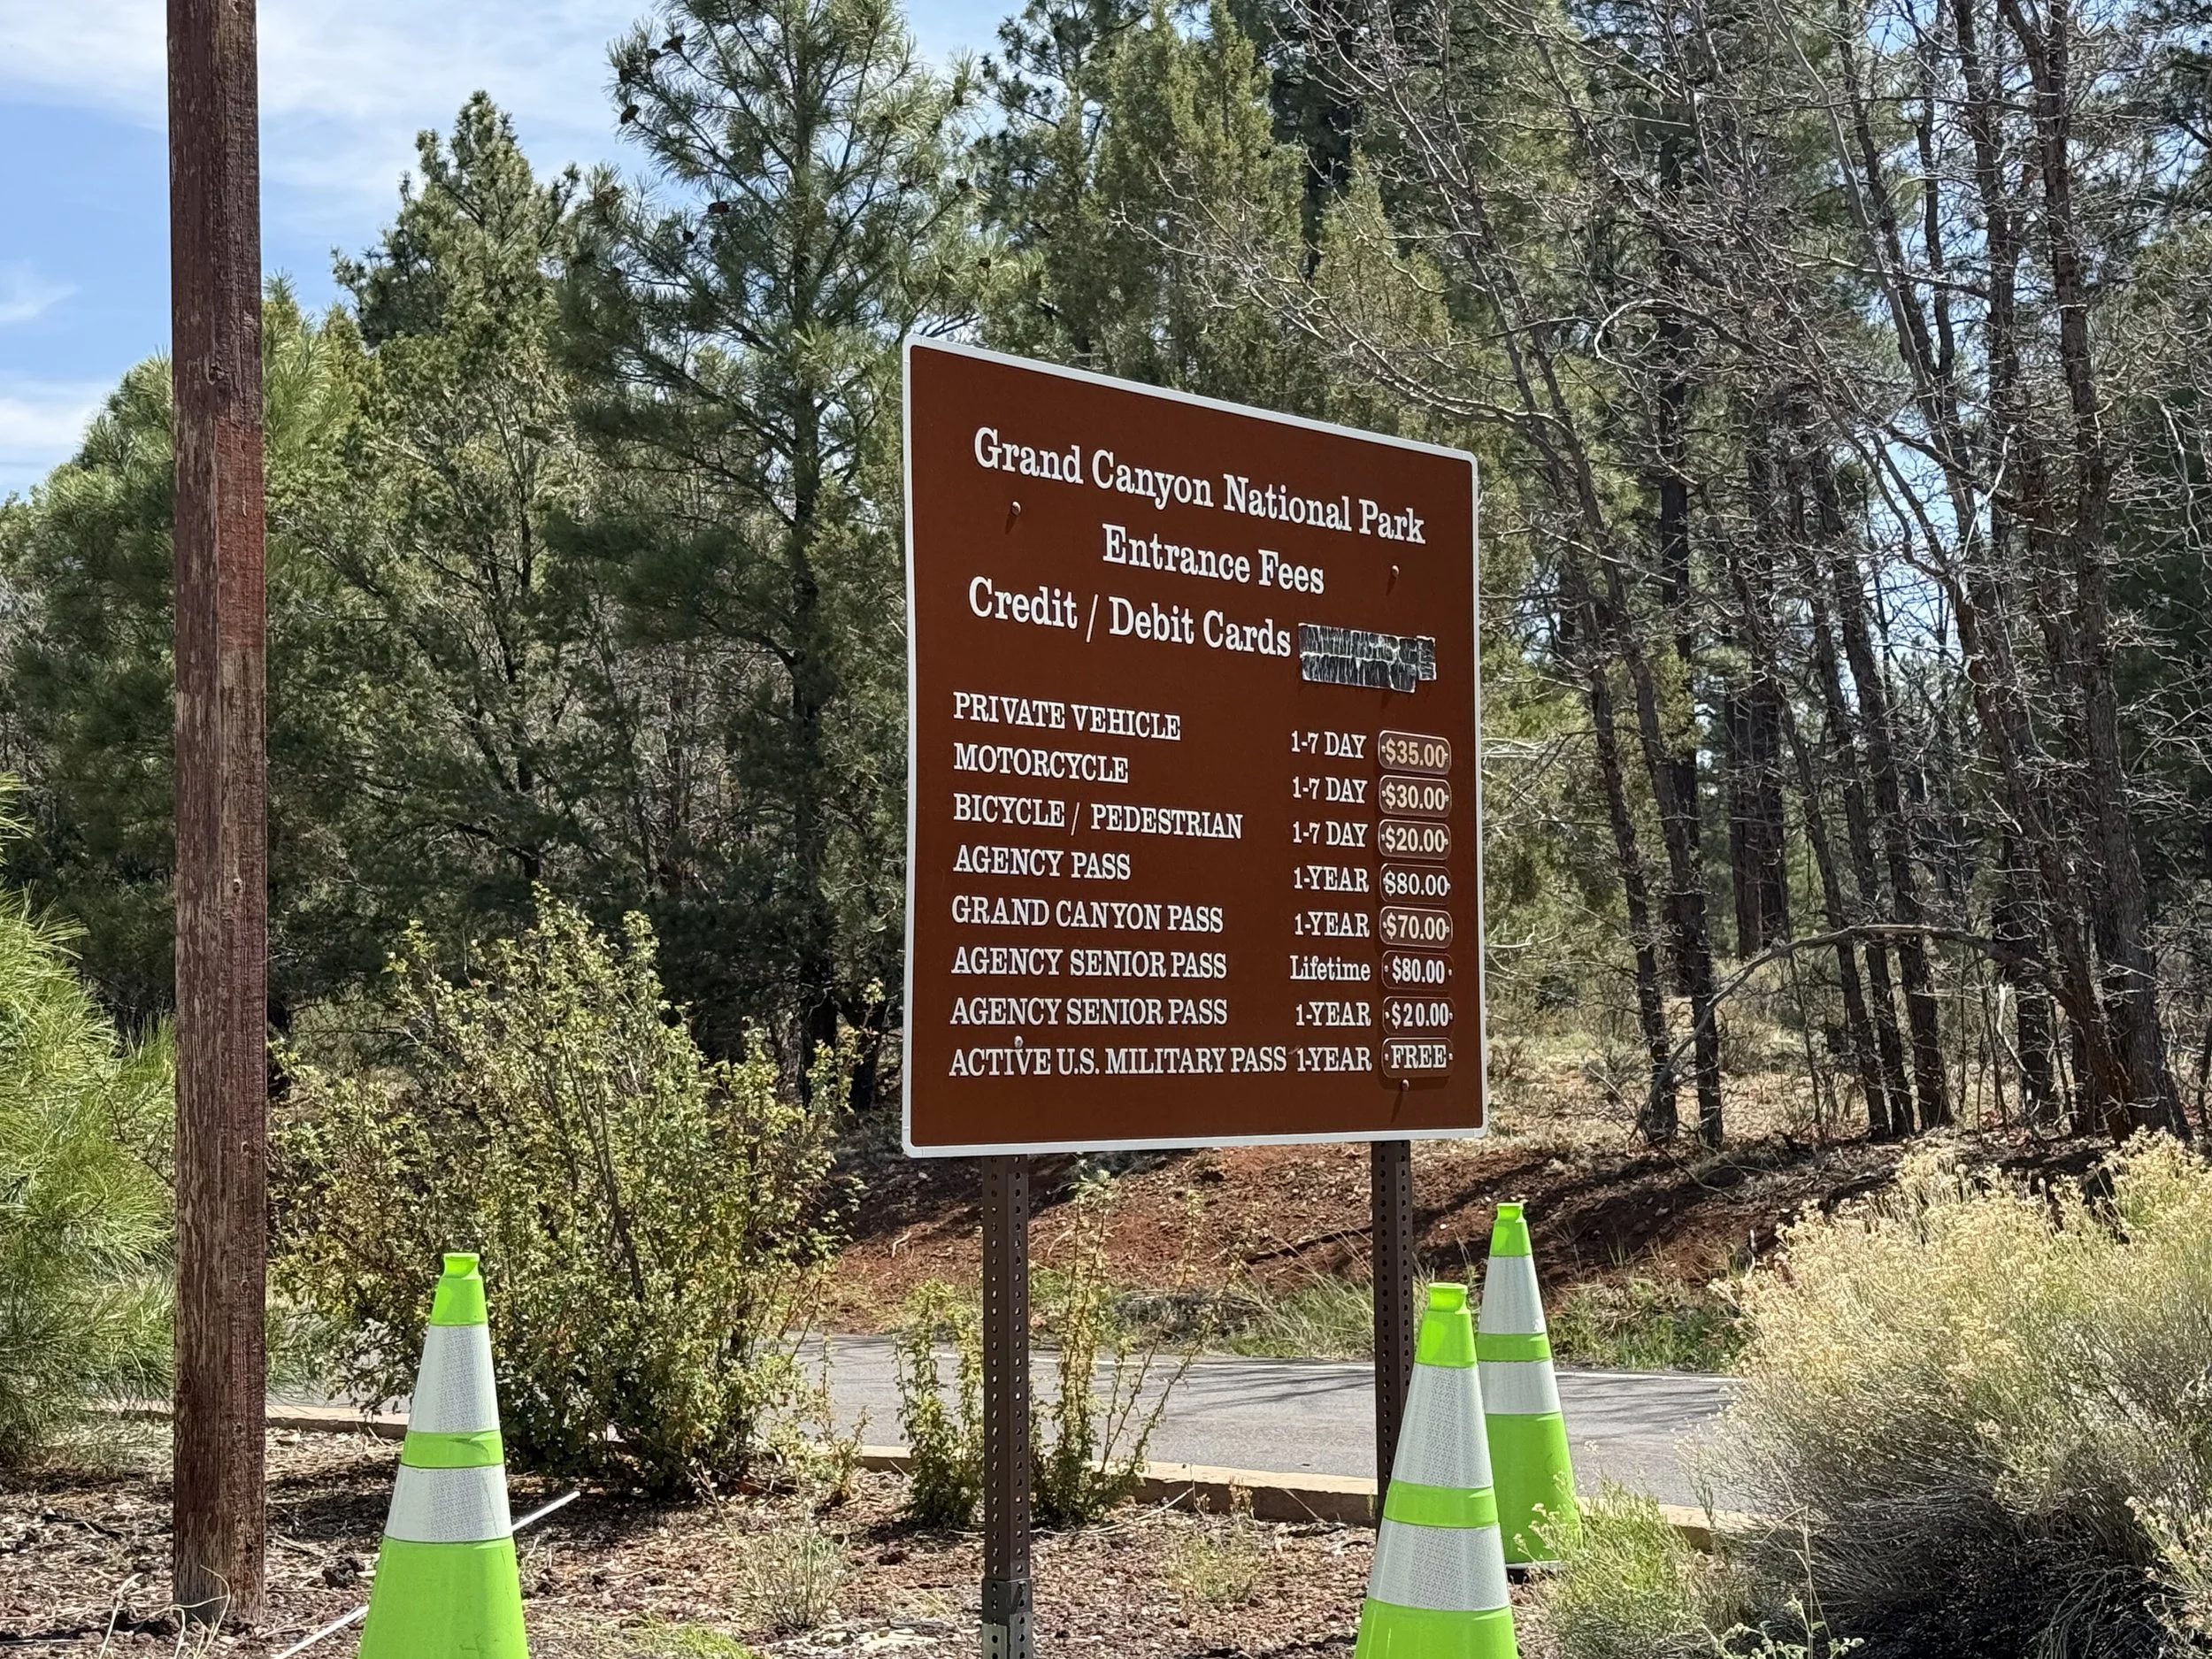
Entrance Fees and Passes
• Private vehicle: $35 (valid 7 days)
• Motorcycle: $30
• Individual (foot/bike): $20
• Annual America the Beautiful Pass: $80 (unlimited entry to all U.S. national parks for a year)
Best Hikes and Things To Do
• Mather Point: A short, paved walk from the South Rim Visitor Center, offering iconic views
• Yavapai Point and Geology Museum: A great combo of views and educational exhibits
• Rim Trail: Stretching along the canyon edge, offering mostly flat, accessible paths with multiple viewpoints
• Bright Angel Trail: The most popular rim-to-canyon trail — even hiking just a short way down gives a new perspective
Multi-Day Hikes and Rafting Trips
If you’re feeling adventurous, the Grand Canyon offers much more than just rim views. For those ready to go deeper — literally — here’s what you need to know:
Hiking Into the Canyon
Most visitors stick to the rim or take short hikes partway down, but if you want to hike all the way to the Colorado River or spend a night below the rim, it’s a serious commitment. Popular multi-day trails include:
• Bright Angel Trail to Phantom Ranch — about 9.5 miles one way, with overnight lodging or camping at the bottom (reservations required, often booked up a year in advance).
• South Kaibab Trail to Bright Angel Trail loop — a challenging multi-day loop with no water sources along South Kaibab (you need to carry everything).
• Backcountry camping — requires a backcountry permit from the park, which is highly competitive and often requires applying months in advance.
Important: DO NOT attempt to hike down to the river and back in a single day — the elevation change, heat, and distance are extremely demanding, and the park strongly warns against it.
Rafting and Kayaking the Colorado River
If you’re dreaming of rafting or kayaking through the canyon, you’ll need to plan ahead:
• Commercial rafting trips — These are multi-day guided trips (ranging from 3 days to over 2 weeks) offered by authorized outfitters. They handle permits, gear, and logistics, and you can choose motorized or oar-powered rafts.
• Non-commercial (private) trips — For experienced boaters only. These require a permit through a weighted lottery system, often with years-long waitlists. You’ll need to bring your own gear and demonstrate river-running expertise.
• Day trips — The main Colorado River inside Grand Canyon doesn’t offer casual day rafting; for that, you’d look upstream at places like Glen Canyon or downstream at Lake Mead.
Important: Rafting the Colorado River through the Grand Canyon is a serious wilderness experience, with remote conditions, challenging rapids, and no cell service. Whether you go guided or private, be prepared for an unforgettable — but demanding — adventure.
Best Photo Spots
• Mather Point (sunrise or sunset)
• Yavapai Point (geology views)
• Desert View Watchtower (sweeping vistas)
• Hermit Road viewpoints (via shuttle, especially for sunset shots)
• And of course: the national park entrance sign!

Grand Canyon Shuttle
Accessibility
The South Rim is the most accessible part of the park, with paved paths, accessible restrooms, shuttle buses with lifts, and designated parking at major overlooks. Portions of the Rim Trail are wheelchair-friendly, but always double-check conditions at the visitor center, as some areas can be uneven.
Other Helpful Info
• Best time to visit: Spring (March–May) and fall (September–November) when temperatures are mild
• Weather: It can be very hot in summer and chilly in winter, even snowing at times — dress in layers
• Food and drink: Restaurants, cafés, and grocery stores are located in Grand Canyon Village; bring plenty of water regardless
• Wildlife: Watch for elk, mule deer, California condors, and other wildlife — but do not approach or feed them
• Safety: Many canyon edges are unguarded; exercise caution and supervise children closely
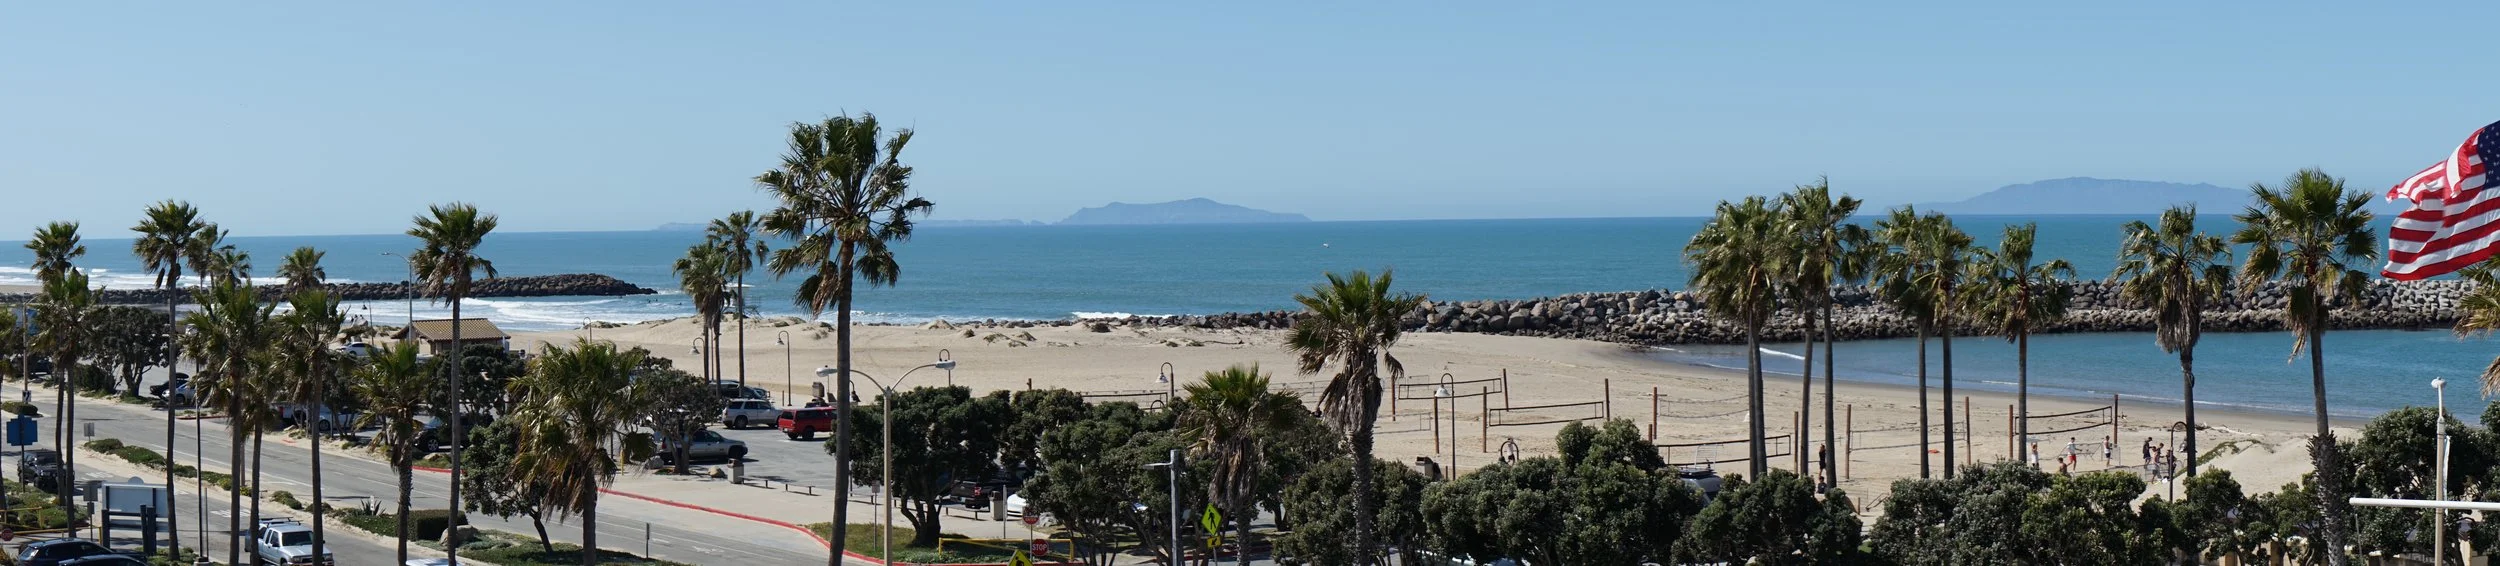
#26 Channel Islands National Park, California
I visited Channel Islands National Park on a whim. I had a free afternoon during a weekend trip to California and thought I might be able to squeeze in a ferry ride out to one of the islands. I didn’t have a reservation—or much of a plan, really. Just a hunch and some extra time.
By the time I got to Ventura Harbor, the last ferry had already left.
So I headed into the Channel Islands National Park Visitor Center, hoping for a bit of information and a small consolation prize in the form of a park stamp. I ended up getting both.
The ranger at the front desk was kind, not at all surprised that I hadn’t pre-booked anything. While I stood there flipping through the passport stamp station, I asked about ferry schedules and how people usually visit the park. She walked me through the basics—how Island Packers runs boats to Santa Cruz and Anacapa year-round, with seasonal access to the other islands. Everything has to be reserved in advance. And there are no services once you’re out there. Which, looking back, is probably something I should’ve known before showing up.
Still, the visit wasn’t a loss.
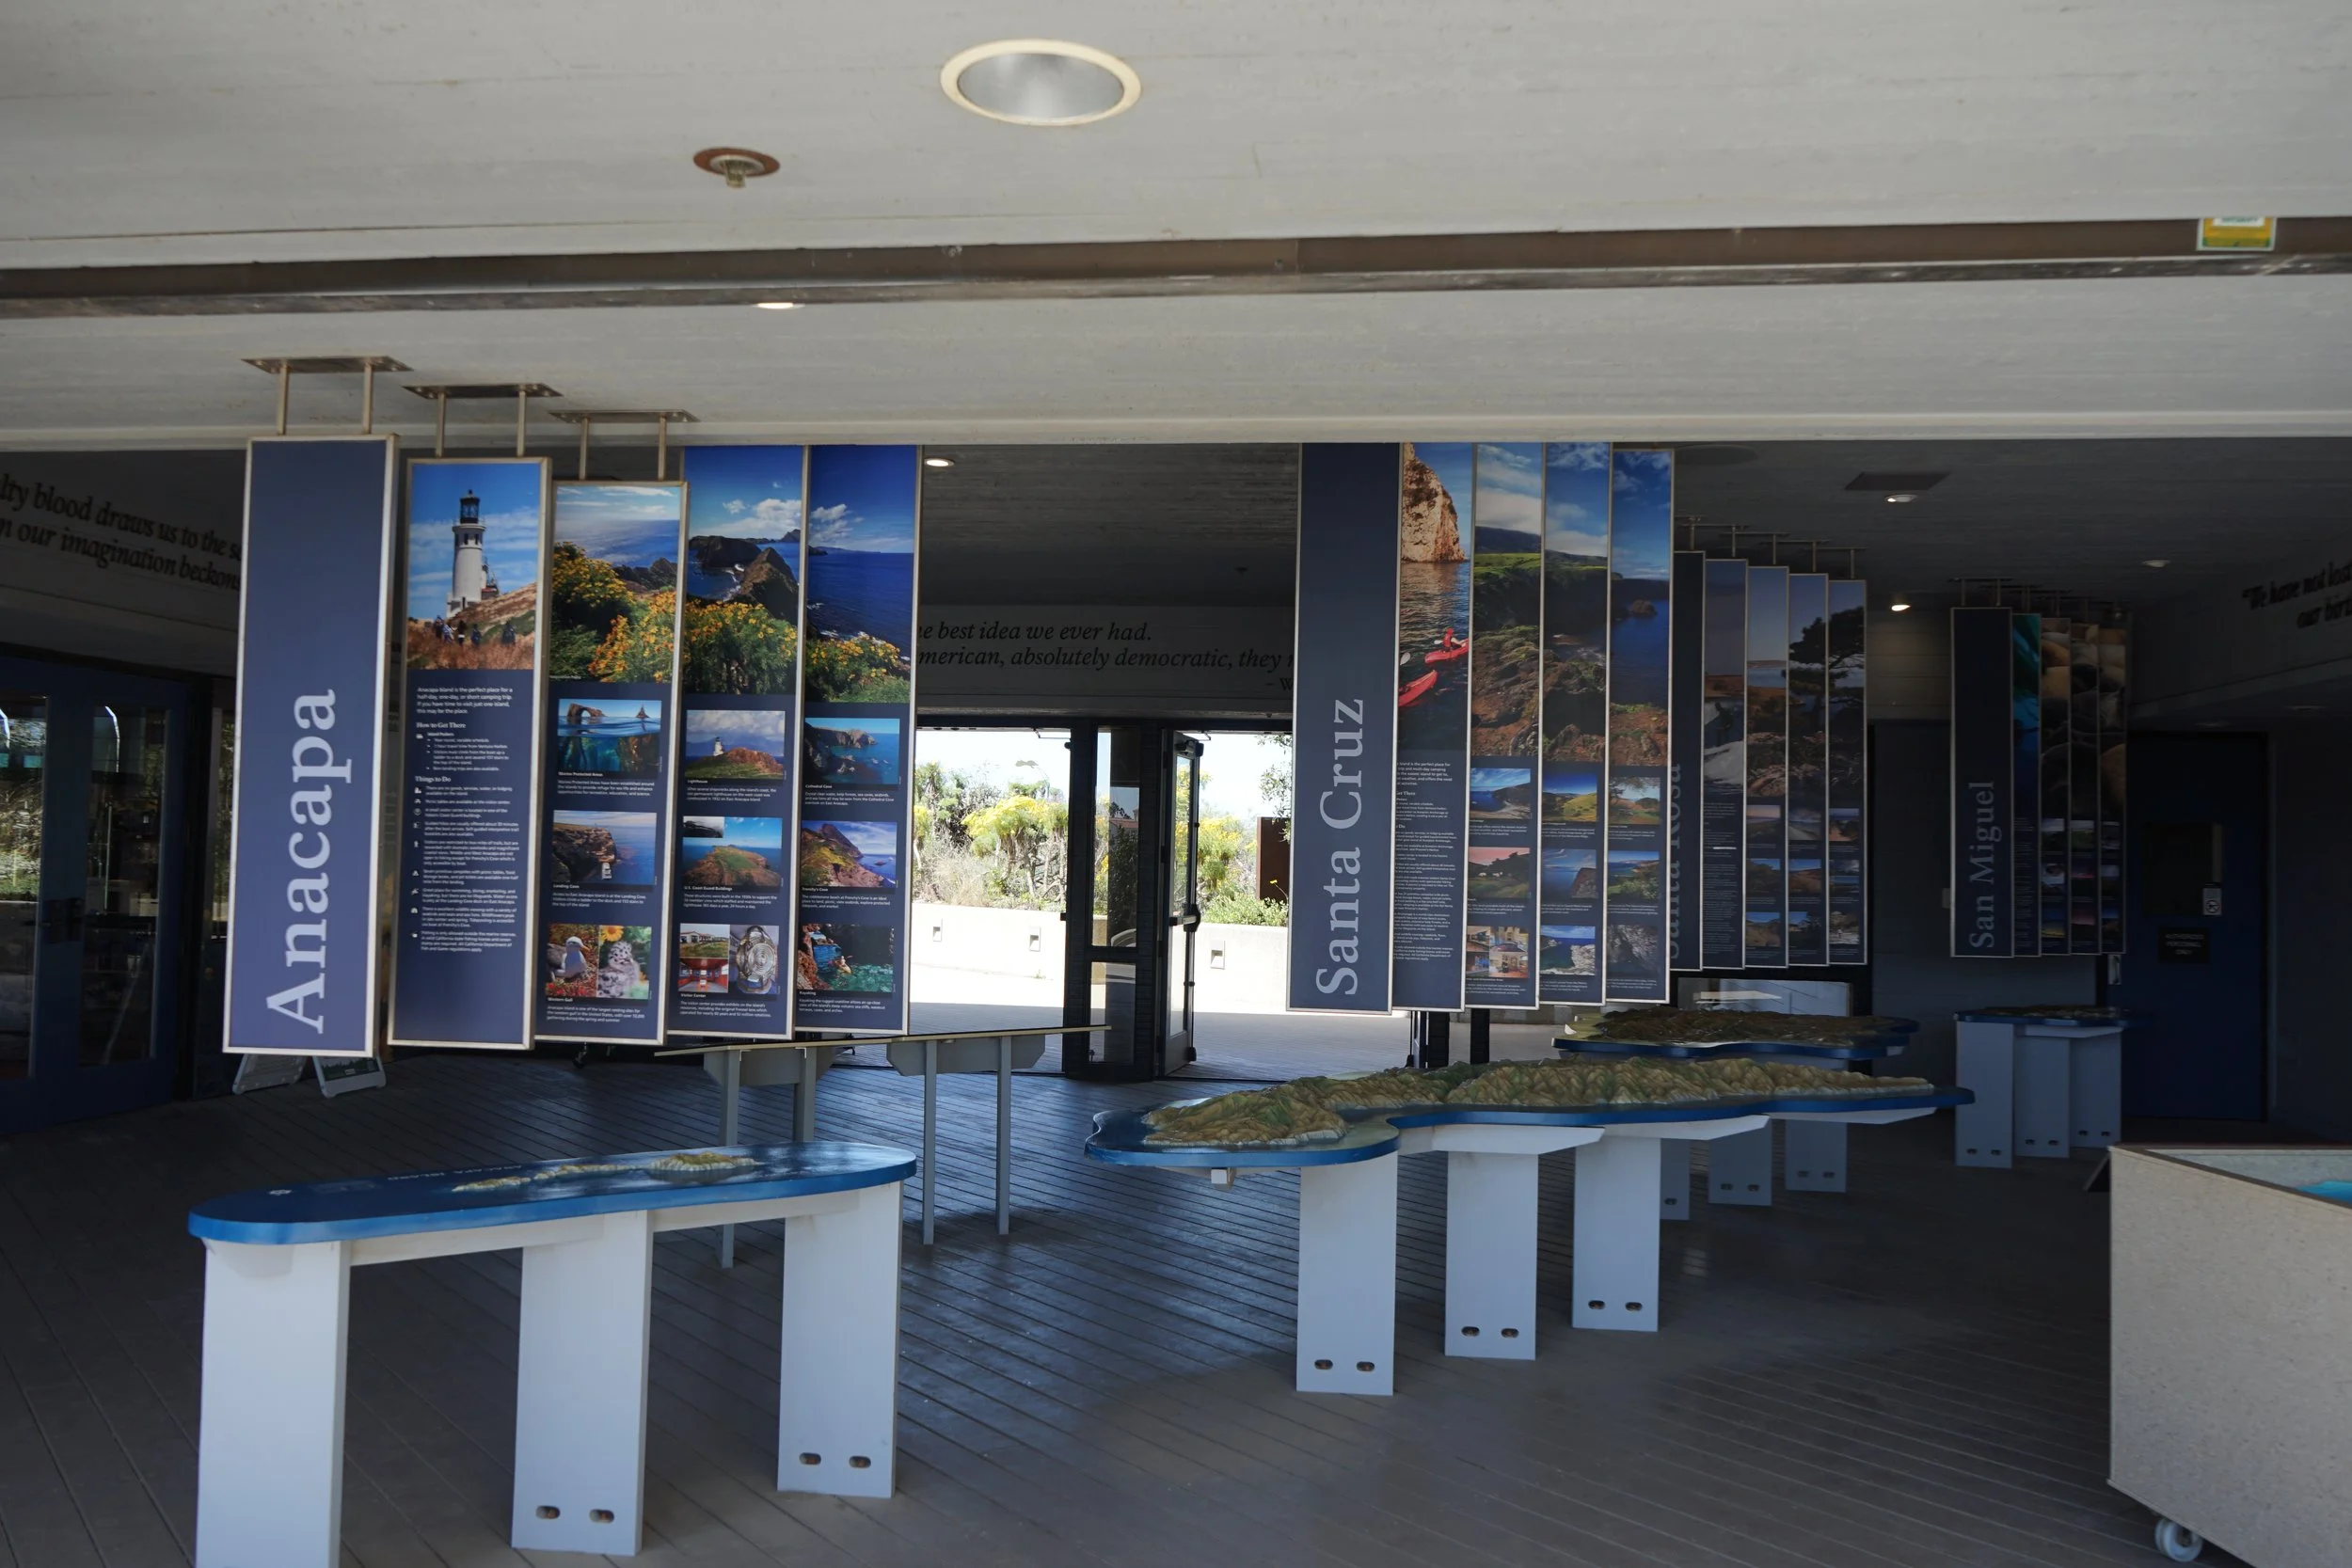
A Window Into the Islands
The visitor center sits right along the harbor. It’s not flashy, but it’s thoughtfully done. Inside, I walked through the exhibits—displays on the island ecosystems, native wildlife, and the layered human history of the place. I didn’t rush. It felt like the kind of place that invites quiet observation.
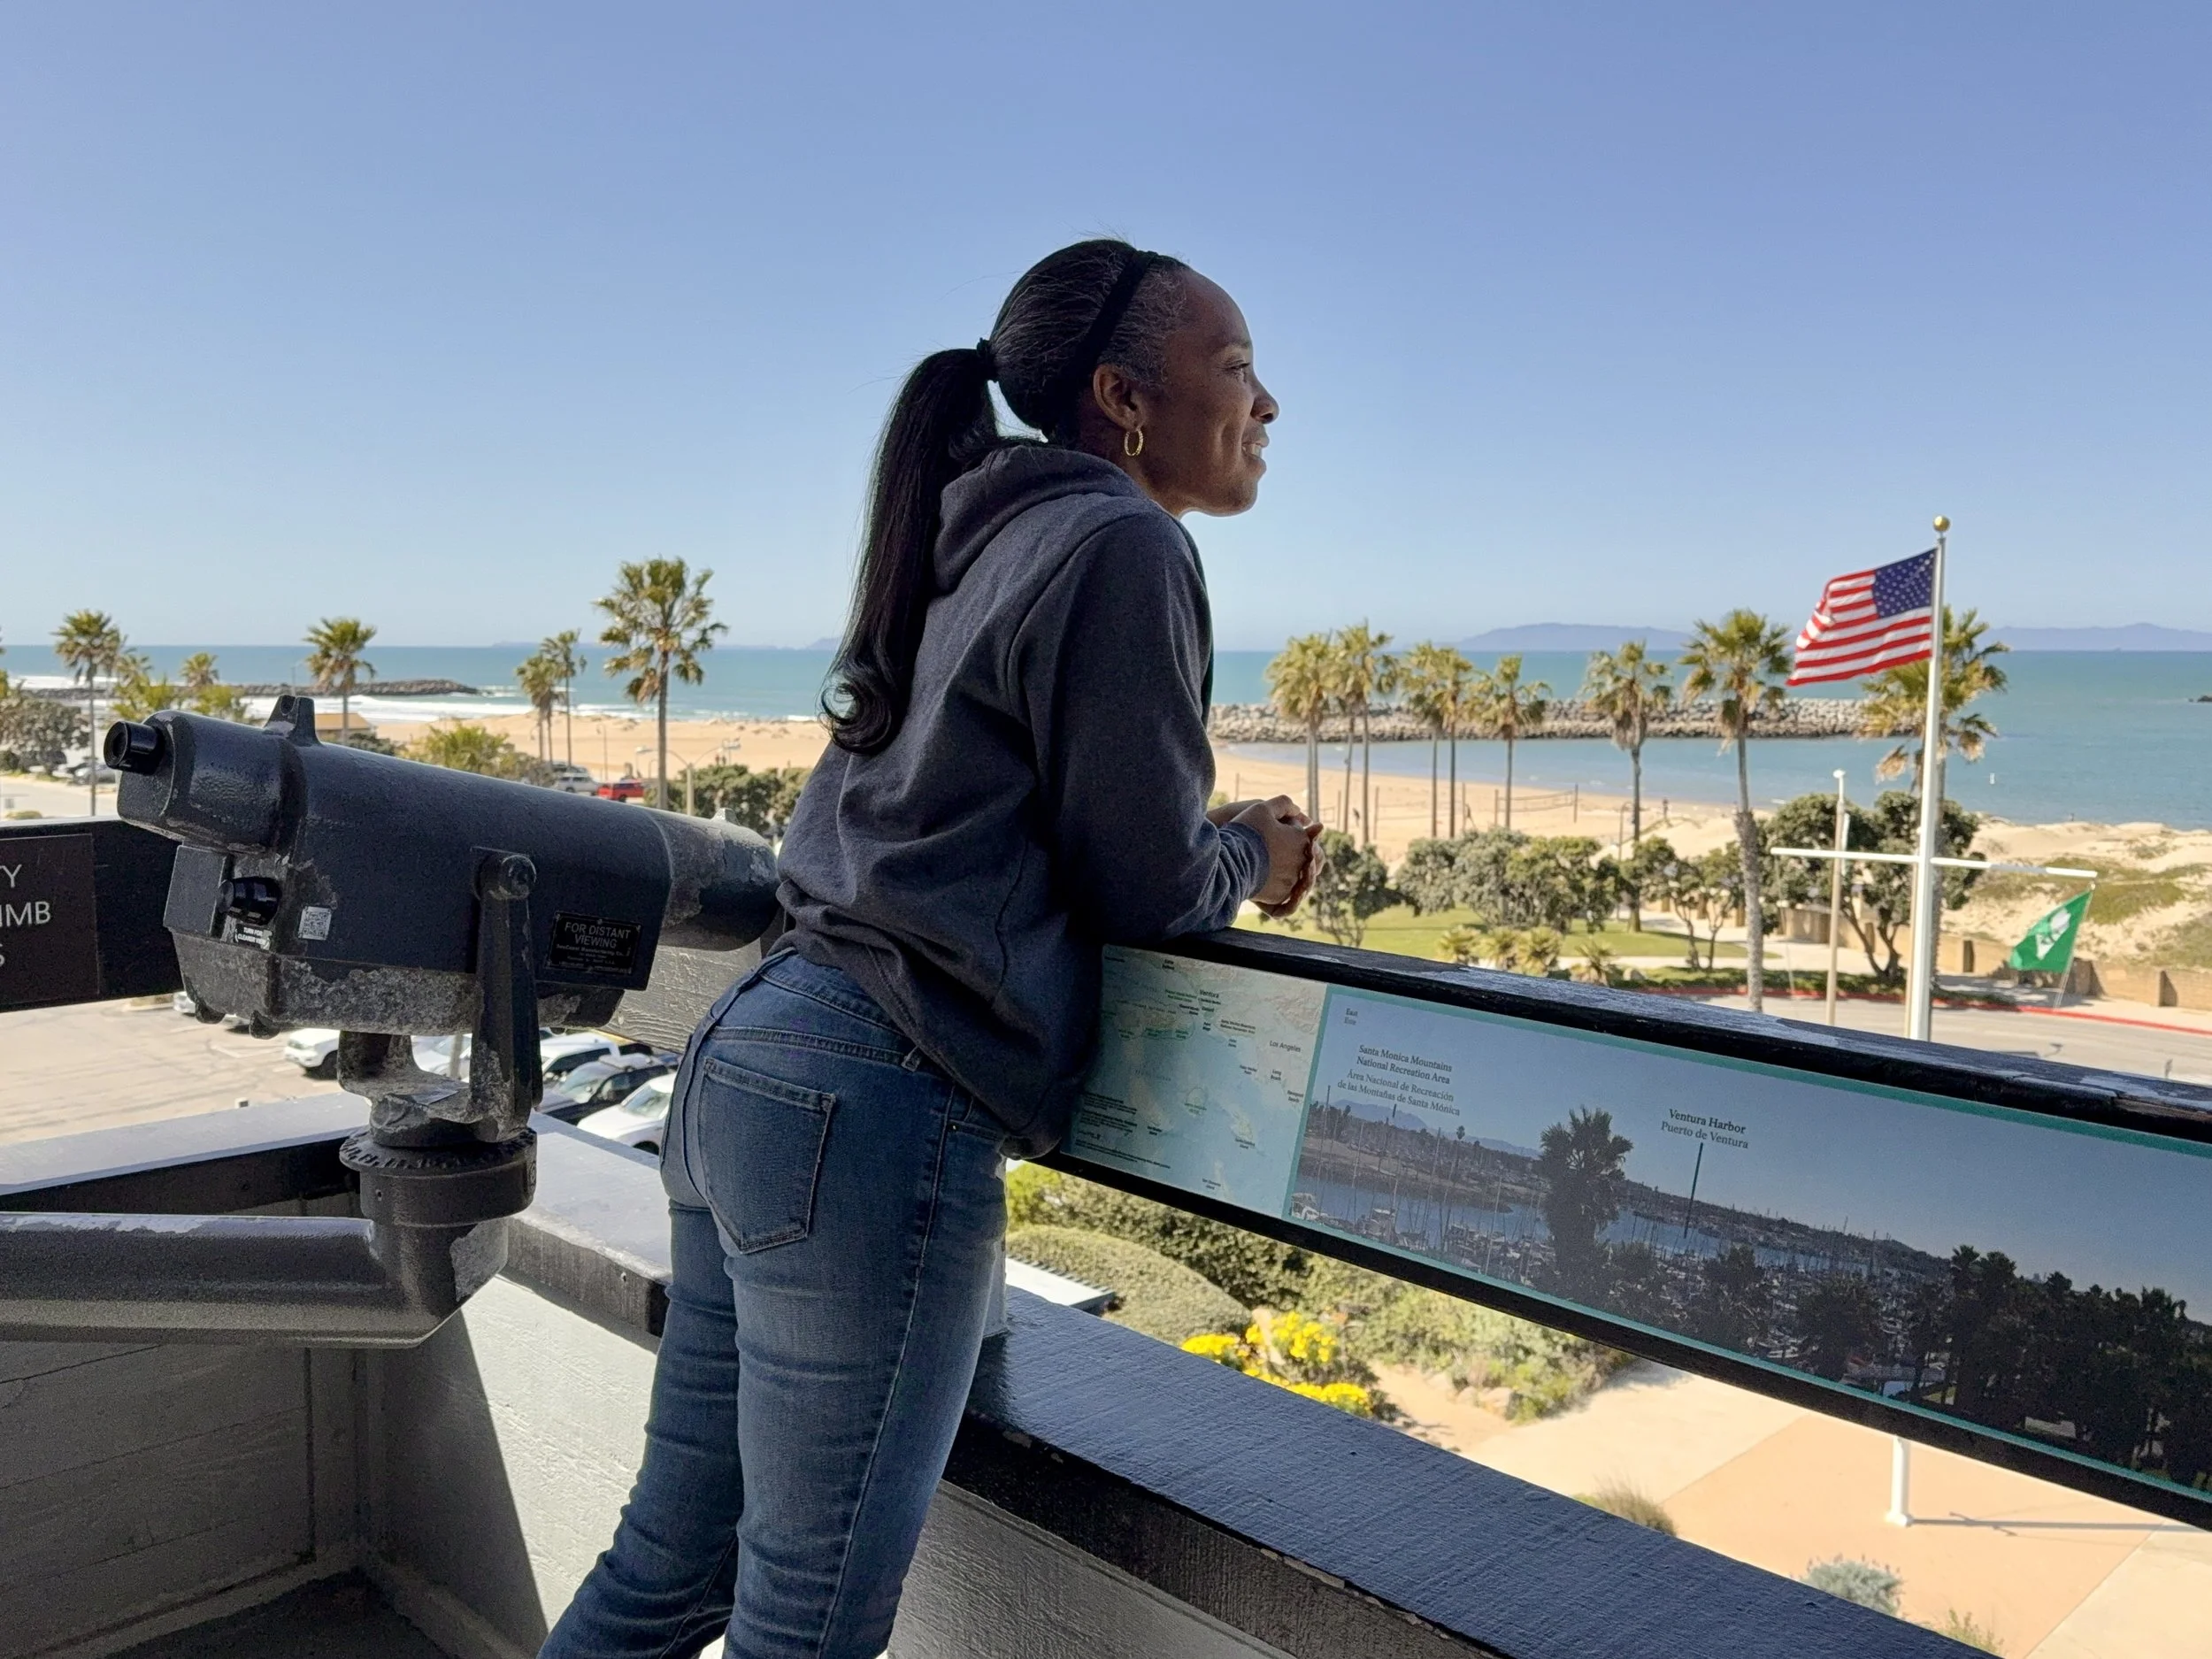
Afterwards, I climbed the observation tower out back. It was a clear day, and from the top, I could see the outlines of Anacapa and Santa Cruz Island stretching across the water. I stood there for a while, taking photos and letting my mind wander toward all the things I didn’t get to do—but still could, next time.
A Park Made of Distance
Channel Islands National Park protects five islands: Santa Cruz, Anacapa, Santa Rosa, San Miguel, and Santa Barbara. Though just off the coast of Southern California, they feel far more remote than they look. There are no roads, no stores, no conveniences. Once you’re out there, it’s just you and whatever you brought.
The islands are often called the “Galápagos of North America” thanks to the high number of species found nowhere else, including the island fox, a housecat-sized fox that only lives here.
Long before it became a park, the islands were home to the Chumash people, who traveled between them in wooden canoes. Archaeological finds here include some of the oldest human remains in North America. Ranchers came later. So did the military. It wasn’t until 1980 that the park was officially established, and even then, it remained one of the least visited in the system—partly because of how difficult it is to reach, and partly because that difficulty is the entire point.
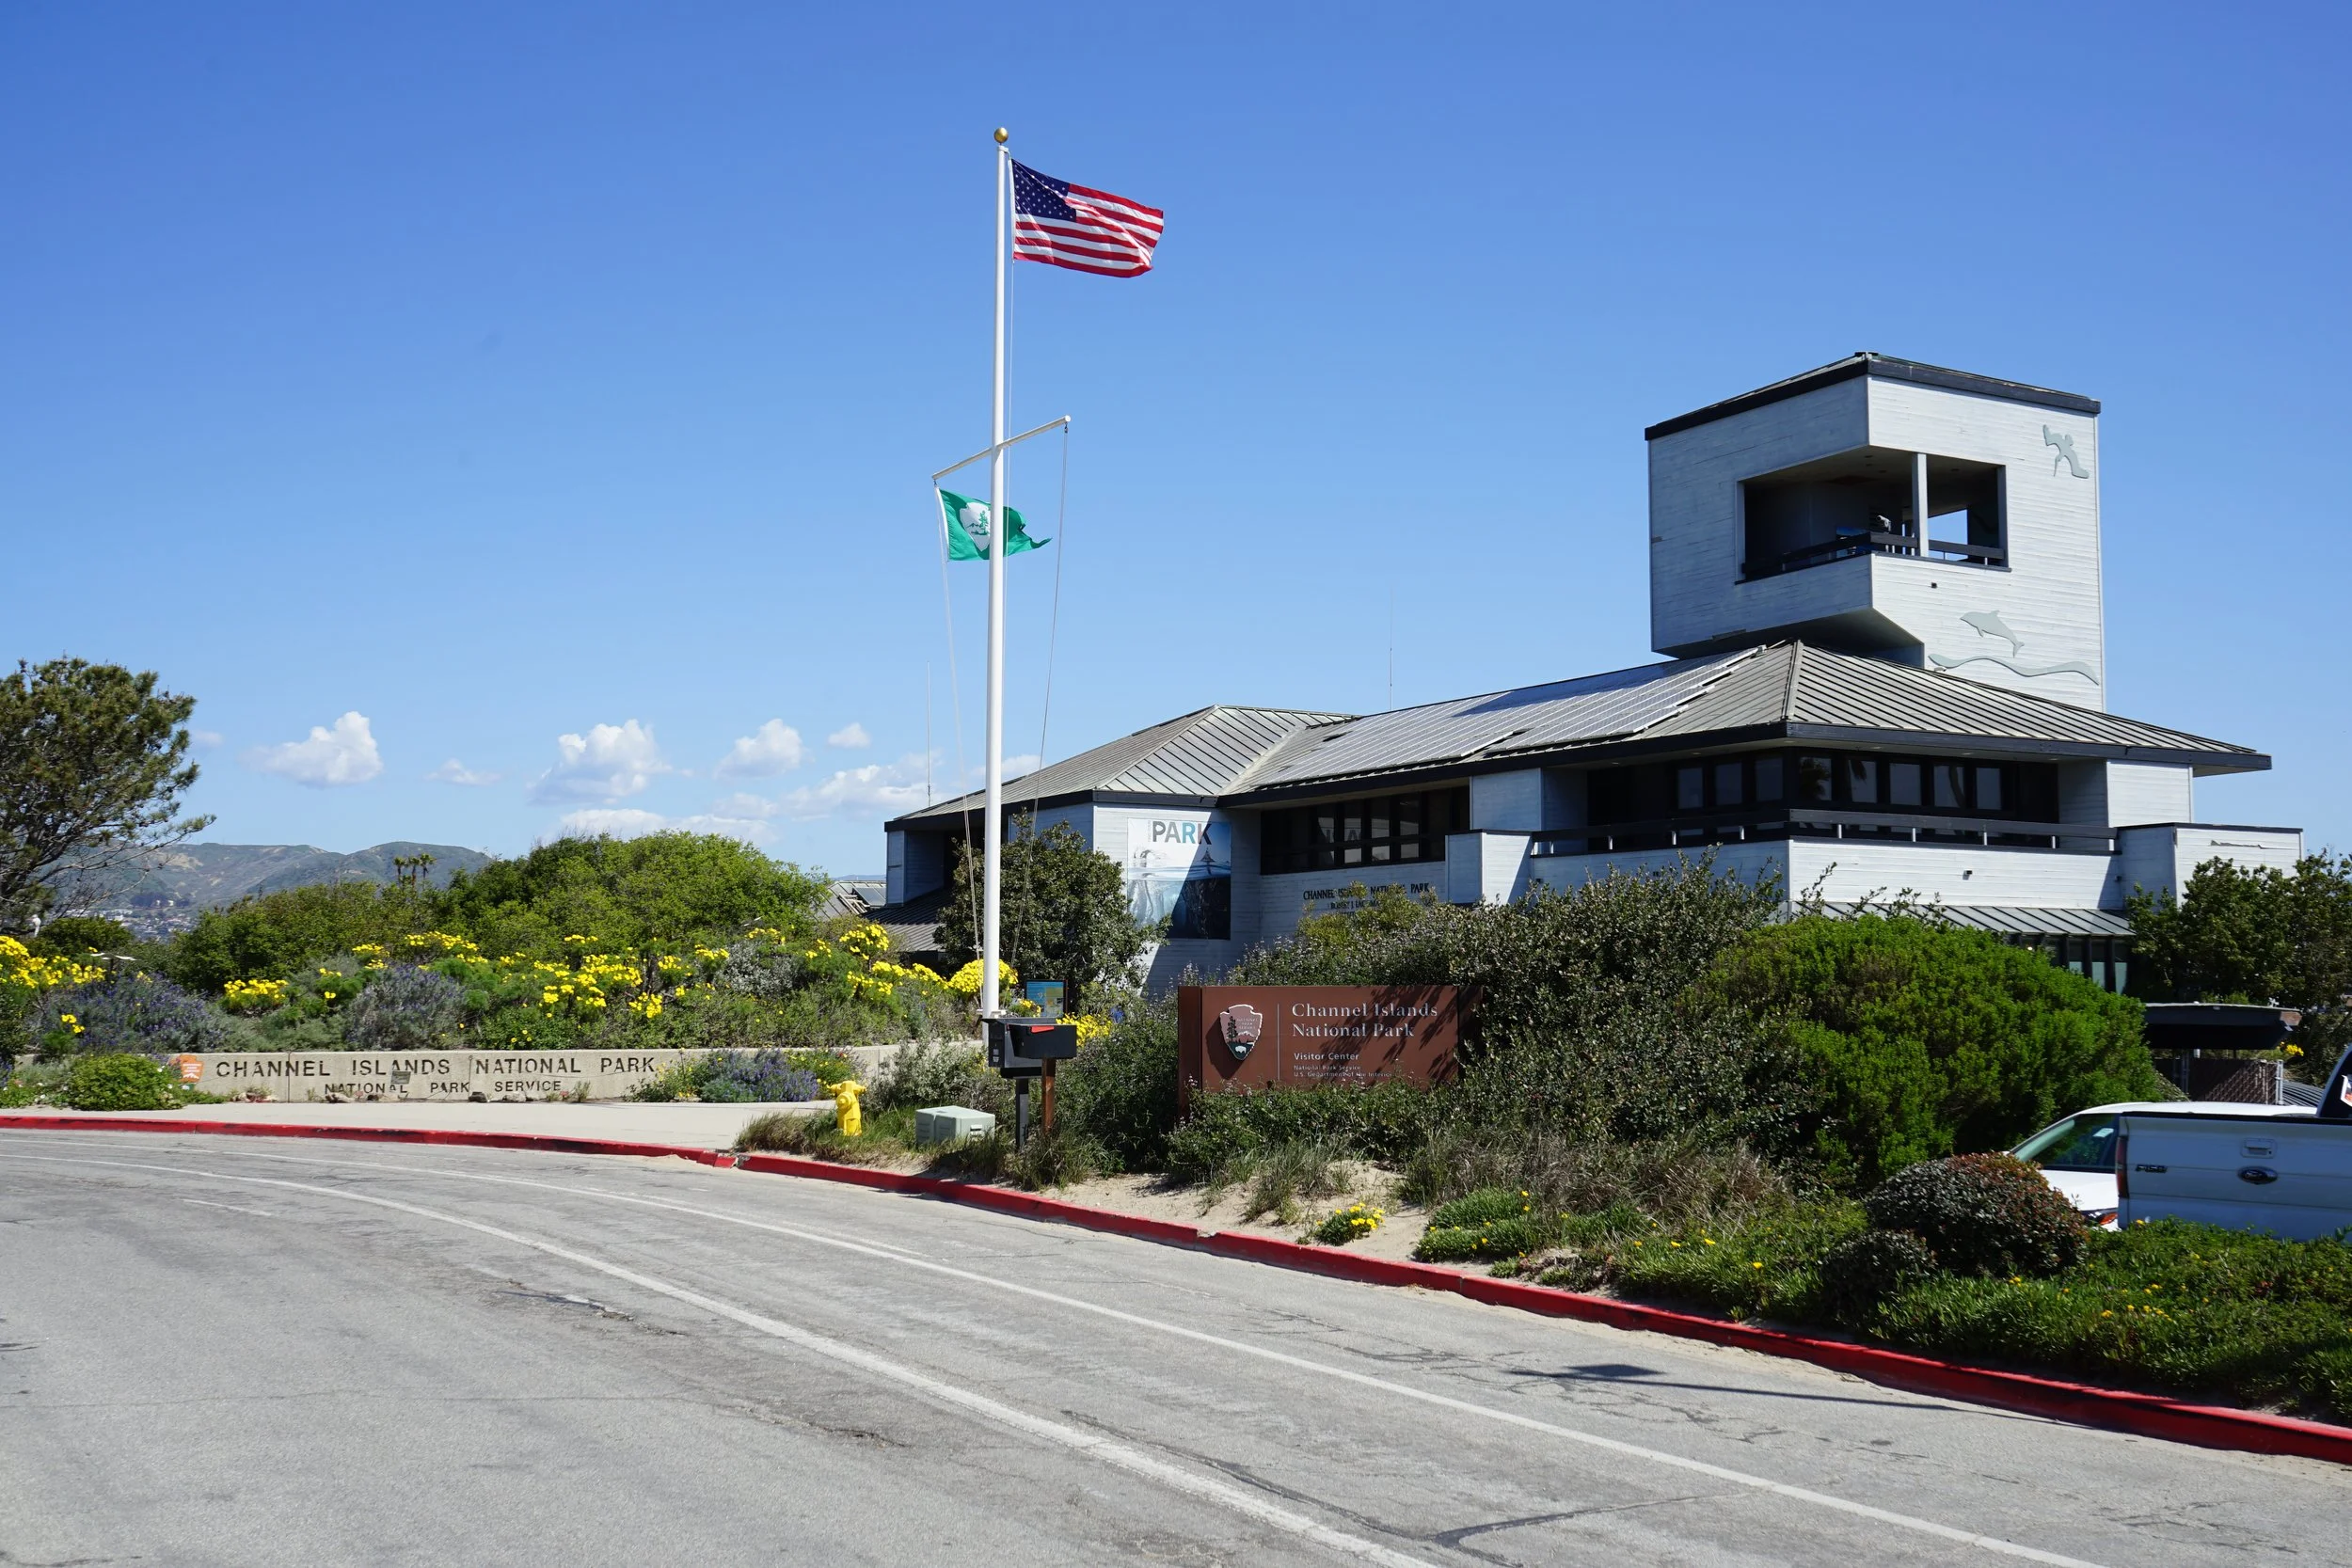
Channel Islands National Park Visitor Center
Location: 1901 Spinnaker Drive, Ventura, CA
Hours: 8:30 AM – 5:00 PM daily (closed Thanksgiving & Christmas)
Admission: Free
If you’re anywhere near Ventura and curious about the park—even if you don’t have time to catch a ferry—the visitor center is well worth a stop. It offers:
• Exhibits on wildlife, geology, and human history
• A large 3D model of the islands
• National Park Passport stamps
• Rangers available to answer questions or help with planning
• A small bookstore and gift shop
• A rooftop observation deck with views of the harbor and the islands on clear days
This is where I learned how the ferries work. It’s also where I stood on the deck and looked out toward where I’d hoped to be—and made a mental note to do it right next time.

How to Actually Visit the Islands
• Island Packers Cruises offers ferry service from Ventura and Oxnard.
• Boats run year-round to Santa Cruz and Anacapa, and seasonally to Santa Rosa, San Miguel, and Santa Barbara.
• Reservations are highly recommended (or, let’s be honest, necessary).
• There are no services on the islands—bring your own food, water, and gear, and pack out all trash.
What You’ll See Once You’re There
Trails & Views:
• Cavern Point Loop (Santa Cruz) – Short hike with panoramic coastal views
• Lighthouse Trail (Anacapa) – Walk along the cliffs to the historic lighthouse
• Scorpion Canyon Loop – Great chance to see island foxes
Activities:
• Sea cave kayaking
• Snorkeling in kelp forests
• Whale watching (gray whales in winter, blue whales in summer)
• Birding and tidepooling
Wildlife Highlights:
• Island foxes
• California sea lions and harbor seals
• Dolphins and whales
• Garibaldi fish, sea stars, sea urchins
• Bald eagles and nesting seabirds
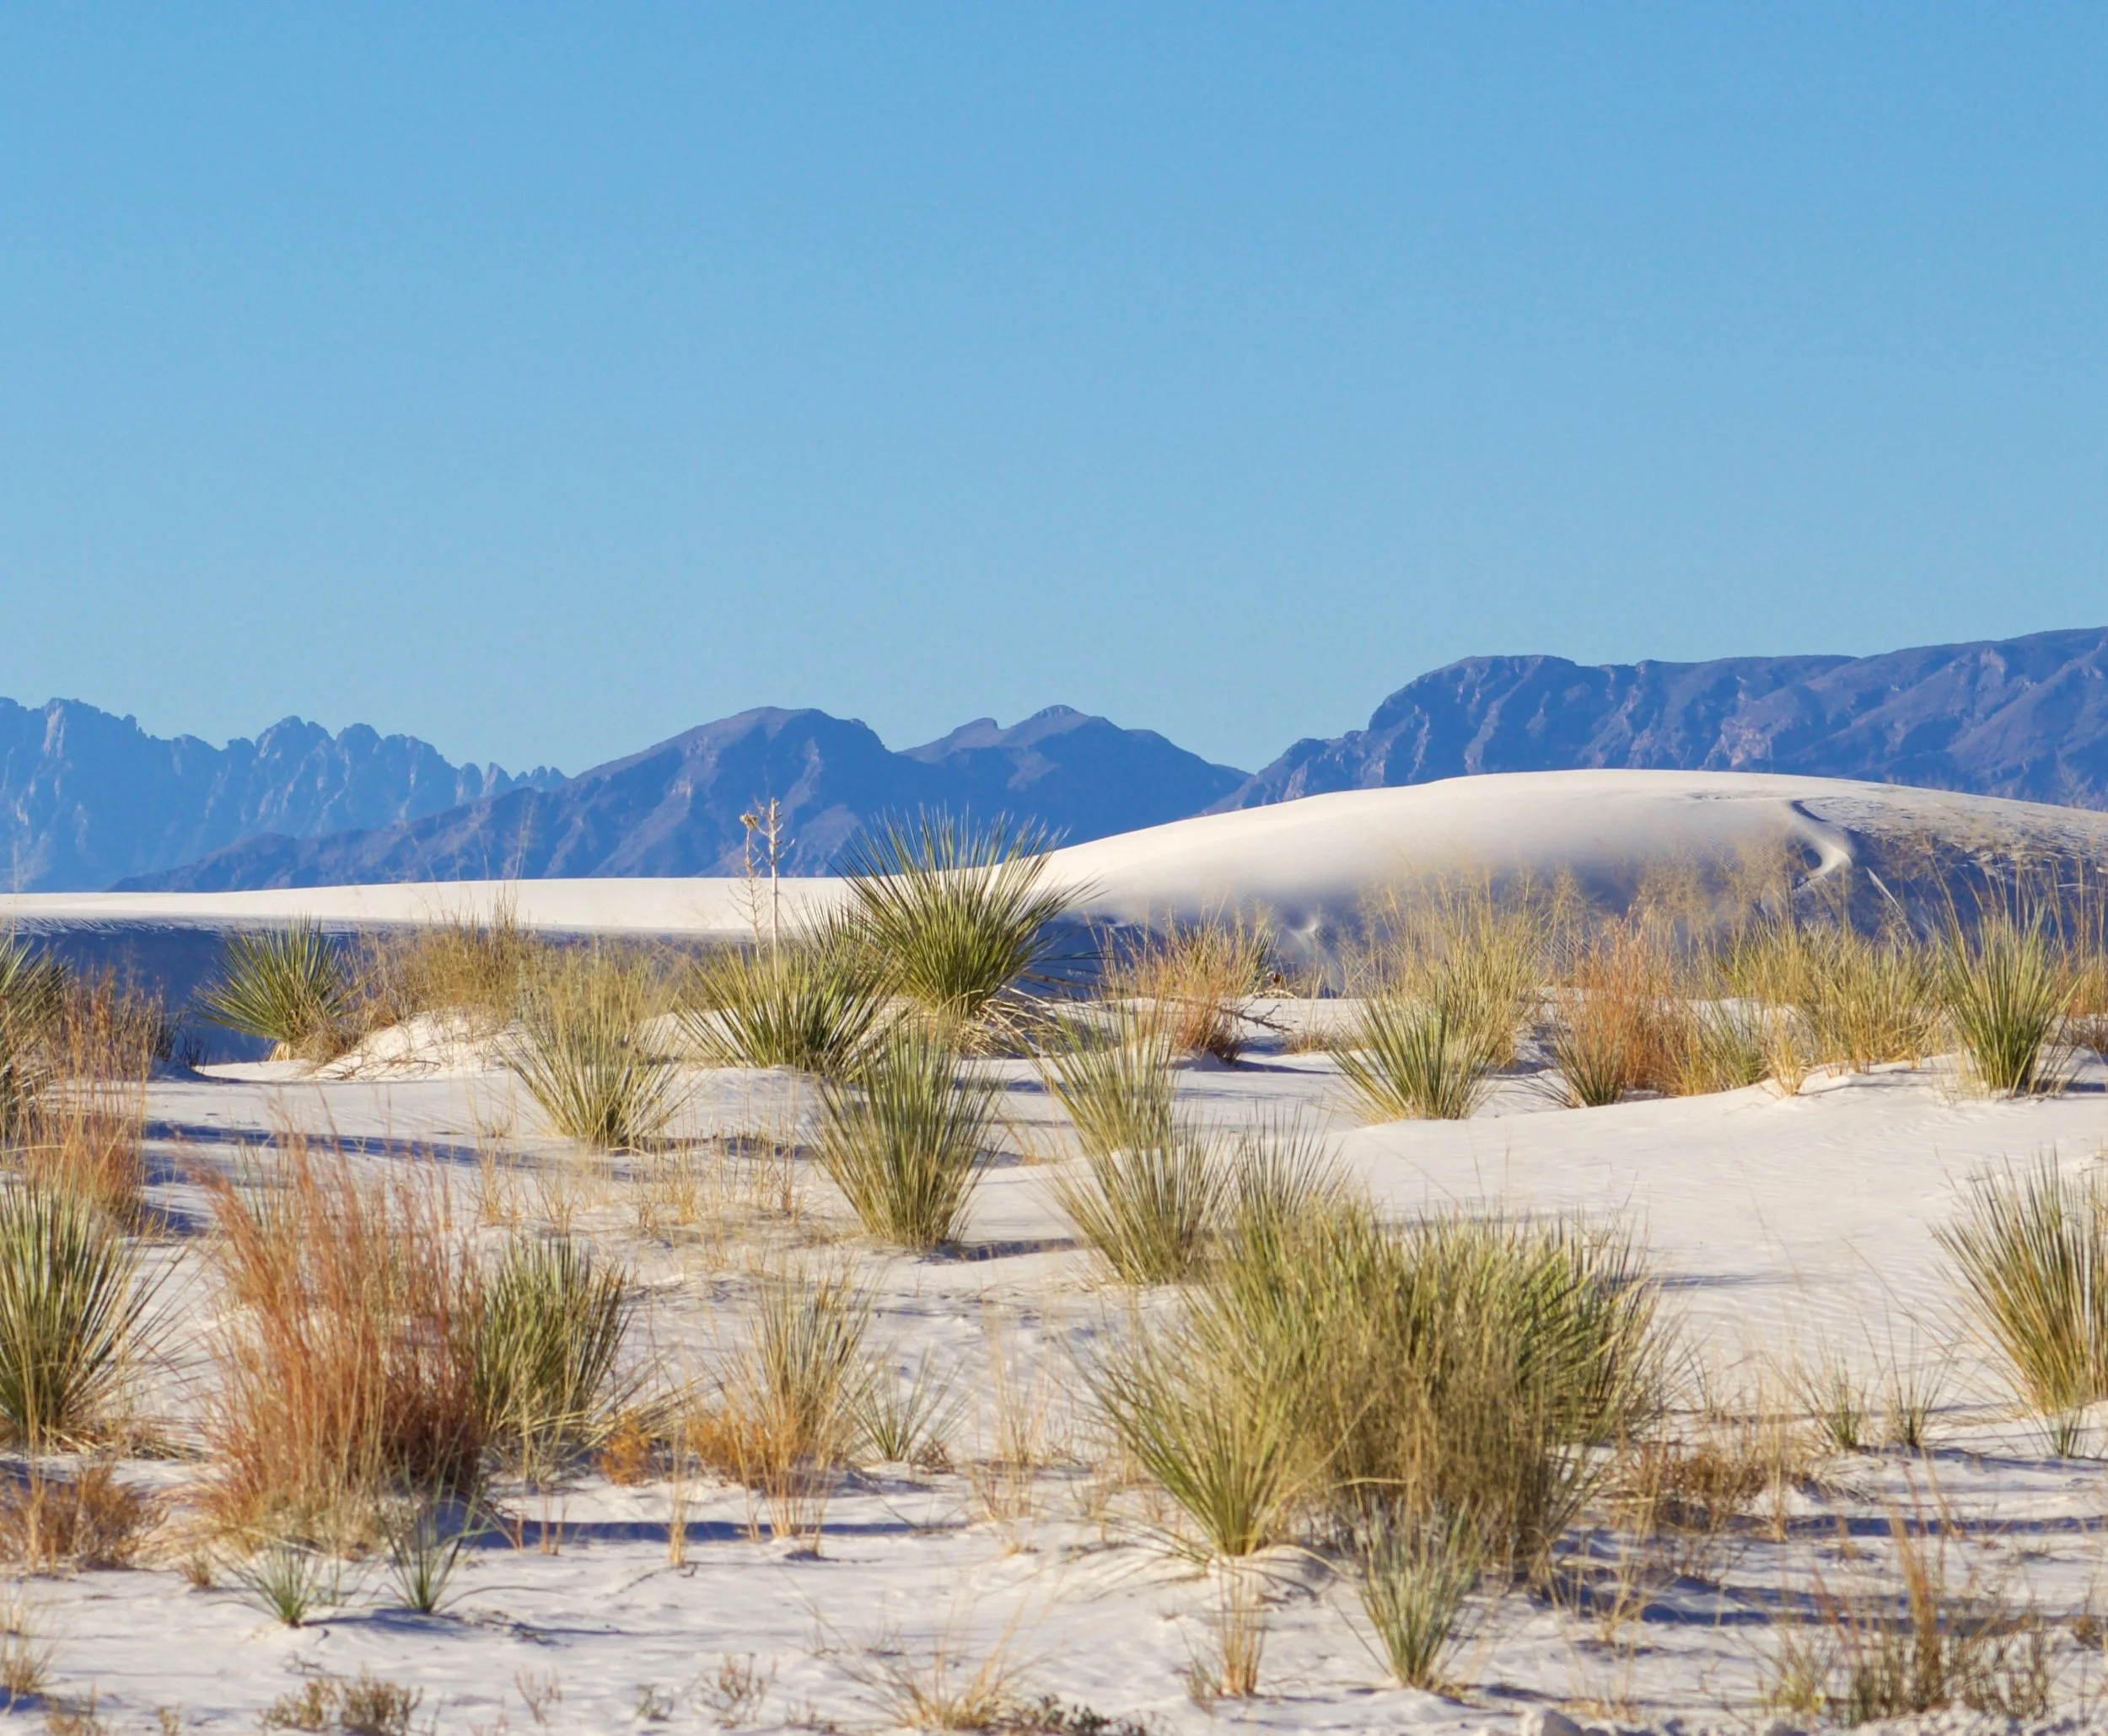
#25 White Sands National Park, New Mexico
Visiting White Sands National Park
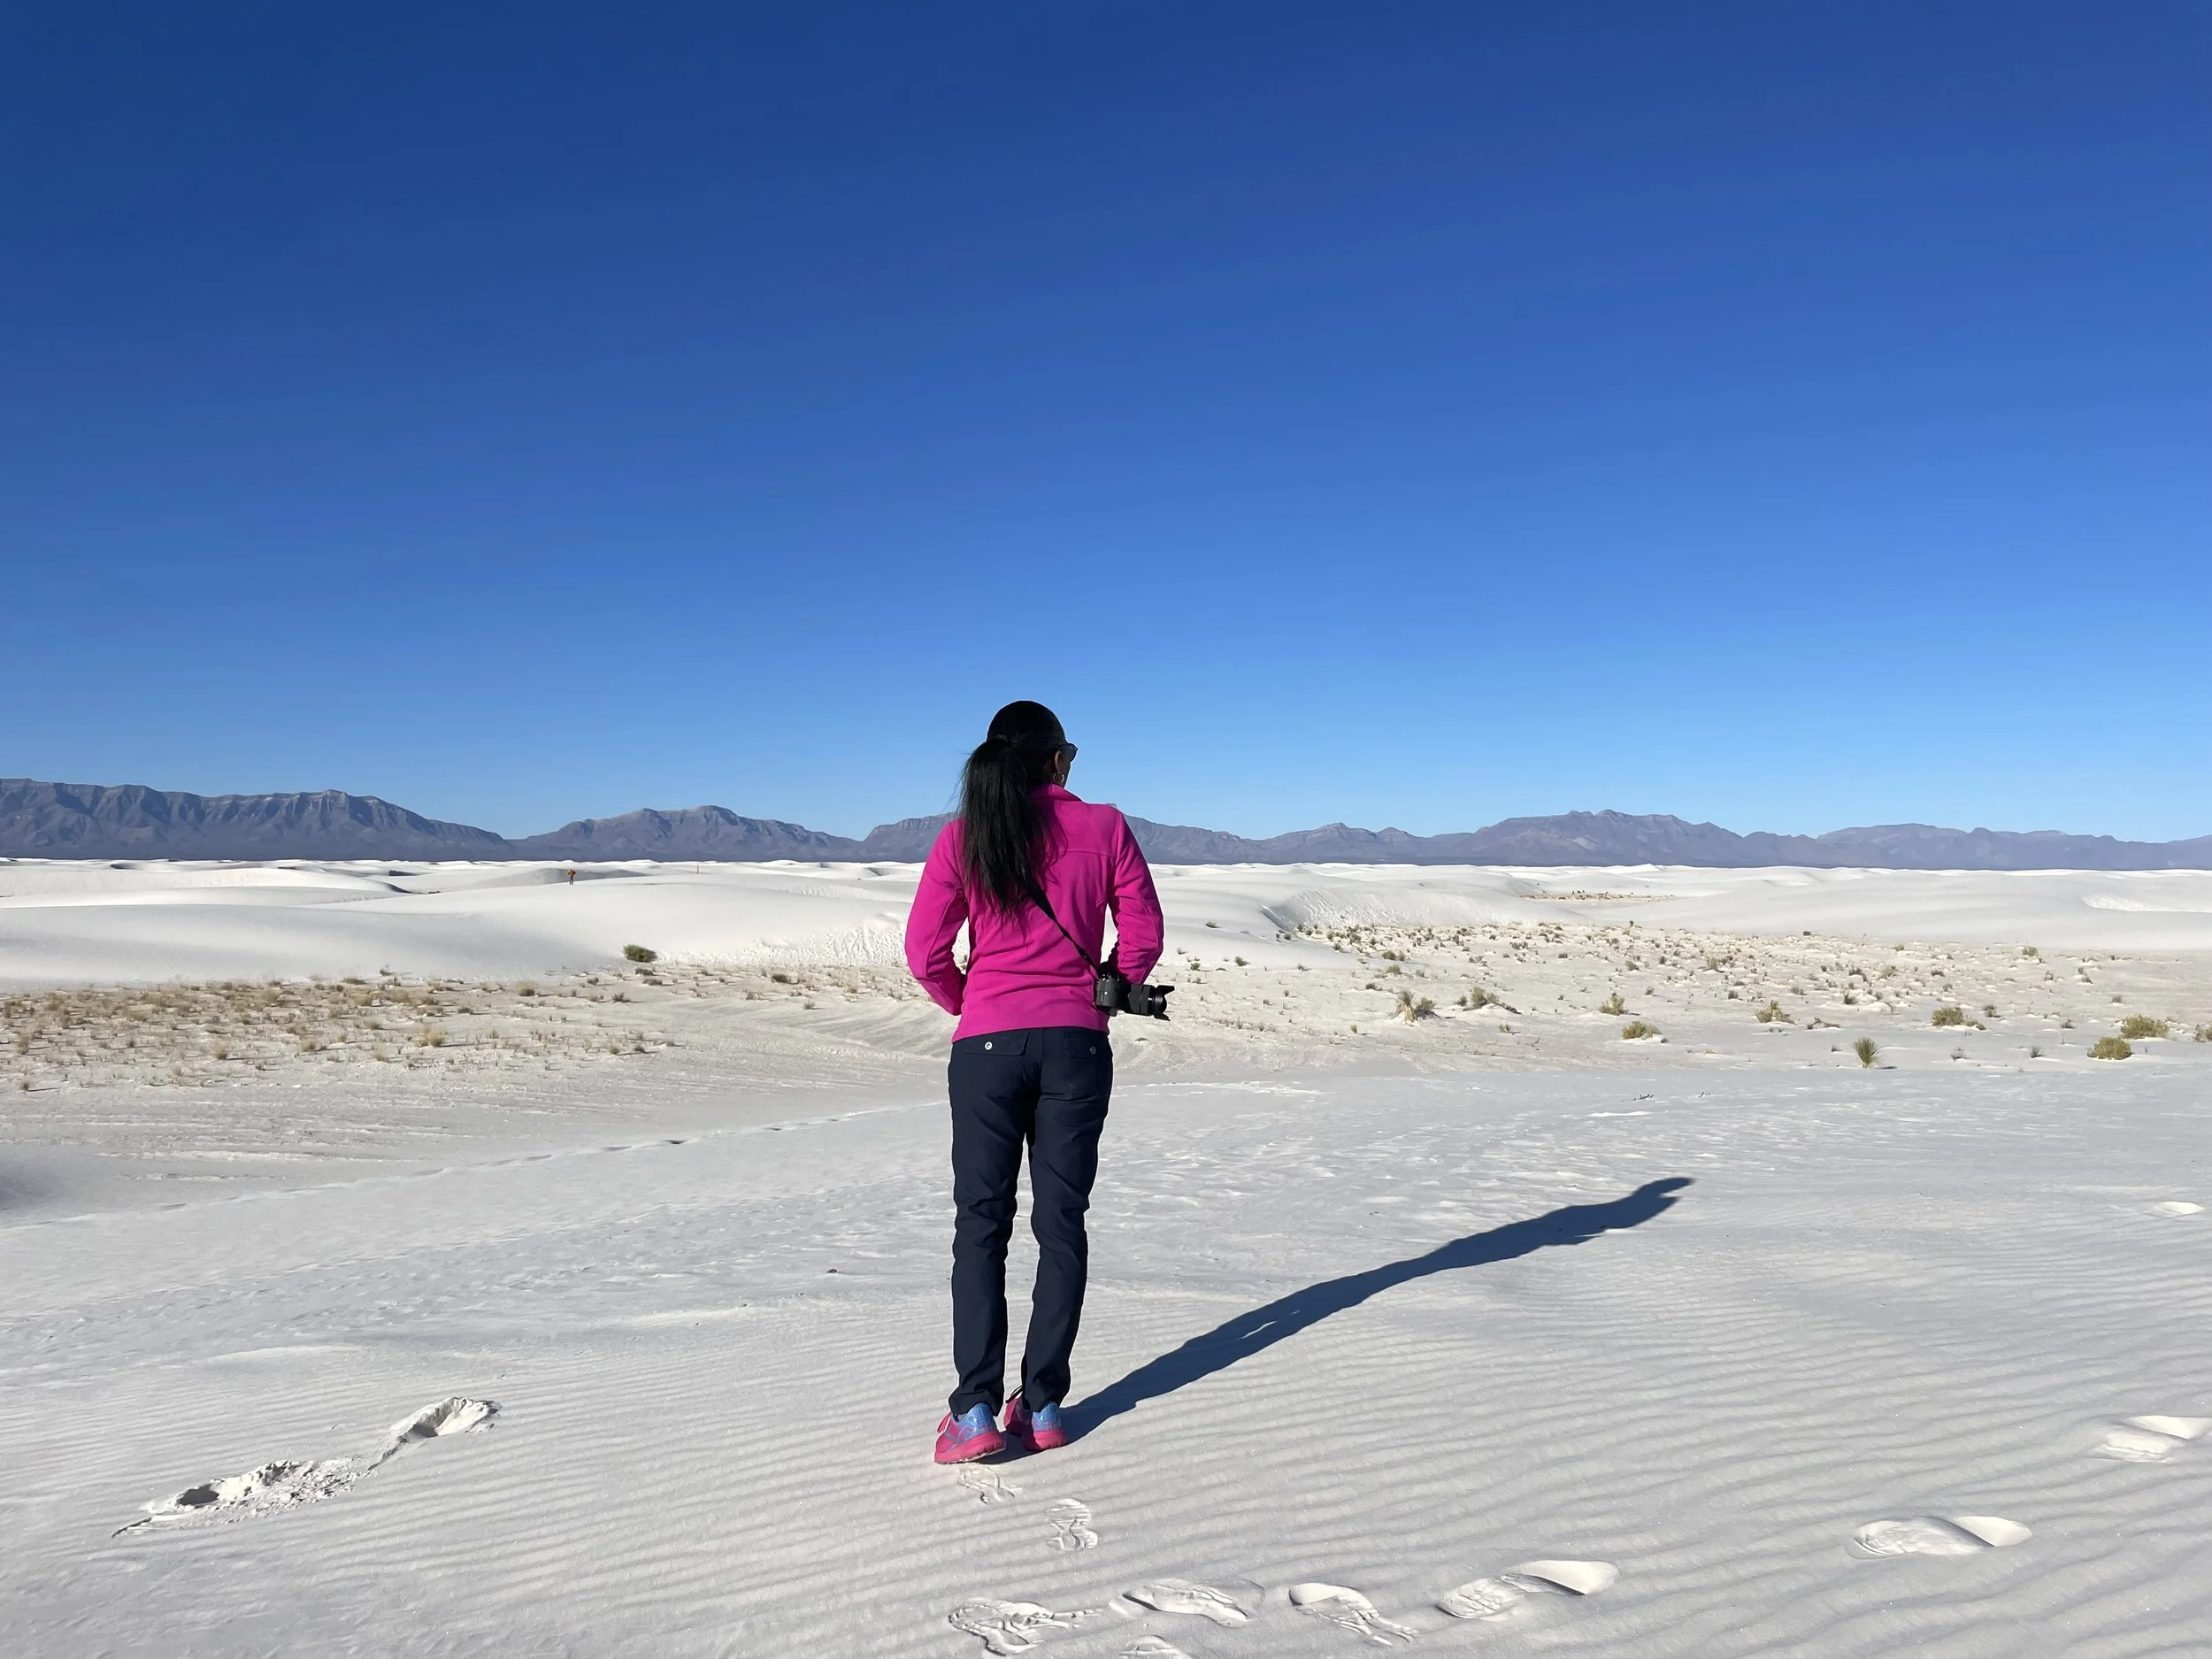
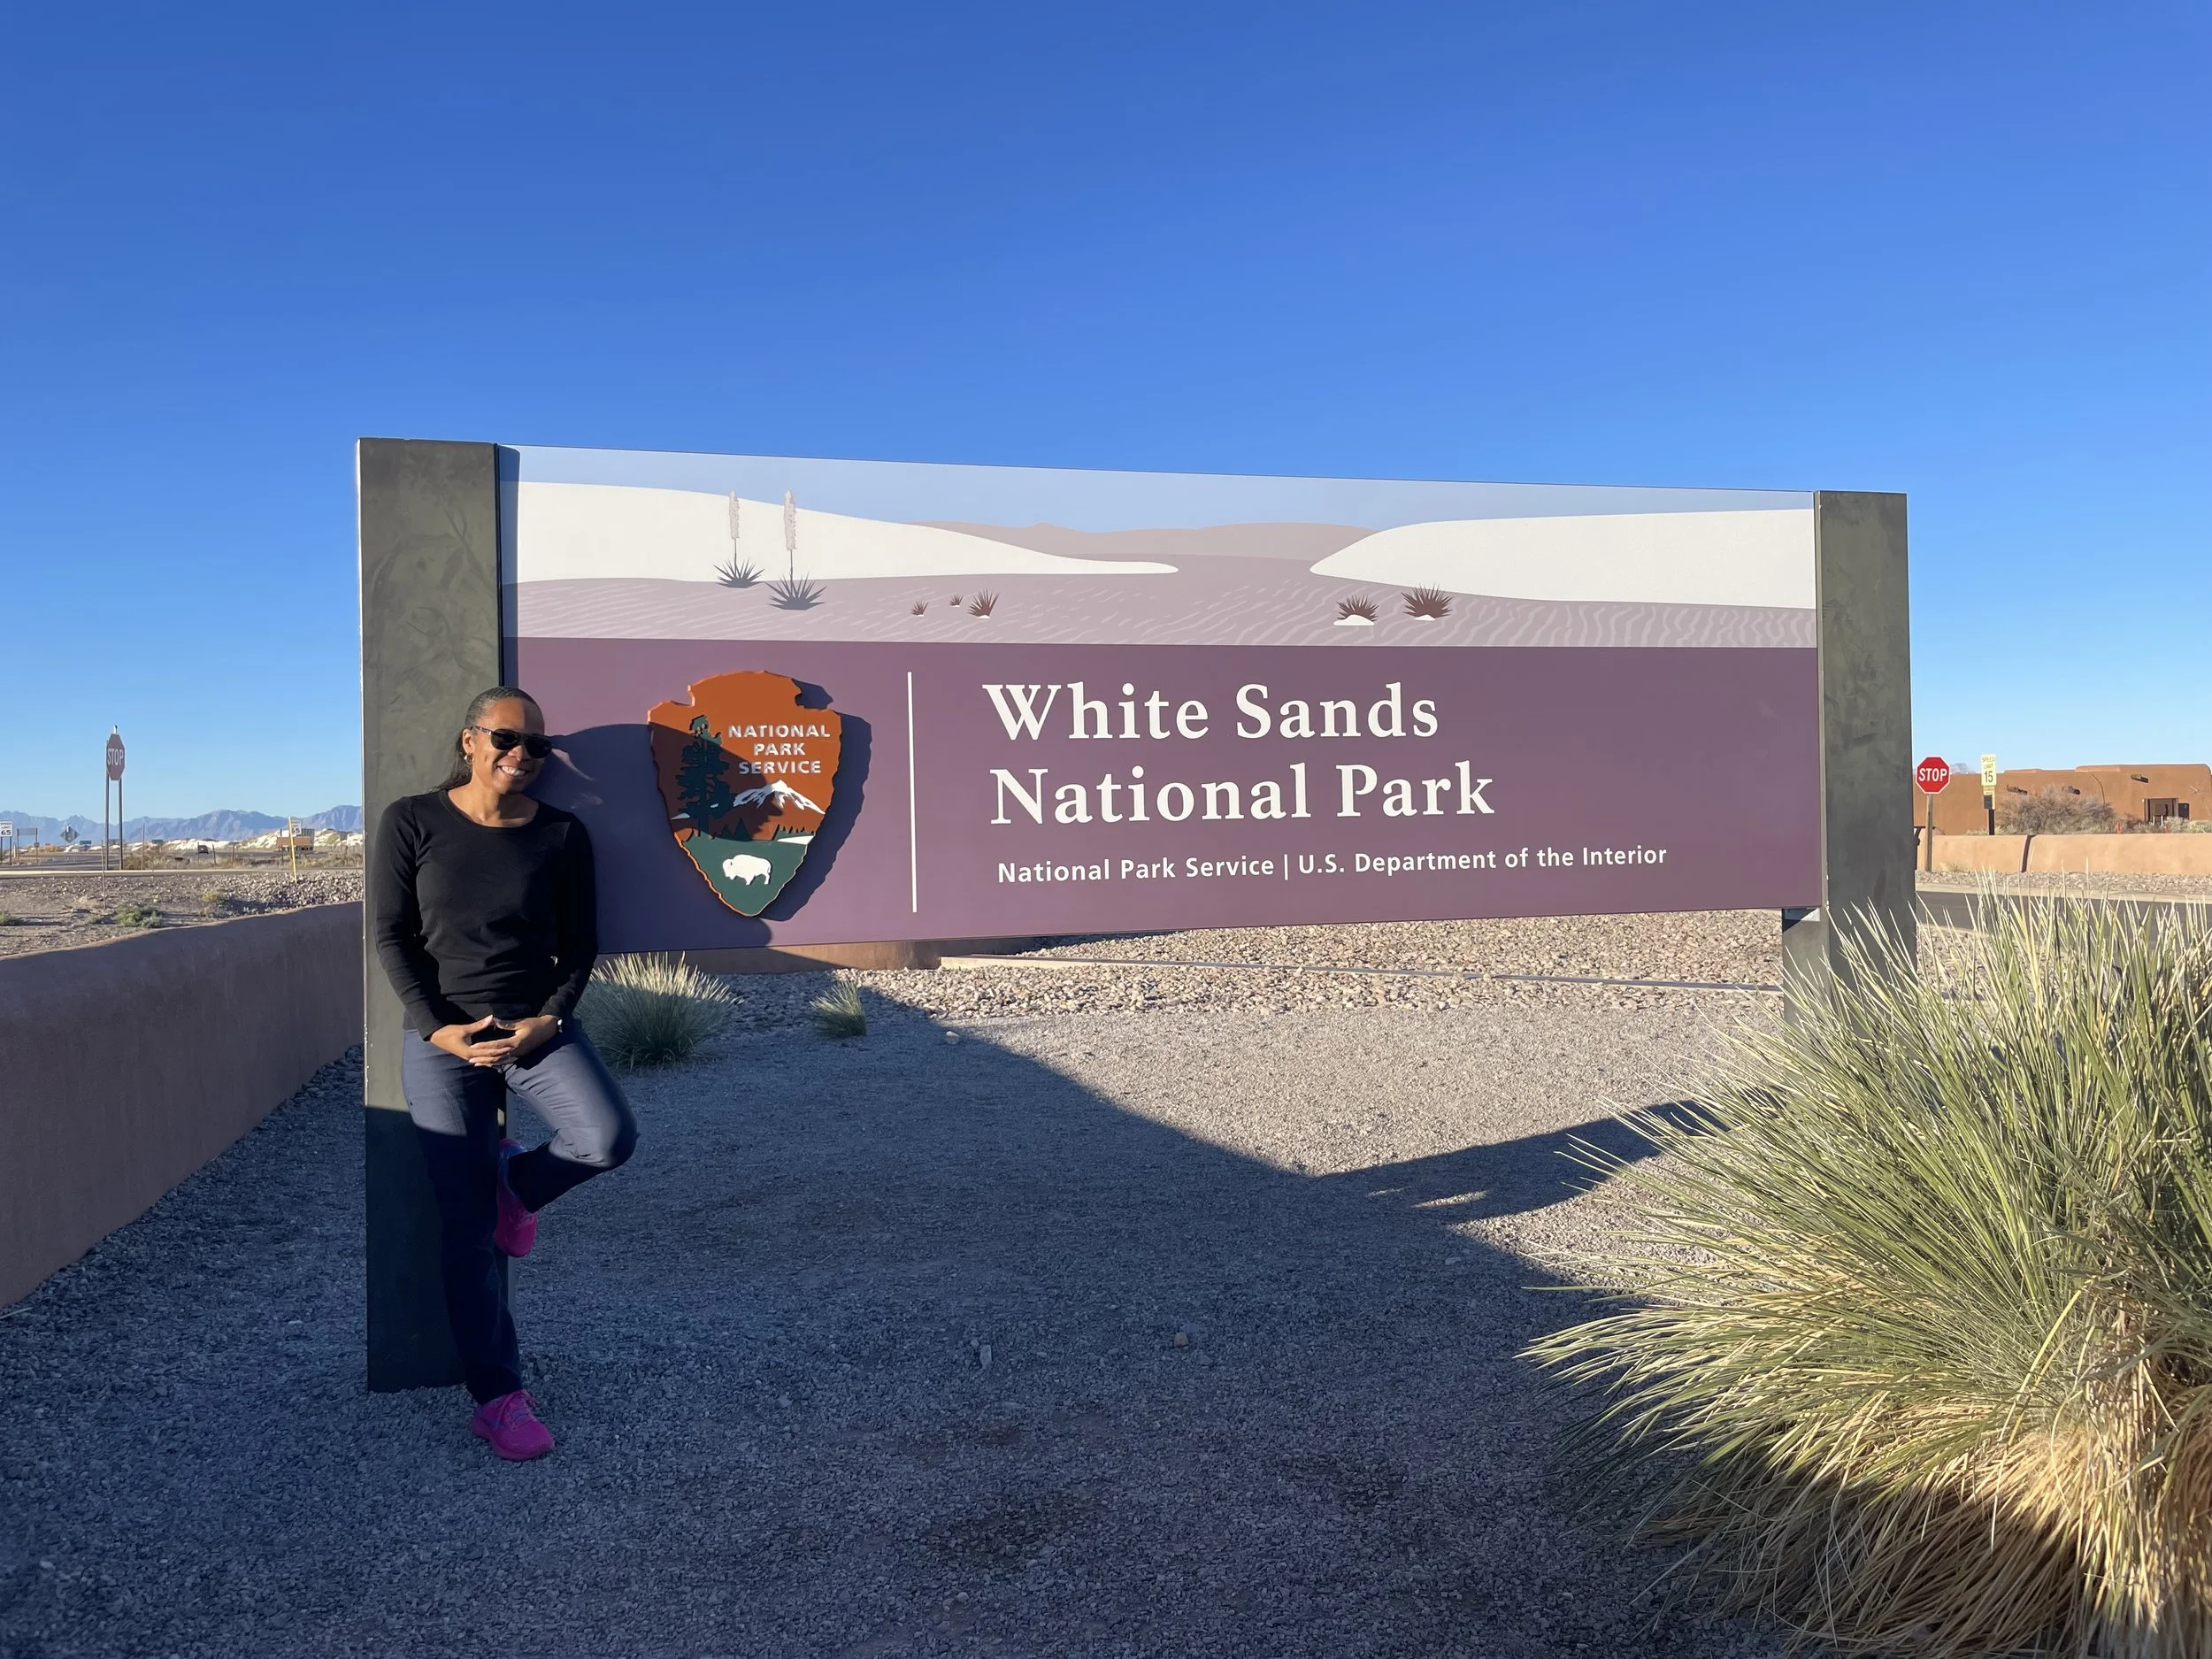
My journey to White Sands National Park began on a crisp November morning in El Paso, Texas, where I was staying. I drove the 95 miles south on US 54 E toward the park—a scenic trip that took about an hour and a half. I arrived early enough that the Visitor Center was still closed, so after snapping the obligatory photo in front of the iconic National Park sign, I ventured into the park on my own.
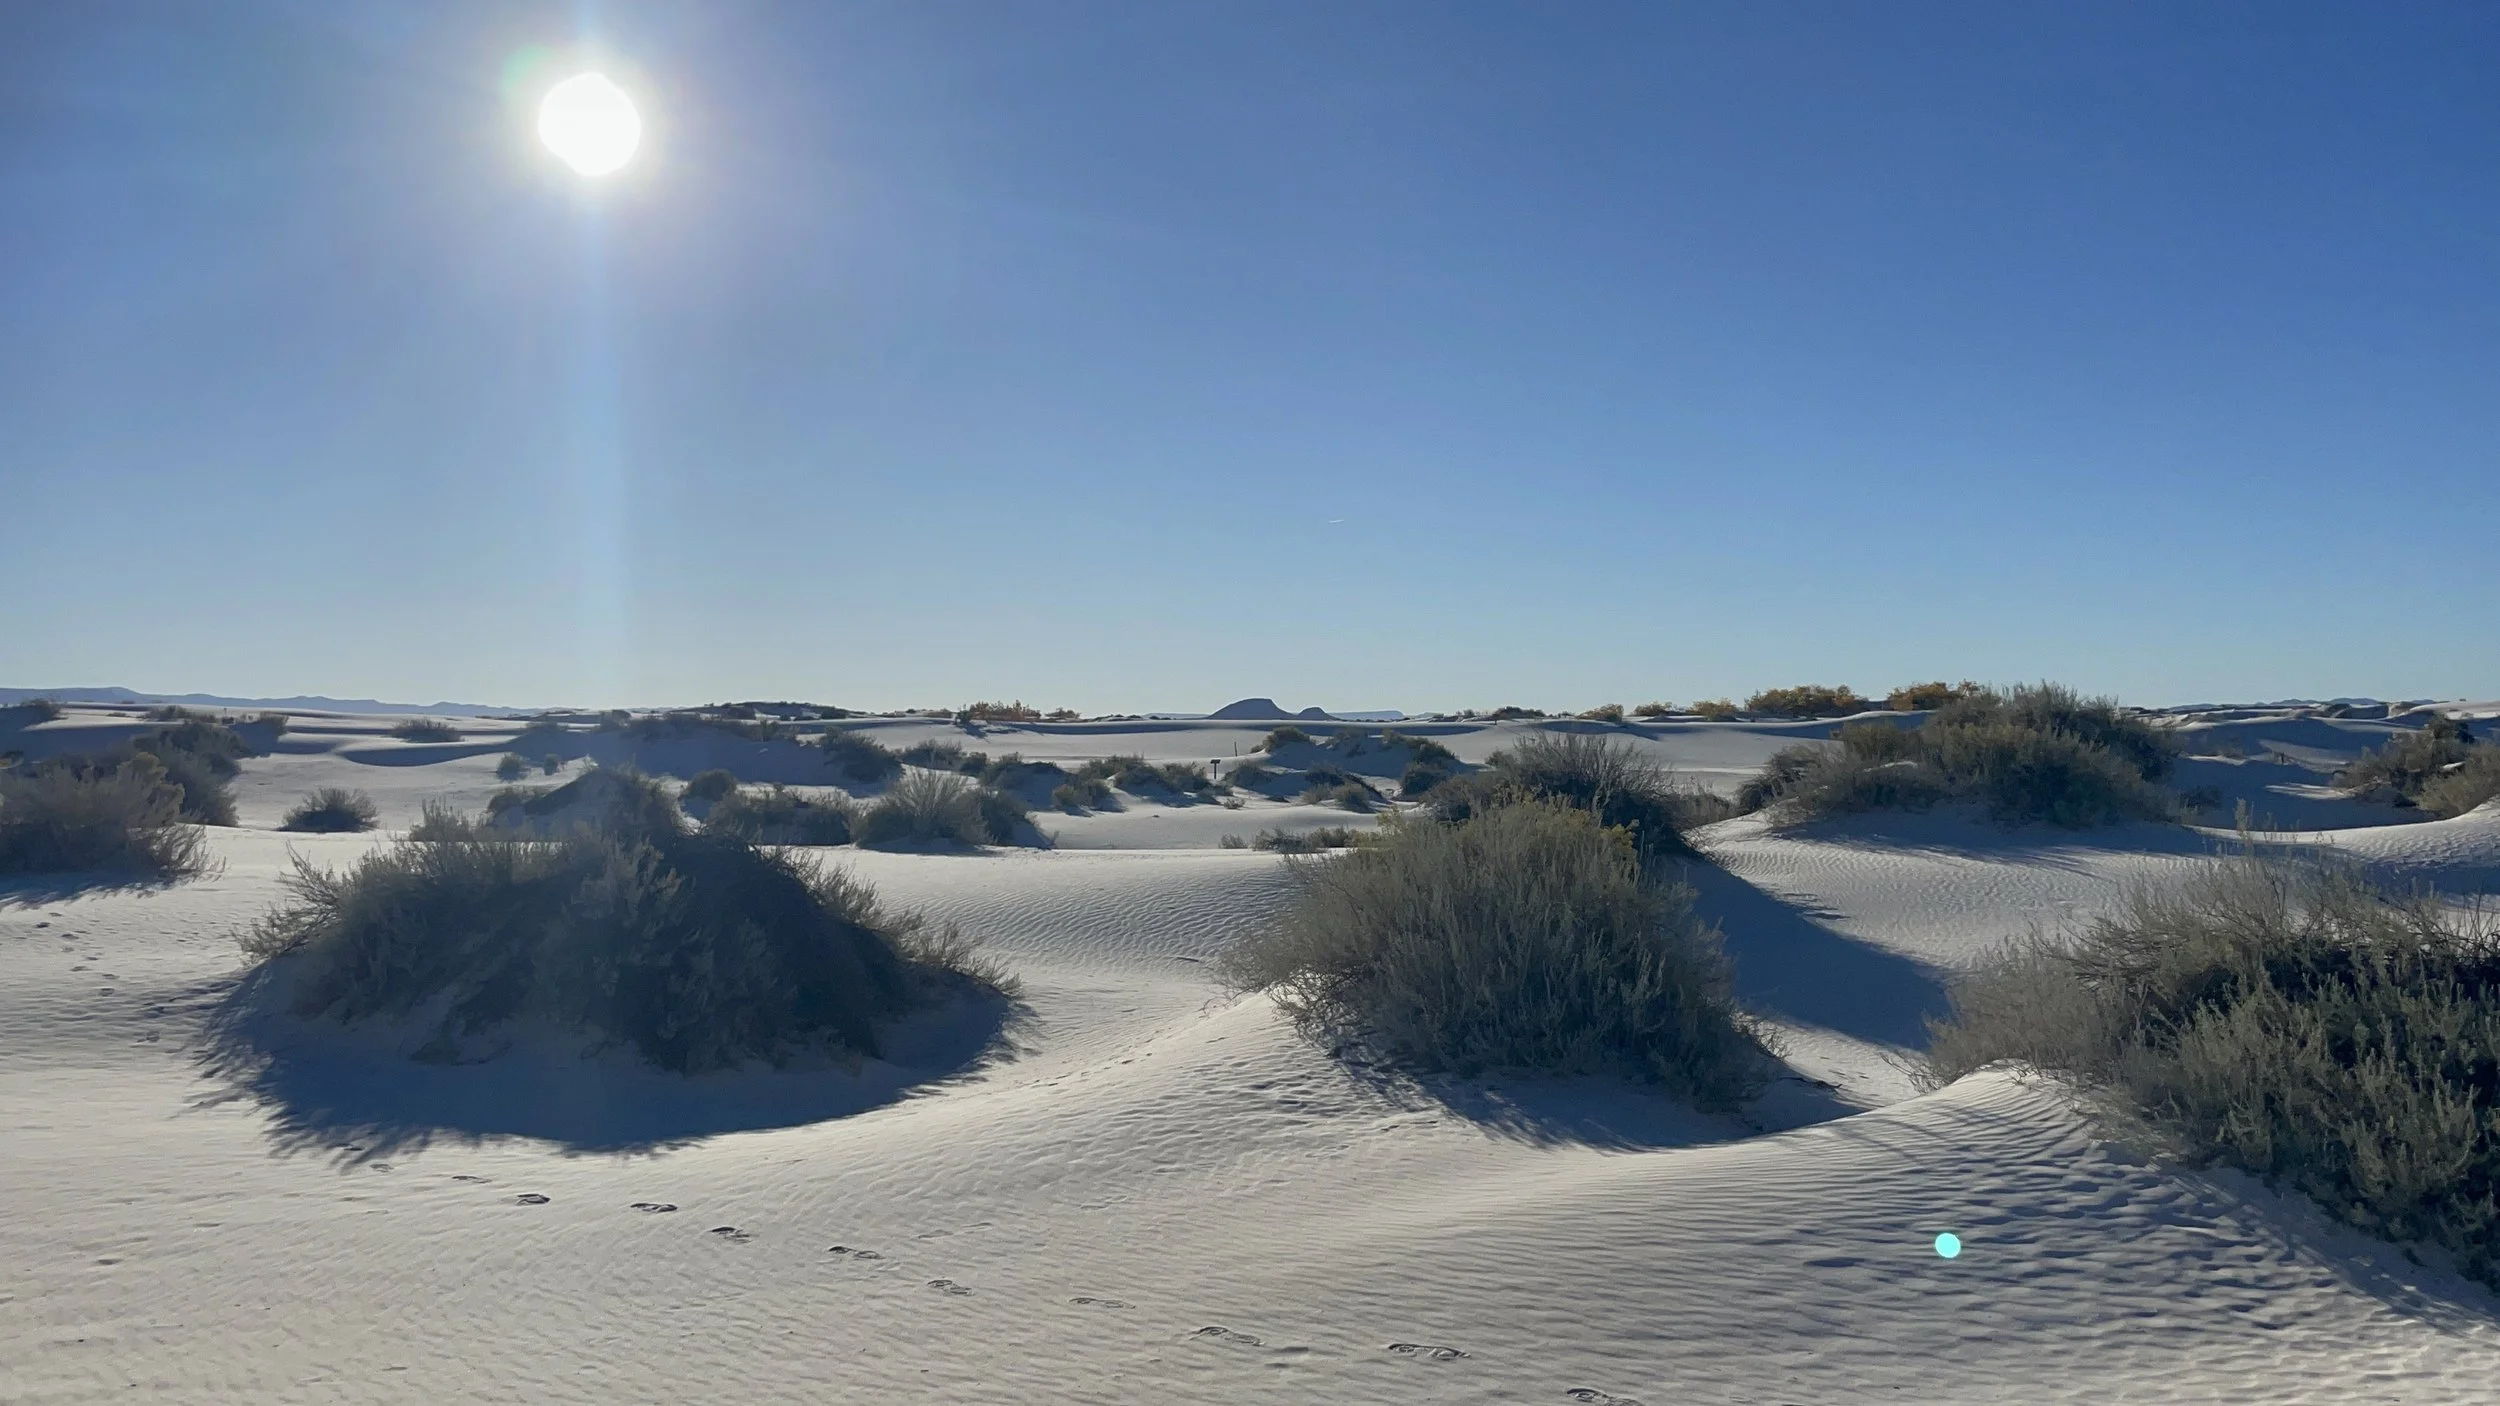
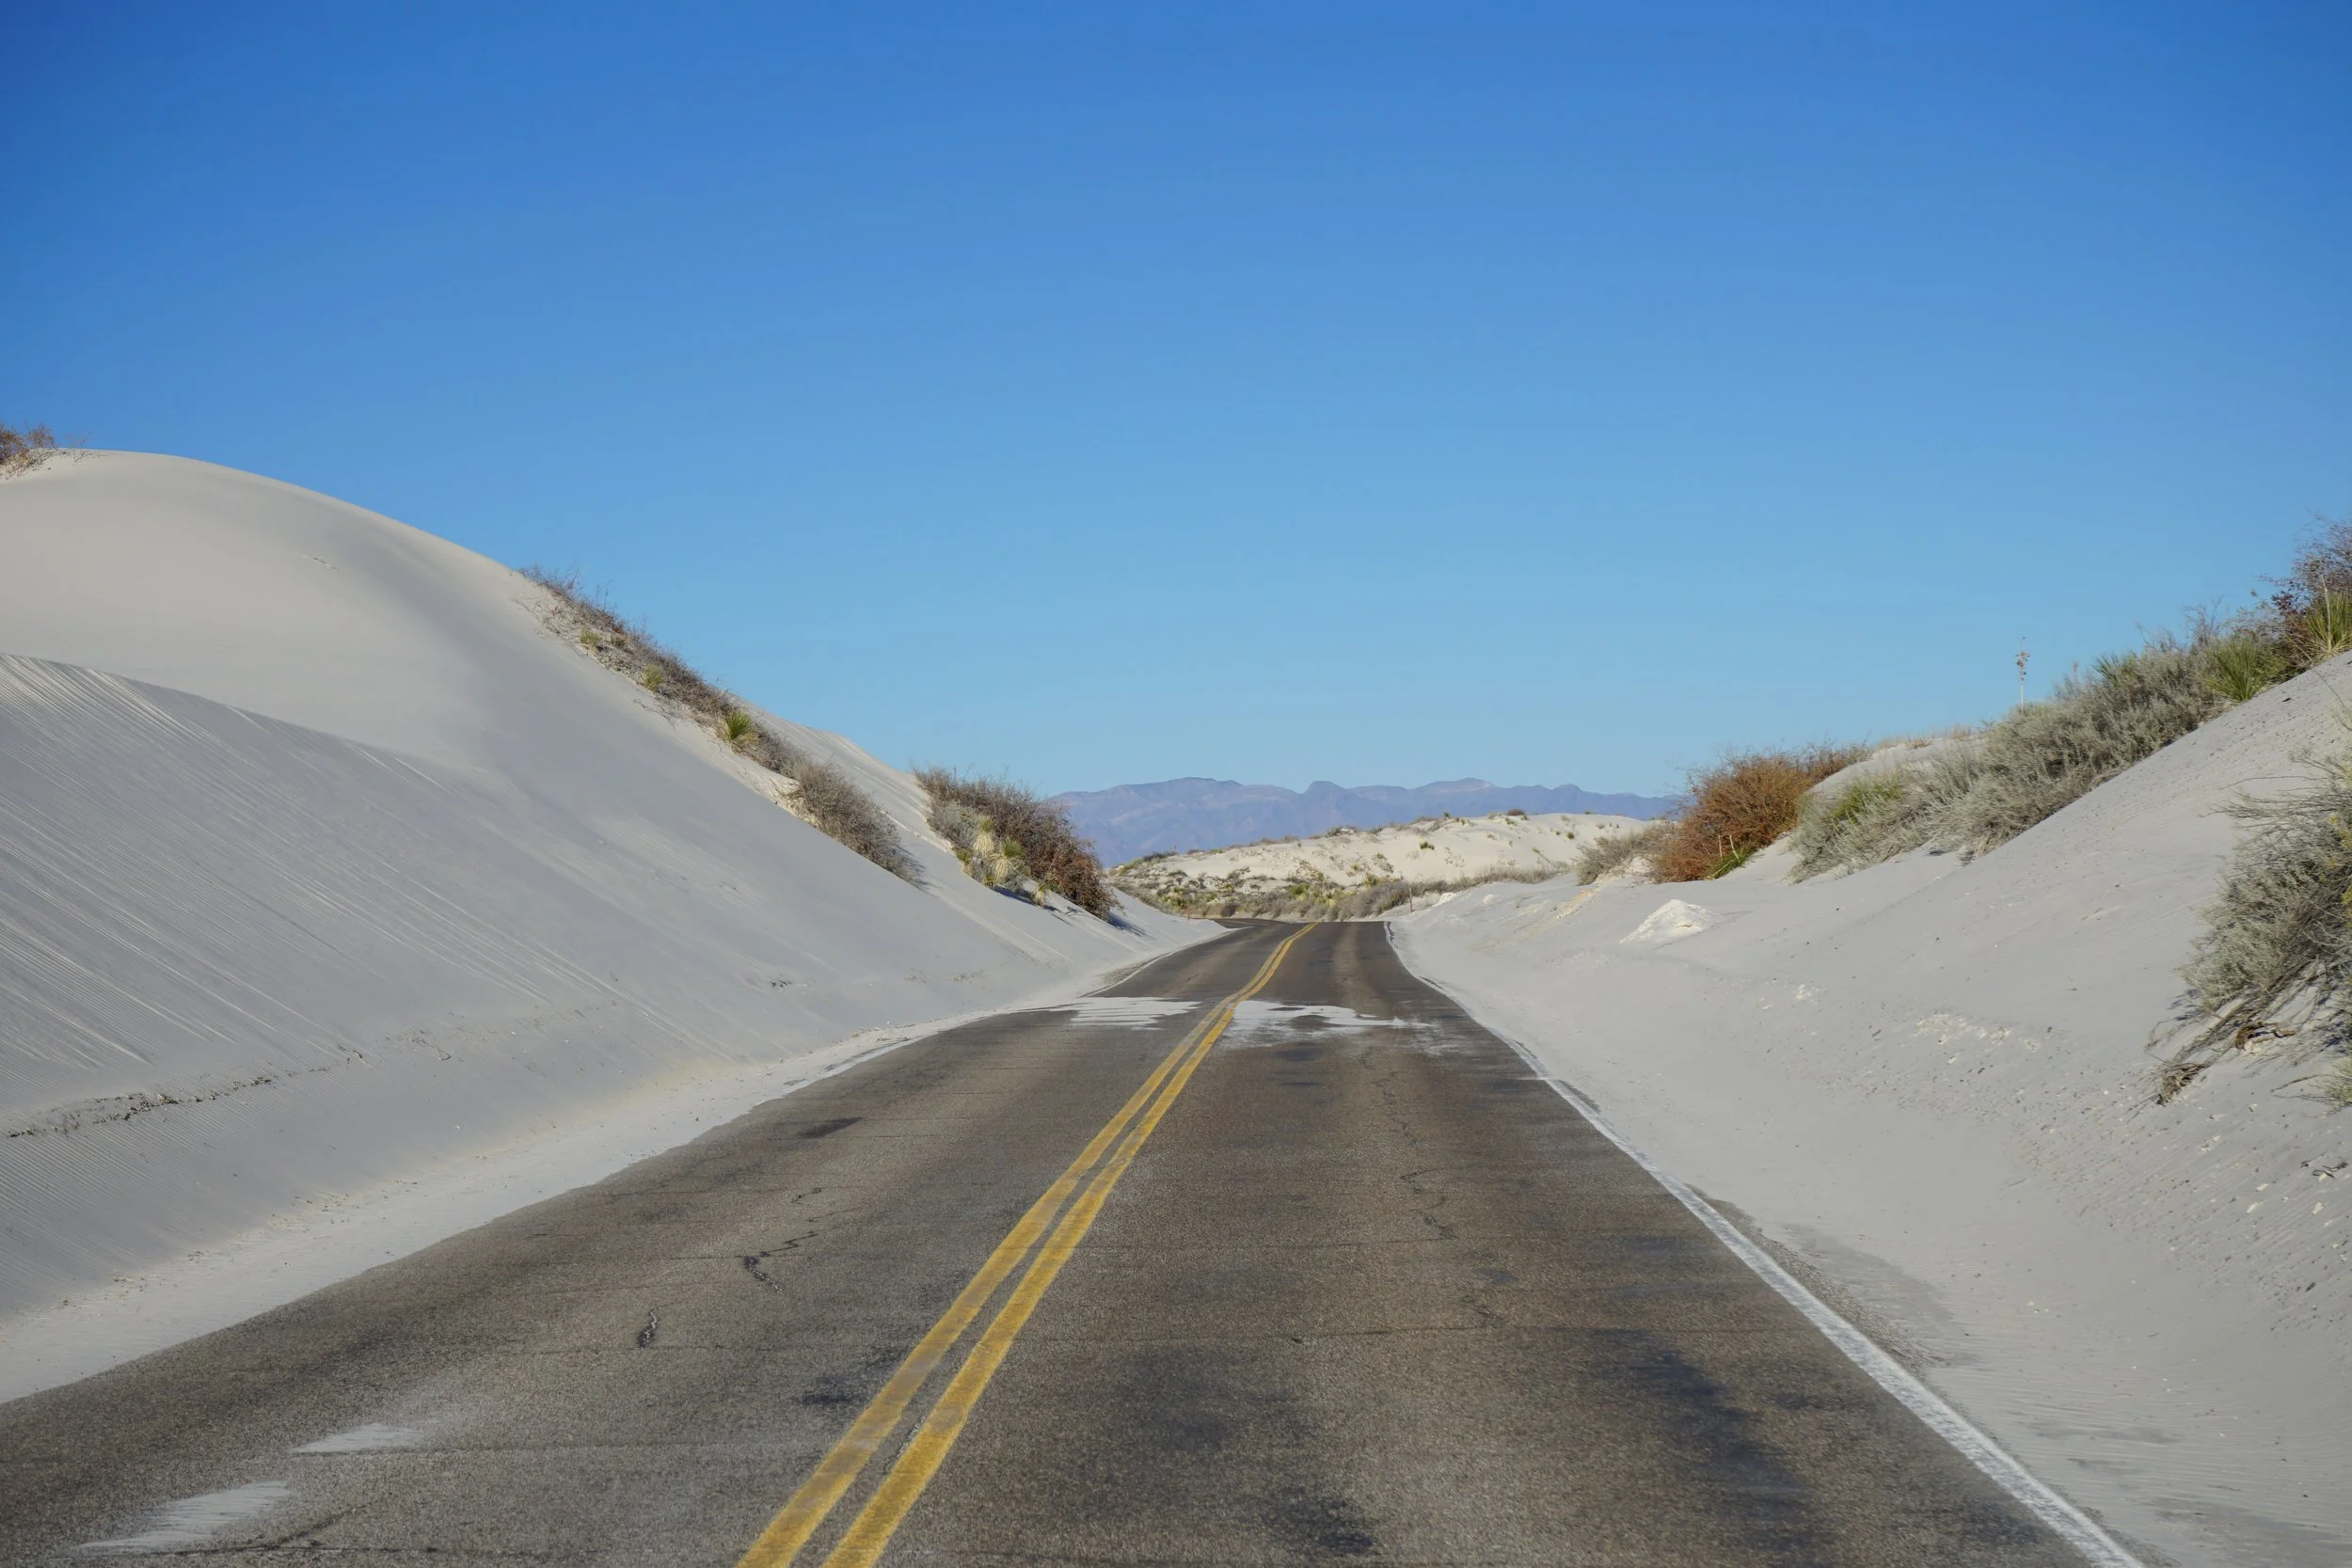
Because I got there so early, there were very few people around. I drove the long, winding road, stopping at various parking areas to explore the dunes. The sand was mostly undisturbed in the morning sunlight. The only tracks were the ones I made and a set left behind by a lone hiker who’d walked the trail before me. I stood there for a while, soaking in the vast emptiness. It was calming—almost meditative.
I’ll be honest: while I’ve visited my fair share of sand dunes over the years, I’ve never fully understood the fascination people have with them. Sure, they’re beautiful to look at, but I usually can’t spend more than an hour or so wandering through them. White Sands was no different in that regard.
That said, the sand here is breathtaking. It’s so fine it almost looks like fresh snow, and under the sun it sparkles the way a pristine snowfield would. There’s a certain magic in the way the light dances across the dunes, creating a peaceful atmosphere that made me want to linger just a little longer than usual. As the sun rose higher in the sky, I kept exploring the dunes, enjoying the beauty of the ever-changing landscape. Getting there early meant I had the park nearly to myself before the crowds started to arrive—what a treat!
Before heading out, I stopped by the Visitor Center to get my passport stamp—a little souvenir from my visit. National Park number 25—done!
For those curious: White Sands National Park is located in southern New Mexico and is home to the world’s largest gypsum dune field. The park spans over 275 square miles of glistening white sand, creating an almost otherworldly atmosphere. Unlike typical beach sand, the sand here is made of gypsum crystals, which stay cooler to the touch—even during the hotter months.
The dunes are constantly shifting with the wind, always reshaping the landscape. Besides offering stunning scenery, White Sands is a haven for outdoor activities like hiking, picnicking, and sand sledding. The Visitor Center has educational exhibits covering the area’s geology, wildlife, and history, and there are several trails and scenic drives that let you fully immerse yourself in this beautiful desert environment.
If you’re into wildlife, you’ll also find plenty to observe here. The park is home to various birds, reptiles, and small mammals, all specially adapted to this unique setting.
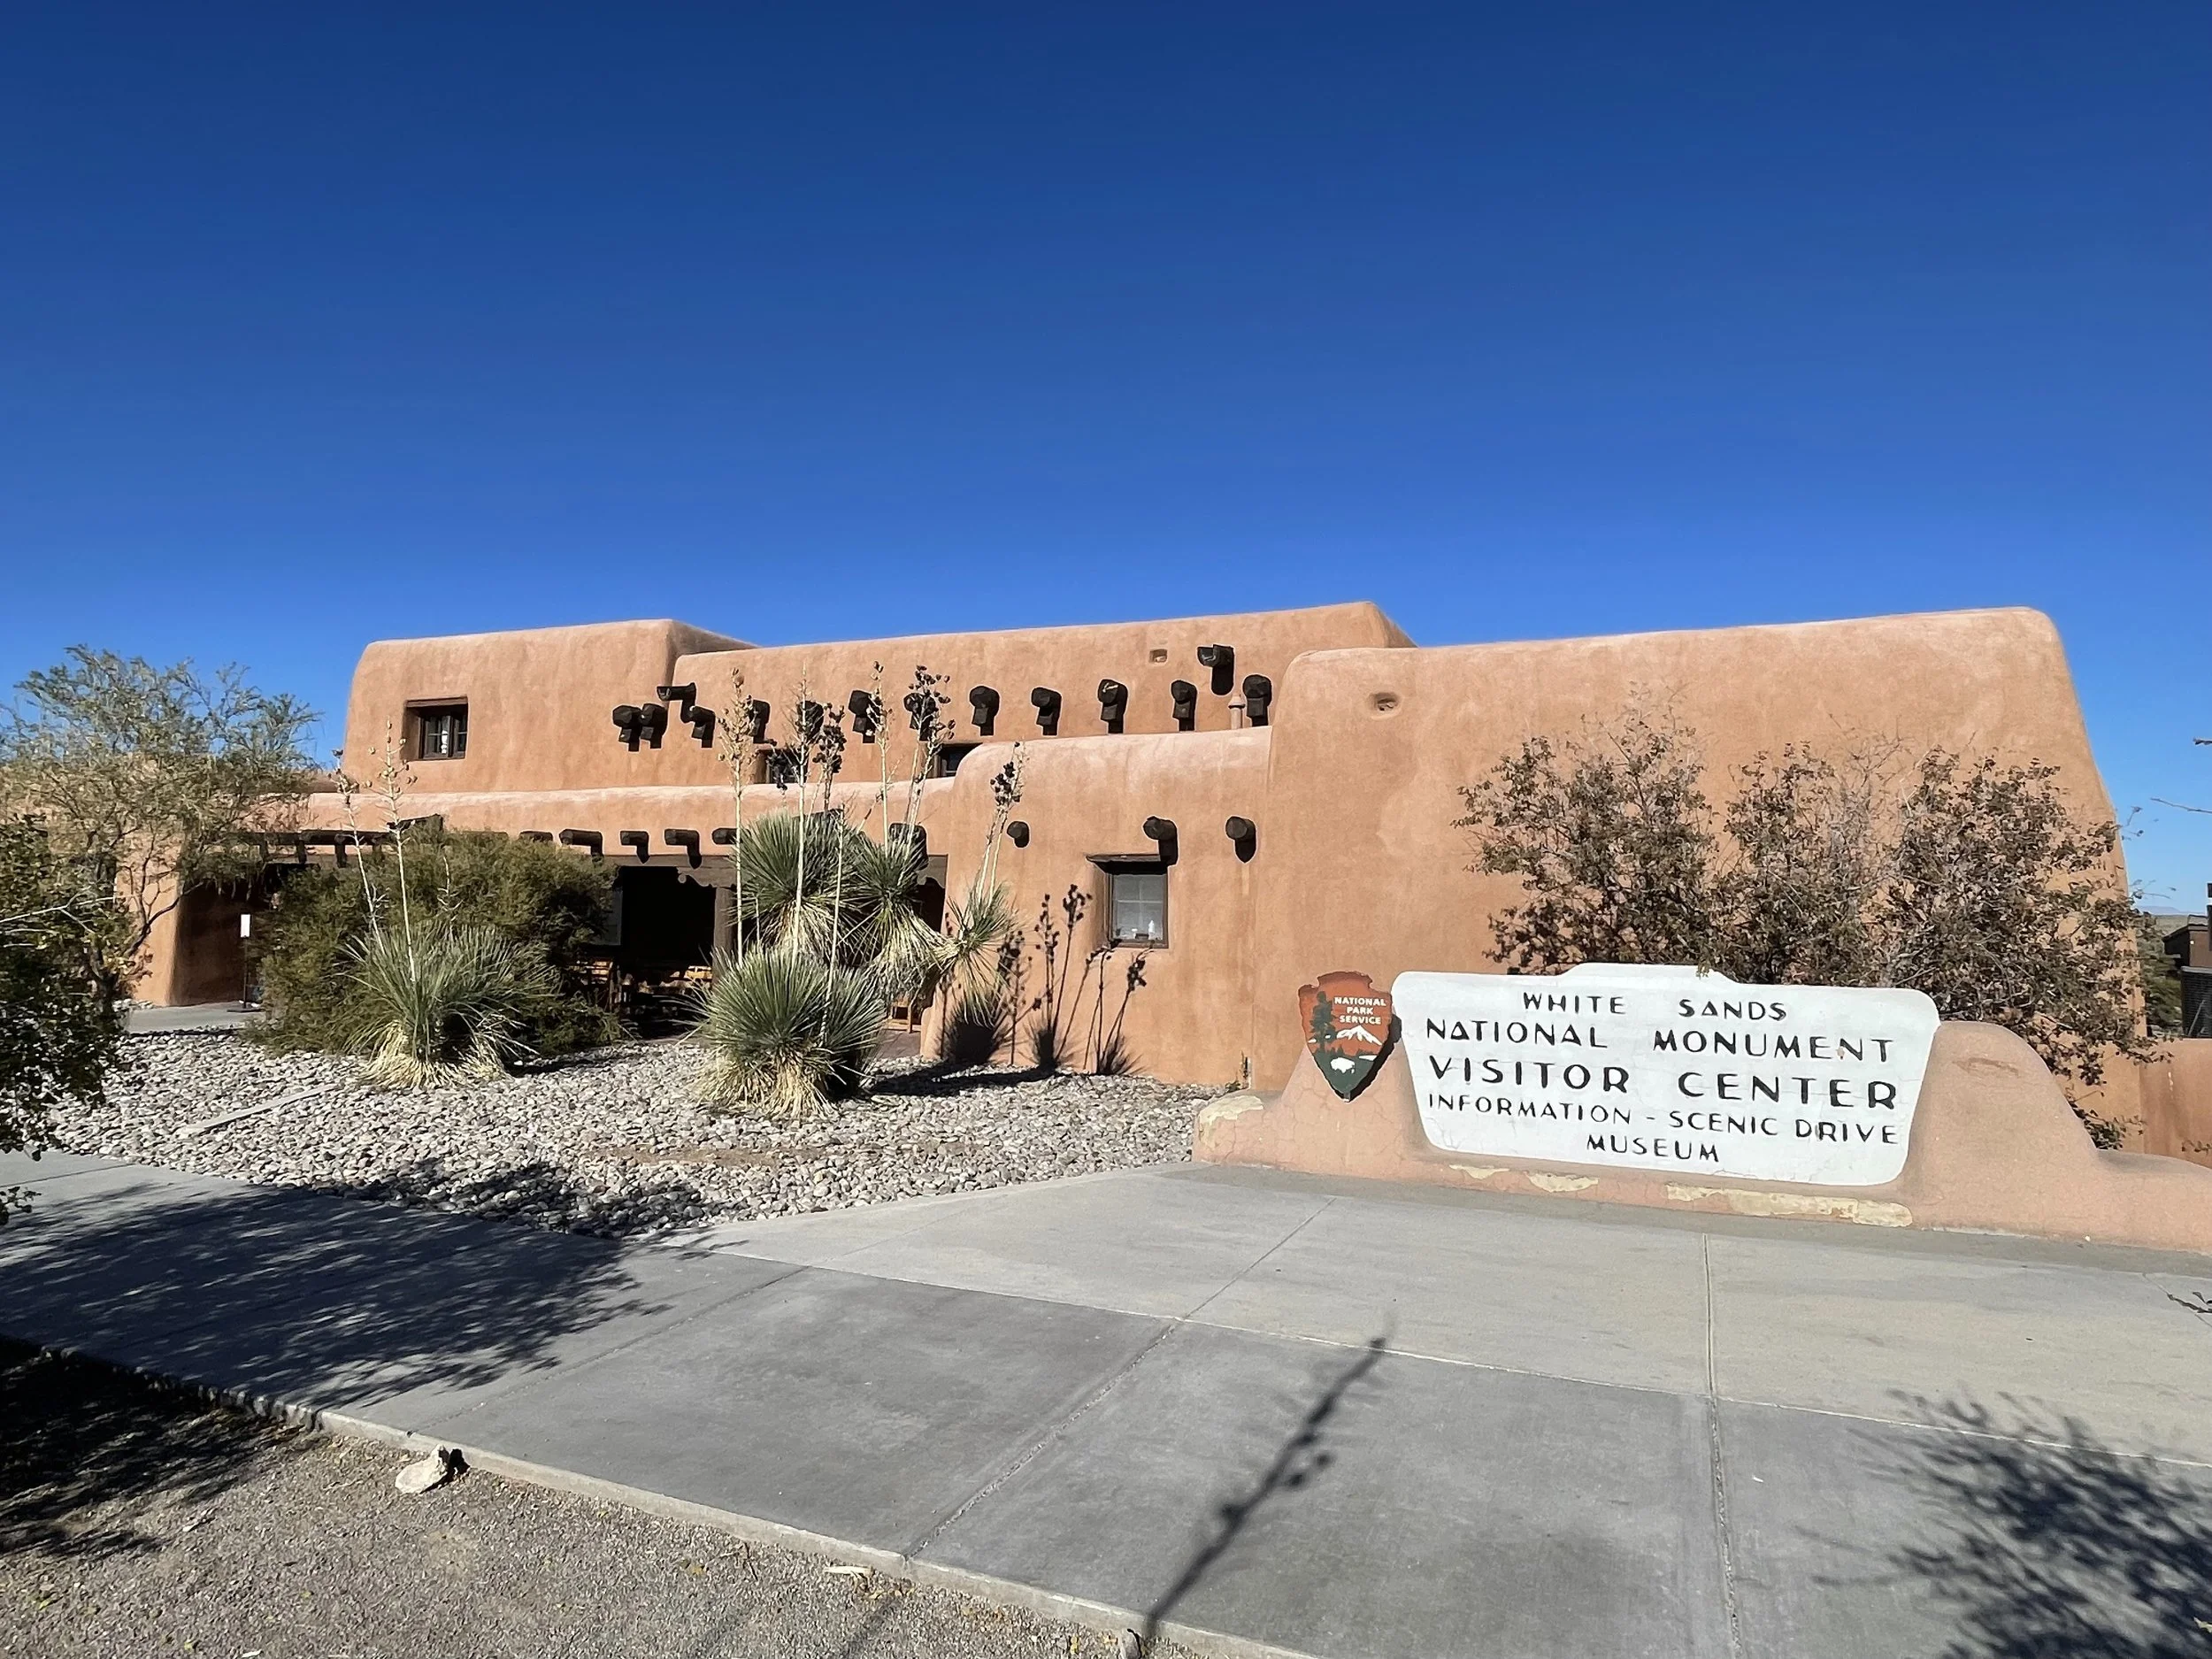
White Sands Visitor Center
Visitor Center
White Sands Visitor Center:
19955 Highway 70 WestAlamogordo, NM 88310
Hours:
The visitor center is typically open daily from 9:00 AM to 4:30 PM, except on Christmas Day (December 25th) when it’s closed.
Hours may change seasonally, so it’s always a good idea to check the official website before your visit.
Location: The visitor center is conveniently located at the park entrance, where you can grab maps, learn about the park's history, and buy passes.
Park Fees
Entrance Fee:
$25 per vehicle for a 7-day pass (up to 4 adults).
$20 per motorcycle.
$10 per individual (for pedestrians, cyclists, or anyone using non-motorized transport).
Annual Pass: For those planning to visit more than once, the $45 Annual Pass gives you unlimited access for a full year.
Tip: The National Park Service offers free entry days during special events, like National Public Lands Day and Martin Luther King Jr. Day—check their website for specific dates.
Things to Do at White Sands National Park
1. Explore the Dunes
Hiking: The park has several trails to explore the dunes, including:
Interdune Boardwalk: A short and accessible boardwalk that gives you an elevated view of the dunes.
Alkali Flat Trail: A 5-mile round-trip hike that takes you deep into the dunes for incredible views and solitude.
Sand Sledding: Bring your own sled or rent one from the Visitor Center to zoom down the dunes for a fun and thrilling experience.
2. Scenic Drive
Dunes Drive: This 16-mile, one-way road offers sweeping views of the dunes, with several pull-off points where you can stop and take photos or explore the area on foot. It’s a great way to take in the park’s beauty if you’re short on time.
3. Picnicking
There are picnic areas near the entrance, perfect for a break. Some spots offer shaded seating, and others provide a quieter place to enjoy your lunch surrounded by the dunes.
4. Wildlife Watching
White Sands is home to a variety of desert wildlife. Look out for horned lizards, kangaroo rats, and birds like the burrowing owl. Early mornings and evenings are the best times to spot wildlife, as it’s cooler, and animals are more active. Unfortunately I didn’t see much wildlife during my visit
5. Photography & Stargazing
The park offers amazing photo opportunities, especially at sunrise and sunset when the dunes glow with soft light. It’s also a fantastic spot for stargazing due to the minimal light pollution, giving you a clear view of the night sky.
6. Visitor Center Exhibits
The Visitor Center has exhibits that teach visitors about the park's geology, flora, fauna, and the history behind this stunning landscape. The center also features a small gift shop where you can pick up souvenirs, books, and educational materials.
Best Time to Visit
Spring and Fall offer the most comfortable temperatures for exploring the park. Summer can get quite hot, with temperatures often exceeding 100°F (38°C). Winter is cooler, but still mild compared to other regions of the U.S.
Sunrise and Sunset: These times are especially beautiful at White Sands, as the soft light creates a peaceful atmosphere over the dunes.
Tips for Visitors
Bring plenty of water: The desert can get very hot, so staying hydrated is key, especially in summer.
Wear sunscreen and a hat: The sun can be intense, and the white sand reflects sunlight, so make sure you’re protected.
Sturdy shoes: The sand can be soft and deep, so comfortable shoes are a must, especially for hiking.
Check the weather: Occasionally, the winds pick up, so be sure to check the forecast before your visit.
Pets: Pets are welcome, but they must be on a leash and aren’t allowed on trails or in the dunes.
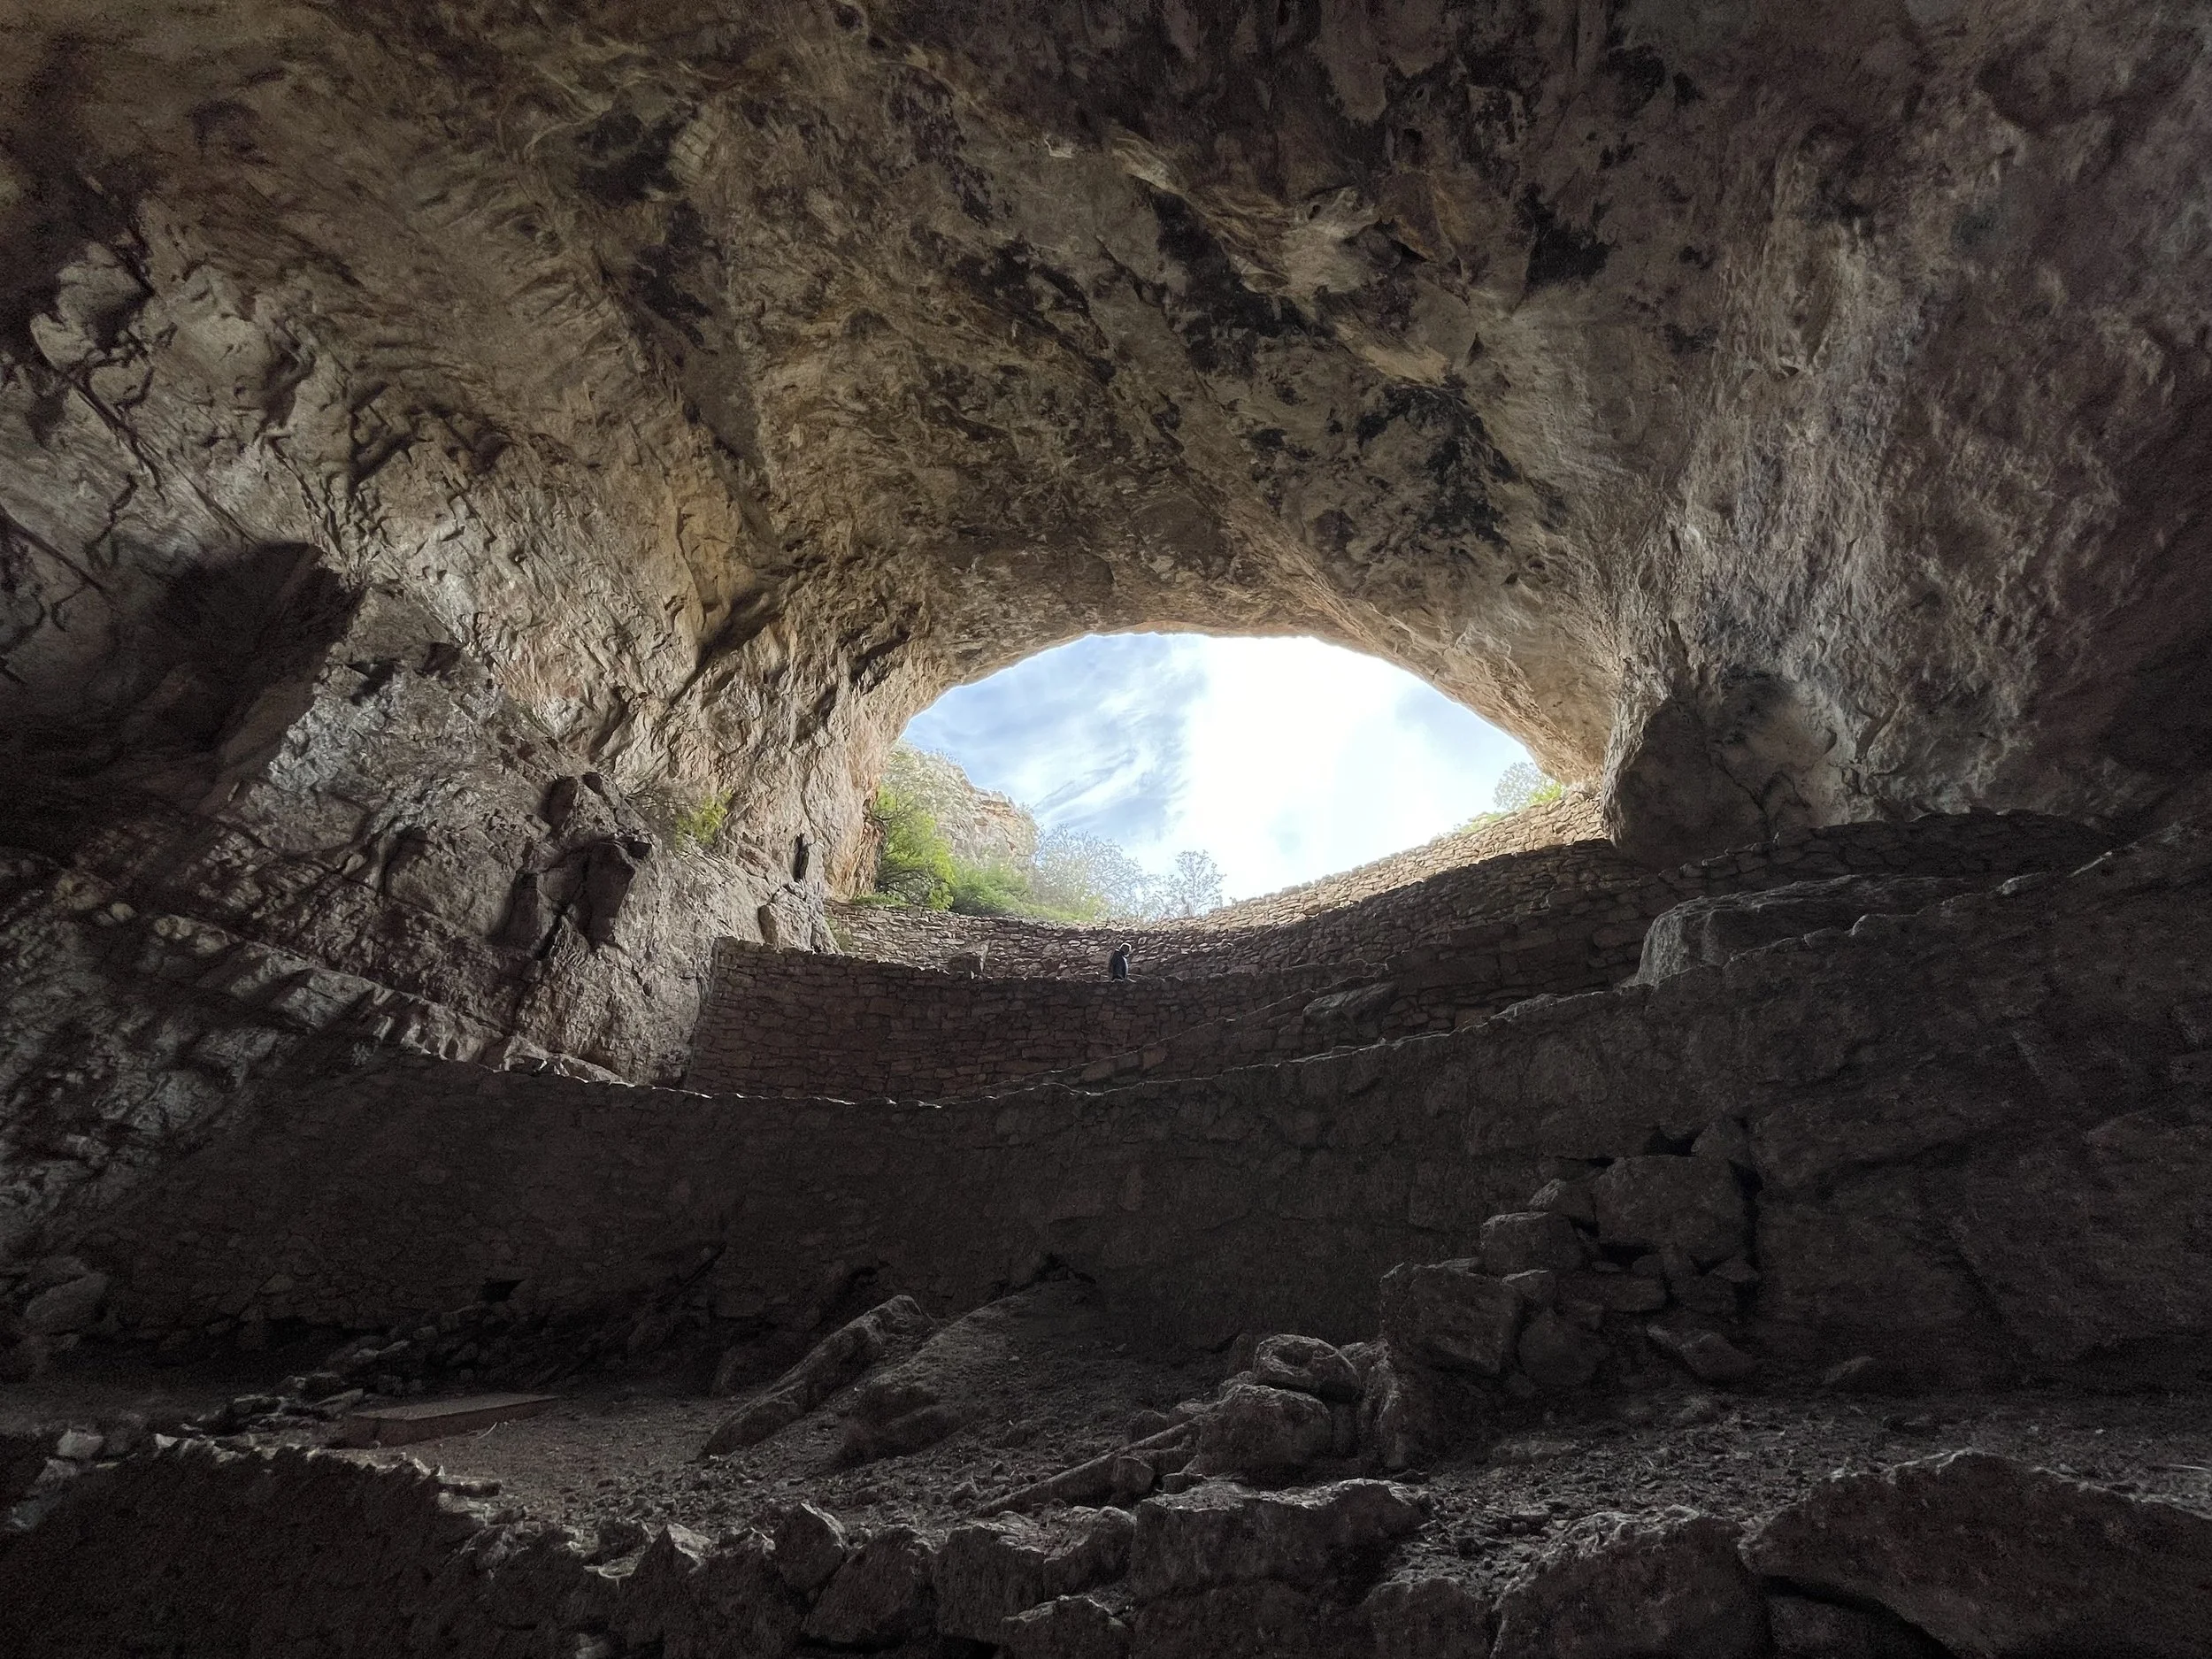
#24 Carlsbad Caverns National Park, New Mexico
Carlsbad Caverns was part of a one-two punch kind of day for me. After spending the morning at Guadalupe Mountains National Park, I crossed the Texas border into New Mexico — a short 30-minute drive that delivered me to Carlsbad Caverns National Park by late morning. Thankfully, I had a reservation; timed entry tickets are required for cave access, so you’ll want to book those ahead.
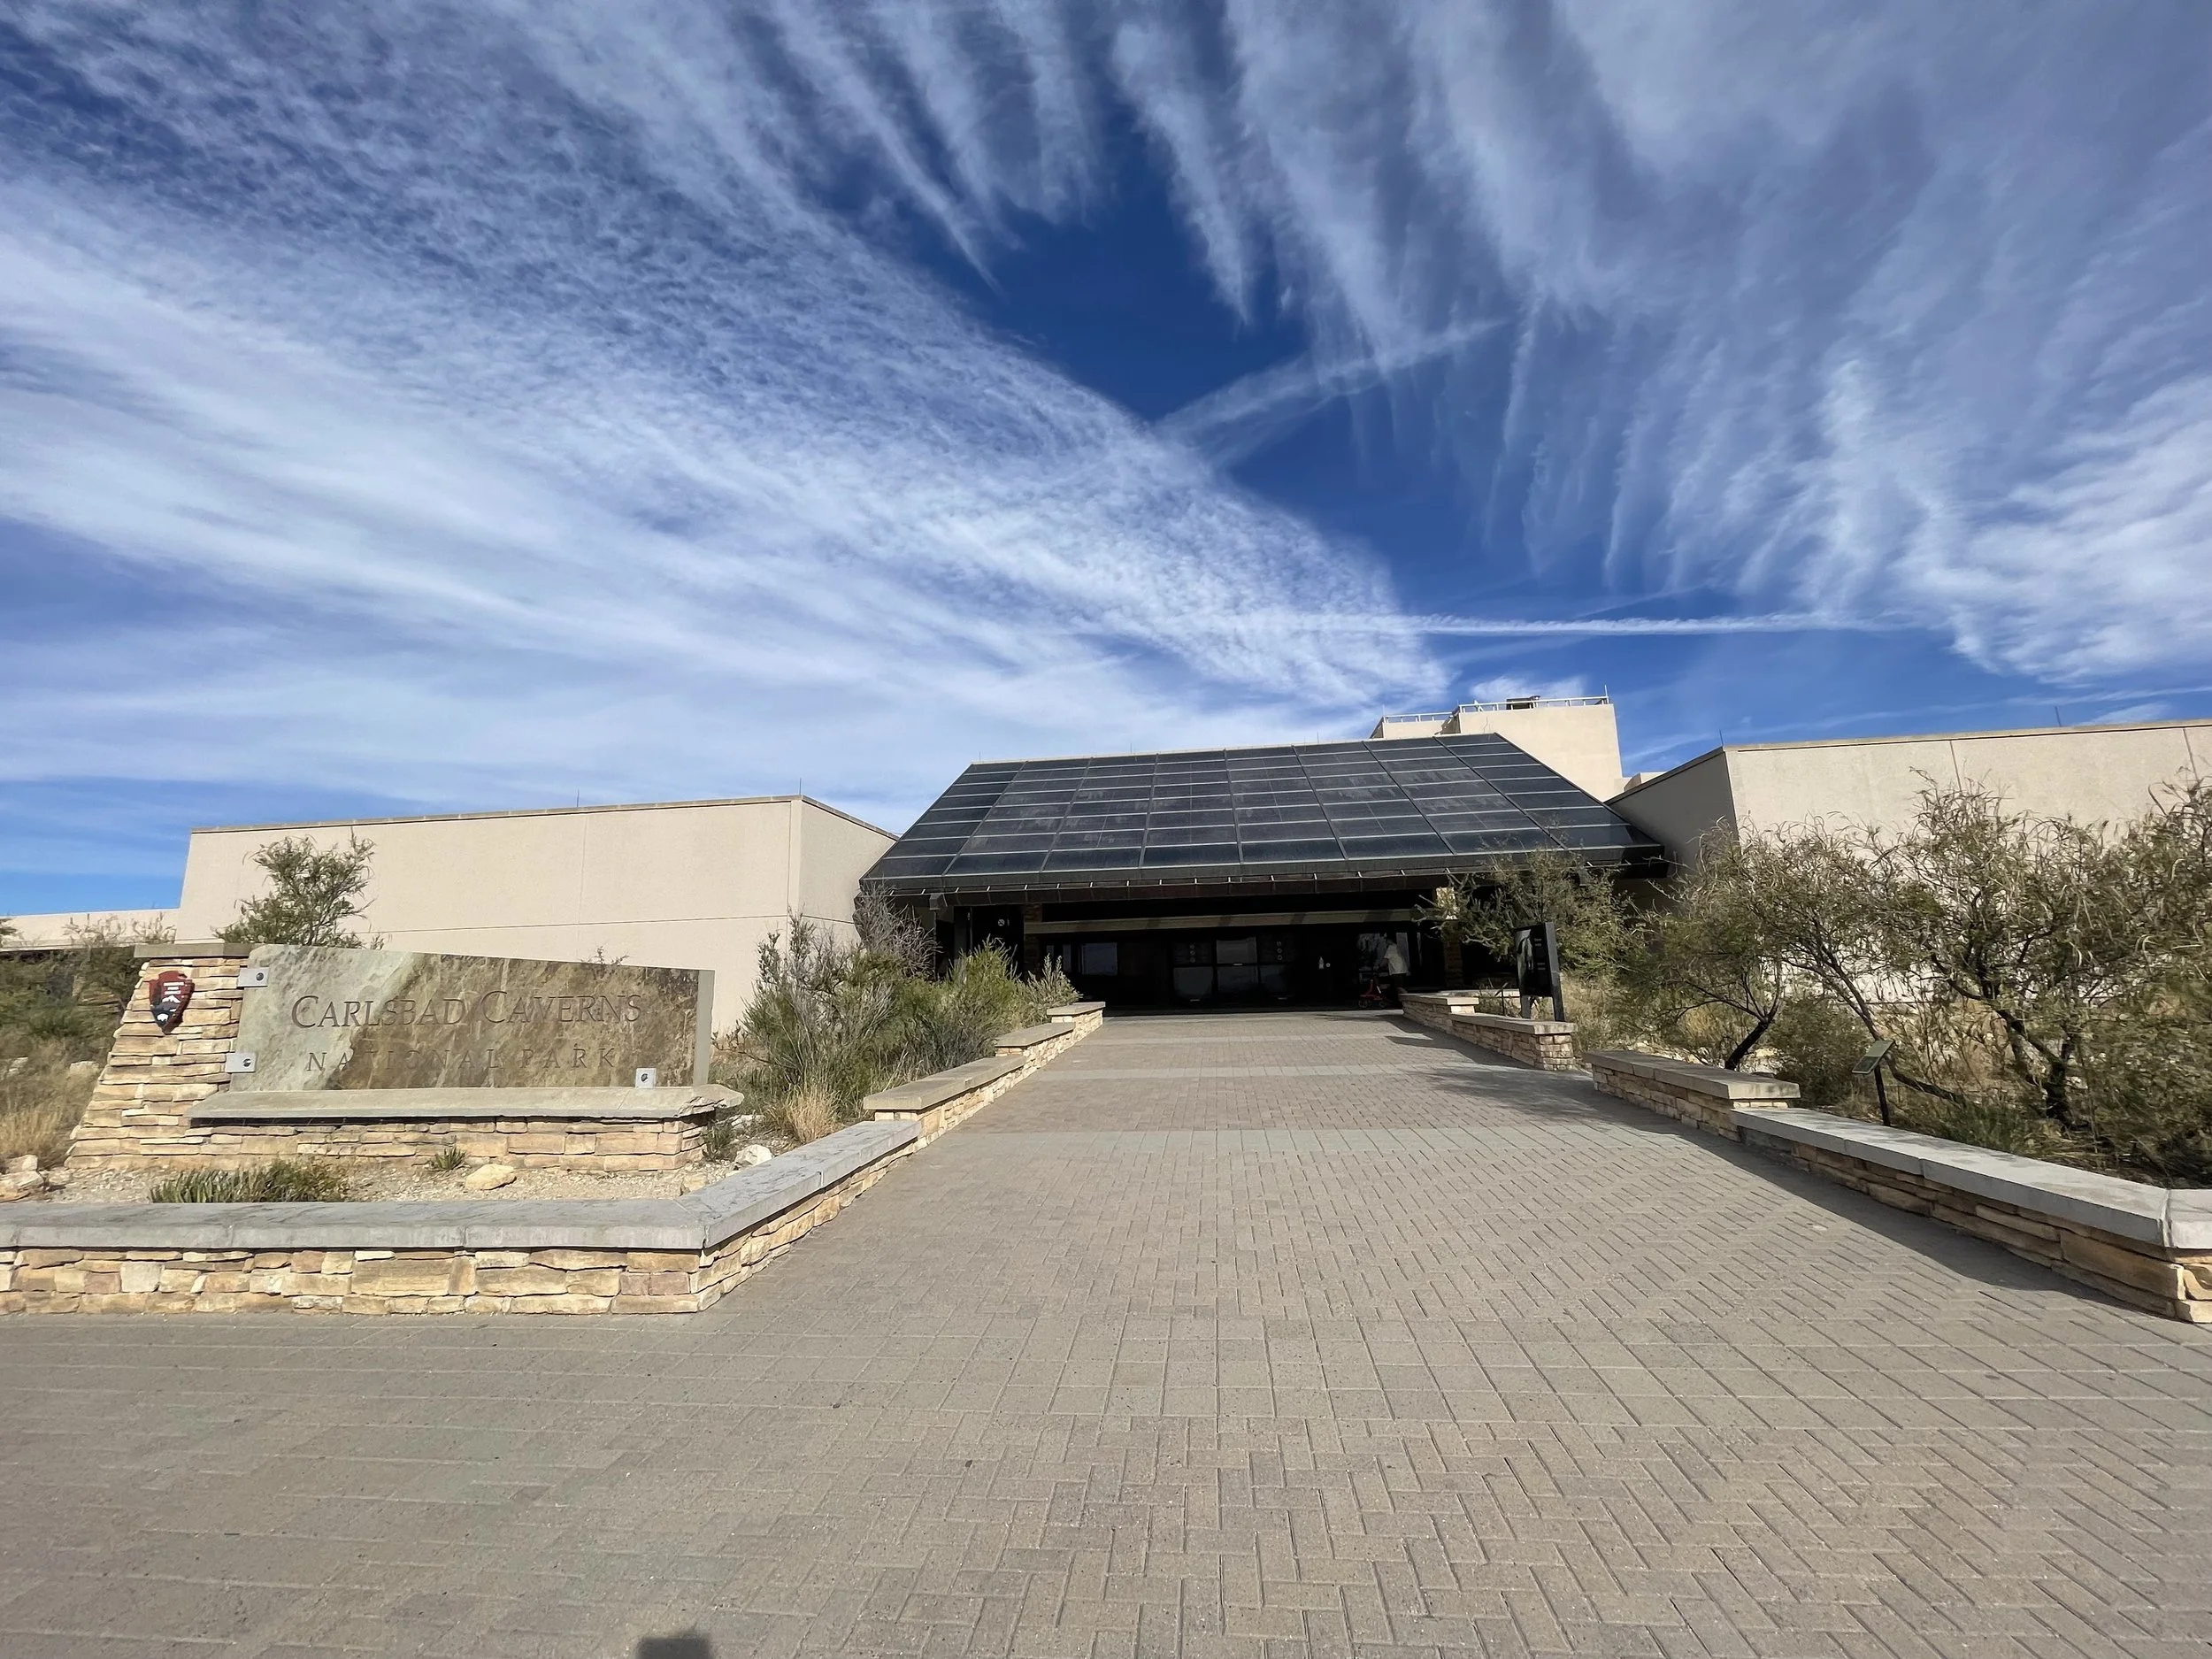
The drive in is beautiful, winding through canyons and desert views before arriving at the Carlsbad Caverns Visitor Center —
📍 727 Carlsbad Caverns Highway, Carlsbad, NM 88220.
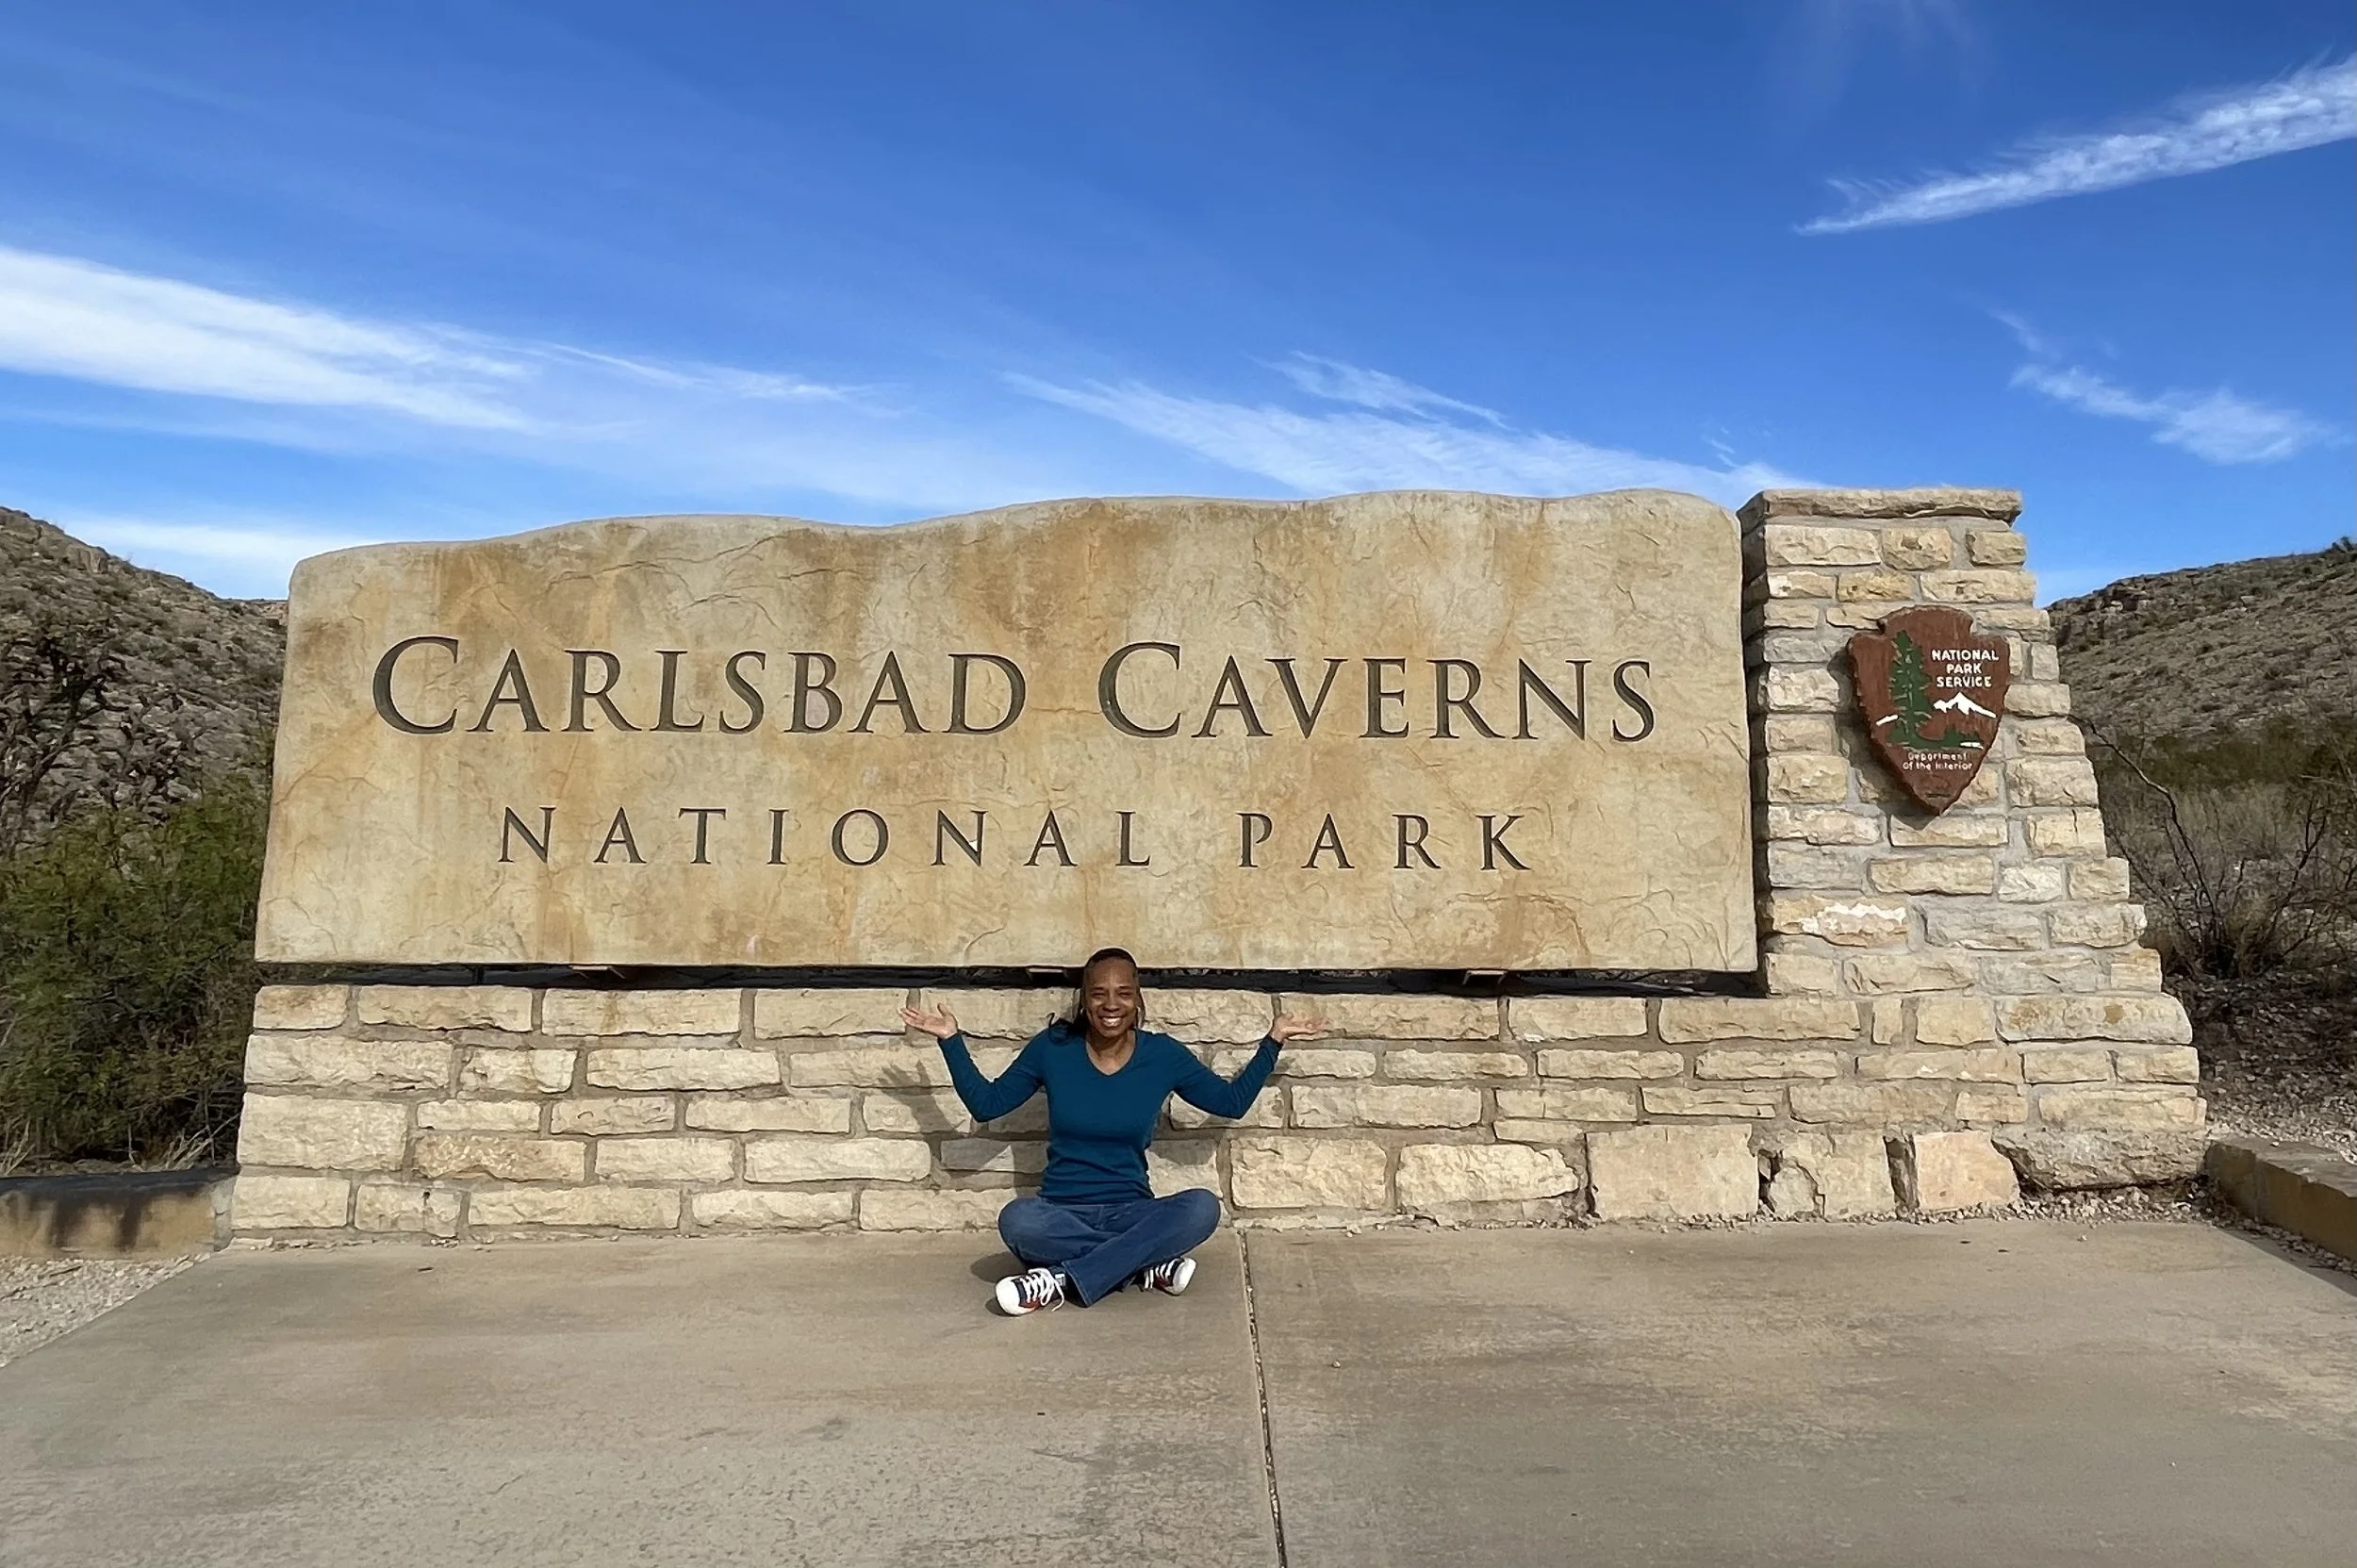
The center itself is spacious and modern, with a museum exhibit on one side and a café and gift shop on the other. As usual, I made time to stop for a photo at the park sign and, of course, grab my passport stamp — one of my favorite little rituals at each national park I visit.
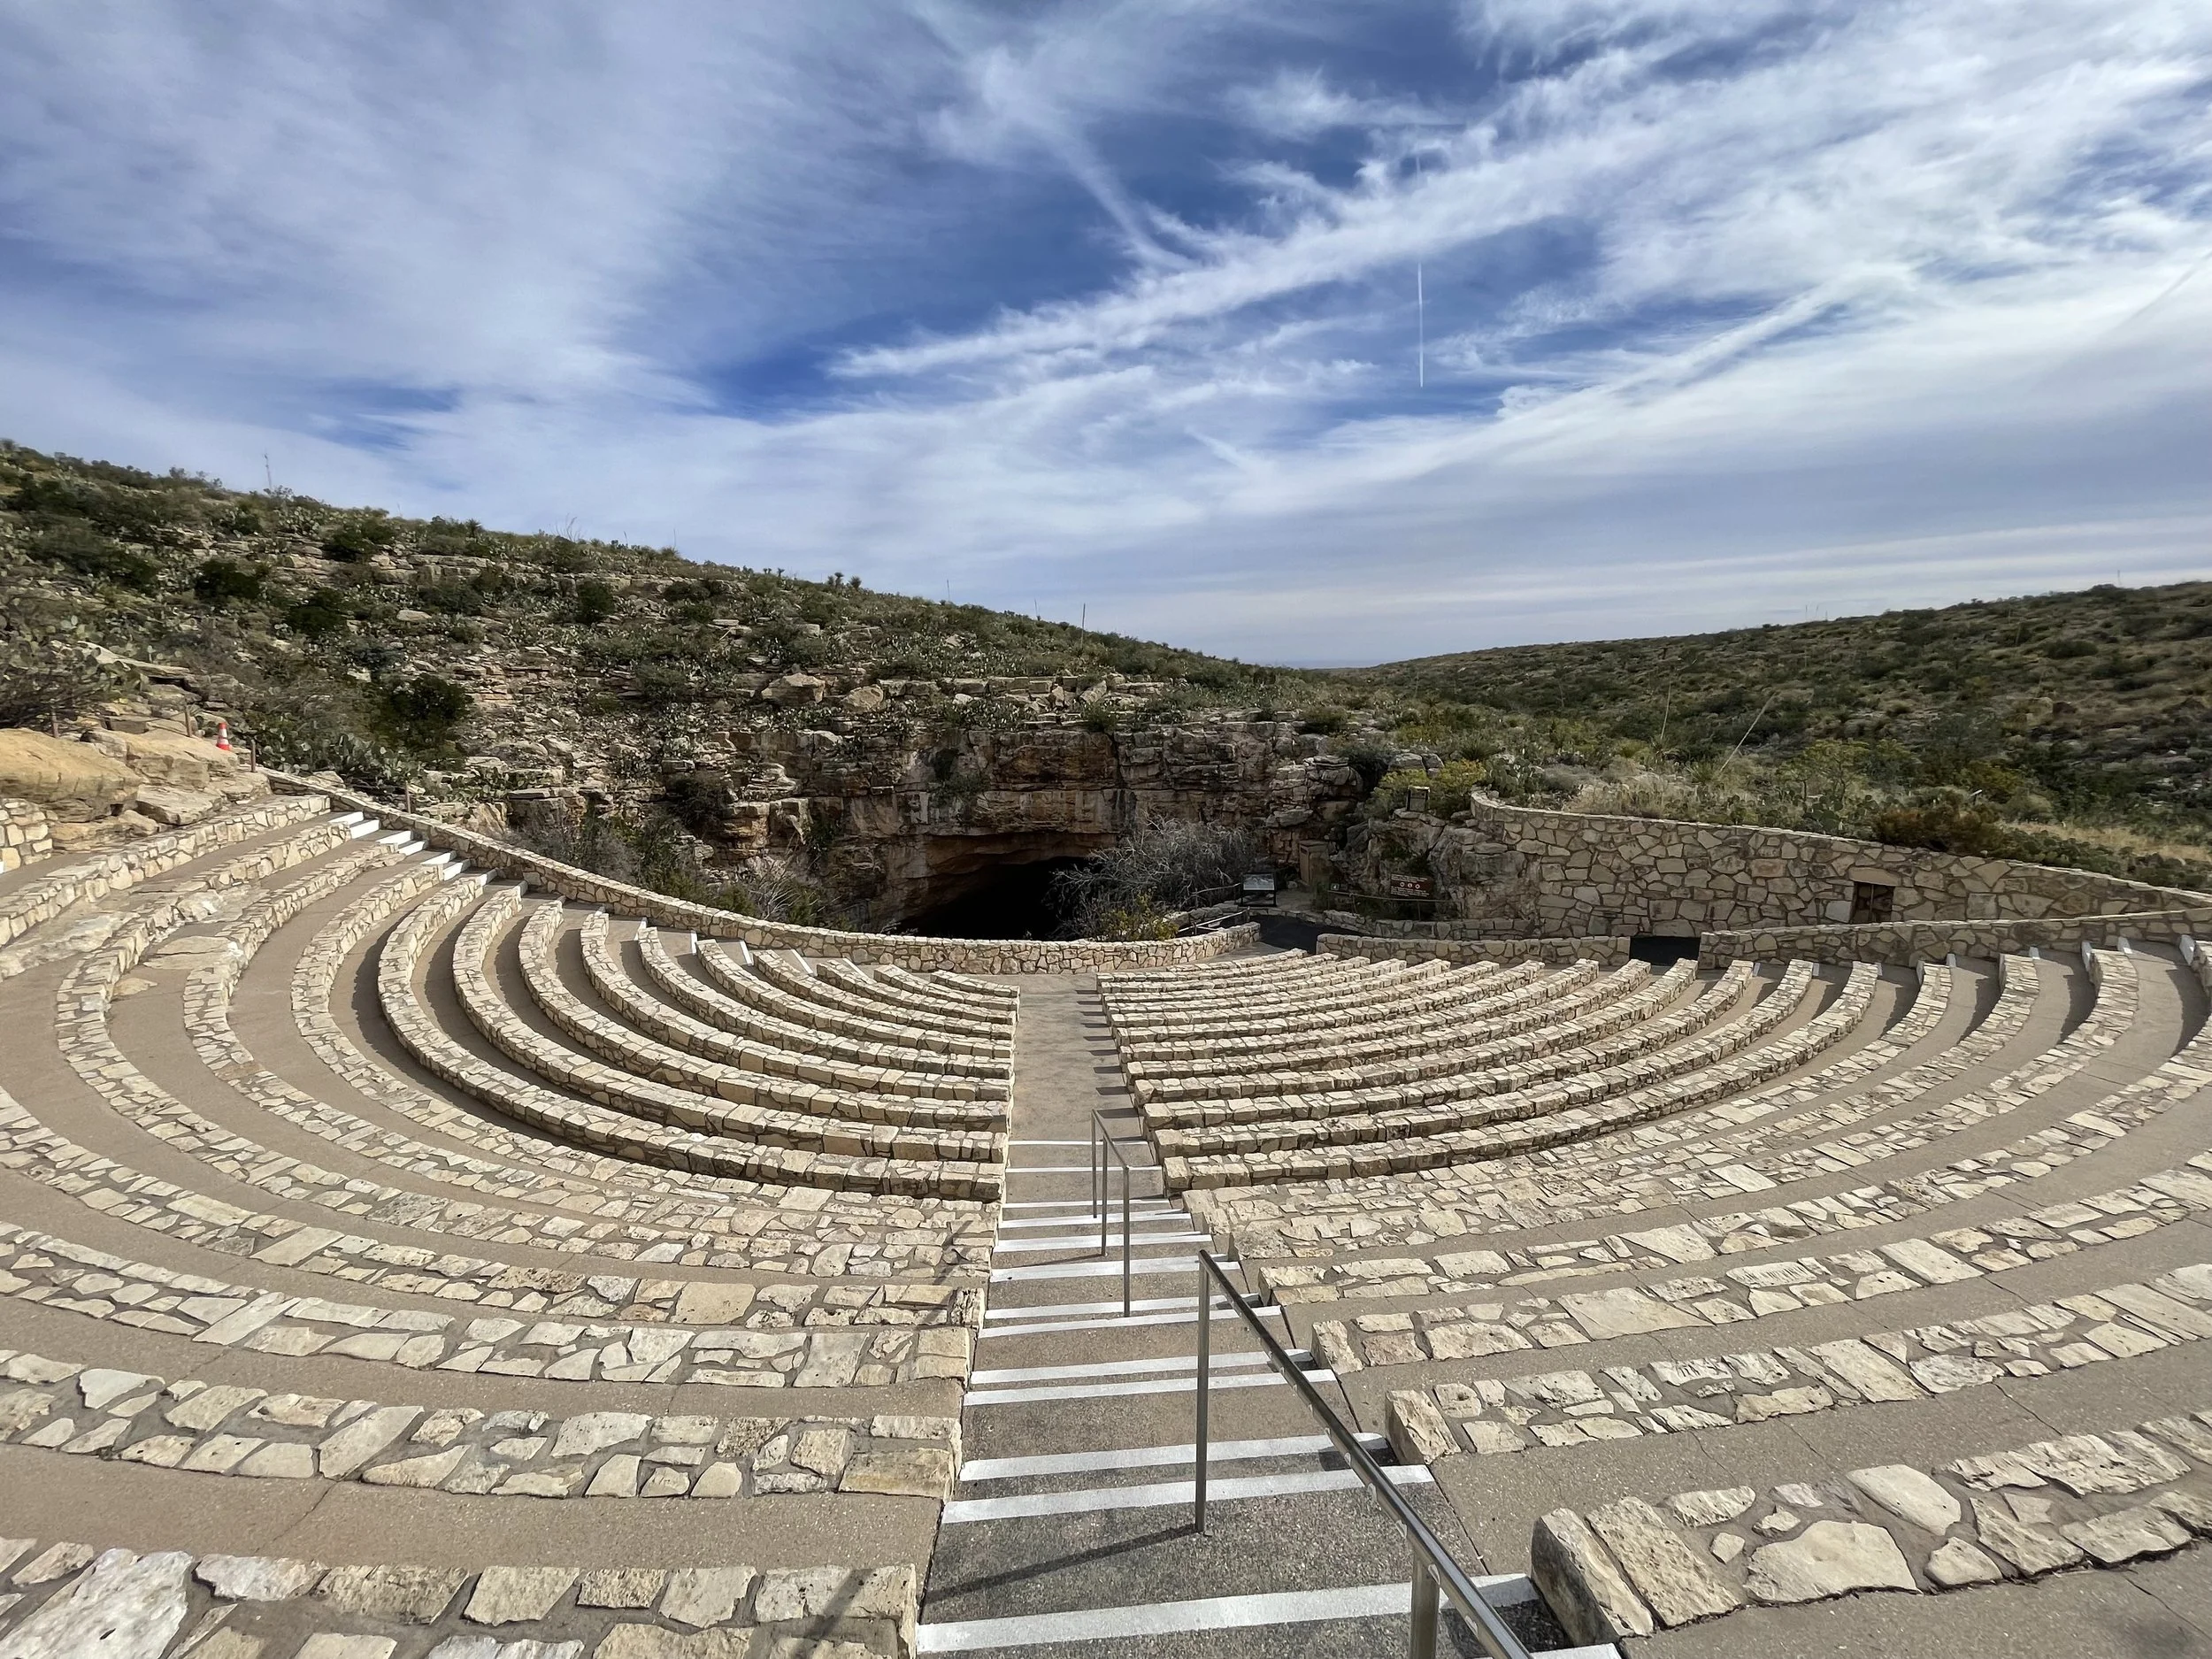
Outside, you’ll find the amphitheater where the park hosts its famous bat flight program from May through October. If you’re here at dusk, you can watch thousands of Brazilian free-tailed bats spiral out of the cave entrance into the night — a sight that draws quite a crowd. Rangers usually give a talk beforehand, so it’s worth showing up early to grab a seat.
When it comes to entering the caverns, you have two choices:
• Take the elevator from the visitor center down 750 feet in under a minute,
• Or hike the Natural Entrance Trail, a steep, switchbacking descent roughly equivalent to walking down 75 stories.
I chose the walk — no surprise there.
That descent is honestly one of the highlights of the whole visit. You leave the bright, dry desert behind and step into cool, damp air, each turn taking you deeper into the quiet. The cavern system stays around 56°F year-round, and the deeper you go, the dimmer and more hushed it feels. You hear the occasional drip of water, the soft scuff of footsteps, and not much else. (Heads up: if you have knee or balance issues, you might want to take the elevator back up — the slope is no joke.)
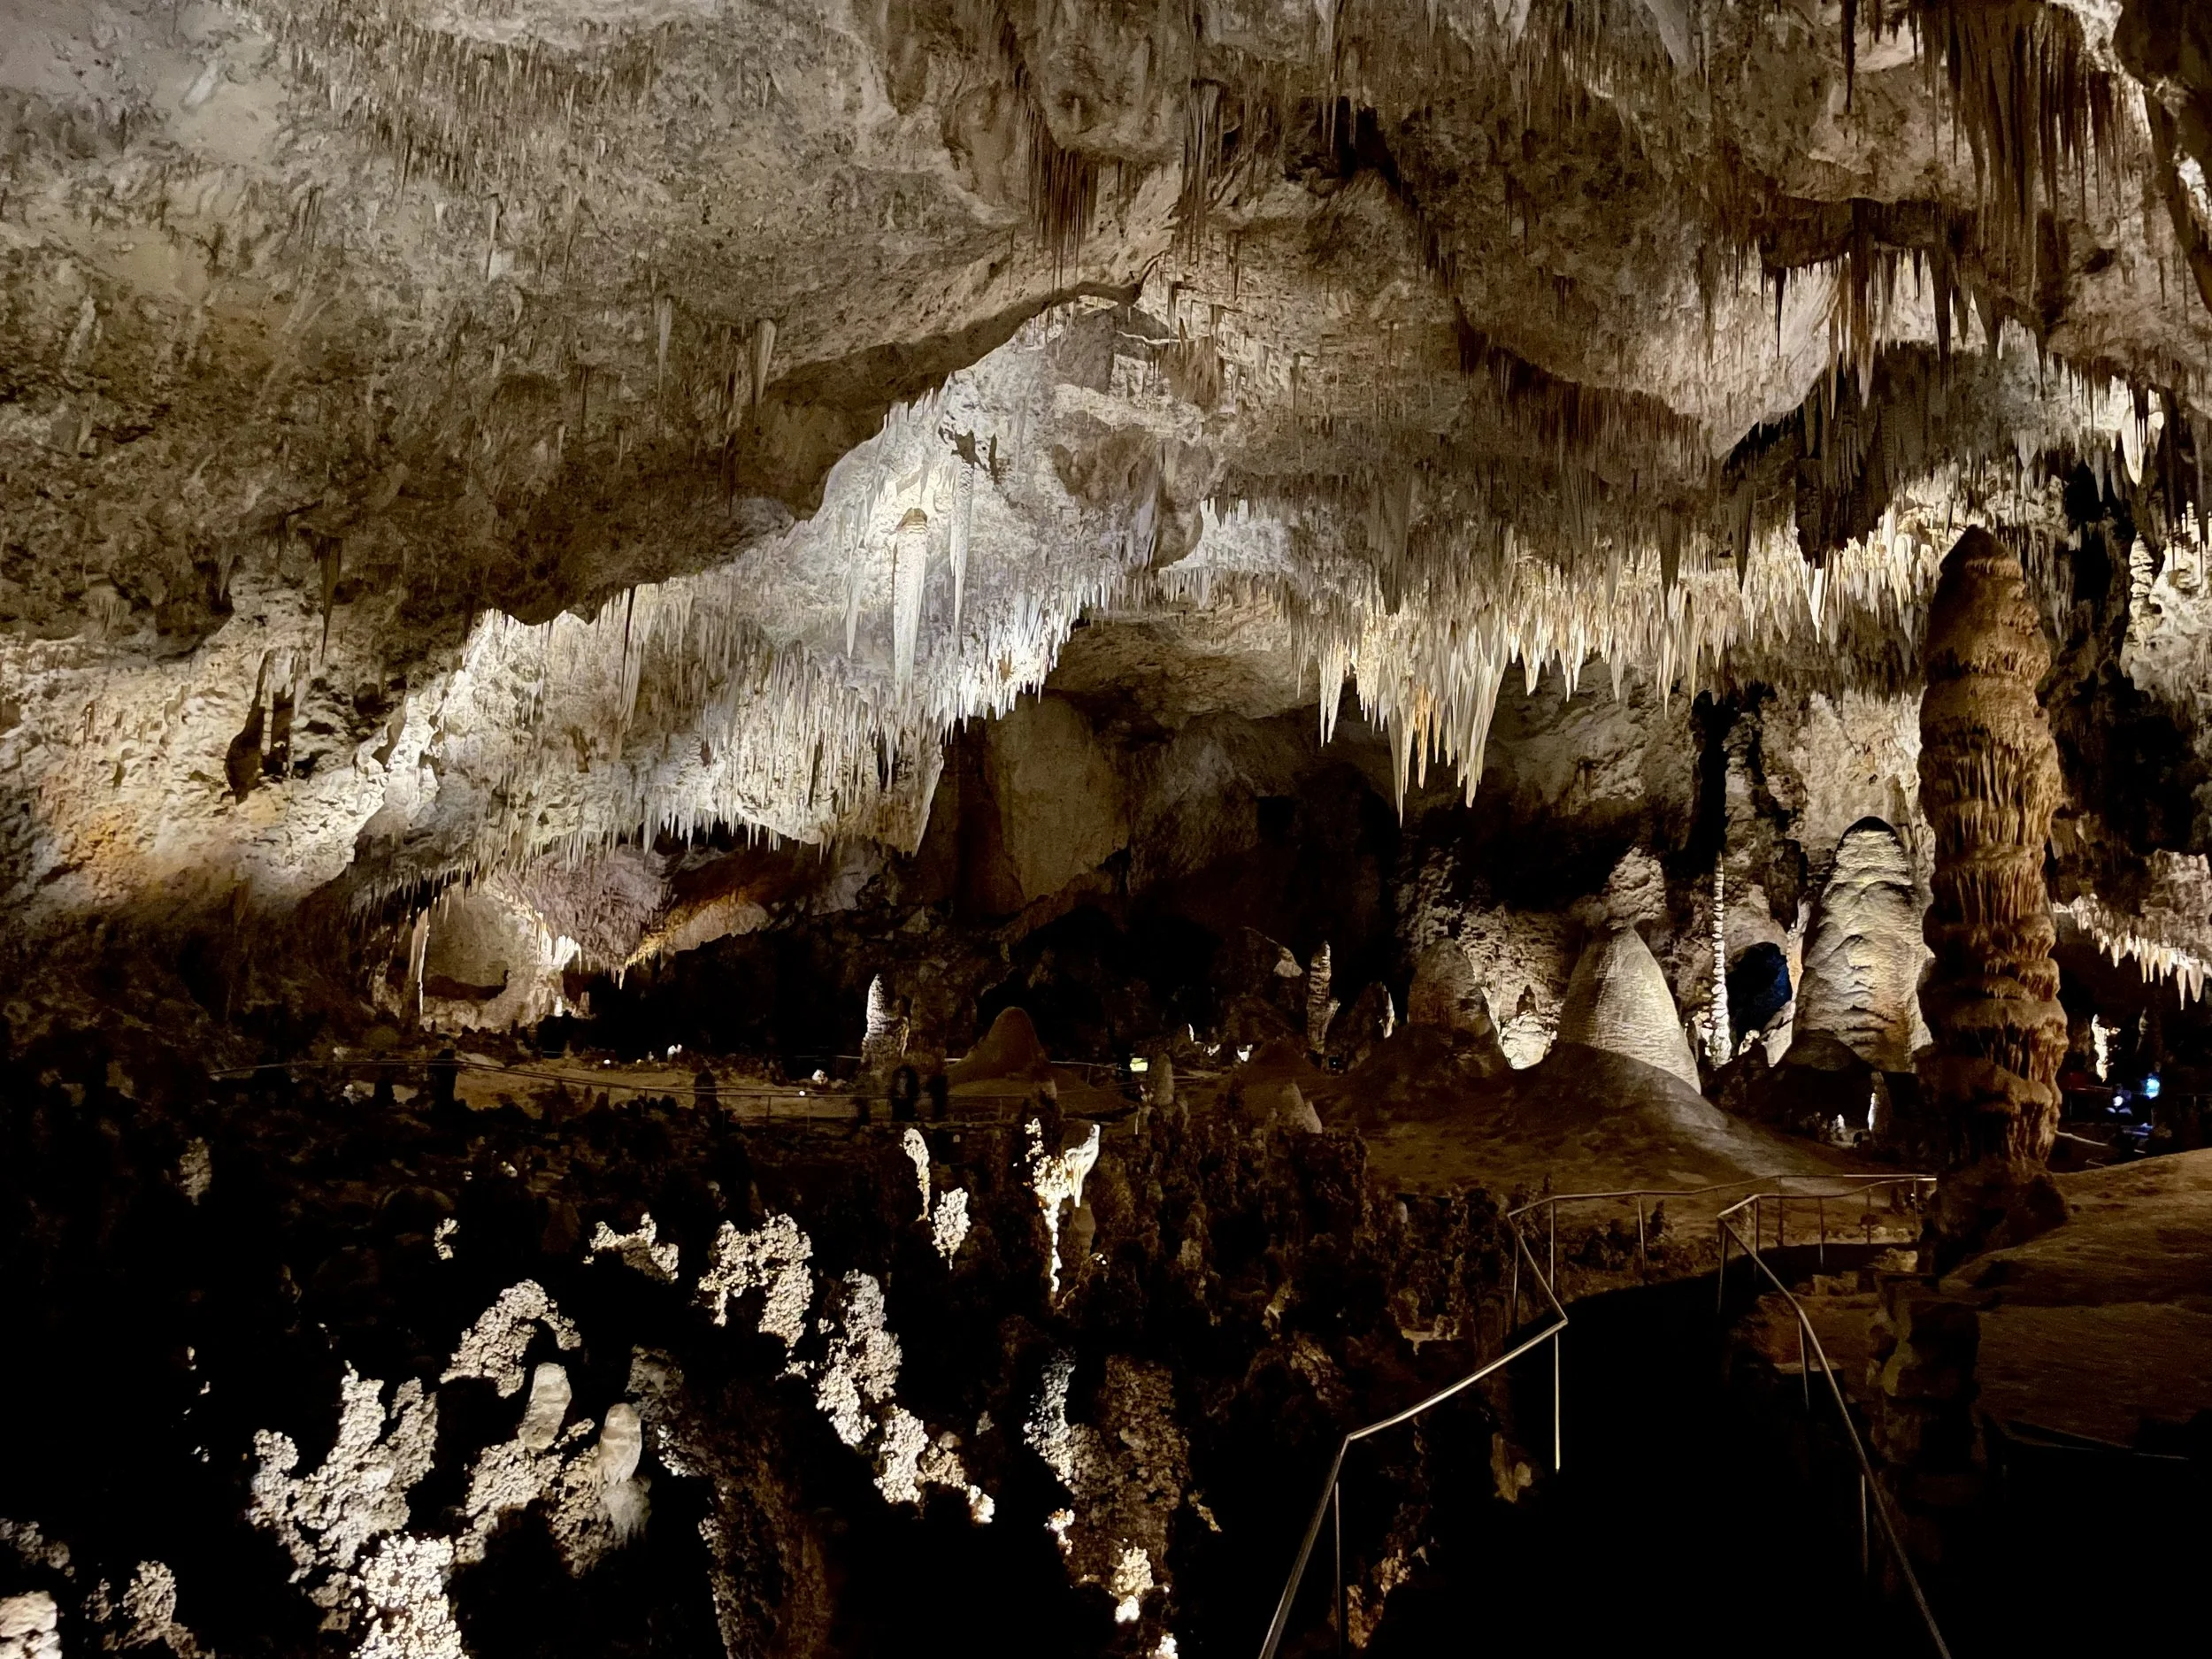
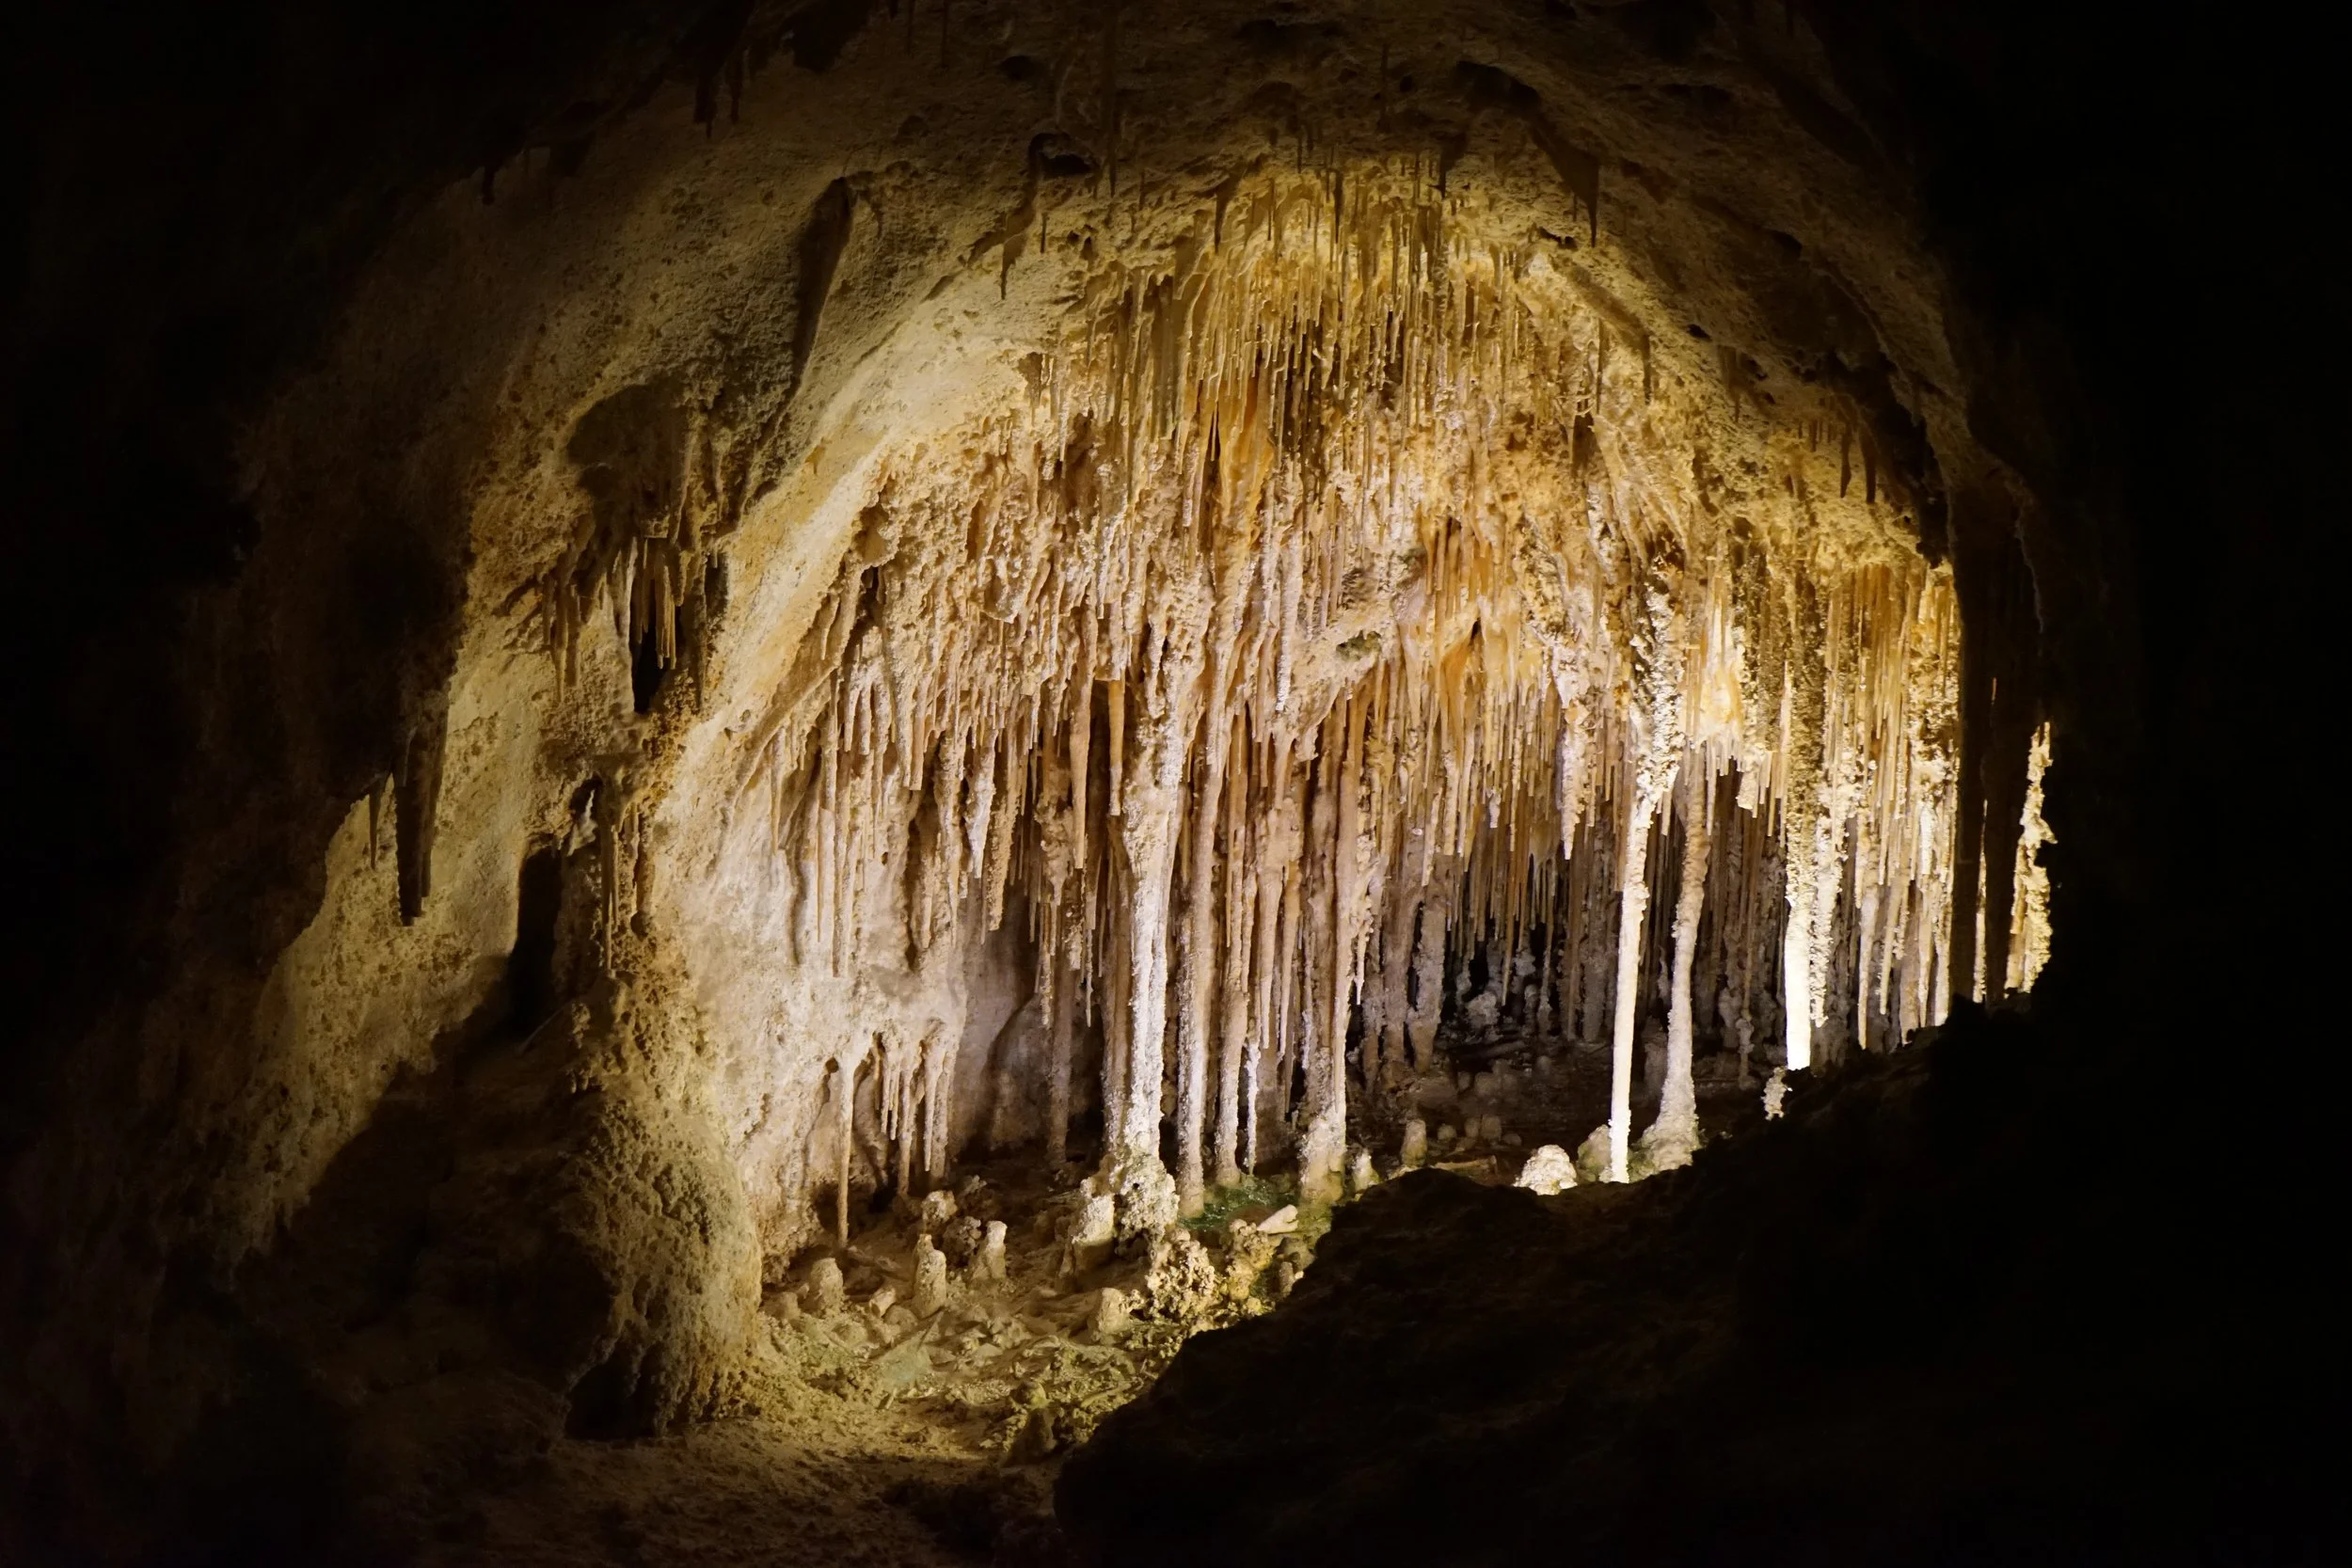
At the bottom, you reach the Big Room — the park’s crown jewel and one of the largest underground chambers in North America. The 1.25-mile loop trail winds past towering stalagmites, delicate stalactites, shimmering draperies, and massive columns. I’ve been to dozens of national parks, but I was genuinely awed by the scale and beauty down here.
And the Big Room is just the tip of the iceberg. The park contains over 119 known caves, though most are closed to the public or require special ranger-led tours, like Spider Cave and Slaughter Canyon Cave. It’s wild to think how much of this underground world is still hidden and protected.
A Bit of History
Carlsbad Caverns became a national monument in 1923 and earned national park status in 1930. But people have known about these caves for far longer — evidence of Indigenous presence, including ancient pictographs, has been found near the cave entrance.
The person most credited with bringing attention to the site is Jim White, a teenage cowboy who explored the caverns by lantern in the 1890s. His early explorations helped spark public interest, eventually leading to the park’s UNESCO World Heritage Site designation in 1995.
Helpful Info
Fees: $15 per person (ages 16+); kids 15 and under are free. America the Beautiful passes are accepted.
Hours: Typically 8 AM–5 PM; check the NPS site for seasonal updates.
Reservations: Required for cave entry — book online in advance.
Accessibility: The Big Room Trail is wheelchair accessible if you use the elevator. The Natural Entrance Trail is steep and not recommended for those with mobility issues.
Best Photo Spots: Inside the caves, look for the Chandelier, Hall of Giants, Rock of Ages, and Mirror Lake. Above ground, catch sunset views or the bat flight at the amphitheater.
Night Sky Tip: Carlsbad Caverns is a Dark Sky Park, so if you stay after sunset, the stargazing is incredible — clear, dark skies with views of the Milky Way.
Hiking & Exploring: While the caves get all the attention, there’s also beauty above ground. Trails like Rattlesnake Canyon or the Walnut Canyon Desert Drive showcase desert landscapes dotted with agave, yucca, roadrunners, and lizards. The Guadalupe Ridge Trail even connects all the way to Guadalupe Mountains National Park, though most people just hike small sections.
If you visit, I’d suggest giving yourself at least 3–4 hours to explore — time to walk the caverns, check out the museum, grab your stamp, and maybe relax with a snack at the café. And if you can stick around after dark? Between the bats and the stars, Carlsbad Caverns offers just as much magic above ground as it does below.
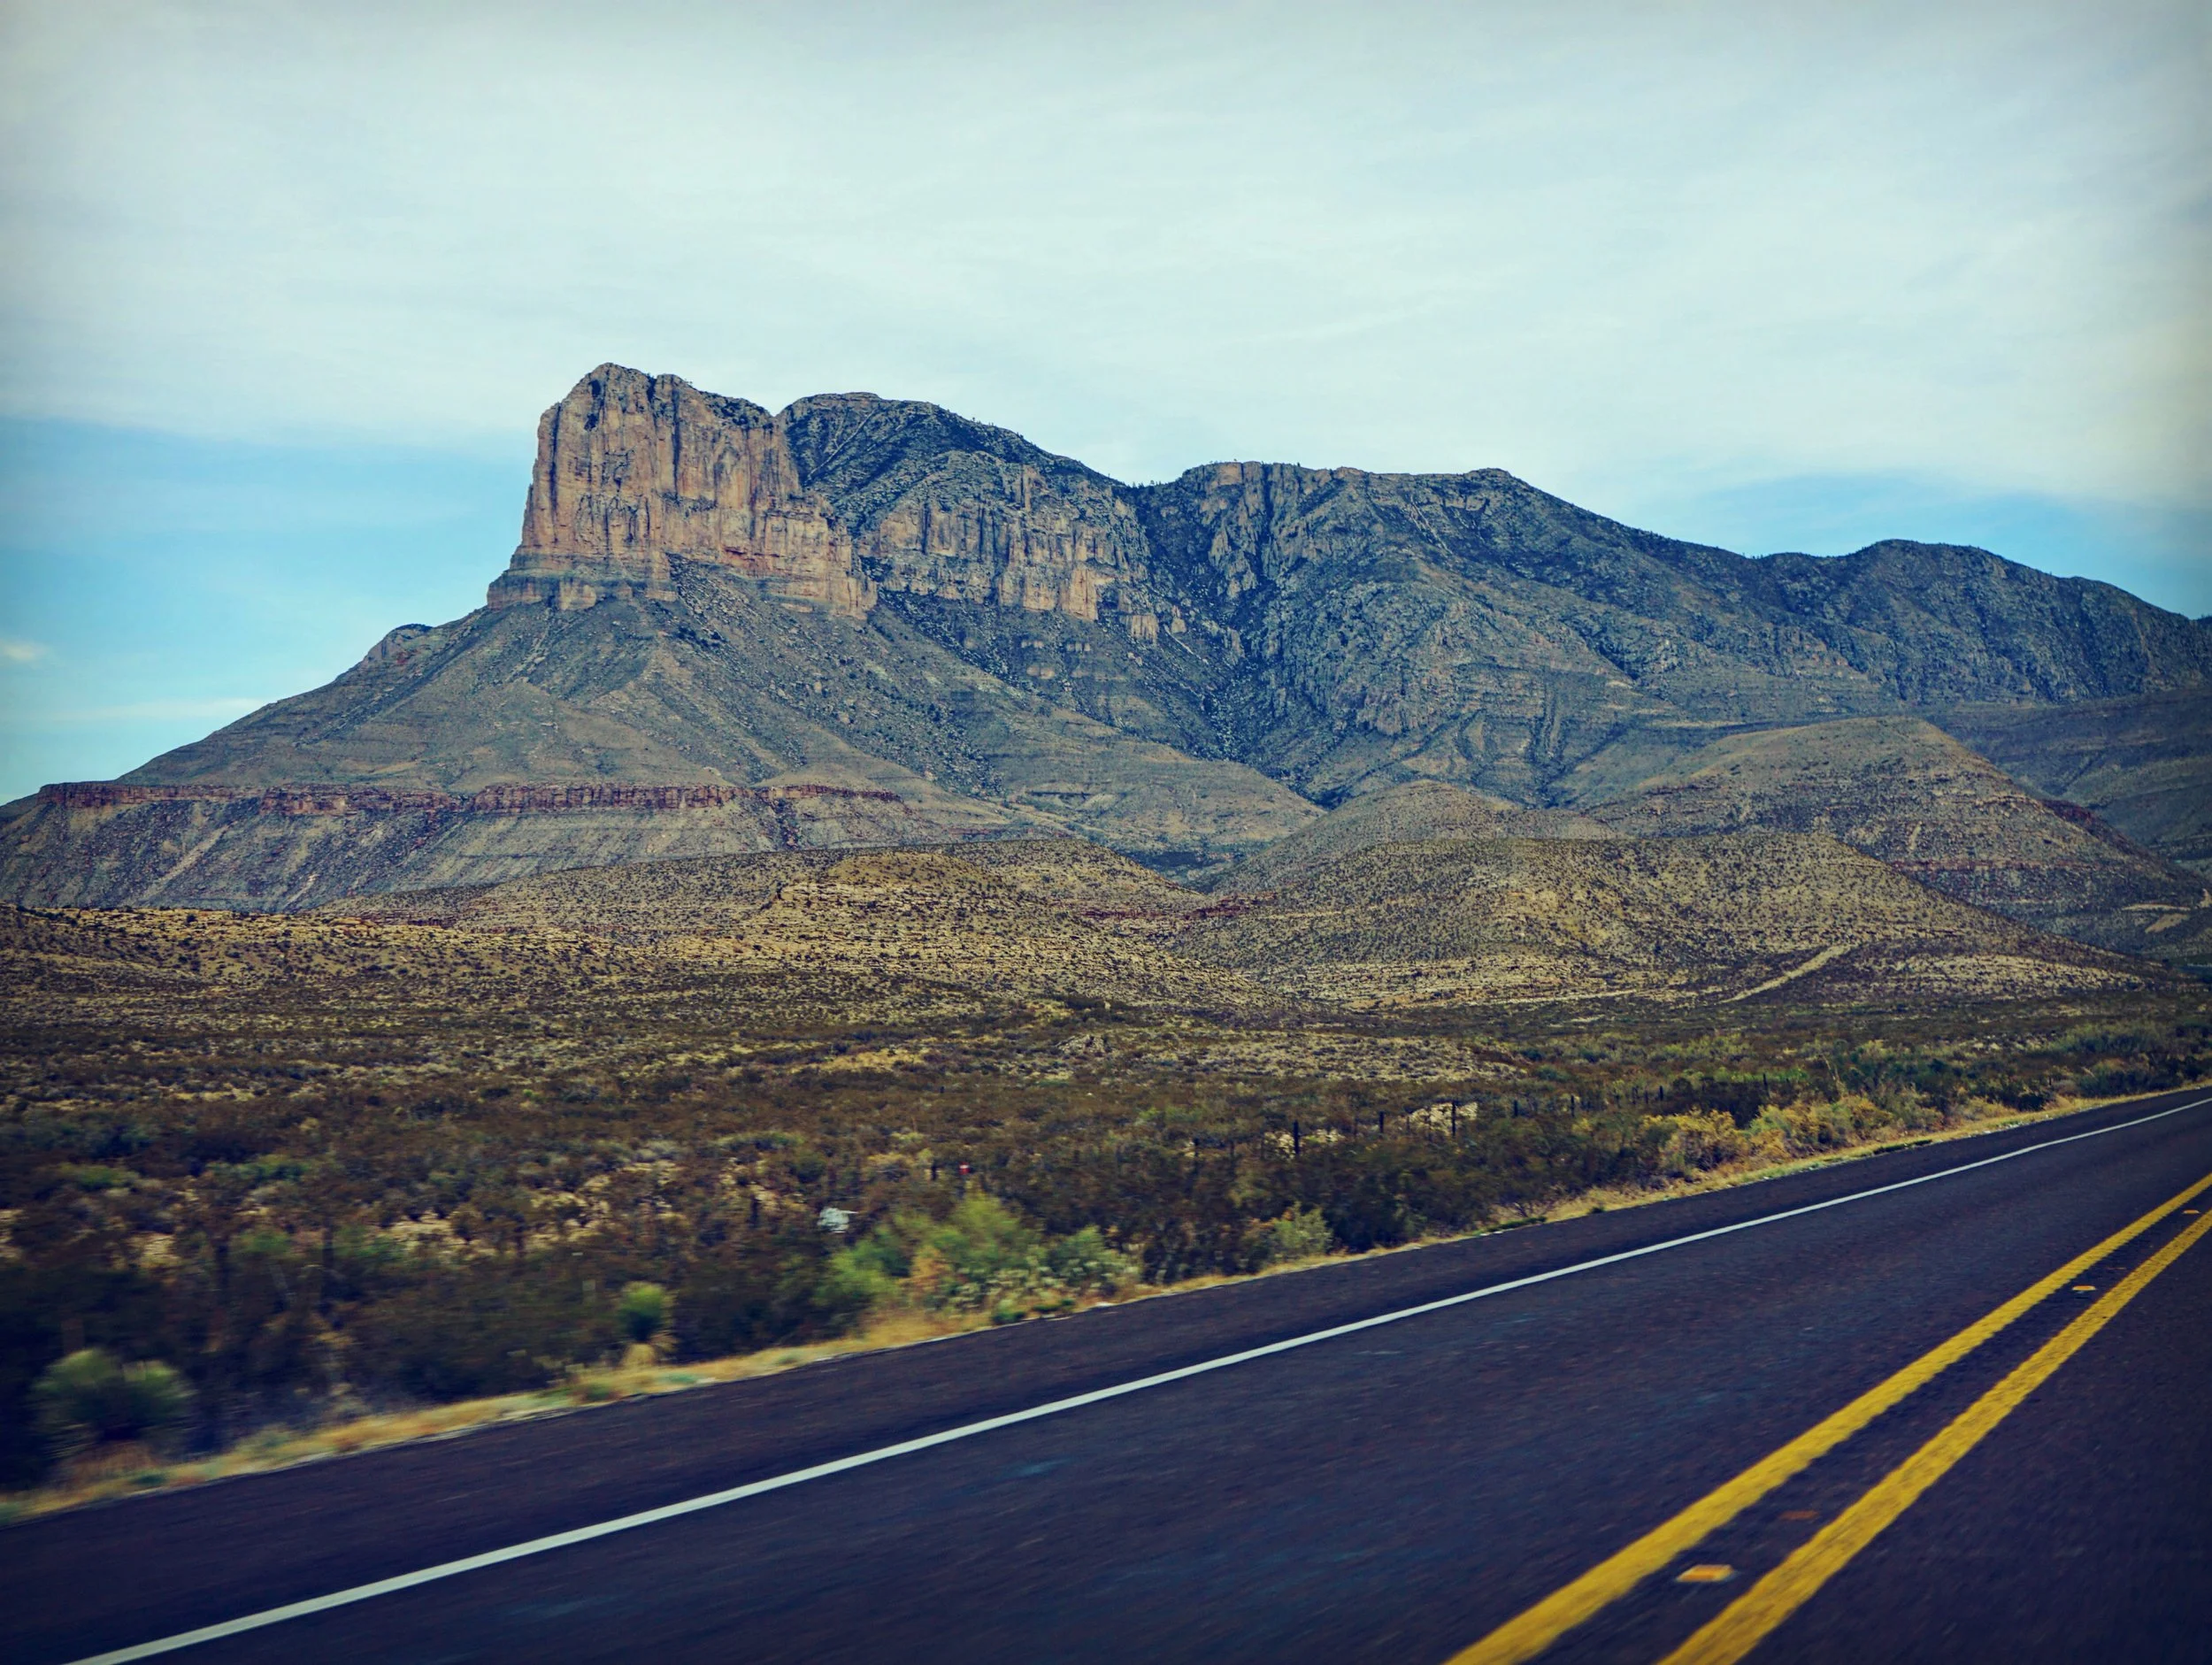
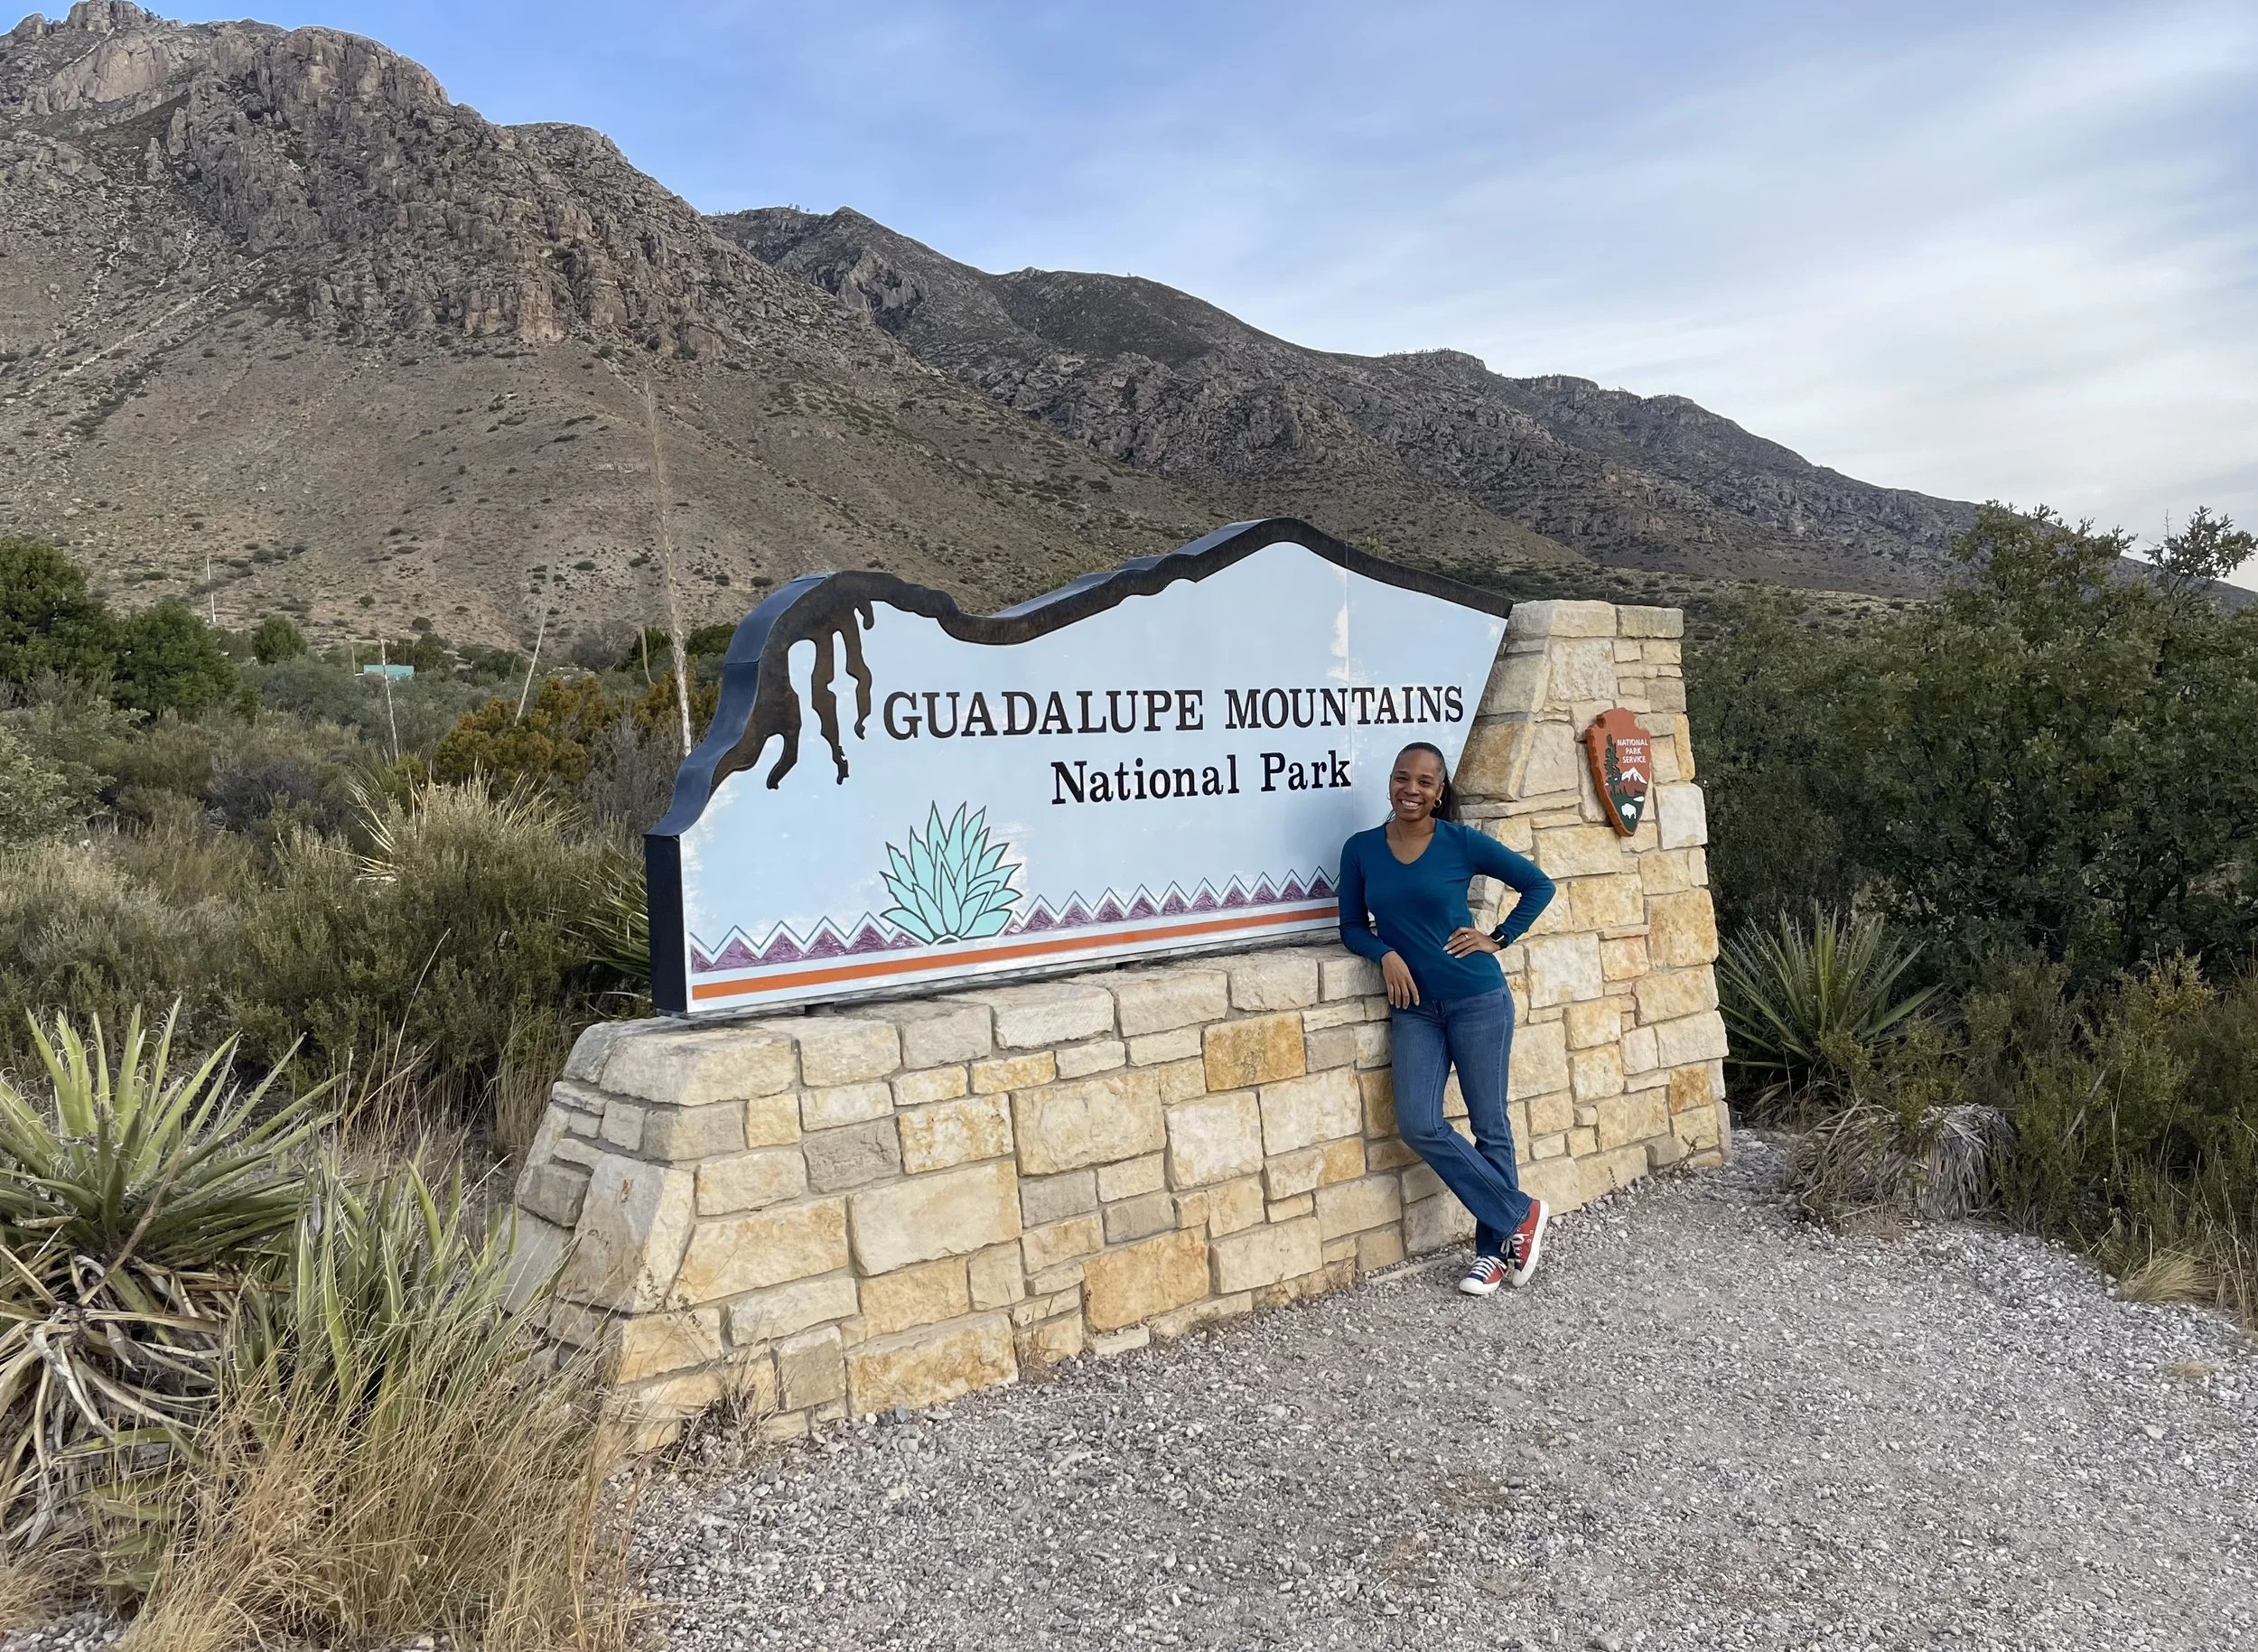
#23 Guadalupe Mountain National Park, Texas
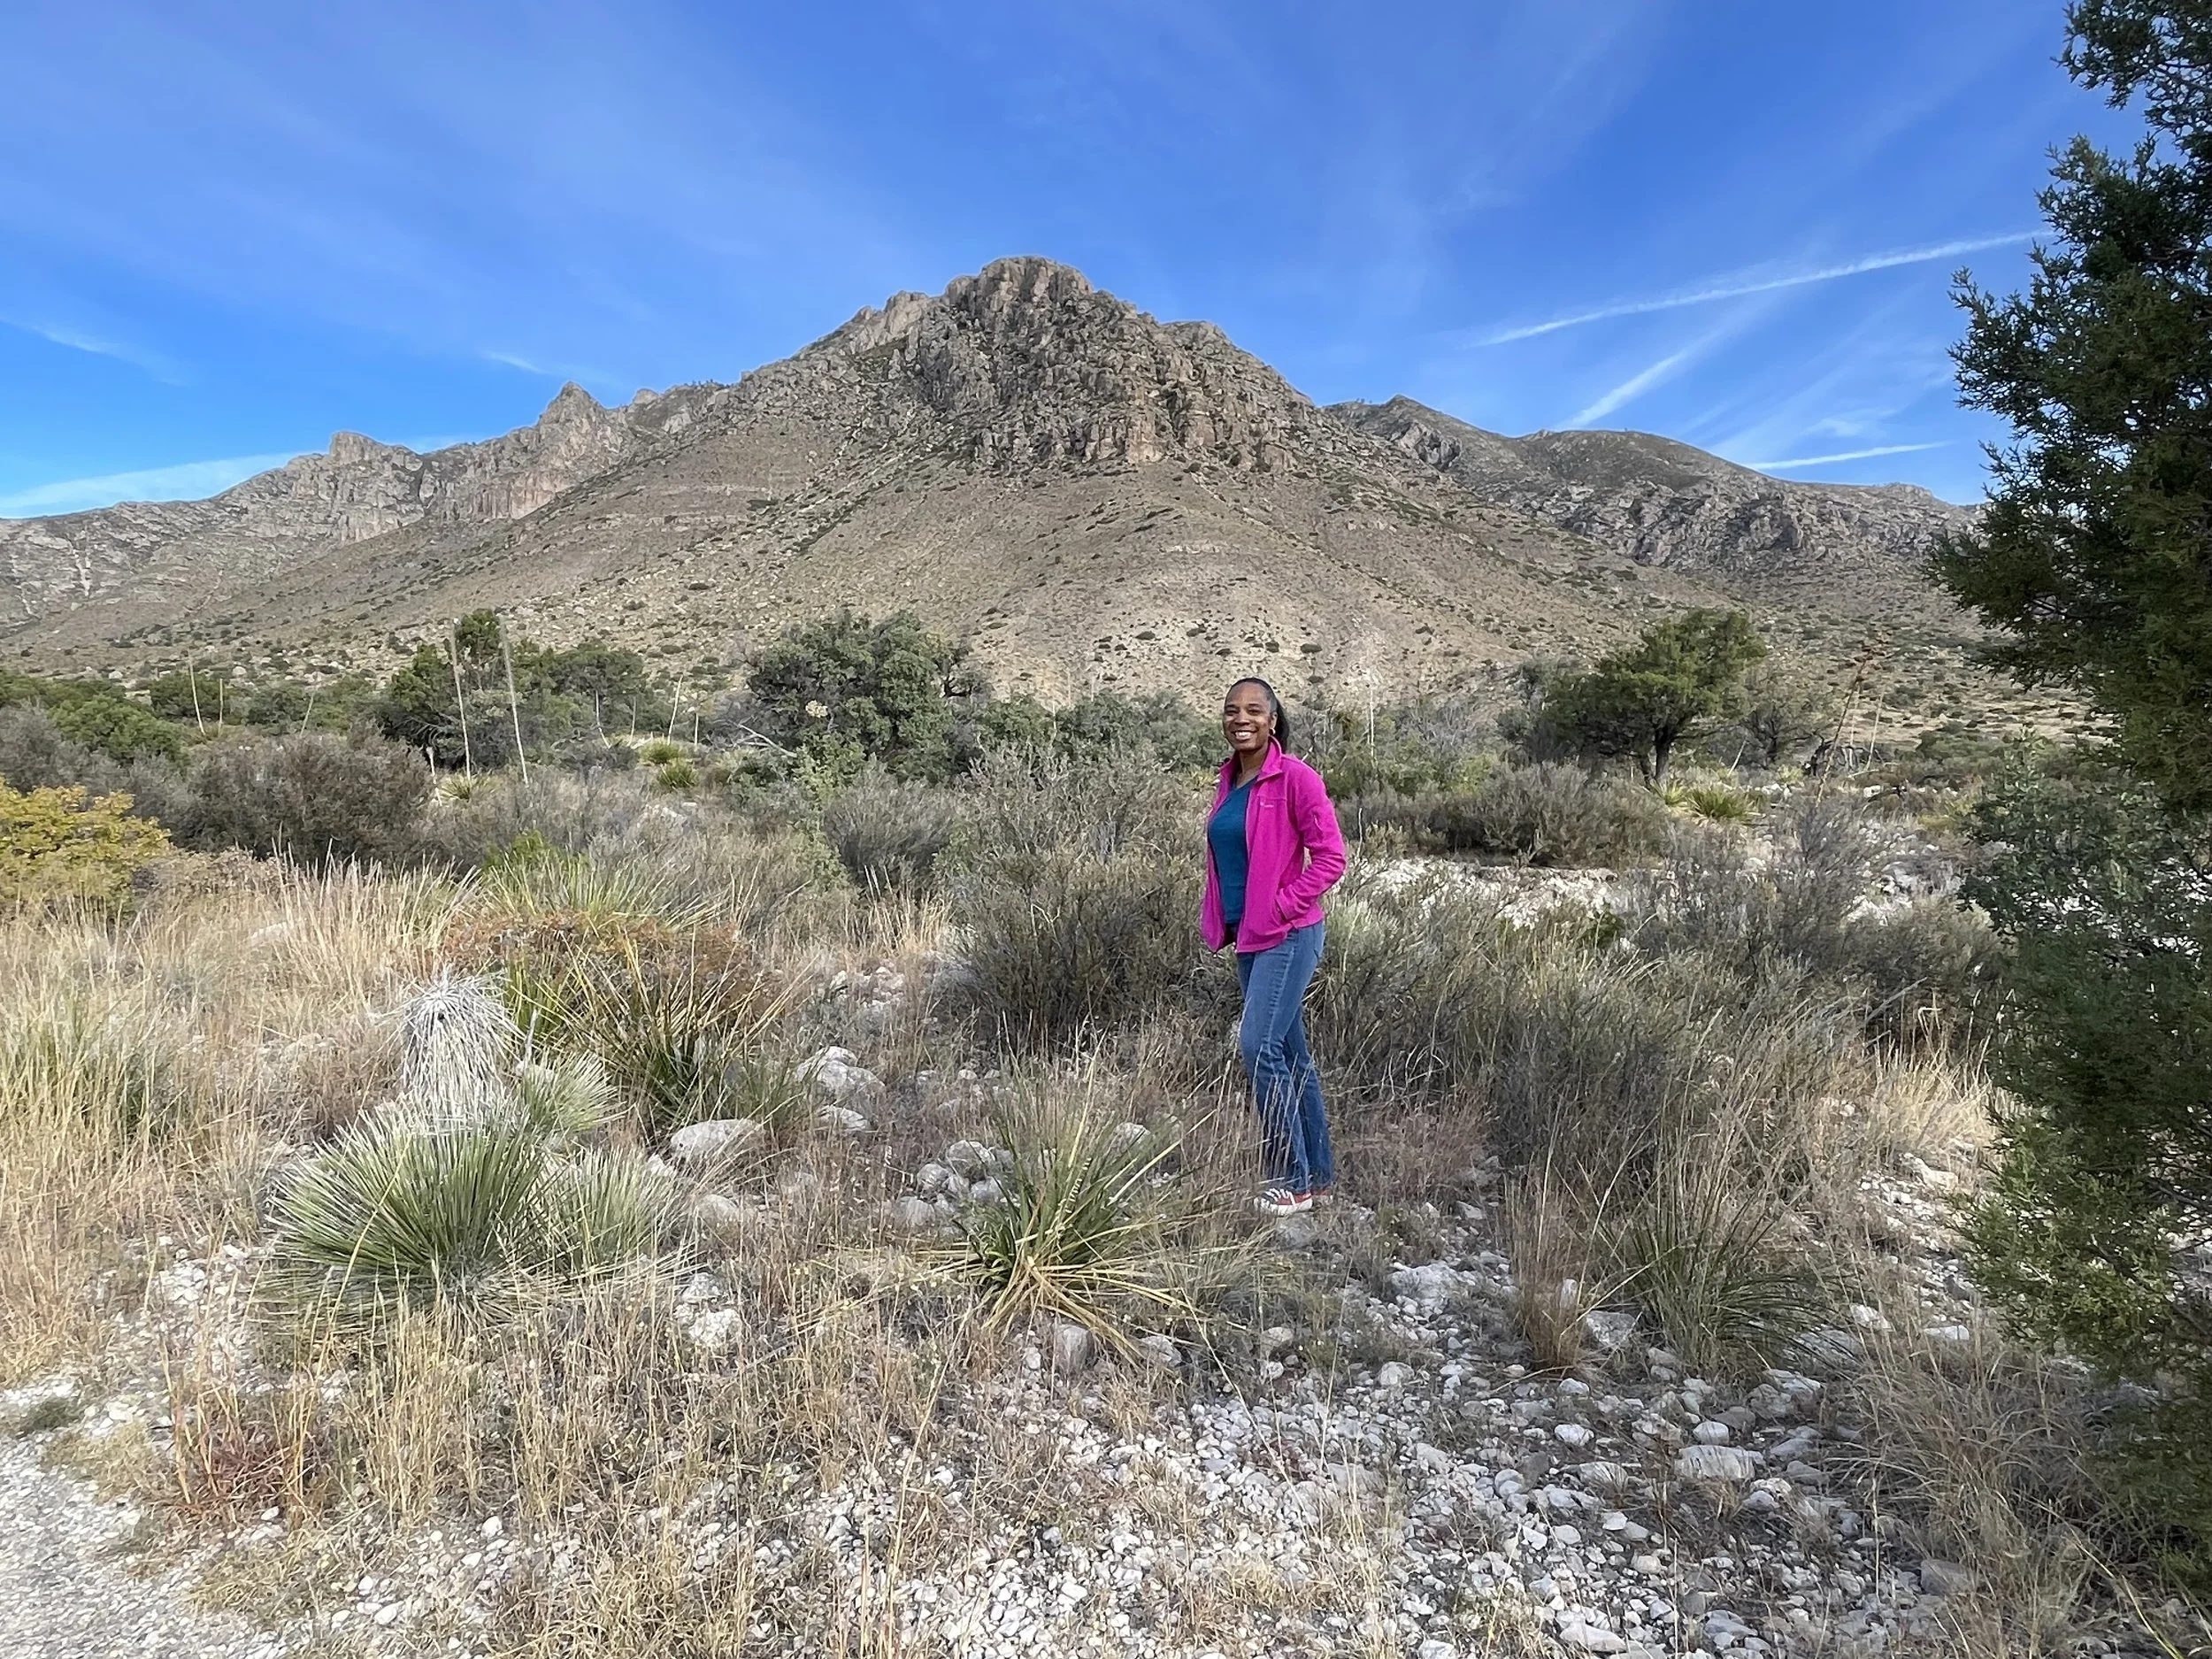
My visit to Guadalupe Mountains National Park started bright and early in El Paso, Texas. I hit the road before sunrise for the almost two-hour (okay, technically 1 hour and 45 minutes) drive to the park. Was I thrilled about leaving that early? Not really. But once I was on the road, it was totally worth it — the sunrise over West Texas was gorgeous. You get these huge, wide-open views of desert and mountain, and the changing colors make the drive surprisingly peaceful (even if you’re still half-asleep).
Before you even get into the park, make sure you pull over. Some of the best views of the Guadalupe Mountains are right from the highway, and there are a bunch of spots where you can safely stop and snap some photos. Of course, I also had to stop for my obligatory photo by the national park sign — or rather, signs. There’s one by the road and another at the visitor center. Did I stop at both? Obviously.
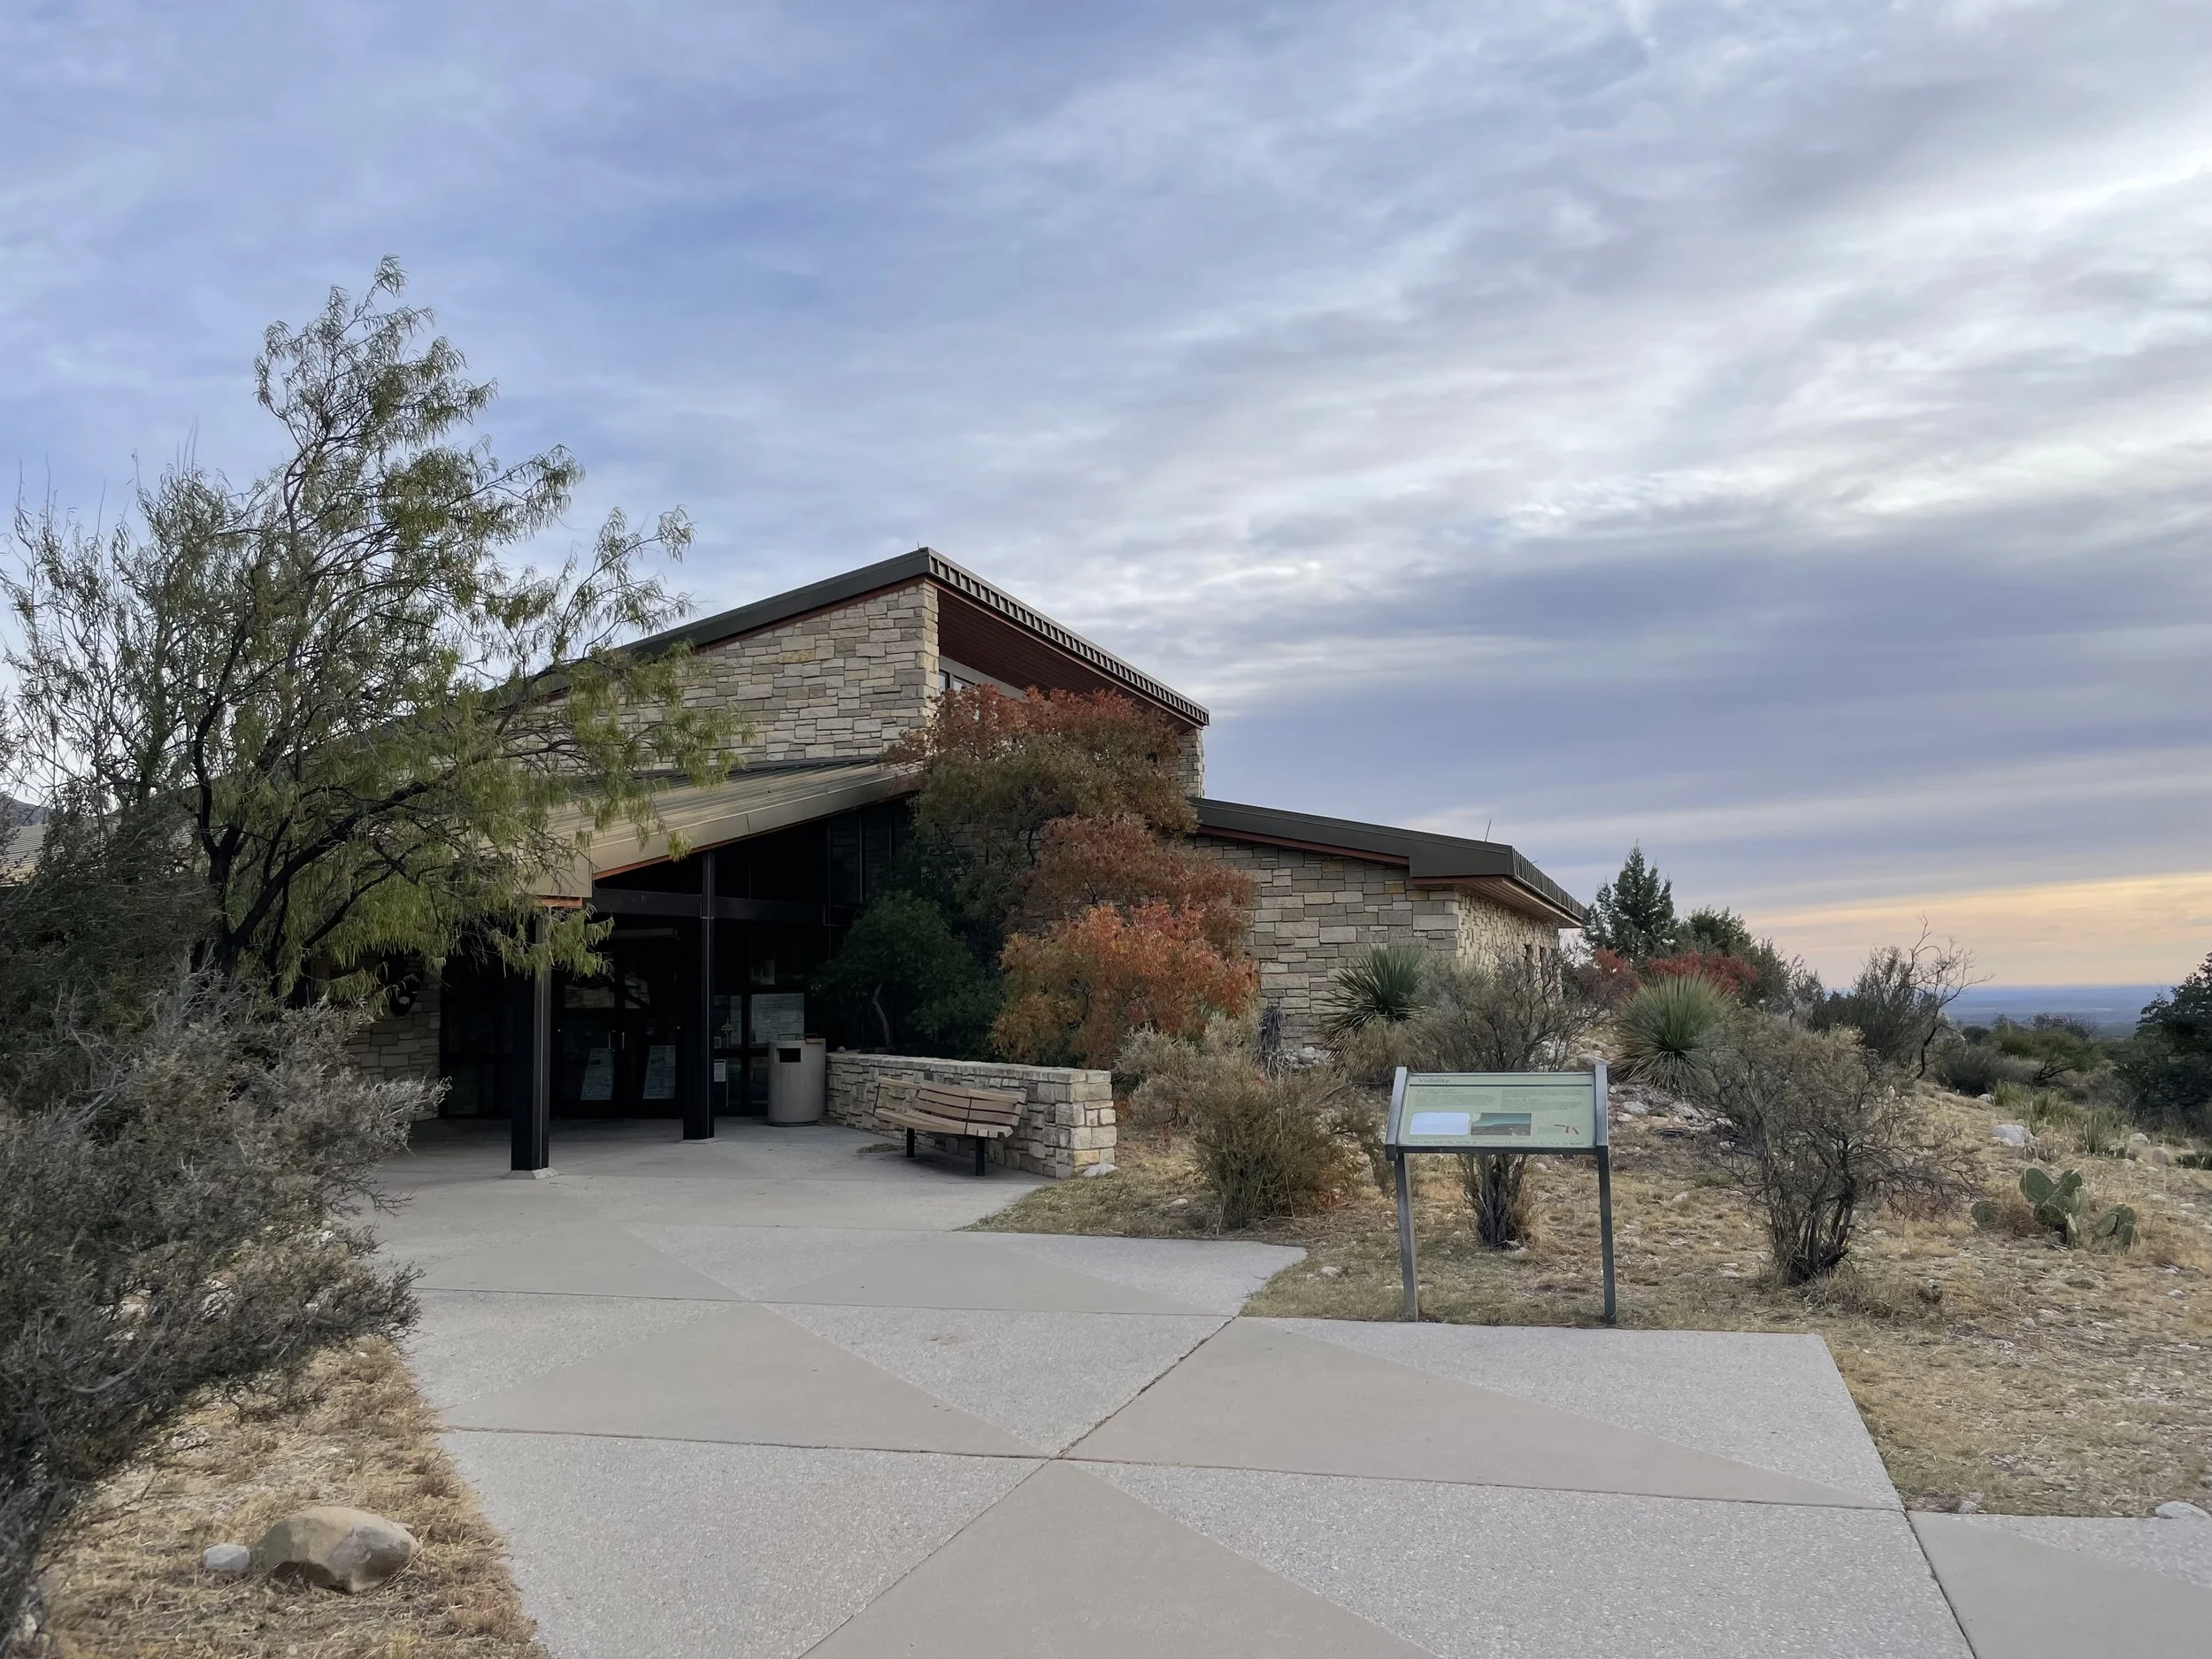
Pine Springs Visitor Center
First Stop: Pine Springs Visitor Center
I pulled into the Pine Springs Visitor Center around 7:45 a.m. with one major mission: find a bathroom, fast. Since it was before 8 a.m., the building was still closed, but thankfully the restrooms are outside and unlocked. Crisis averted.
There was only one other car in the lot, so I had the place pretty much to myself. Once I handled the bathroom situation, I waited in my car for the visitor center to open.
When it did, I headed inside. The area around the visitor center is surrounded by desert scrub and rugged cliffs, with Guadalupe Peak towering in the distance. Inside, the setup is pretty simple — there’s a small exhibit area, a little gift shop, and the all-important stamp station for your national parks passport. I’ll be honest: the rangers were great, but the woman working at the gift shop desk didn’t exactly seem thrilled to be there. Still, she pointed me to the stamp, which is all I really needed. Stamp and map in hand, I was good to go.
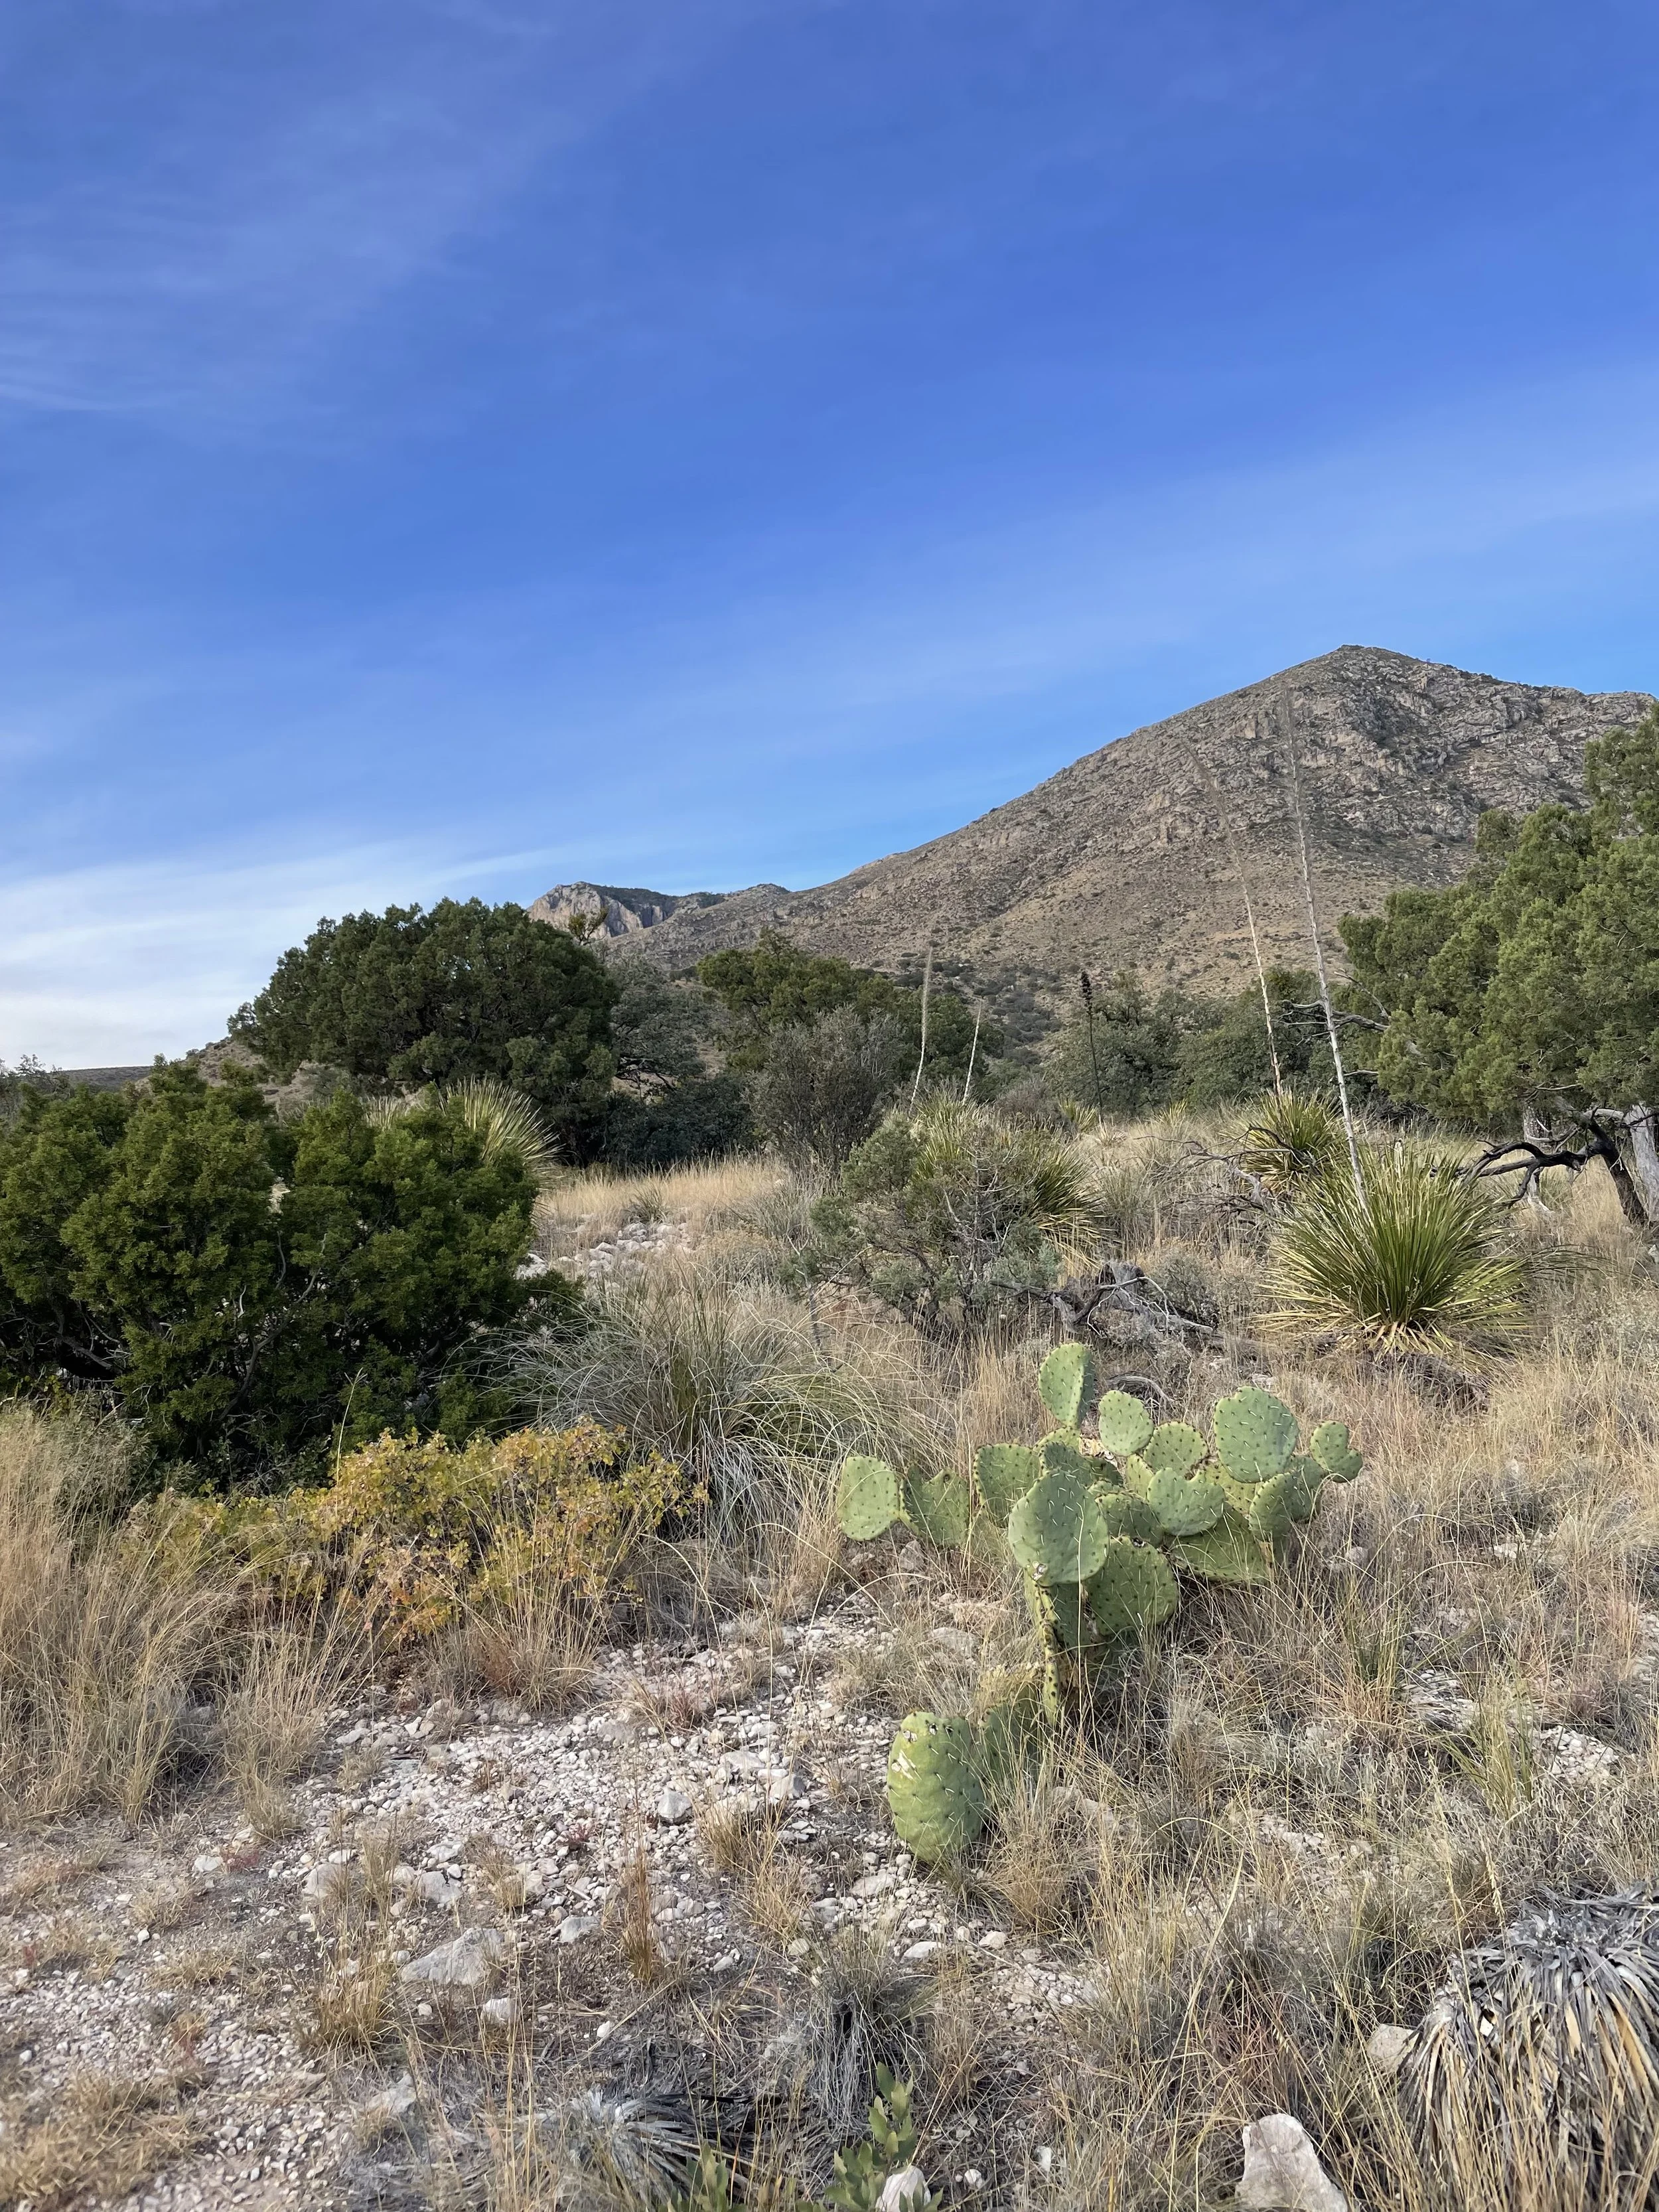
Since I didn’t have time for the big hike up Guadalupe Peak (it’s a serious all-day commitment), I stuck to the short trail behind the visitor center. Fun fact: it’s actually handicap accessible, so anyone can get out and enjoy a bit of the scenery. Even on a short walk, the landscape is impressive — jagged peaks, fossil-rich rocks, desert plants — and you really get that feeling that you’re somewhere special.
The visitor centers is located at : 400 Pine Canyon Drive, Salt Flat, TX 79847
It’s situated just off U.S. Highway 62/180, making it easily accessible for visitors approaching from El Paso or Carlsbad.
About the Park (Why You Should Go)
Guadalupe Mountains National Park isn’t one of those ultra-famous parks like Yosemite or Yellowstone. It’s a bit off the beaten path, but that’s part of what makes it cool. It’s home to Texas’s tallest mountain, Guadalupe Peak, plus dramatic limestone cliffs, fossil-studded canyons, and even some hidden springs.
The park covers about 86,400 acres and was officially established in 1972 (thank you, geologist Wallace Pratt, who donated much of the land). It’s a park for hikers, geology buffs, and people looking for quiet, off-the-radar adventures.
The main entrance is at Pine Springs, but you can also check out McKittrick Canyon (super popular in the fall when the leaves go wild) or Dog Canyon on the north side, which is way less crowded if you want more solitude.
Best Hikes (For When You’re Ready to Sweat)
• Guadalupe Peak Trail: 8.4 miles round trip, a big climb, but you’ll get to stand on the highest point in Texas.
• McKittrick Canyon Trail: Known for amazing fall colors. You can do a short hike to Pratt Cabin or go farther to the Grotto.
• Devil’s Hall Trail: A 3.8-mile moderate hike through a rocky canyon with some scrambling and a super cool narrow hallway section.
• The Bowl Trail: A tougher loop trail that takes you up into a pine forest — yes, actual pine trees growing in the middle of the desert.
Best Photo Spots
If you’re chasing those photo moments, don’t miss:
• El Capitan: This massive limestone formation looks especially stunning at sunrise or sunset.
• Guadalupe Peak: The top-of-Texas view as it’s the highest peak in Texas.
• McKittrick Canyon: In the fall, the colors here are unreal (I hear).
• Salt Basin Dunes: On the west side of the park, you get these bright white sand dunes with mountains in the background — perfect for sunset shots.
Can You Camp There? Yup!
There’s no hotel or lodge inside the park, but you’ve got some camping options:
• Pine Springs Campground: Tent and RV sites (no hookups), restrooms, but no showers or campfires allowed.
• Dog Canyon Campground: Smaller, quieter, and a great option if you want to avoid crowds.
• Backcountry Camping: For the hardcore hikers, you can snag a wilderness permit and camp under the stars out on the trails.
Accessibility note: The Pine Springs Campground has some accessible campsites and restrooms, and the short nature trail behind the visitor center is wheelchair-friendly.
Important Tips Before You Go
• The park is on Mountain Time, but your phone might switch to Central Time depending on the signal, so double-check the actual time.
• There are no gas stations or restaurants in the park. Stock up in Van Horn (about 60 miles south) or Whites City, New Mexico (about 35 miles north).
• Pets are allowed in the campgrounds and on paved areas, but they’re not allowed on most trails.
• Bring plenty of water — it’s dry, even when the weather feels cool, and the elevation can sneak up on you.
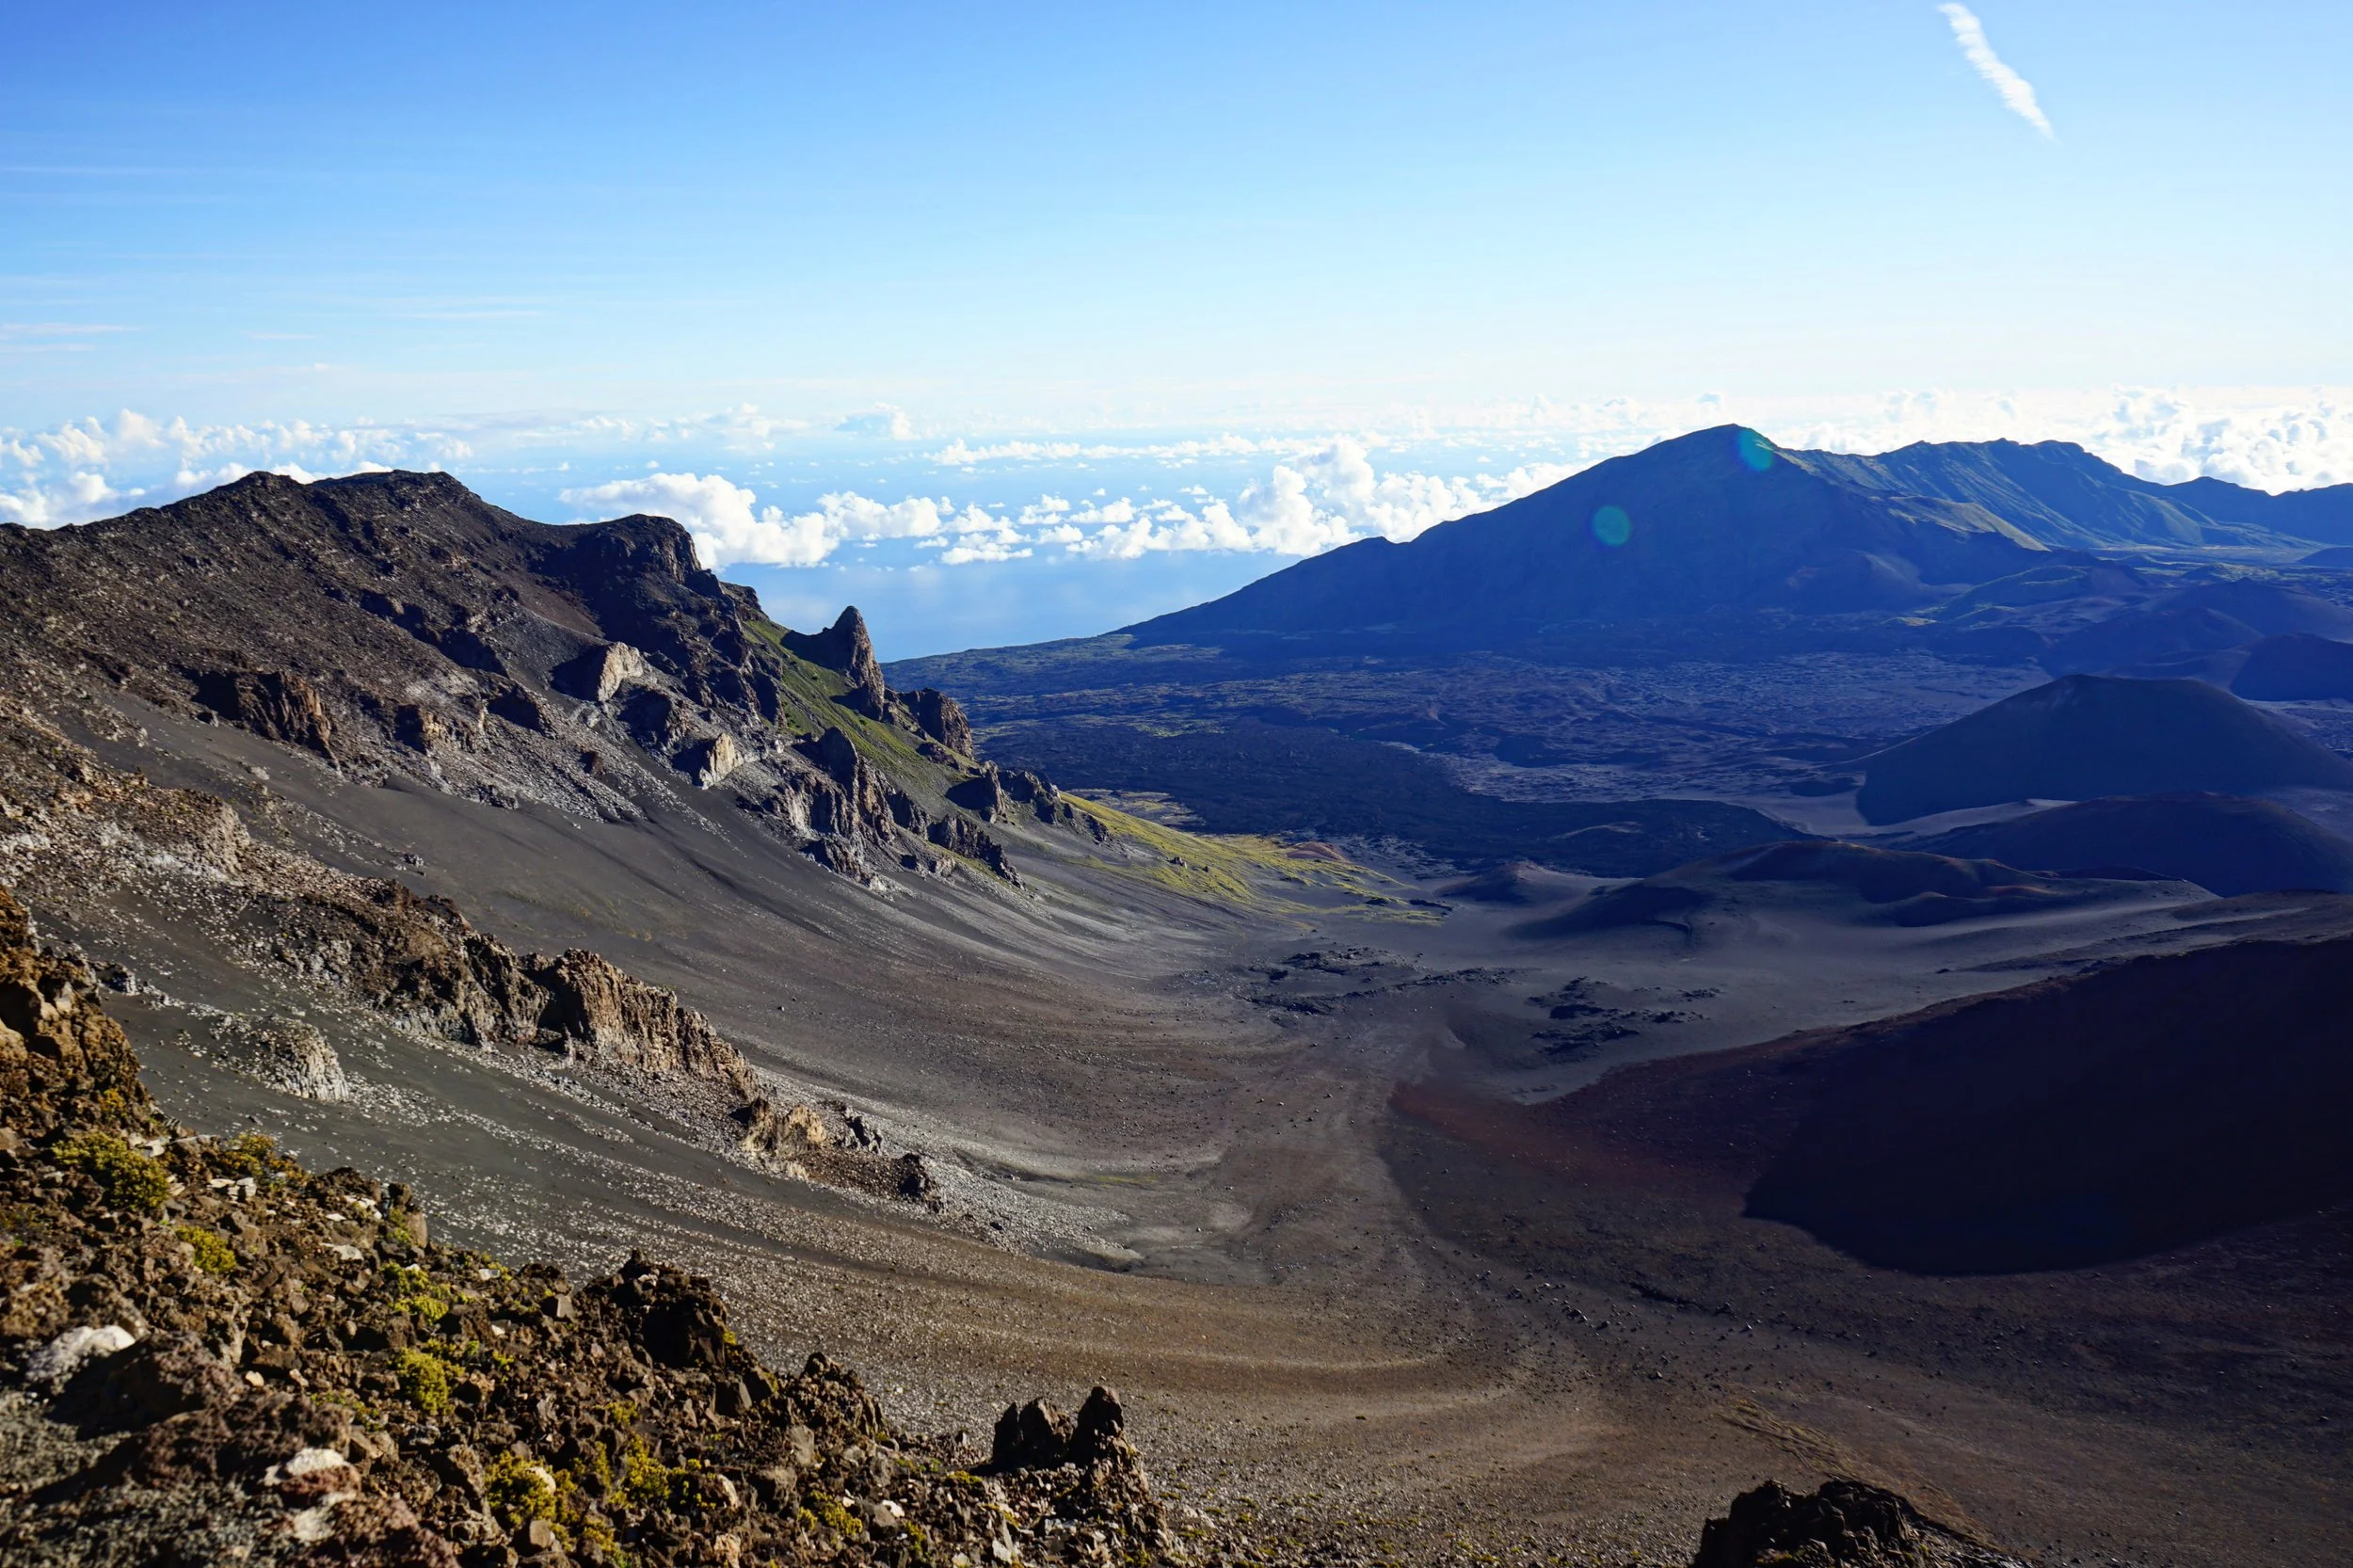
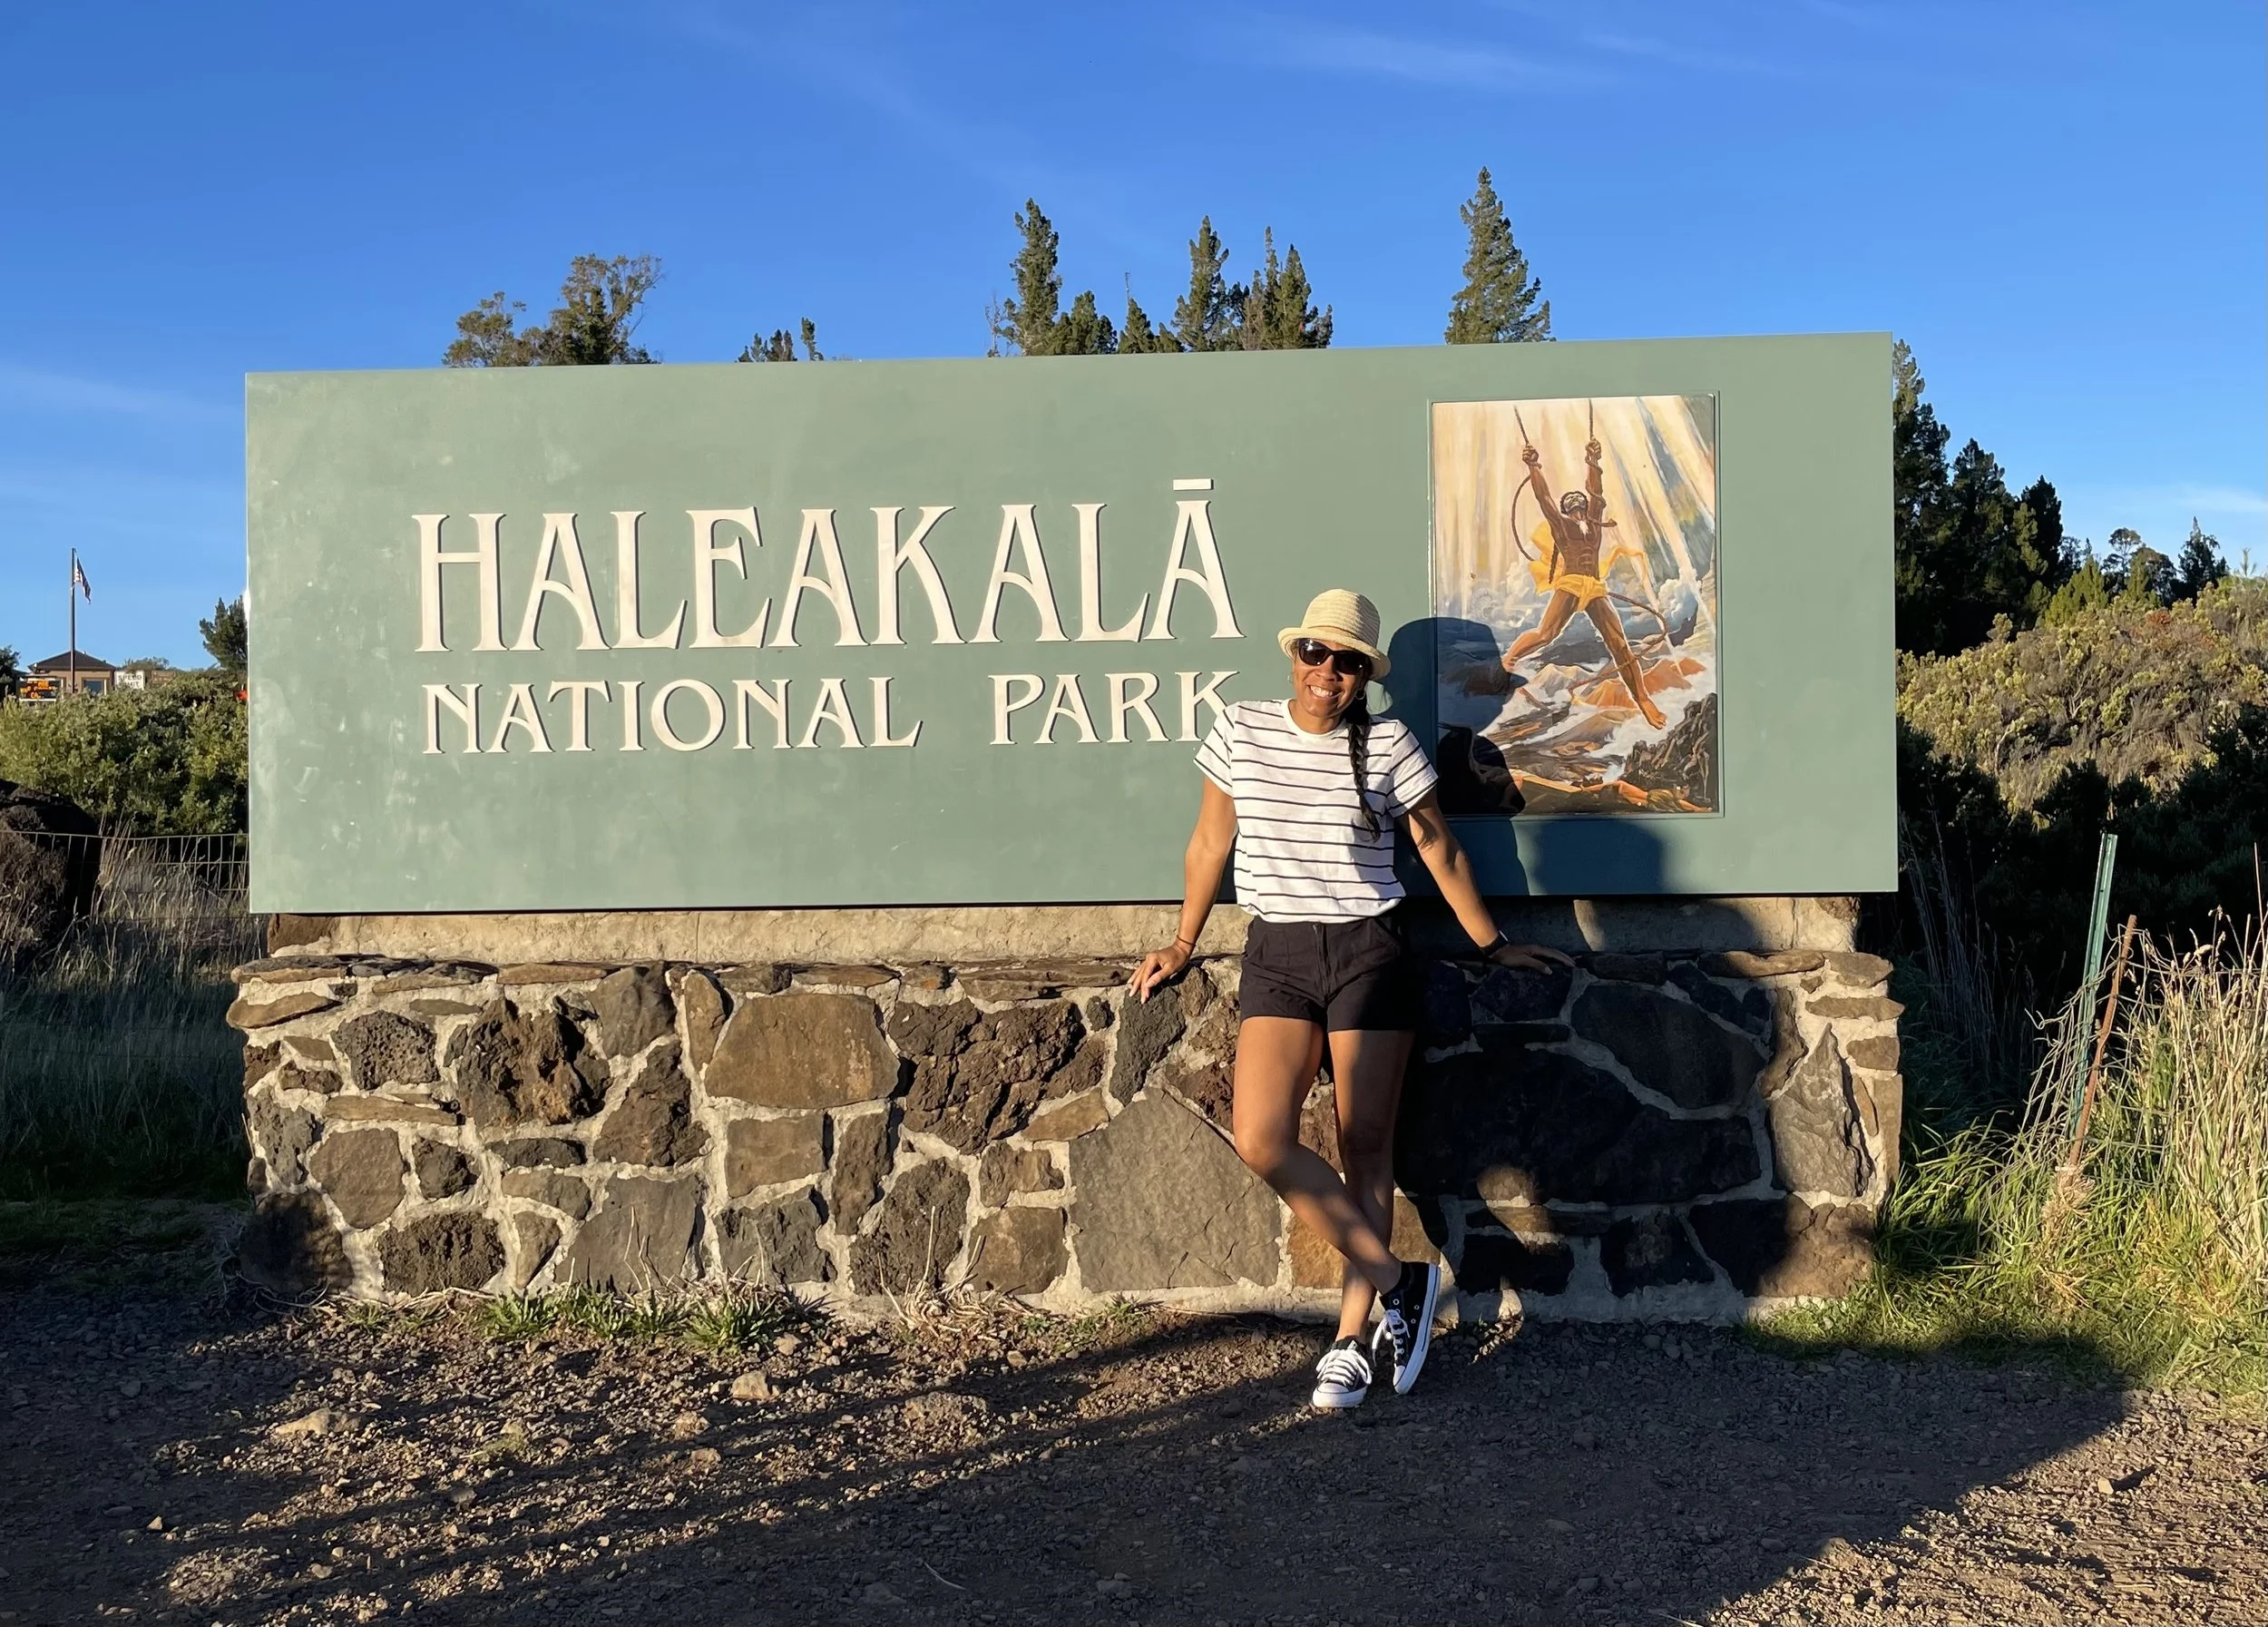
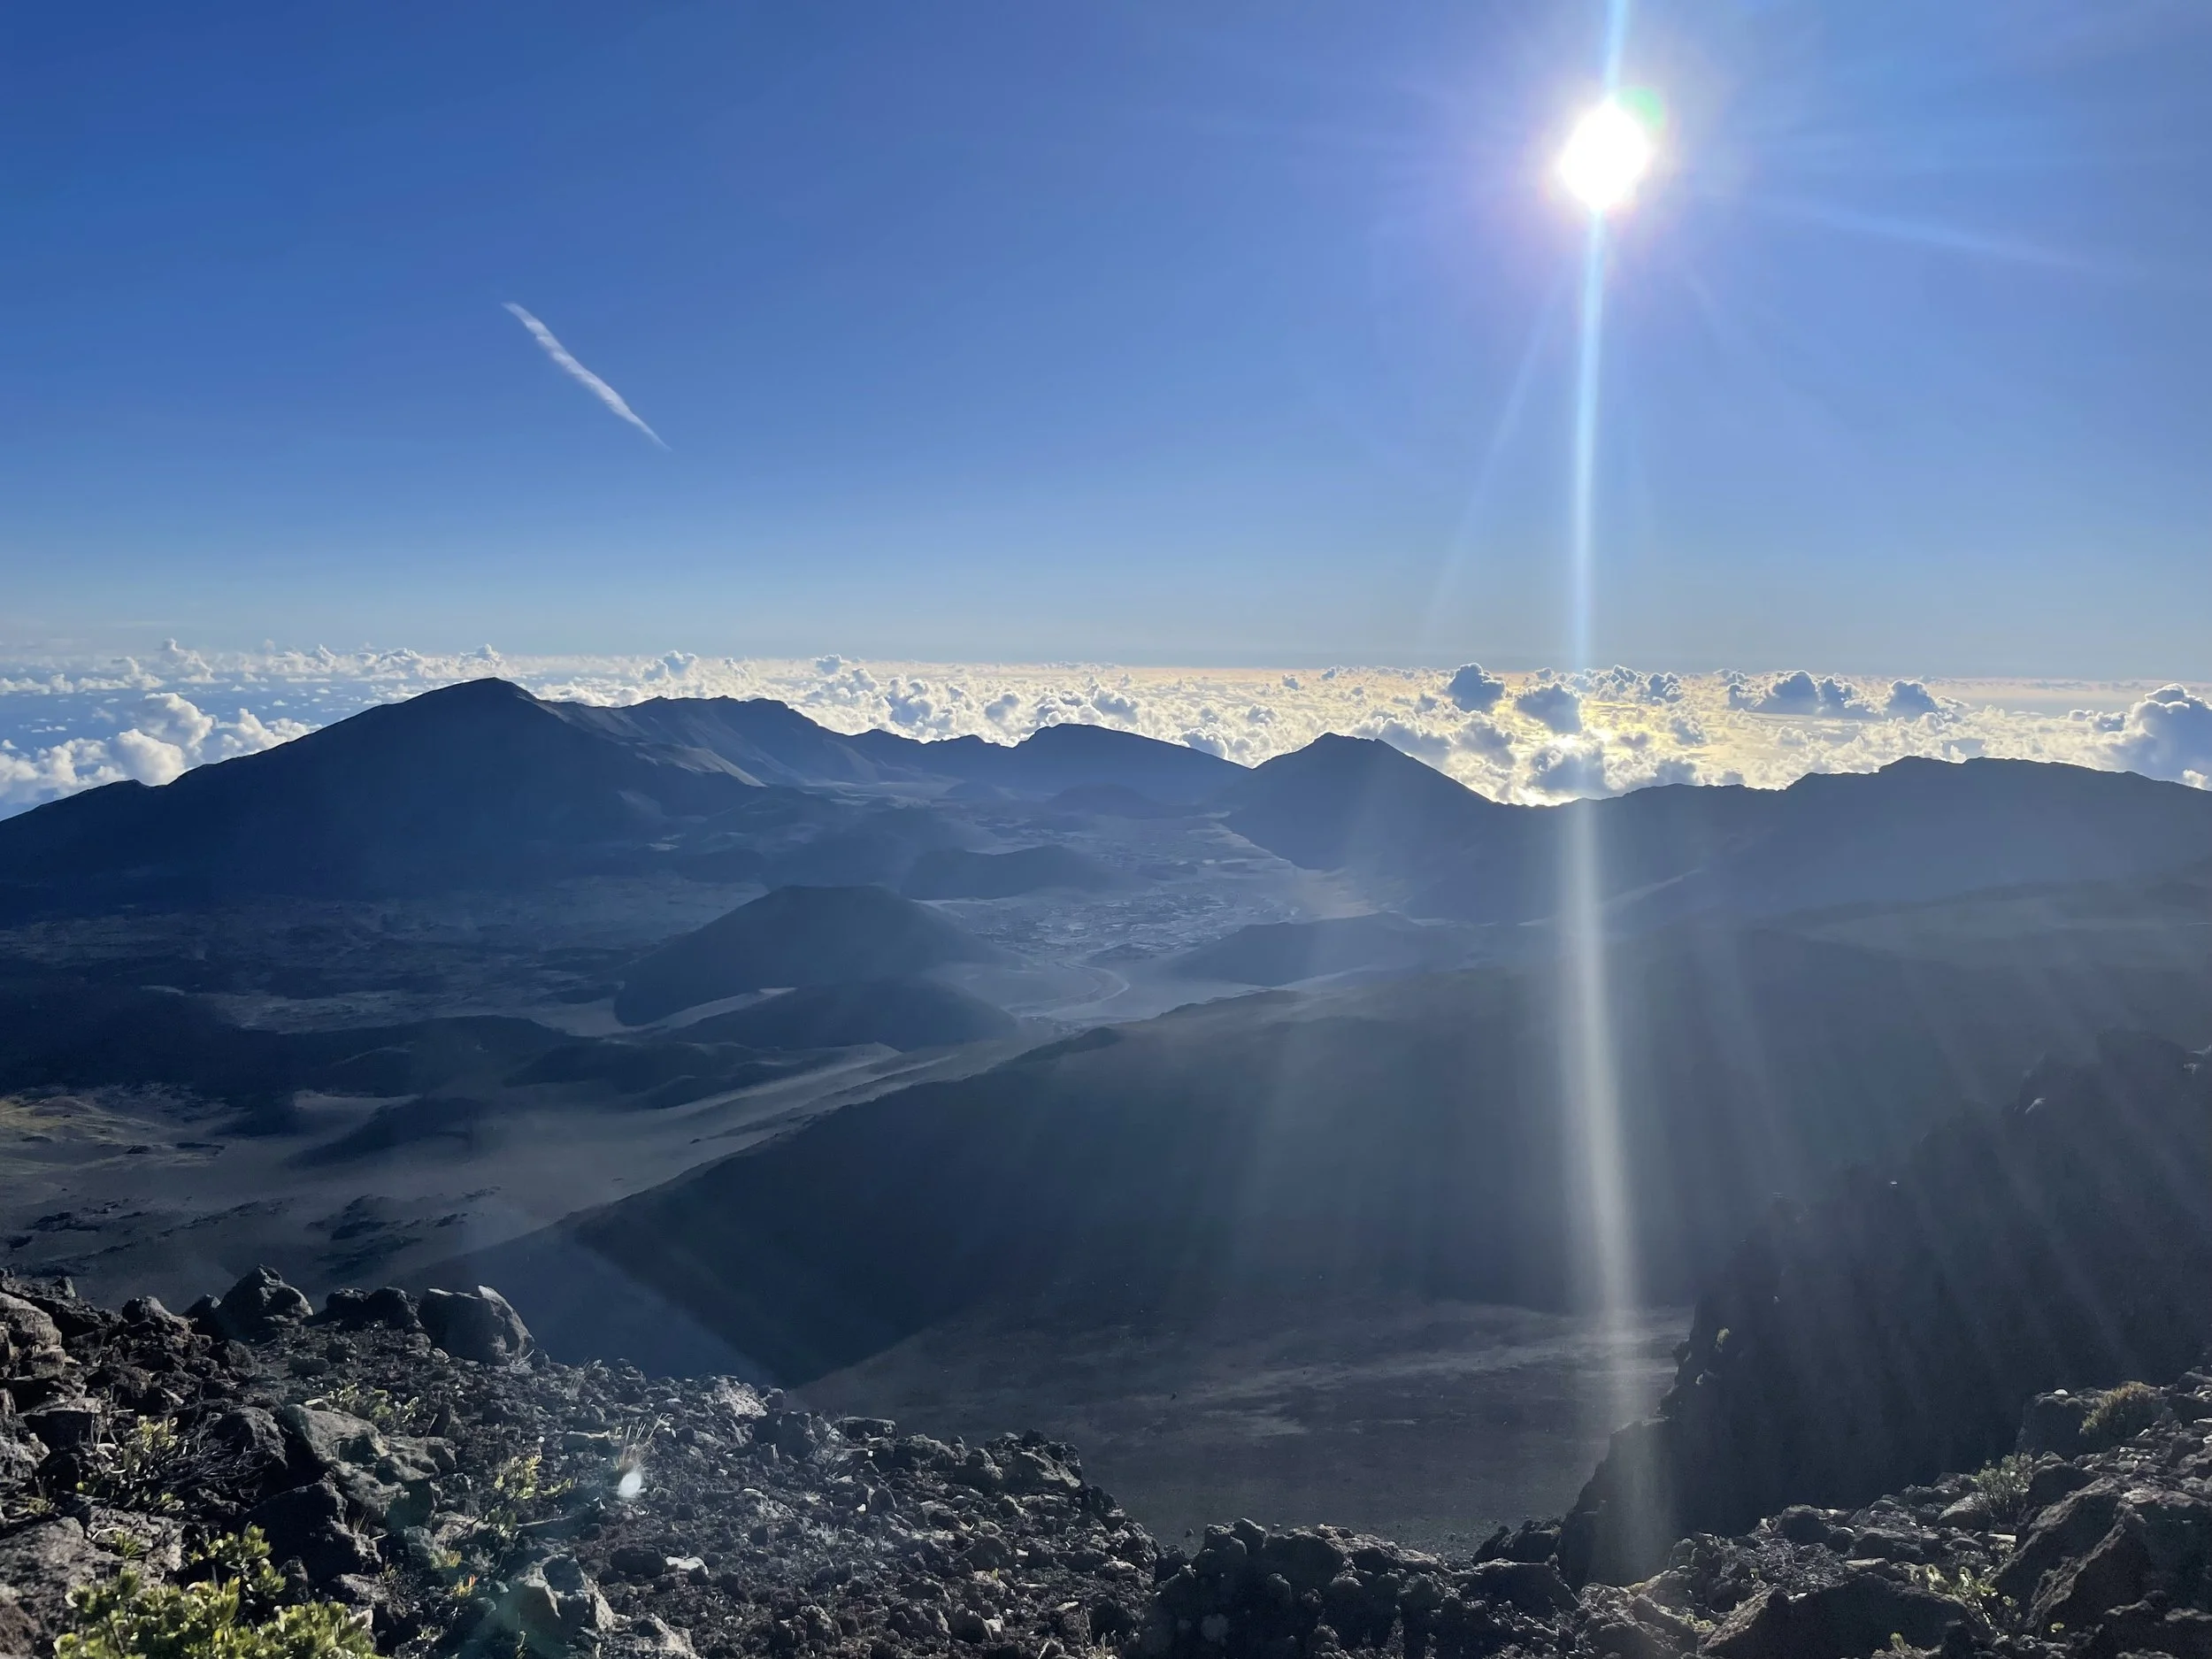
#22 Haleakala National Park, Hawaii
My trip to Haleakalā National Park started early on an October morning. I was staying in Lāhainā, and while the island of Maui isn’t large, the drive to the summit still took a couple of hours. The road climbs steadily through switchbacks and high-altitude curves, offering scenic views of the valley below—once the sun comes up, that is.
The park is famous for its sunrise. People plan entire trips around it. I knew you needed a reservation to enter the park before 7:00 a.m., but I wasn’t trying to catch the sunrise—I just wanted to visit in the morning, without the crowds. If you do have the pass, you’re allowed in between 3:00 a.m. and 7:00 a.m.—but be warned: those roads are dark. Not “a few streetlights here and there” dark. Dark-dark. The kind of dark where the only light comes from your headlights and a few scattered stars, and every switchback feels like a trust fall.
I didn’t have a permit, and didn’t need one. I got to the entrance just a few minutes too early, sometime before 7. The ranger asked me if I had the sunrise pass. I didn’t. She politely told me I’d have to wait. So I parked near the sign with a couple of other travelers, took some photos, and watched the morning brighten while we waited for the clock to tick past 7:00.
Once we were cleared, I continued up the mountain to the Haleakalā Visitor Center, near the summit. The lower visitor center at Park Headquarters wasn’t open yet, so I kept driving.
At the top, it was cooler than I expected. I was in a T-shirt and shorts, and while I wouldn’t call it warm, I was fine for a quick visit. I took a few photos, got my passport stamp, looked out over the crater, and then headed back down. No sunrise, no crater hike, just a still, peaceful morning on the edge of a volcano.
And sometimes, that’s exactly enough.
What to Know Before You Go
Haleakalā’s Layout
The park is split into two districts:
Summit District – where the crater, high-elevation trails, and sunrise access are located.
Kīpahulu District – on the southeastern coast near Hāna, known for waterfalls and rainforest hikes.
These districts aren’t connected internally, so you’ll need to plan separate drives if you want to see both.
Getting There
From Kahului Airport: ~1.5 to 2 hours
From Lāhainā or Kihei: ~2 to 2.5 hours
To Kīpahulu District: ~2–3 hours via the Hāna Highway
Park entry: $30 per vehicle (valid for 3 days)
Sunrise Permits & Entry Details
If you plan to see the sunrise from the summit, you’ll need to:
Book a sunrise permit at recreation.gov.
Entry is only allowed between 3:00 a.m. and 7:00 a.m. with that permit.
The permit is separate from the park fee and often sells out weeks ahead.
Driving warning: That road is steep, winding, and pitch black before dawn. Not for everyone.
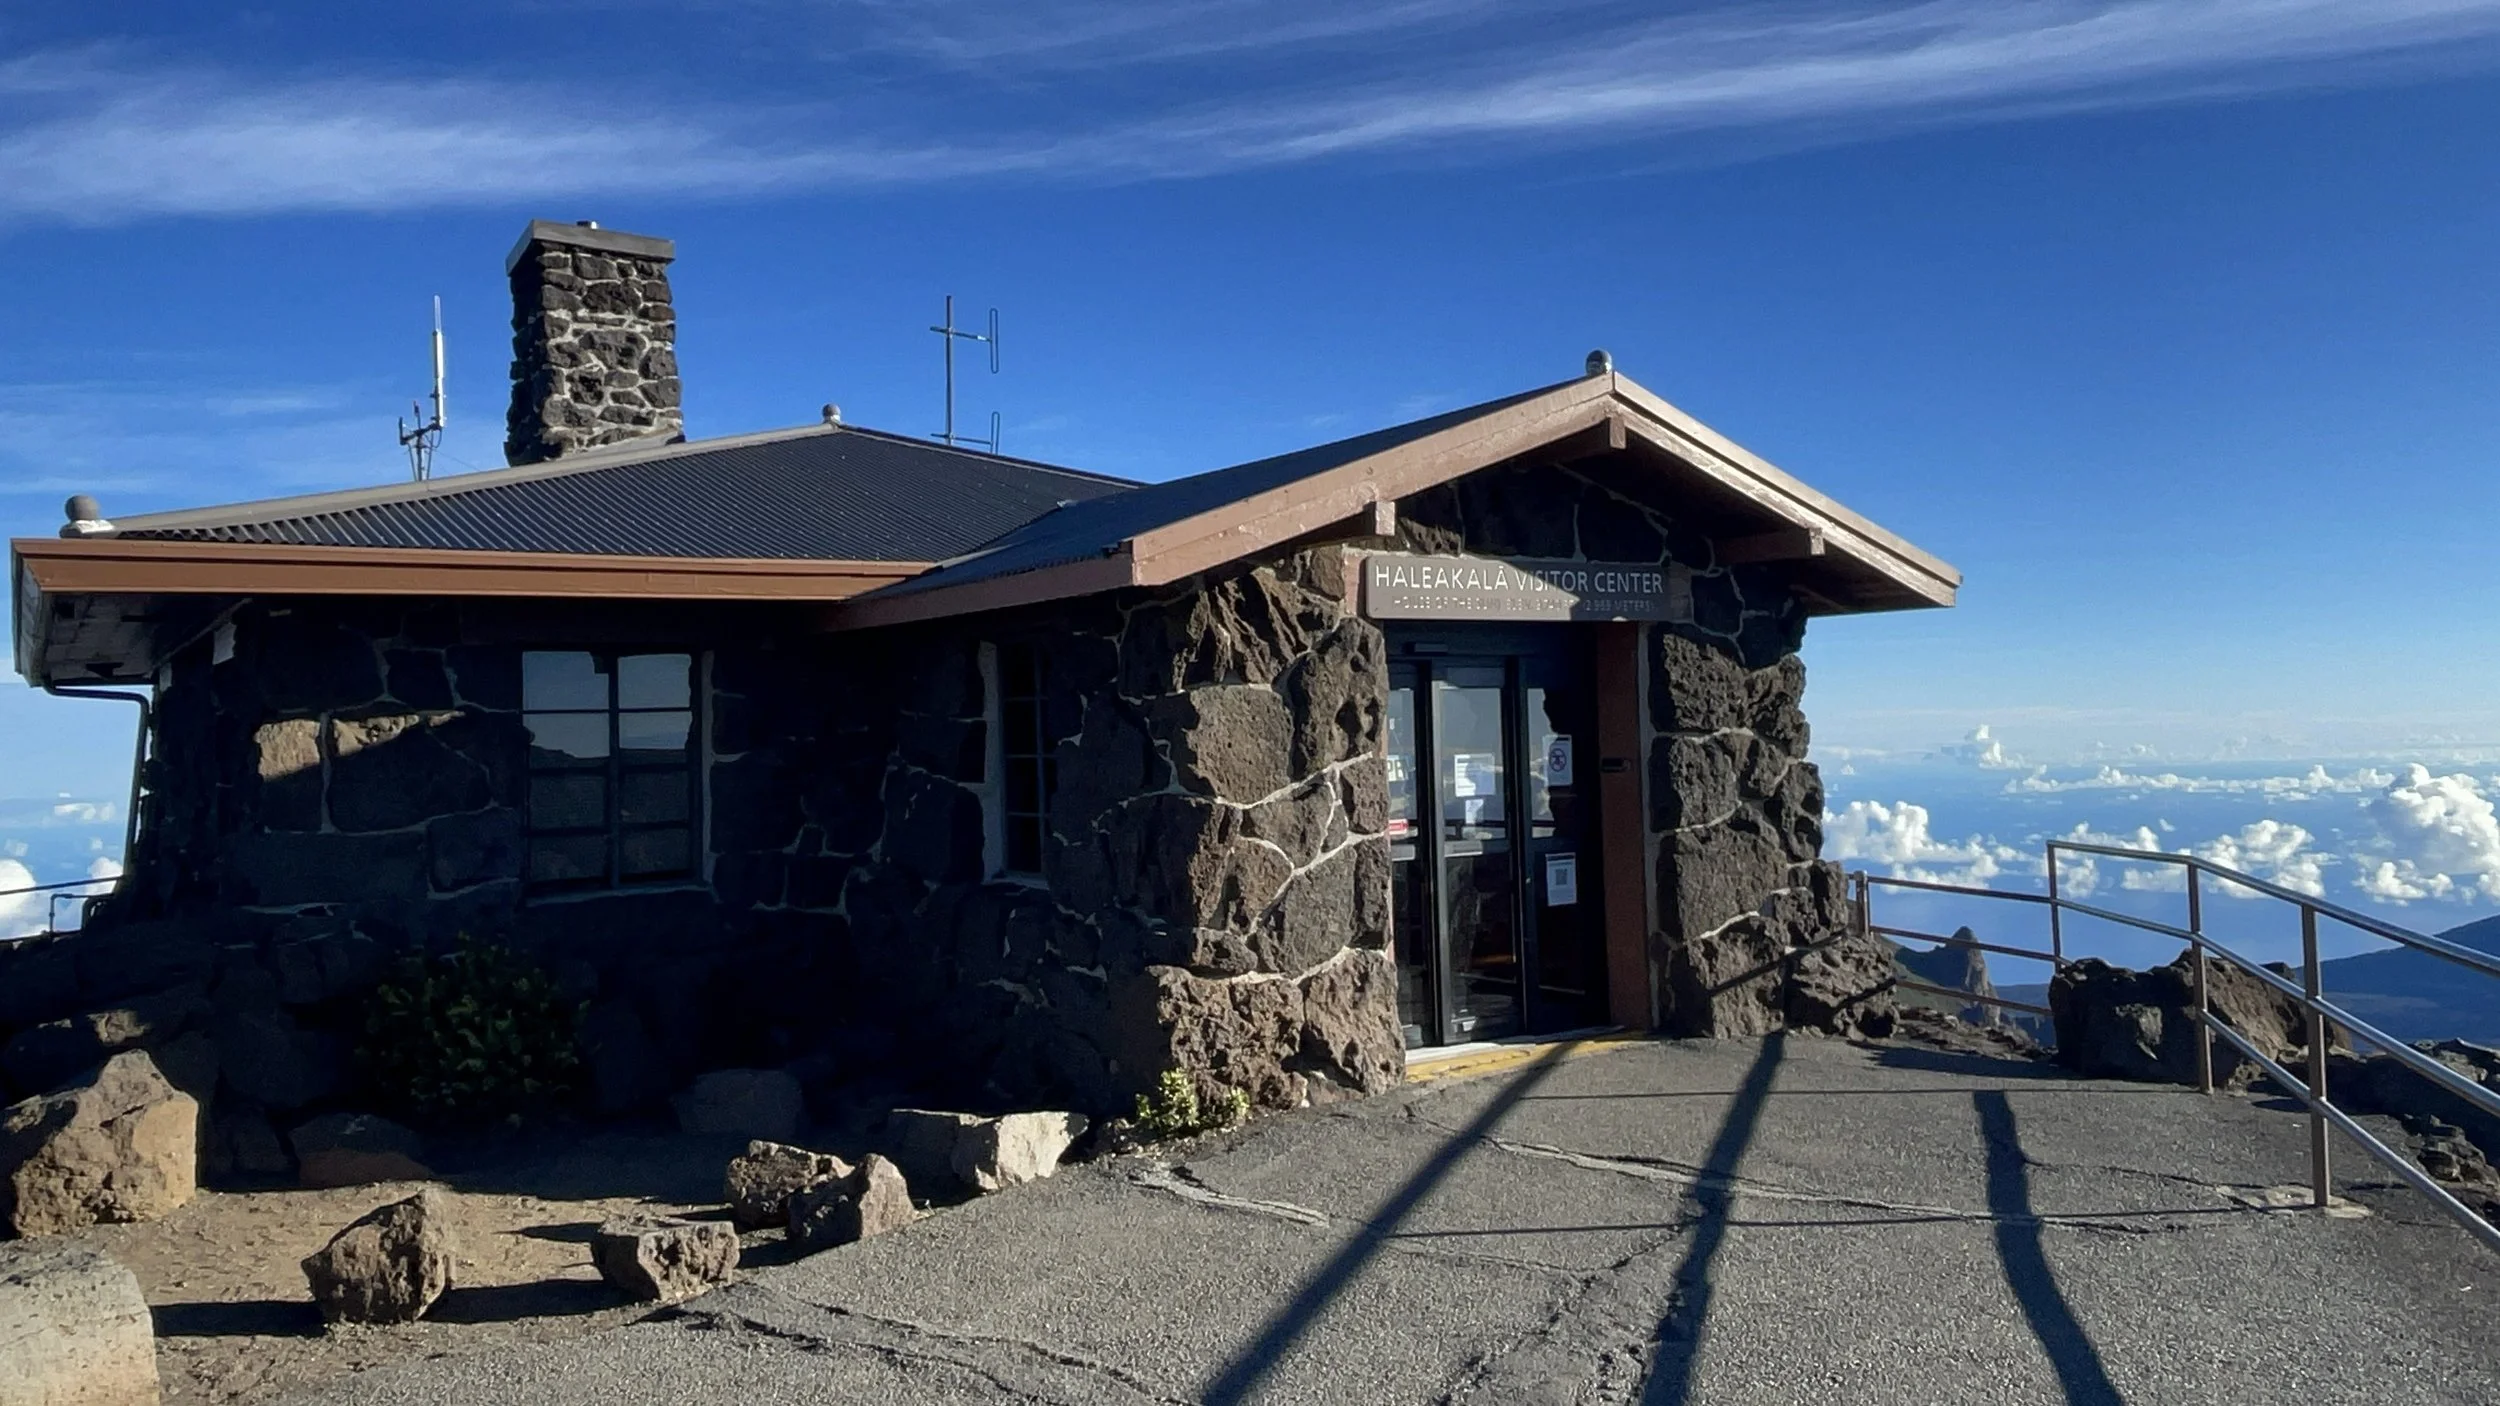
Haleakalā Visitor Center
Visitor Centers
Haleakalā Visitor Center (Summit) – Located at 9,740 ft near the crater. Small, quiet, and has passport stamps.
Park Headquarters Visitor Center (7,000 ft) – Opens later in the day, with more exhibits and a small bookstore.
Kīpahulu Visitor Center – On the island’s east side, near ʻOheʻo Gulch and rainforest trails.
Hikes and Trails
Pa Kaʻoao Trail
0.4 miles round trip
Quick walk to a cinder cone for panoramic crater views. Great for a short visit.
Sliding Sands Trail
Up to 11 miles round trip
Starts at the summit and drops into the crater. You don’t need to go far to feel the scale and stillness of the place.
Pīpīwai Trail (Kīpahulu District)
4 miles round trip
Through bamboo forest and past waterfalls, ending at 400-ft Waimoku Falls. Very different from the summit area.
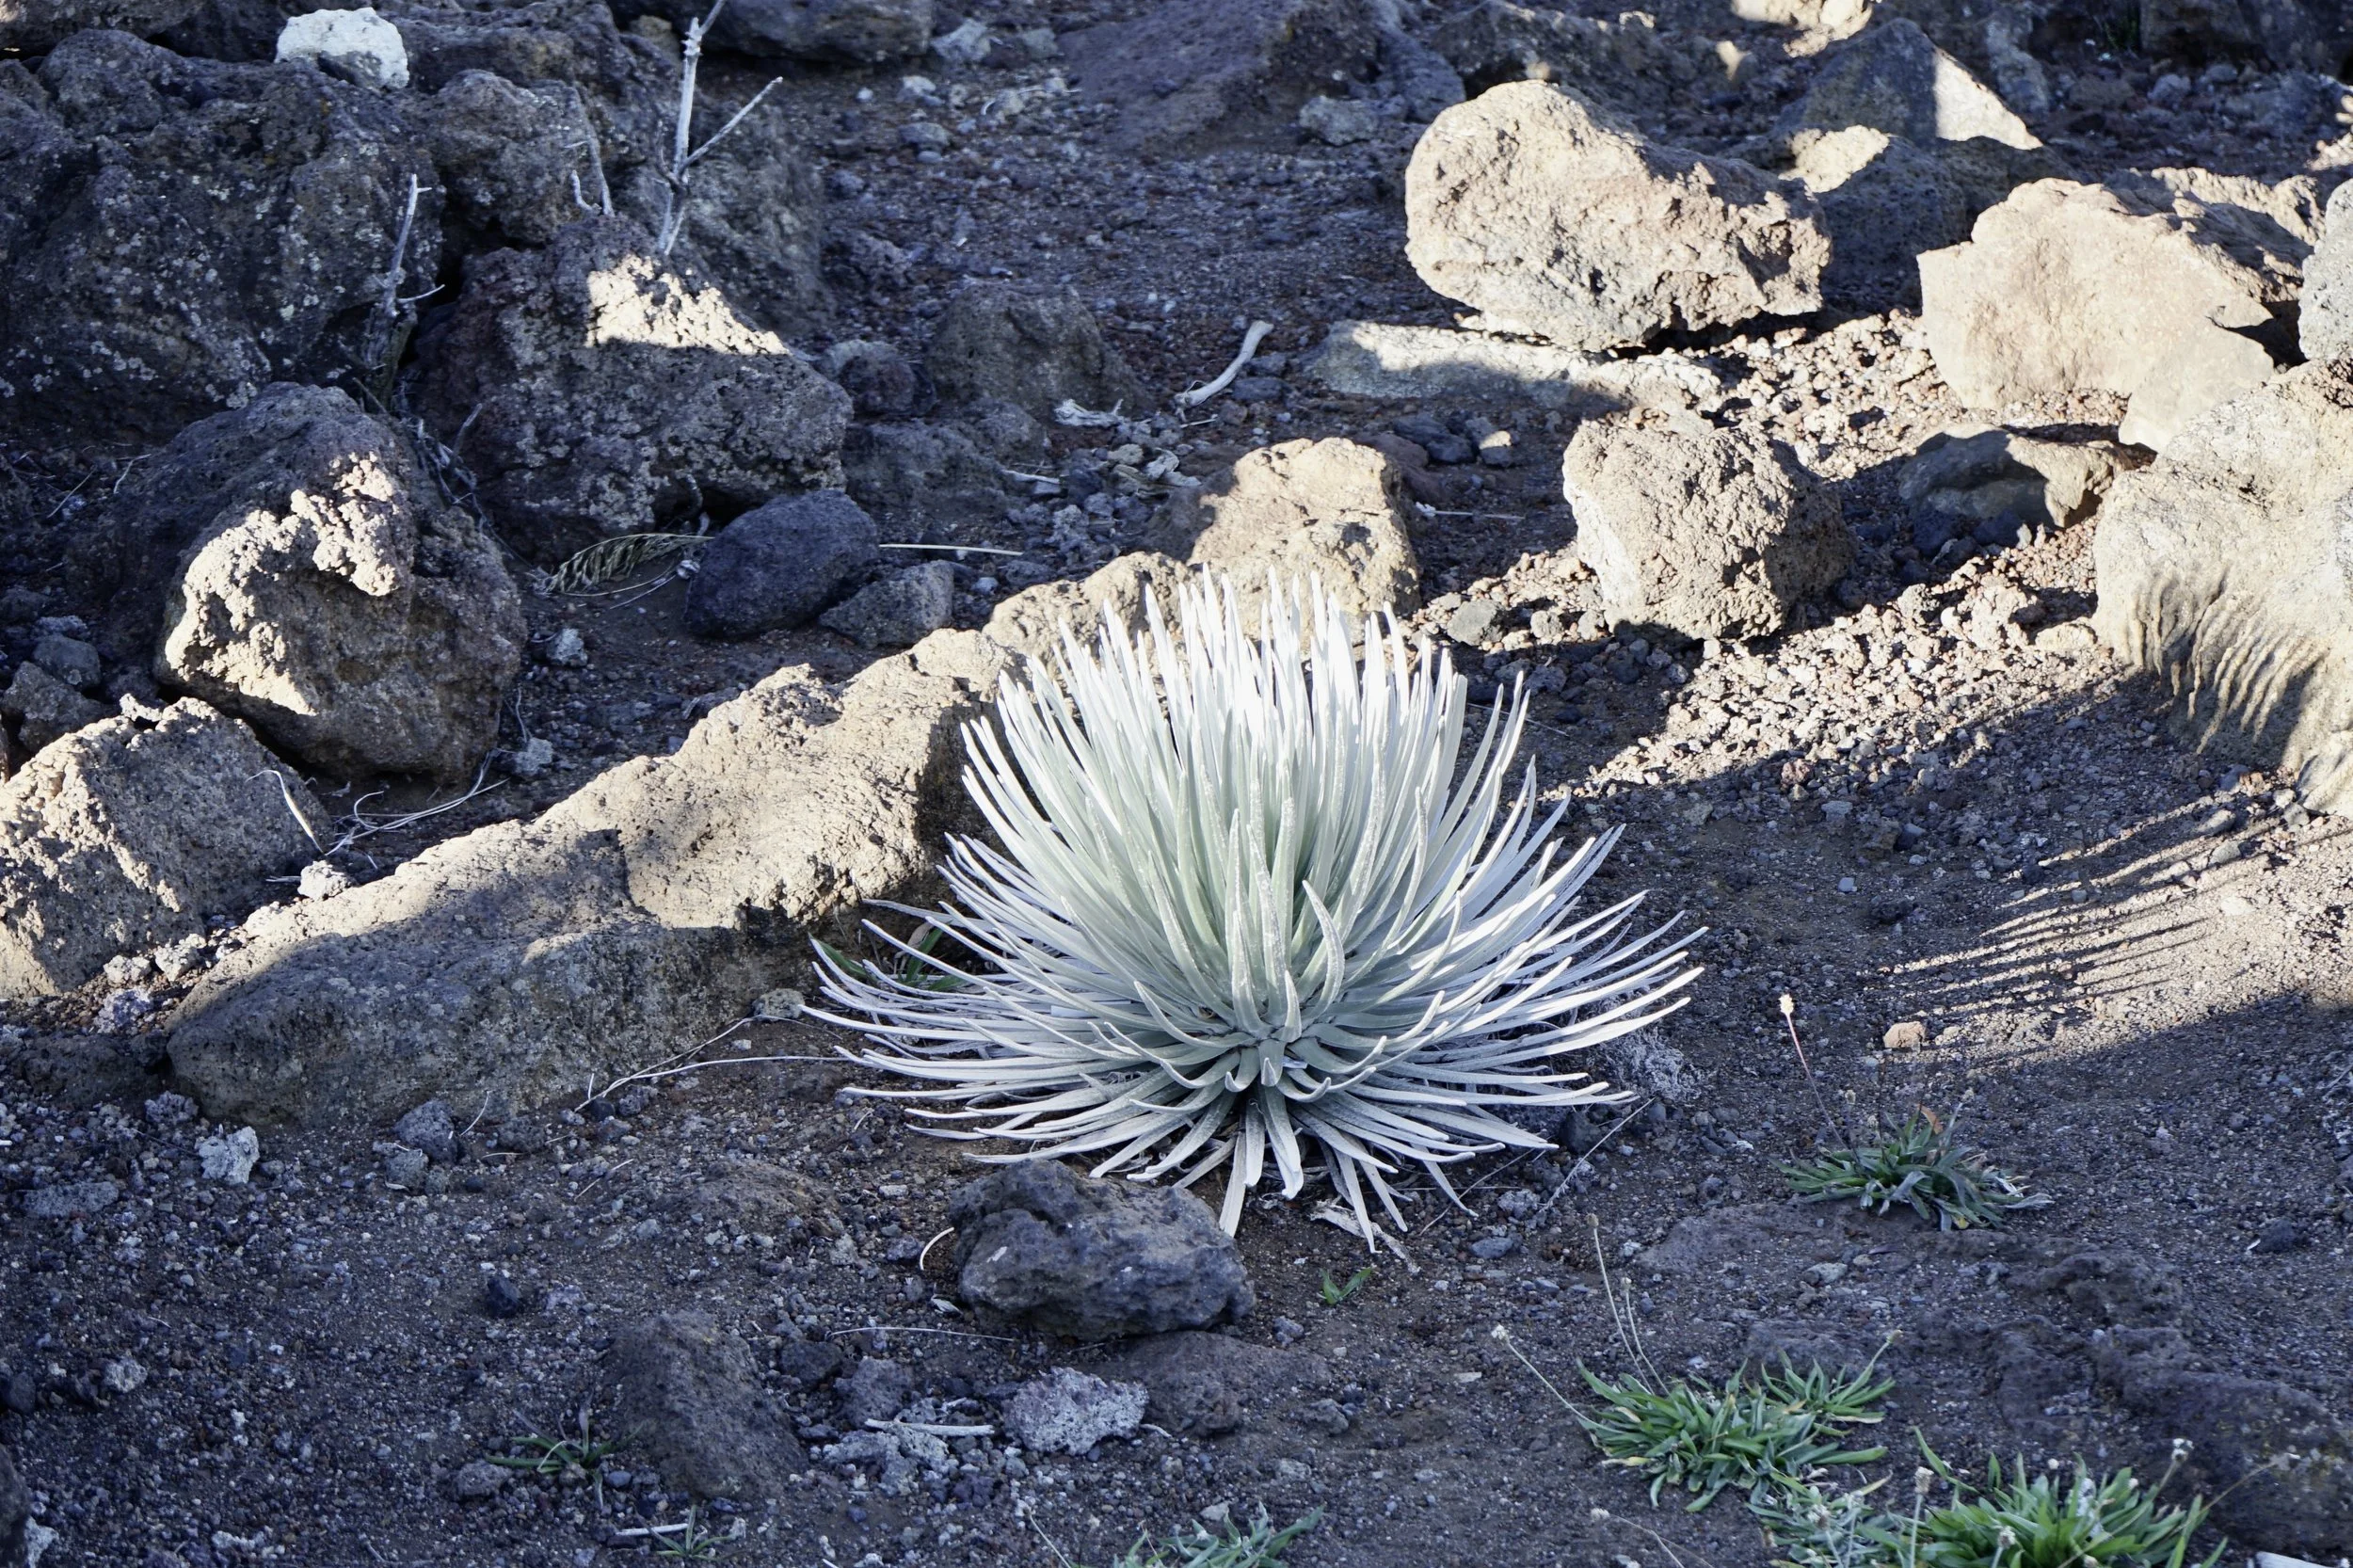
Silverswords: One-of-a-Kind
One of the most distinctive things you’ll see near the summit is the Hawaiian silversword (Argyroxiphium sandwicense). These spiky, silvery plants grow only at high elevations on Haleakalā and parts of the Big Island.
They live for decades, bloom once, and then die. They’re striking—alien-looking—and incredibly fragile. Stay on the trail, and don’t get too close.

Chukar partridge
Wildlife
You might see:
Nēnē (Hawaiian goose) – Often seen near parking lots and visitor centers.
ʻUaʻu (Hawaiian petrel) – A rare seabird that nests near the summit.
Chukar partridges – Bold, fast-moving, and unbothered.
In Kīpahulu: more birds, insects, and the occasional freshwater shrimp in the streams.
Visiting the Kīpahulu District
If you have the time and patience for the Hāna Highway, the Kīpahulu side of the park is worth a visit. Expect a long drive with narrow curves, but also rainforest, waterfalls, and fewer people.
Highlights:
ʻOheʻo Gulch (Seven Sacred Pools)
Pīpīwai Trail through the bamboo forest
Coastal views and river crossings
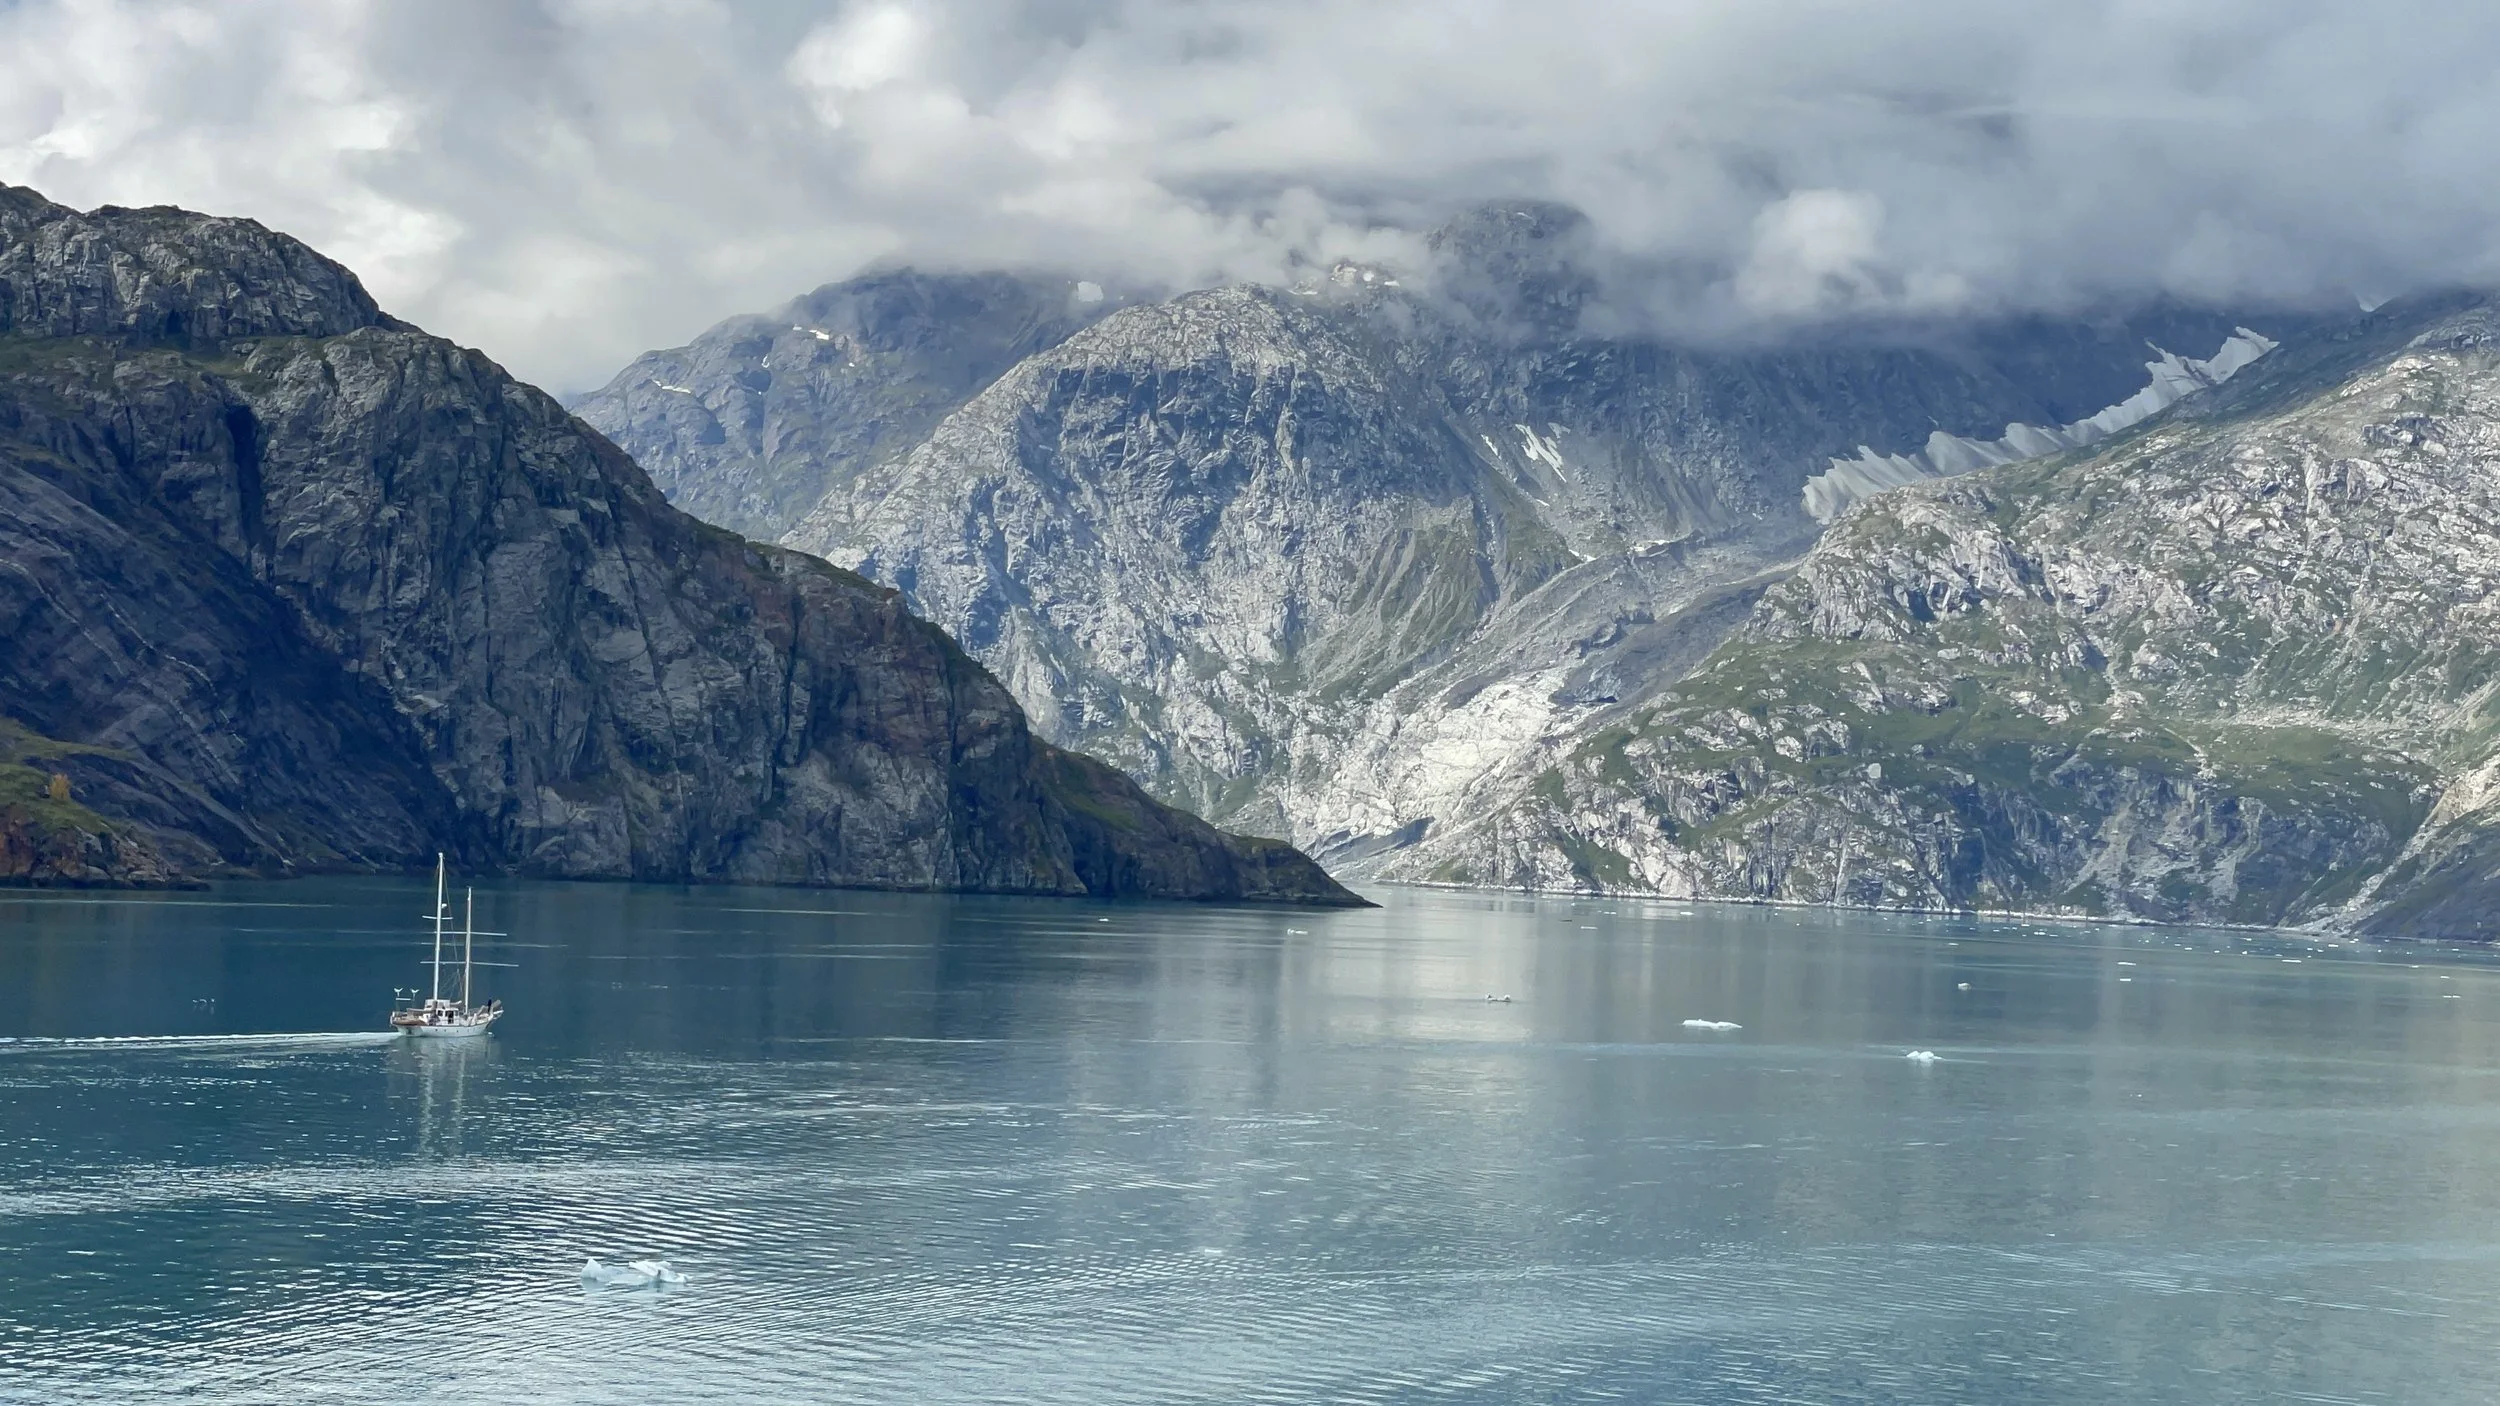
#21 Glacier Bay National Park, Alaska
I had the chance to visit Glacier Bay National Park on a clear, crisp September morning during a 7-day Alaska cruise. Glacier Bay isn’t the kind of place you just stumble into. There are no roads, no scenic pull-offs, no traffic jams. You either arrive by water—or not at all. And honestly, that feels right for a place like this. Remote. Intact. Meant to be approached slowly.
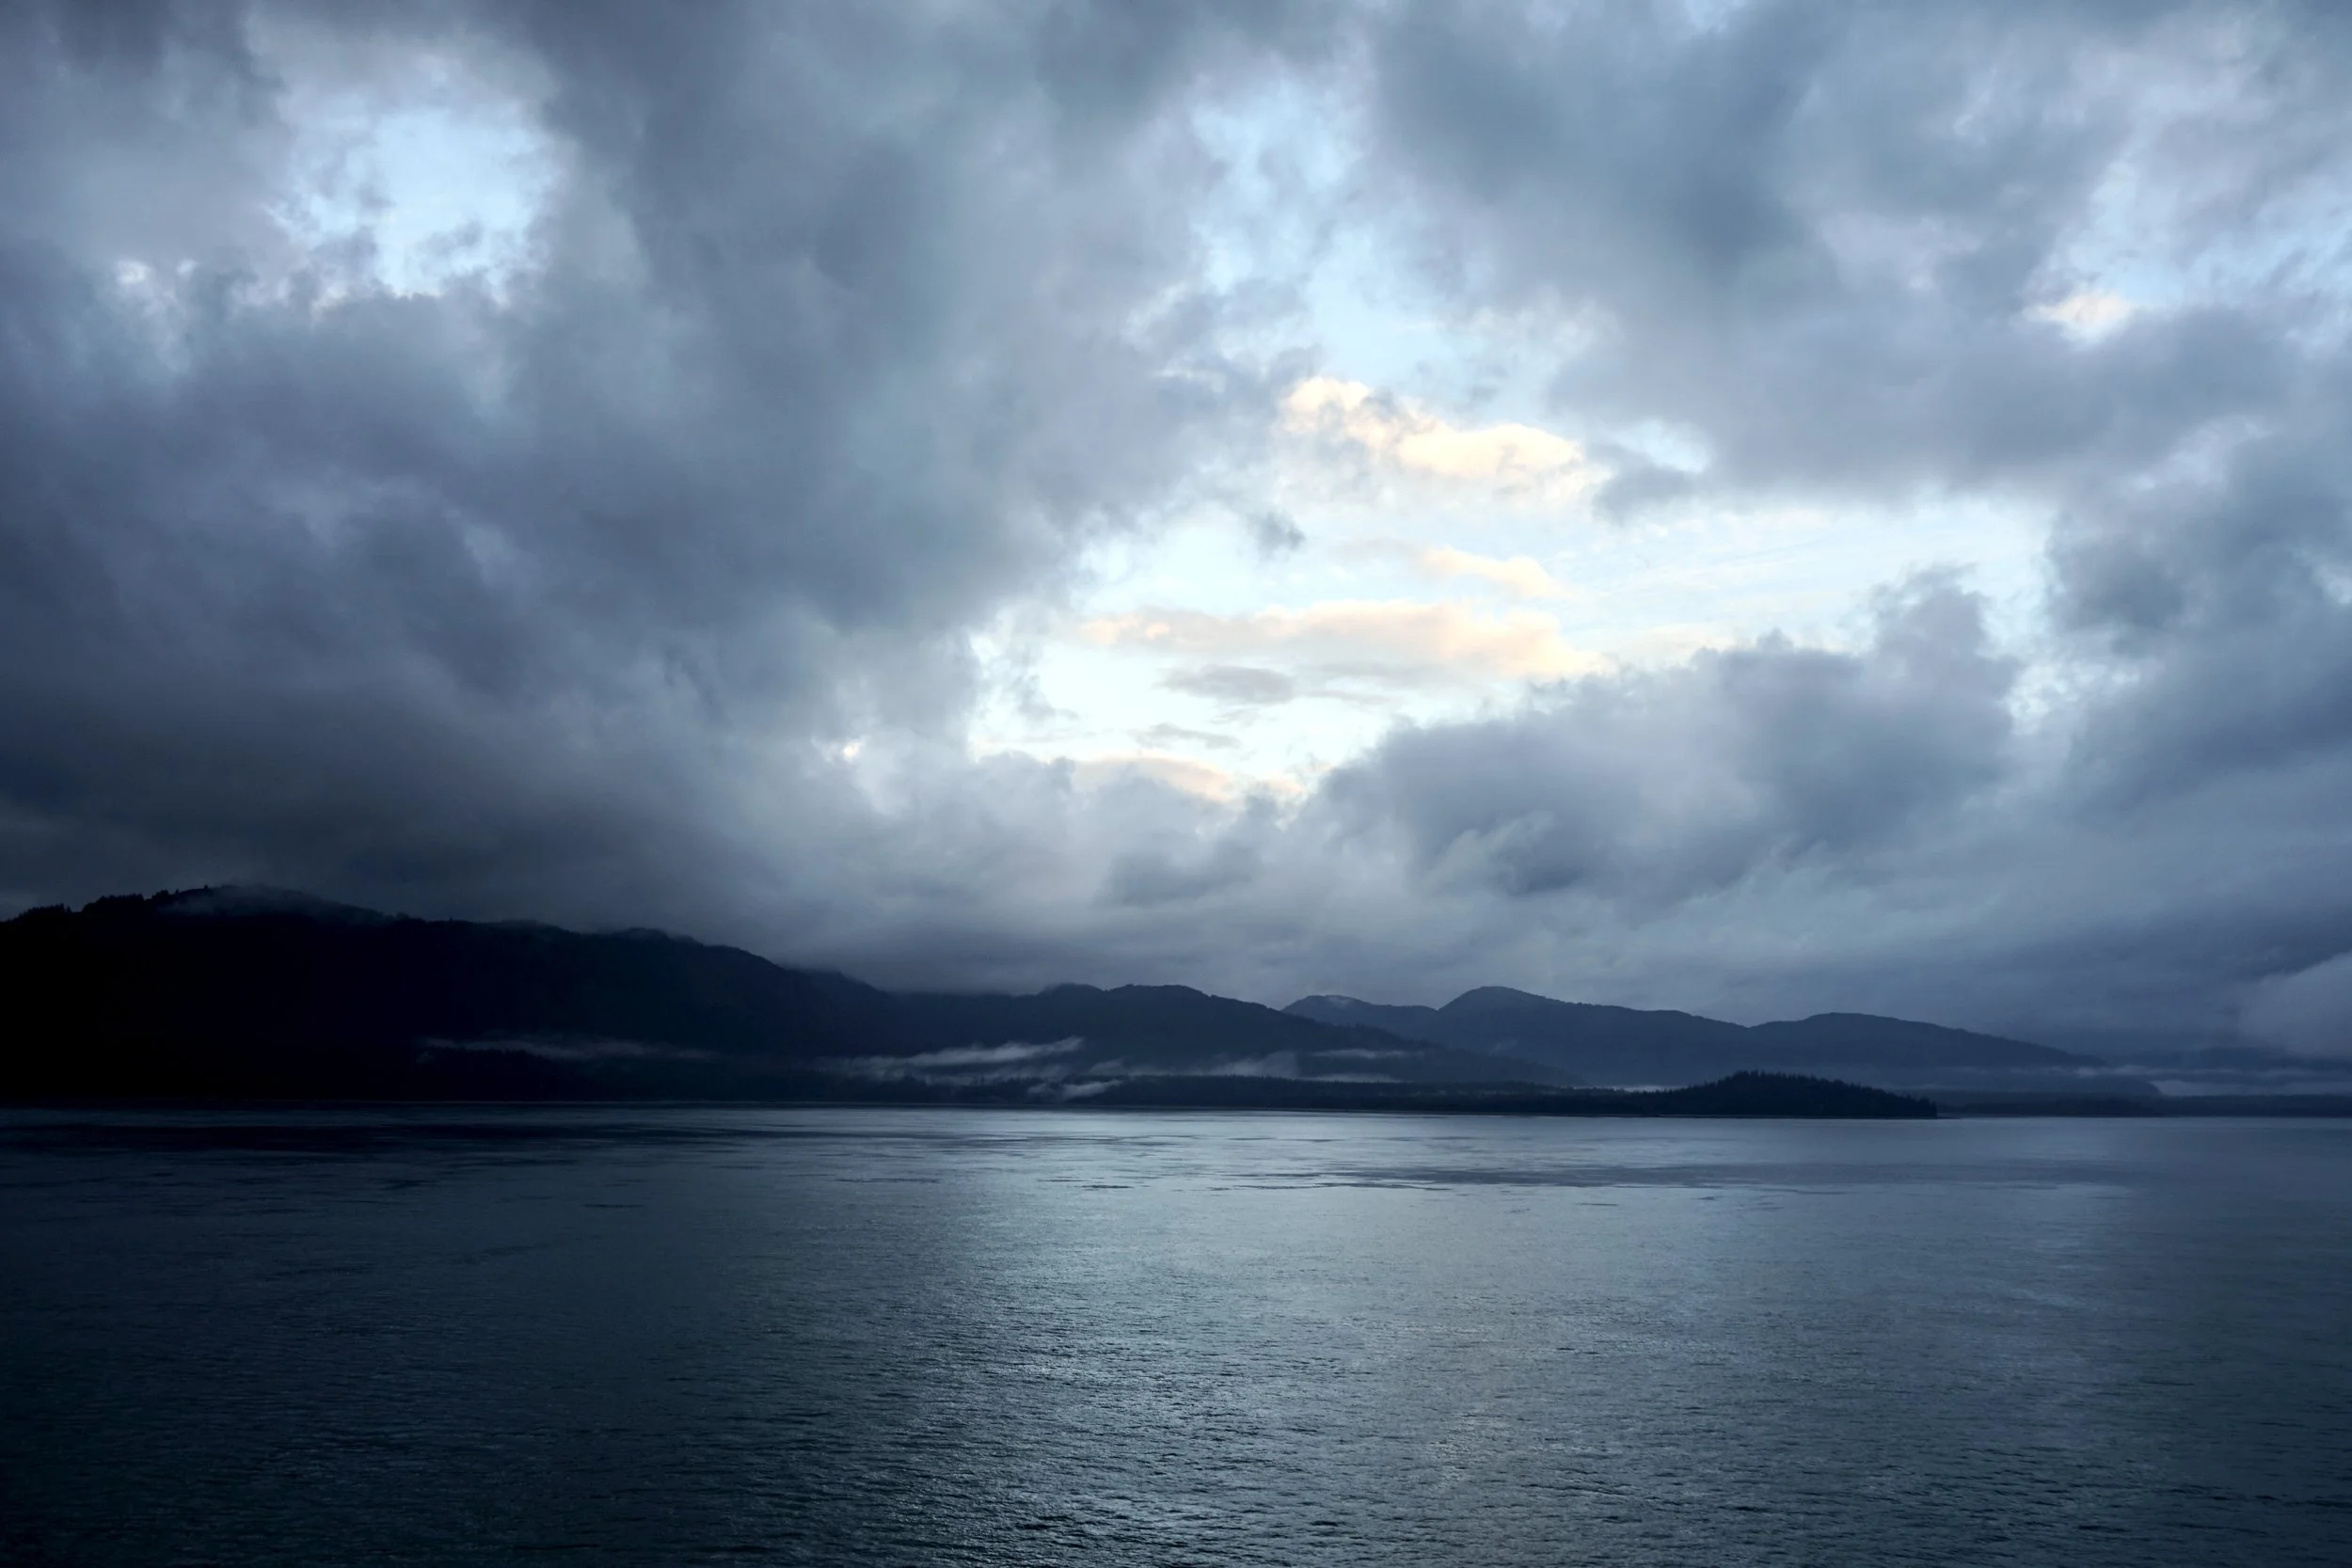
We entered the bay at first light, as the sun pushed its way through a layer of low gray mist. The mountains in the distance stood still and massive, their ridgelines soft and smoky. It was quiet. Not empty, just… unhurried.
The air was biting. The kind of cold that doesn’t let you forget where you are. Eventually we slowed down to let a park ranger board the ship—part of the Glacier Bay experience for all cruise passengers. Once aboard, she set up a makeshift visitor center on one of the upper decks: folding table, brochures, a few laminated displays, and—of course—National Park Passport stamps. I made sure to get mine. You don’t come all this way and skip the stamp.
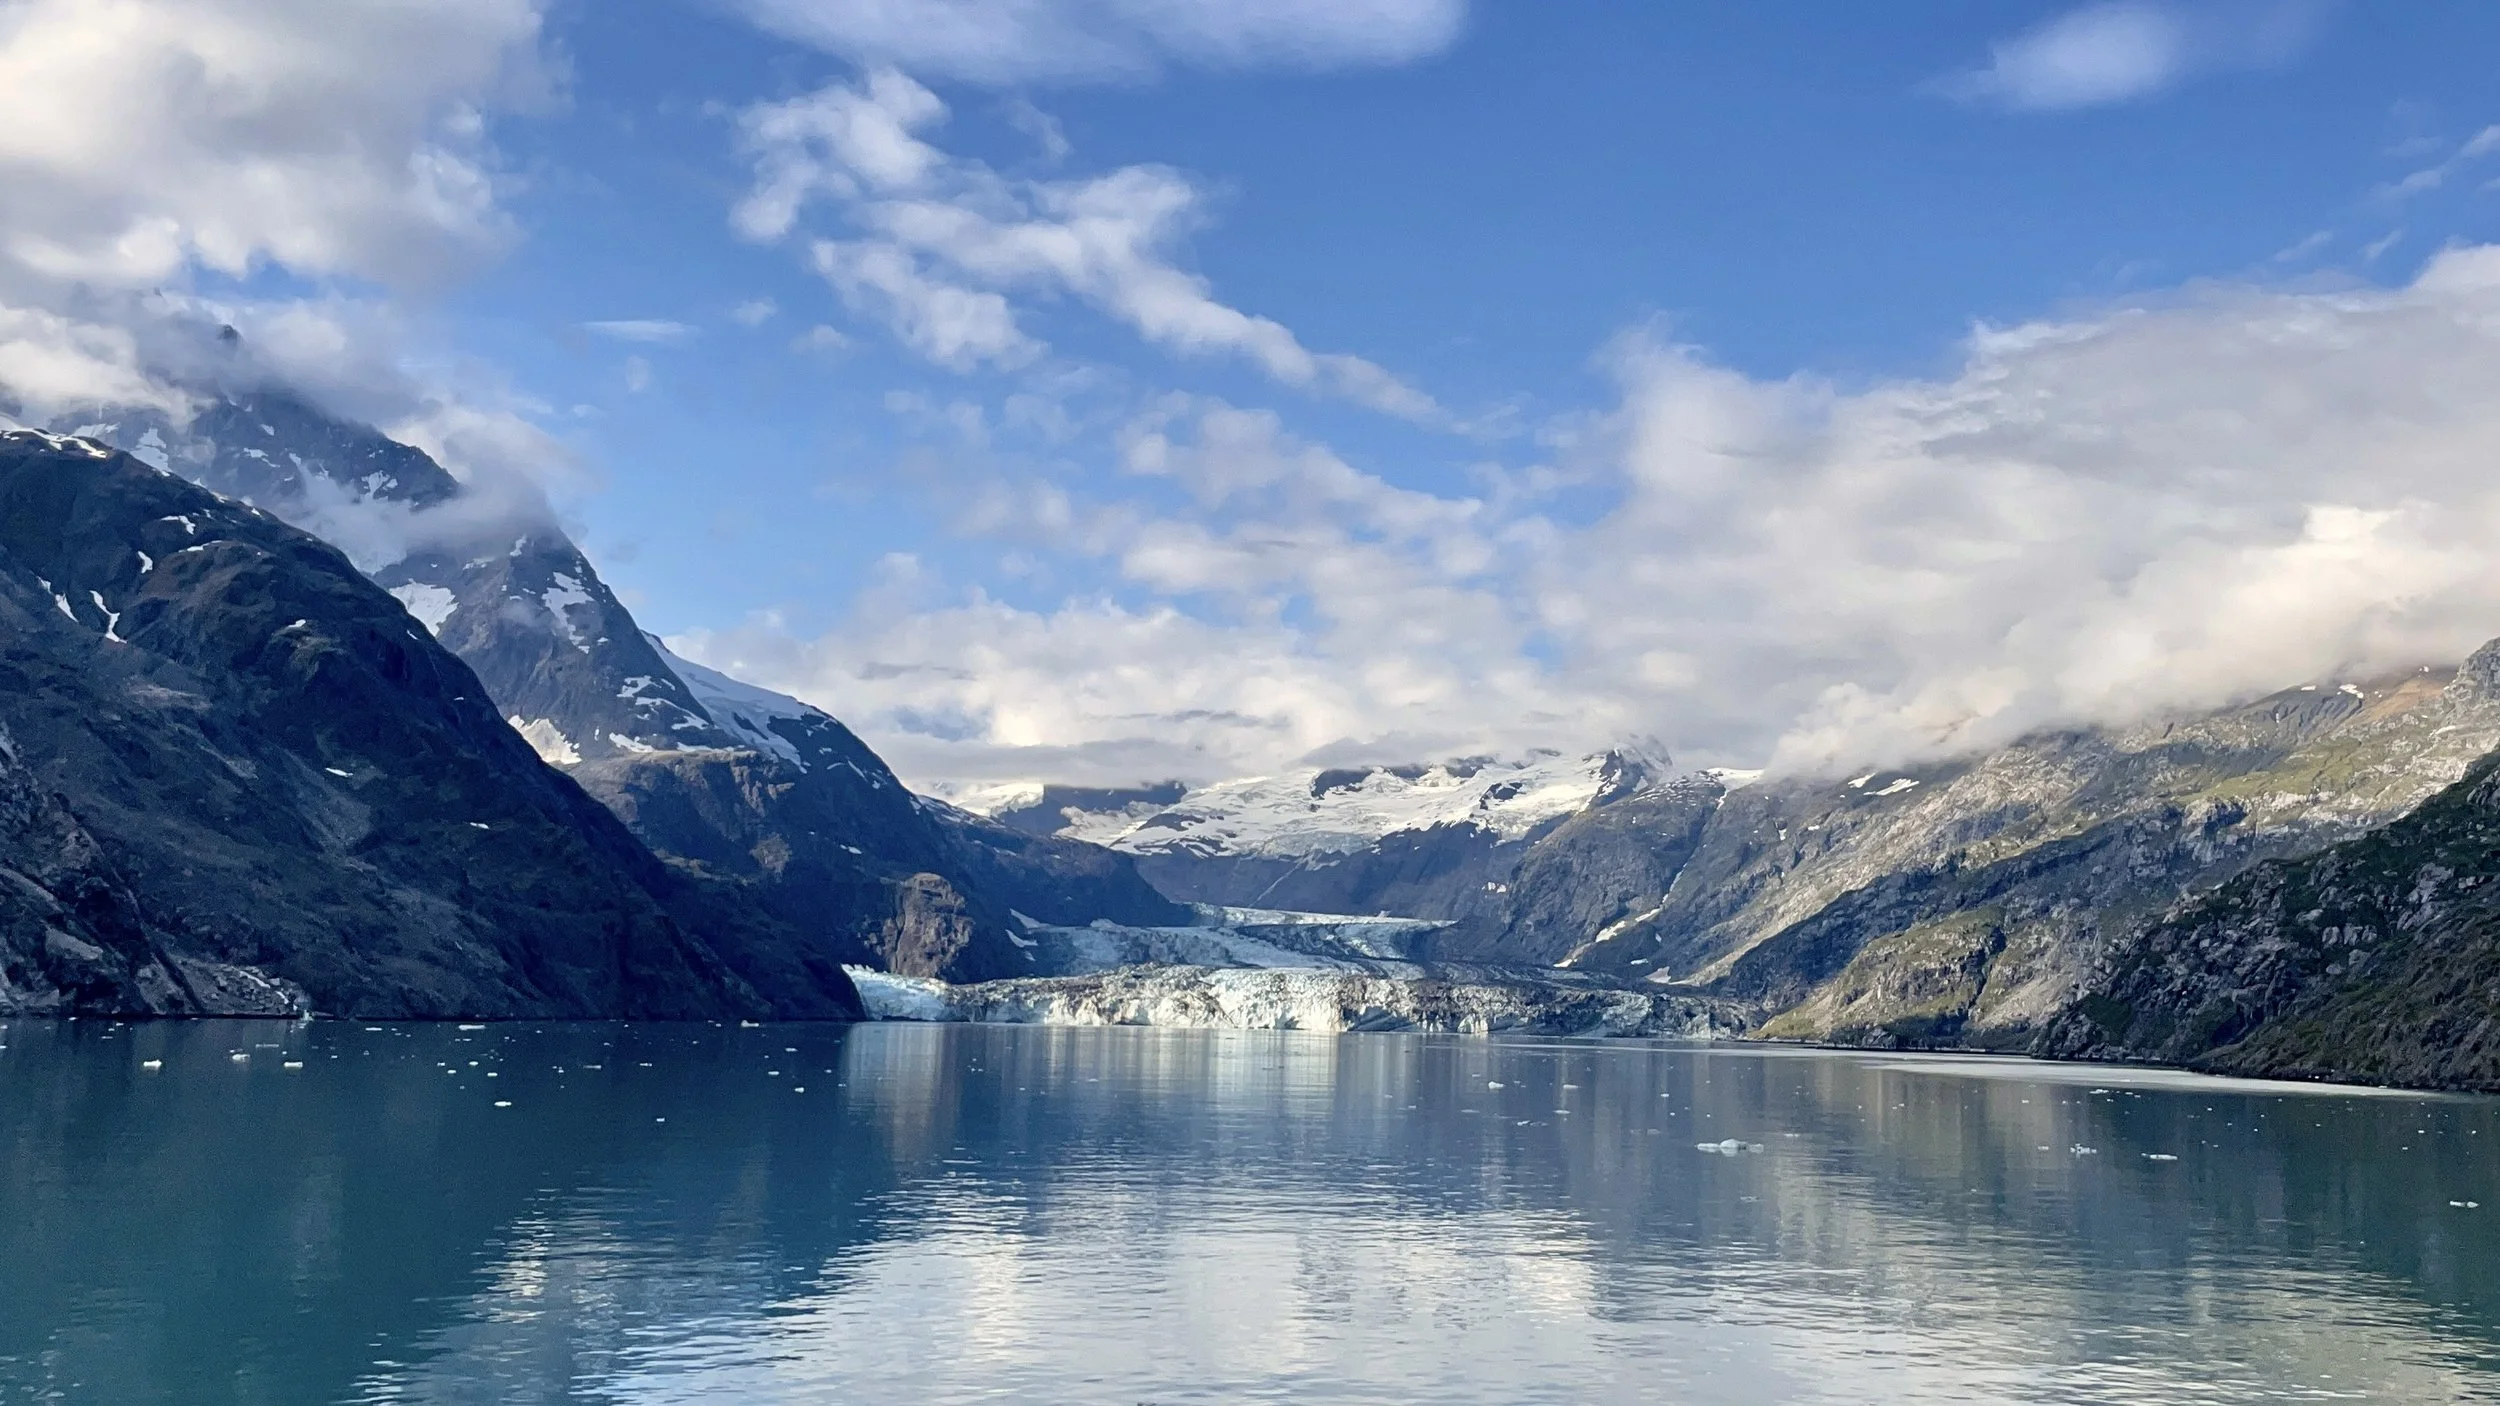
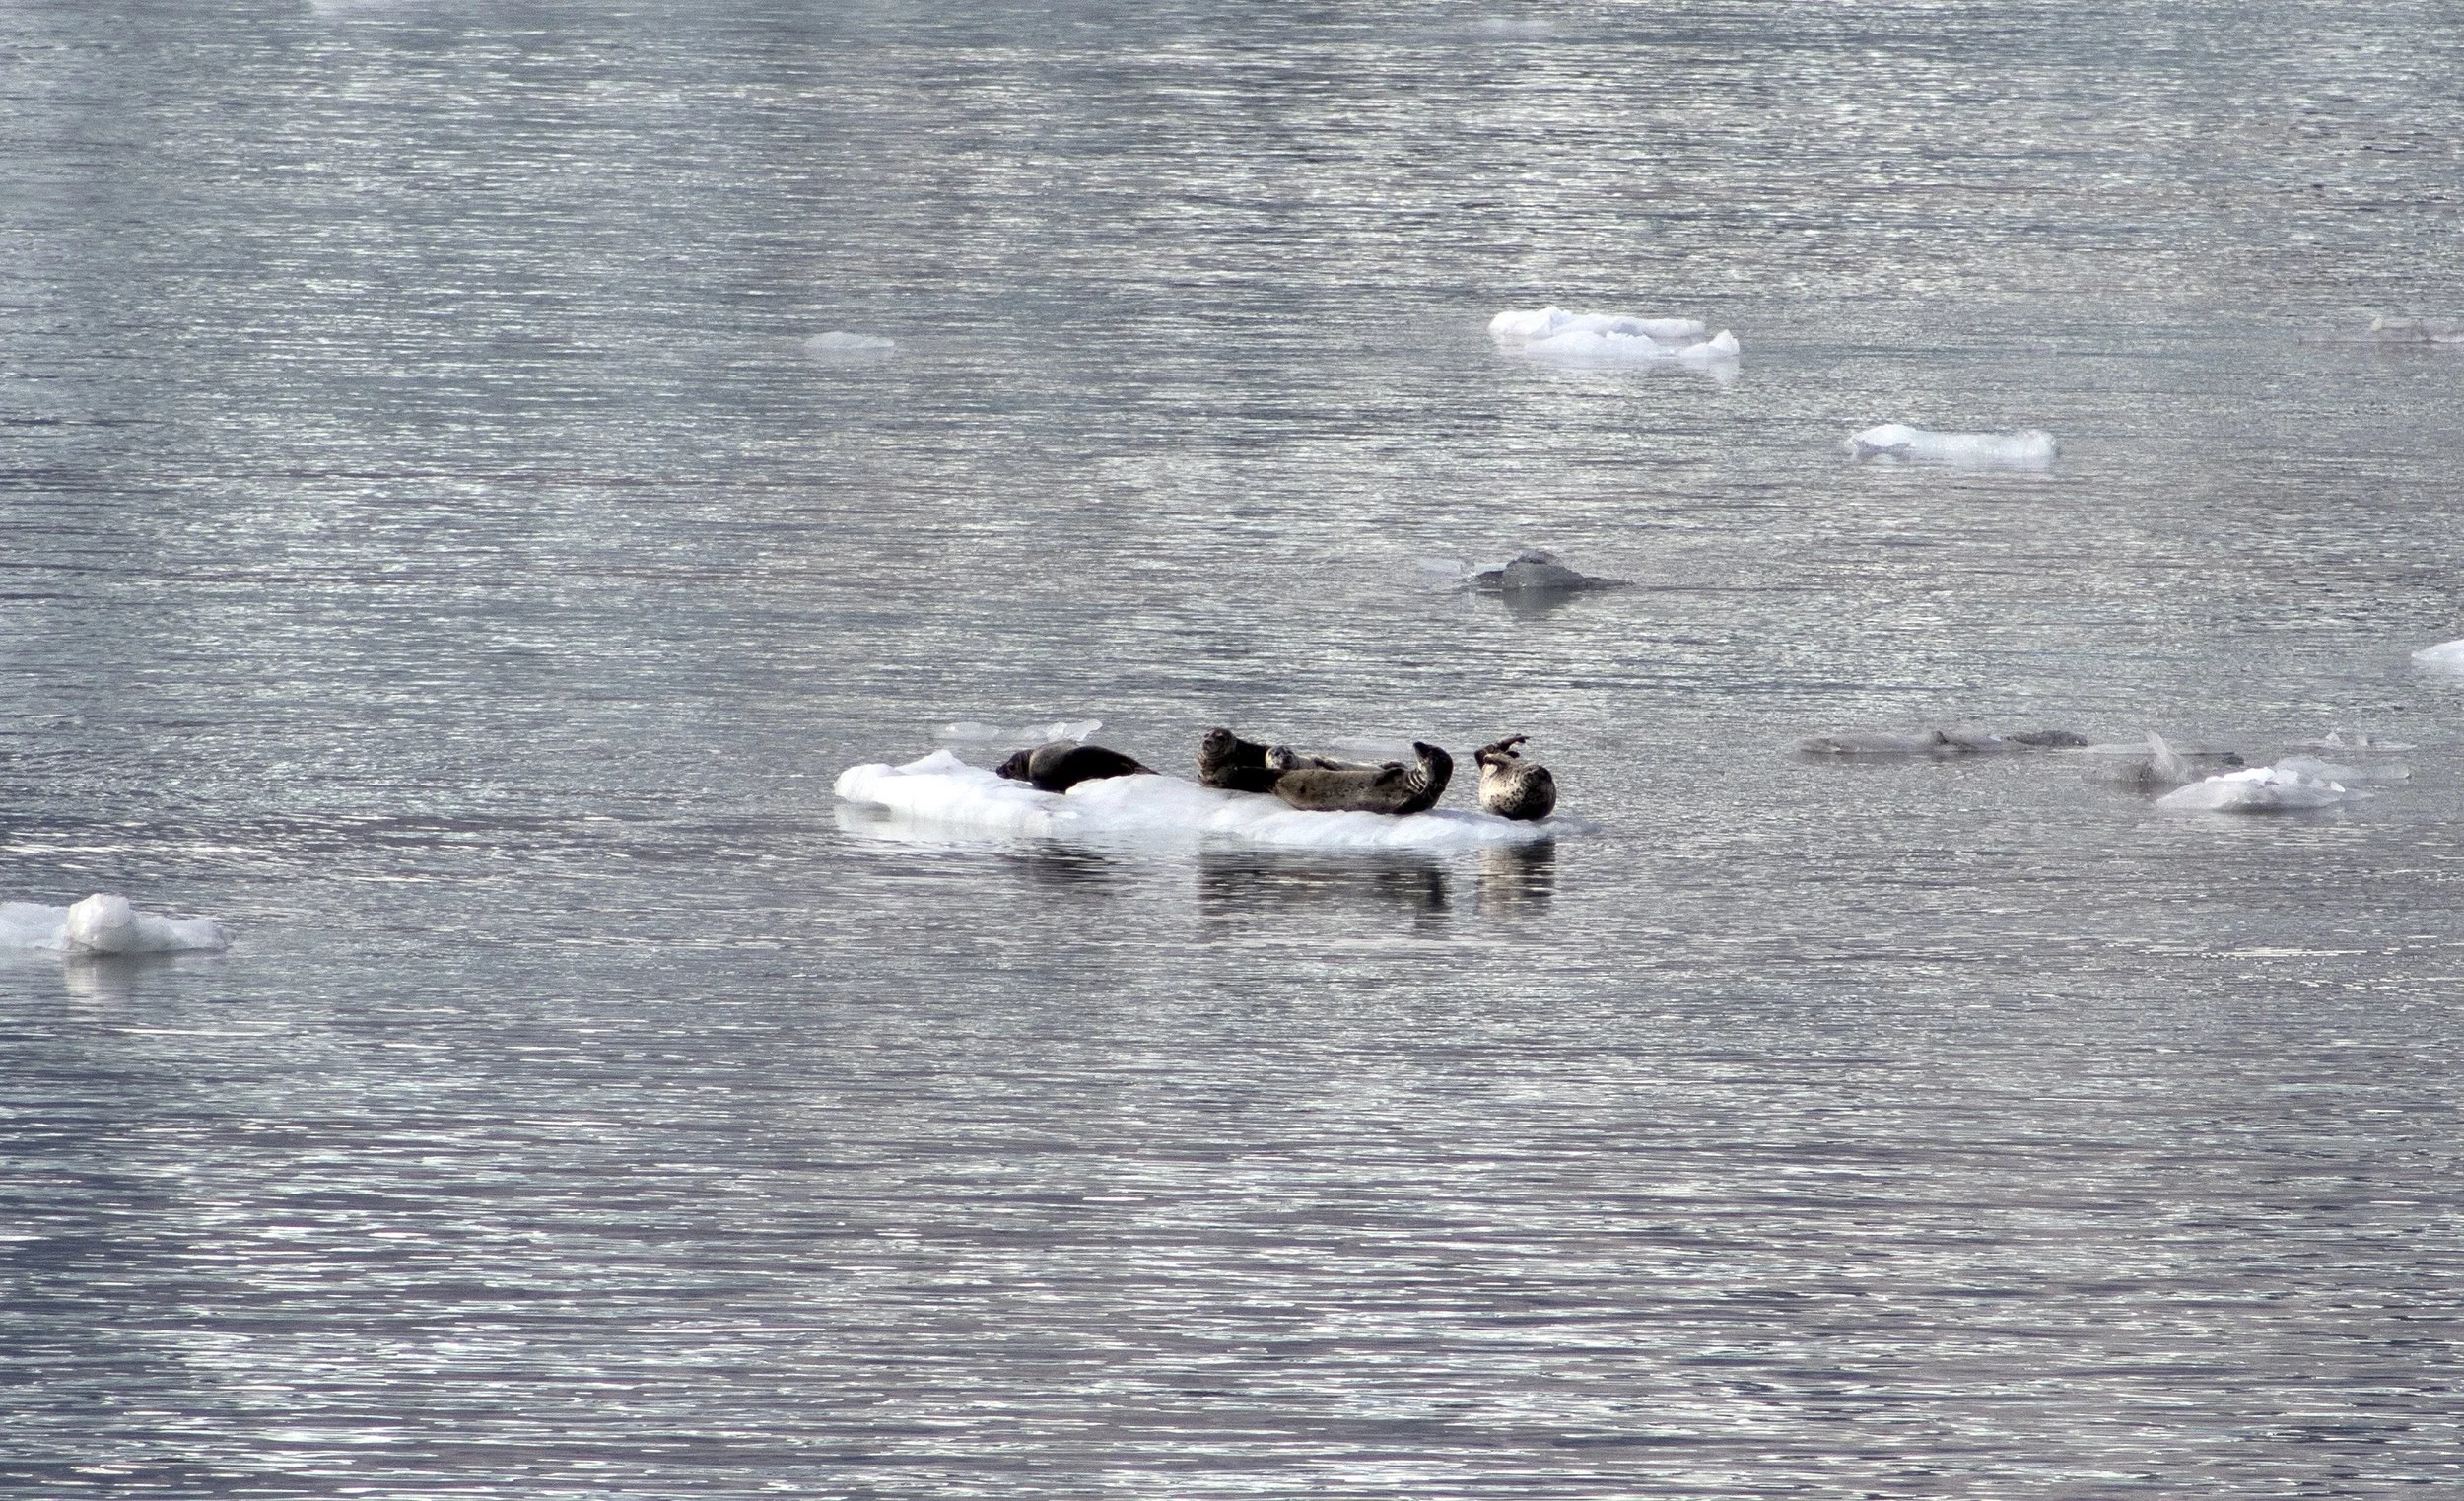
Throughout the morning, she gave short talks over the loudspeaker, answering questions and pointing out wildlife as we drifted past glacier after glacier. Sea otters floated on their backs, hands clasped together. A few harbor seals hauled themselves up onto the ice. Occasionally, we spotted a loan sea lion sunning itself on a floating piece of ice. When we reached Johns Hopkins Glacier, we paused. It was a wall of ancient ice—cracking, shifting, alive, and a bit dirty.
But here’s what most people don’t realize: Glacier Bay wasn’t always a bay. In 1794, when Captain George Vancouver sailed by, the entire area was locked in ice—one massive glacier. No open water, no wildlife, no ships passing through. By the time John Muir visited in 1879, the glacier had already retreated more than 40 miles. That’s an astonishing pace, and it hasn’t stopped.
The park was designated a national monument in 1925 and upgraded to national park status in 1980. It’s also a UNESCO World Heritage Site and a Biosphere Reserve, which are formal ways of saying: “Please don’t ruin this.”
Glacier Bay doesn’t shout. It doesn’t overwhelm with color or size. It hums with presence. It invites you to pay attention—to what’s there, what’s changing, and what’s quietly disappearing. It’s a place where things melt, shift, break, and continue anyway.

What to See and Do in Glacier Bay National Park
Glacier Bay is wilderness in the truest sense—no roads, no grand lodges, no reliable phone signal. And that’s kind of the point. Whether you pass through by cruise ship or come in closer via small boat, this is one of Alaska’s most striking places. Here’s how to make the most of it:
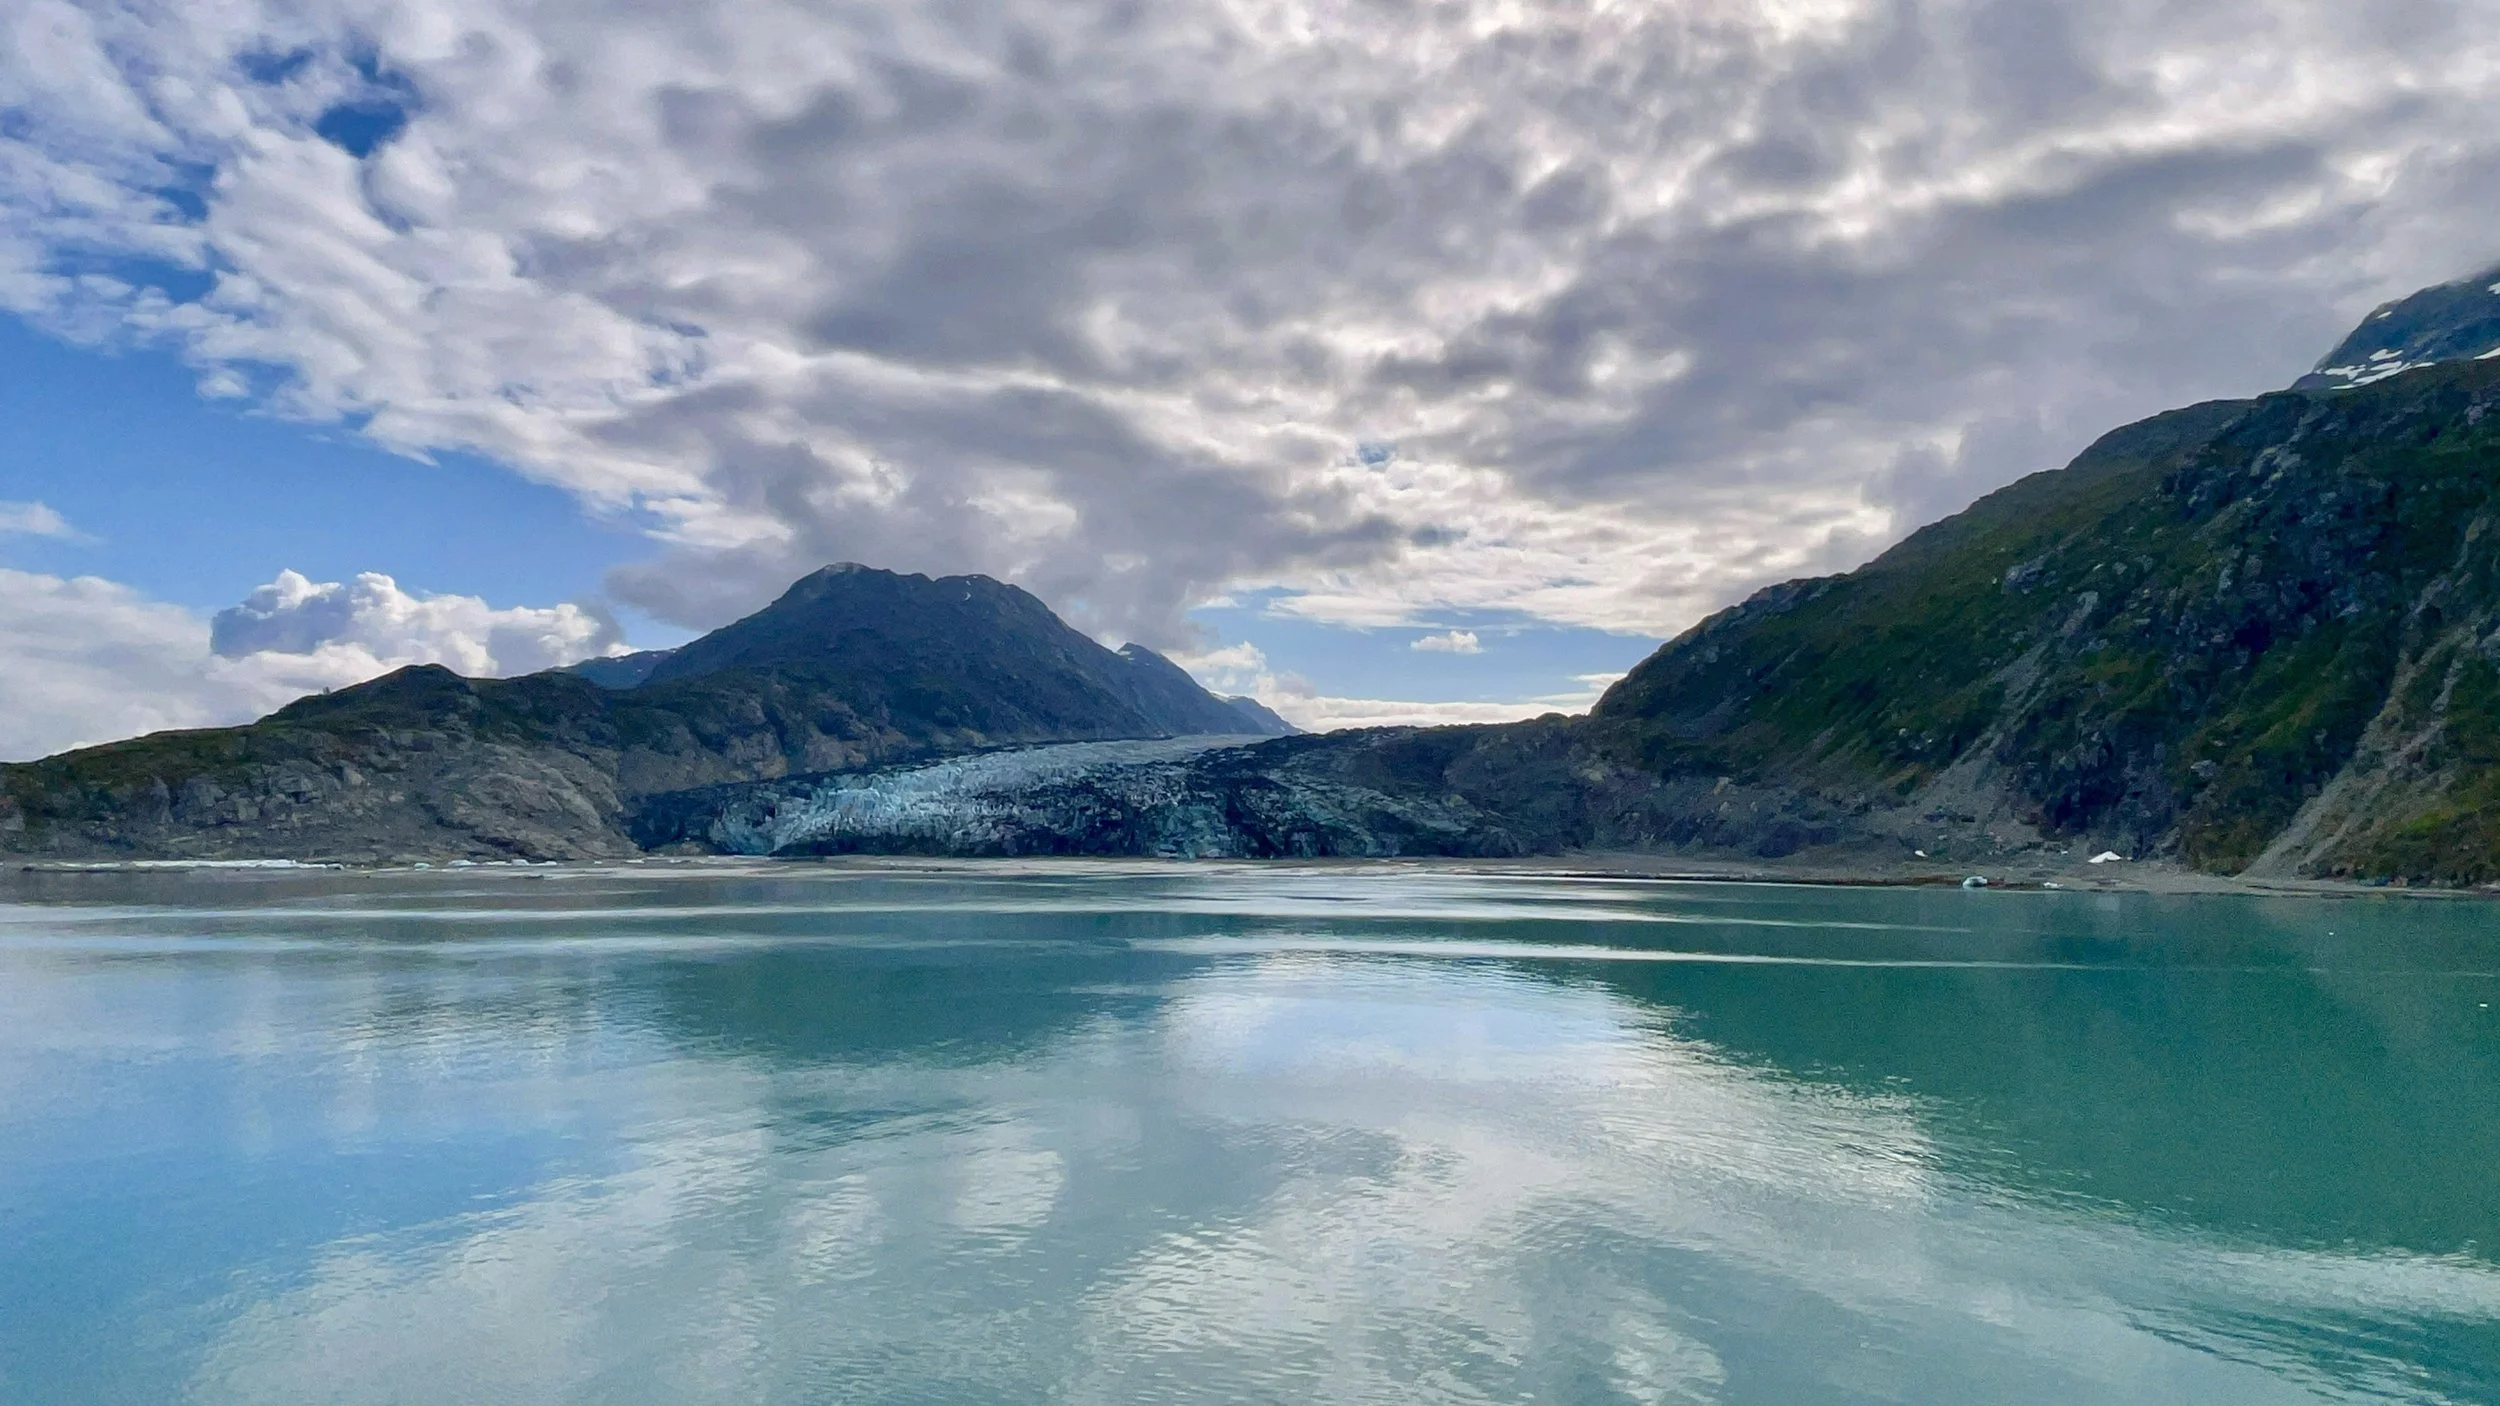
Johns Hopkins Glacier
Major Glaciers You May See
Johns Hopkins Glacier – A showstopper. One of the few advancing glaciers, surrounded by mountain peaks. Often a turnaround point for cruise ships.
Margerie Glacier – A classic tidewater glacier with frequent calving. Listen for the cracks—it’s louder than you’d expect.
Grand Pacific Glacier – Just beside Margerie. Covered in rocky debris and less flashy, but impressive in its own quiet, massive way.
Lamplugh Glacier – Brilliant blue ice and a more dramatic face. Often passed on smaller boat tours.
Reid Glacier – More gradual and accessible by kayak. A different, more grounded perspective.
Muir Glacier – Once the most visited in the park, now too far inland for most vessels. Still important—it’s where John Muir did much of his glacier research.
How to Visit Glacier Bay
By Cruise Ship: Most visitors see Glacier Bay this way. Ships spend most of a day cruising the bay, stopping near major glaciers while a park ranger narrates from onboard. You won’t go ashore, but you’ll see plenty.
By Day Boat Tour (from Gustavus): Fly or ferry into the town of Gustavus and take a smaller boat tour operated by Glacier Bay Lodge. These are more personal, closer to the shoreline, and get you deeper into less-traveled parts of the bay.
Kayaking or Backcountry Camping: For the experienced (and fully self-sufficient). Permits required. You’ll need gear, maps, and a good handle on unpredictable Alaskan weather—but the solitude is unmatched.
How to Visit the Glacier Bay Visitor Center
On a Cruise Ship: The rangers come to you. They set up an information table right on the ship, hand out maps and park stamps, and give talks throughout the day. It’s a portable visitor center, and surprisingly effective.
If You’re Staying in Bartlett Cove: The Glacier Bay Visitor Center is upstairs in Glacier Bay Lodge. It’s open seasonally and includes exhibits, ranger programs, and trail access. You can walk forested paths, sit along the shoreline, or take in the stillness from the deck.
Wildlife You Might Spot
Sea otters (playful and everywhere)
Harbor seals
Steller sea lions
Humpback whales (especially at the mouth of the bay)
Bald eagles
Mountain goats and black bears (check the shoreline with binoculars)
#20 Theodore Roosevelt National Park, North Dakota
I drove all the way across the state of North Dakota to visit Theodore Roosevelt National Park. After flying into Fargo, I rented a car and hit the road, making the 4.5-hour drive west along I-94. The route is long, flat, and straight—a classic slice of the Great Plains. But as you edge closer to the park, the scenery begins to shift. Rolling prairies give way to the rugged terrain of the Badlands, and you know you’re about to experience something special.
Welcome to the Park
The first thing I did upon arrival? I stopped at the park sign, of course! It’s a must for any national park visit. After snapping a quick photo, I headed into the South Unit Visitor Center, located in the town of Medora, right near the park’s main entrance. The visitor center is informative and well laid out, offering exhibits on Roosevelt’s time in the Badlands, his conservation legacy, and the park’s unique geology and wildlife. I picked up my National Parks Passport stamp and spent a few minutes chatting with rangers about trail conditions and wildlife sightings.
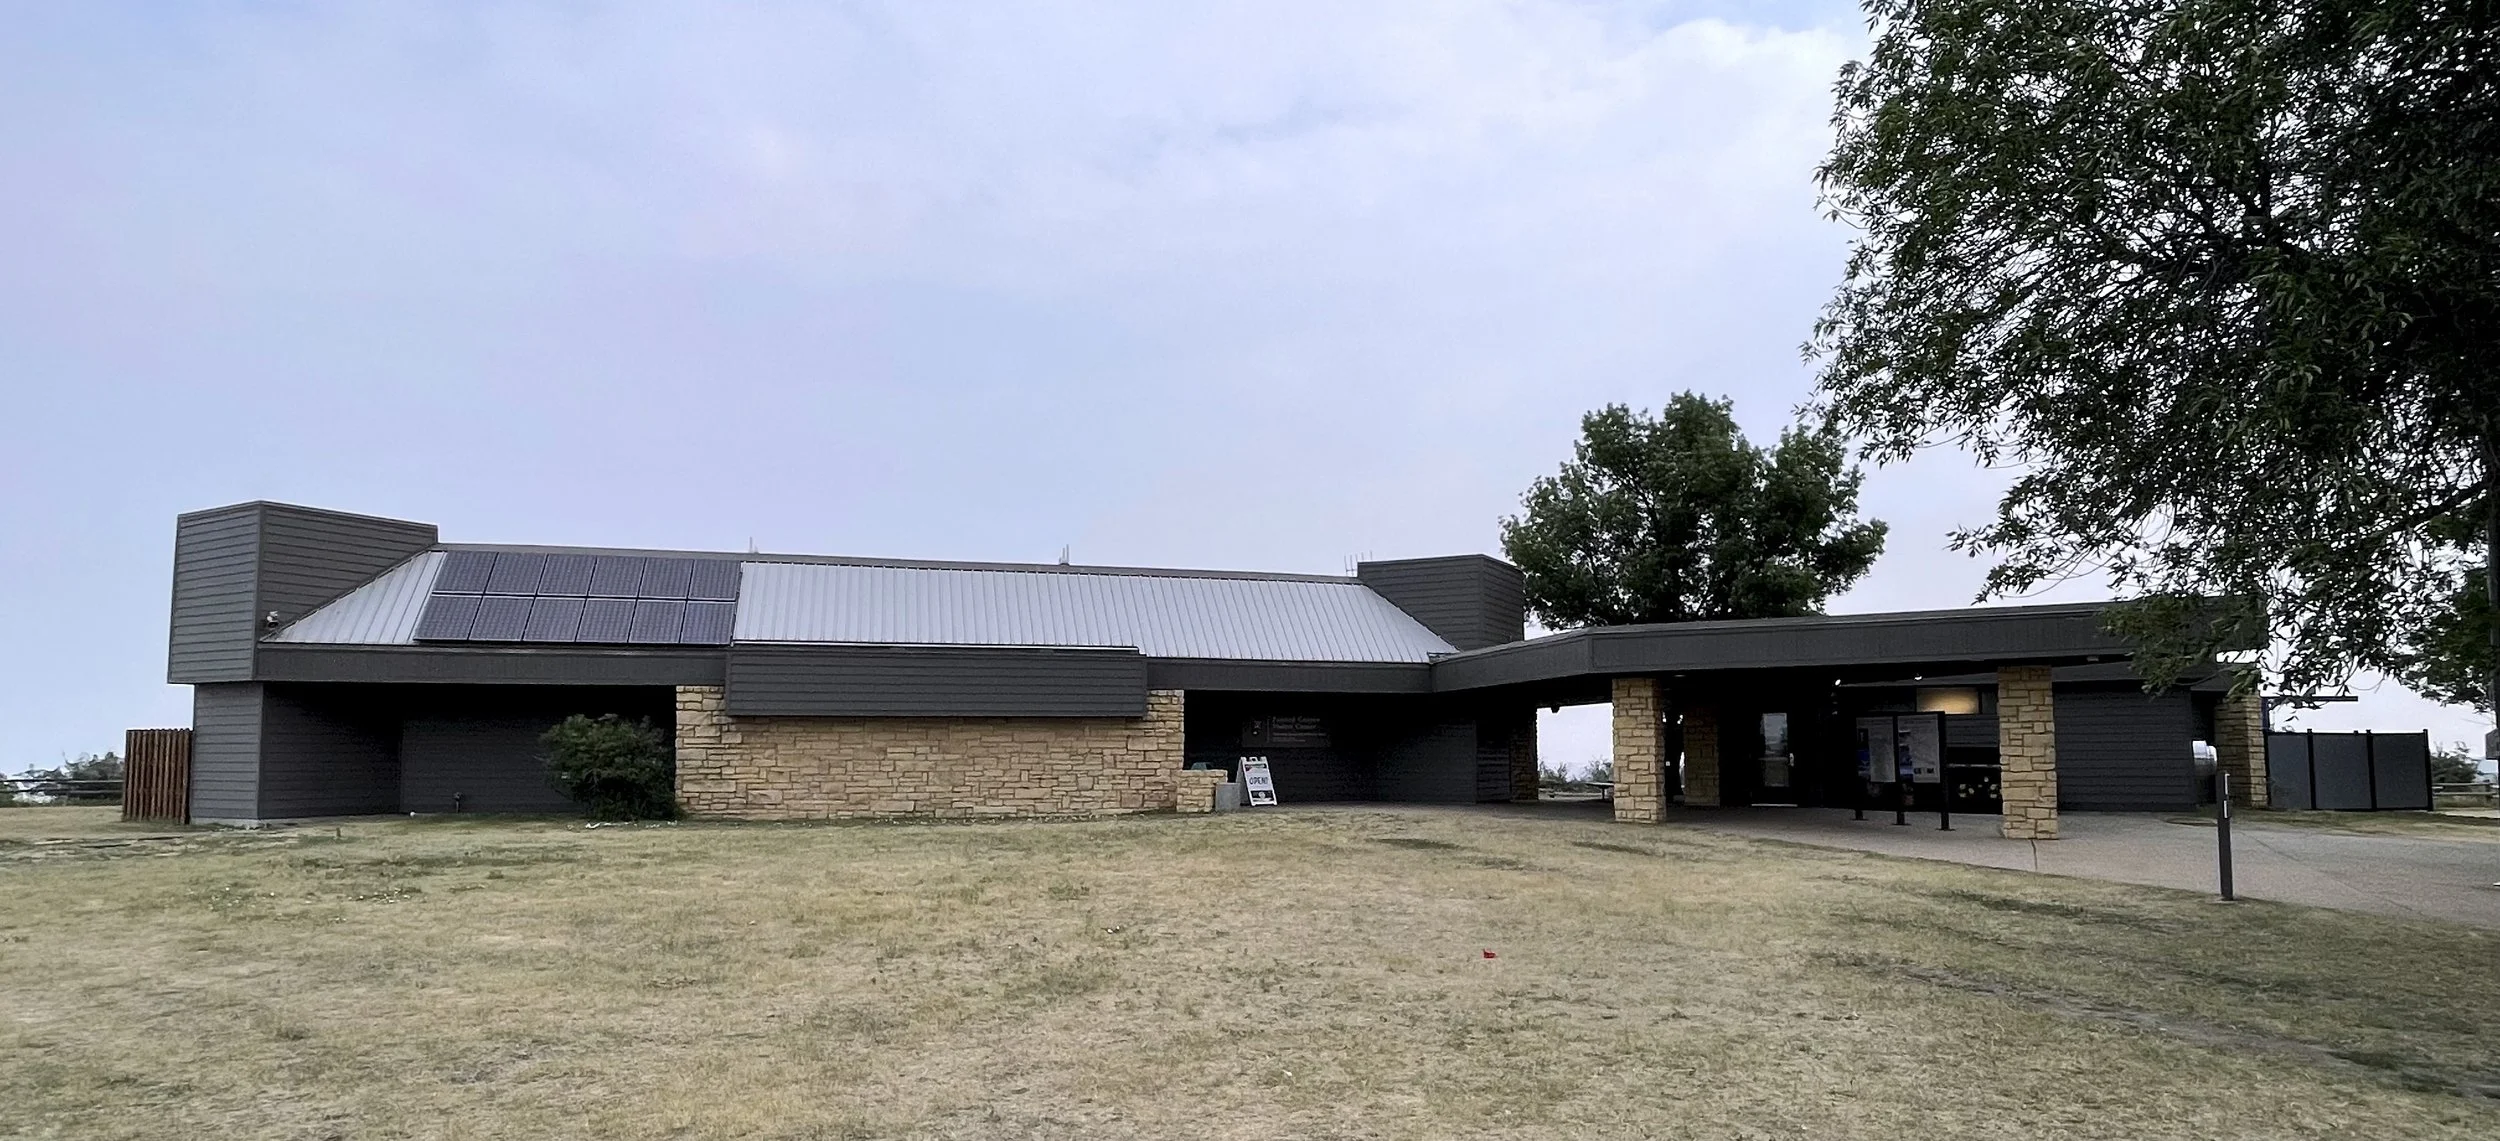
South Unit Visitor Center
Visitor Centers in Theodore Roosevelt National Park
Whether you’re entering from the South or exploring the more remote corners of the park, each visitor center provides unique insights and services:
South Unit Visitor Center – Medora, ND
Address: 201 East River Road North, Medora, ND 58645
Phone: (701) 623-4466
Highlights: Located near the Maltese Cross Cabin, it features interpretive exhibits, a park film, restrooms, and ranger support. Open year-round with seasonal hours.
Painted Canyon Visitor Center – Belfield, ND
Address: Exit 32, Interstate 94, Belfield, ND 58622
Phone: (701) 575-4020
Highlights: Incredible overlook of the Badlands right off the interstate. Great for a quick stop, short hikes, and interpretive displays. Open seasonally.
North Unit Visitor Center – Watford City, ND
Address: 208 Scenic Drive, Watford City, ND 58854
Phone: (701) 842-2333
Highlights: Offers maps, exhibits, a short film, and trip planning help. Conveniently located near the start of the scenic drive in the North Unit.
Elkhorn Ranch Unit – Remote
Access: About 35 miles north of Medora, no facilities or staffed visitor center
Highlights: Site of Theodore Roosevelt’s ranch. Interpretive panels tell the story of his time here. A 0.7-mile walk from the parking area leads to the ranch site.
Park Fees and Passes
Entrance Fee: $30 per vehicle (valid for 7 days)
Motorcycle Fee: $25
Per Person (on foot or bicycle): $15
Annual Pass for Theodore Roosevelt NP: $55
America the Beautiful Pass: $80 (Grants access to all U.S. national parks and federal lands)
Passes can be purchased at visitor centers or online through the NPS website.
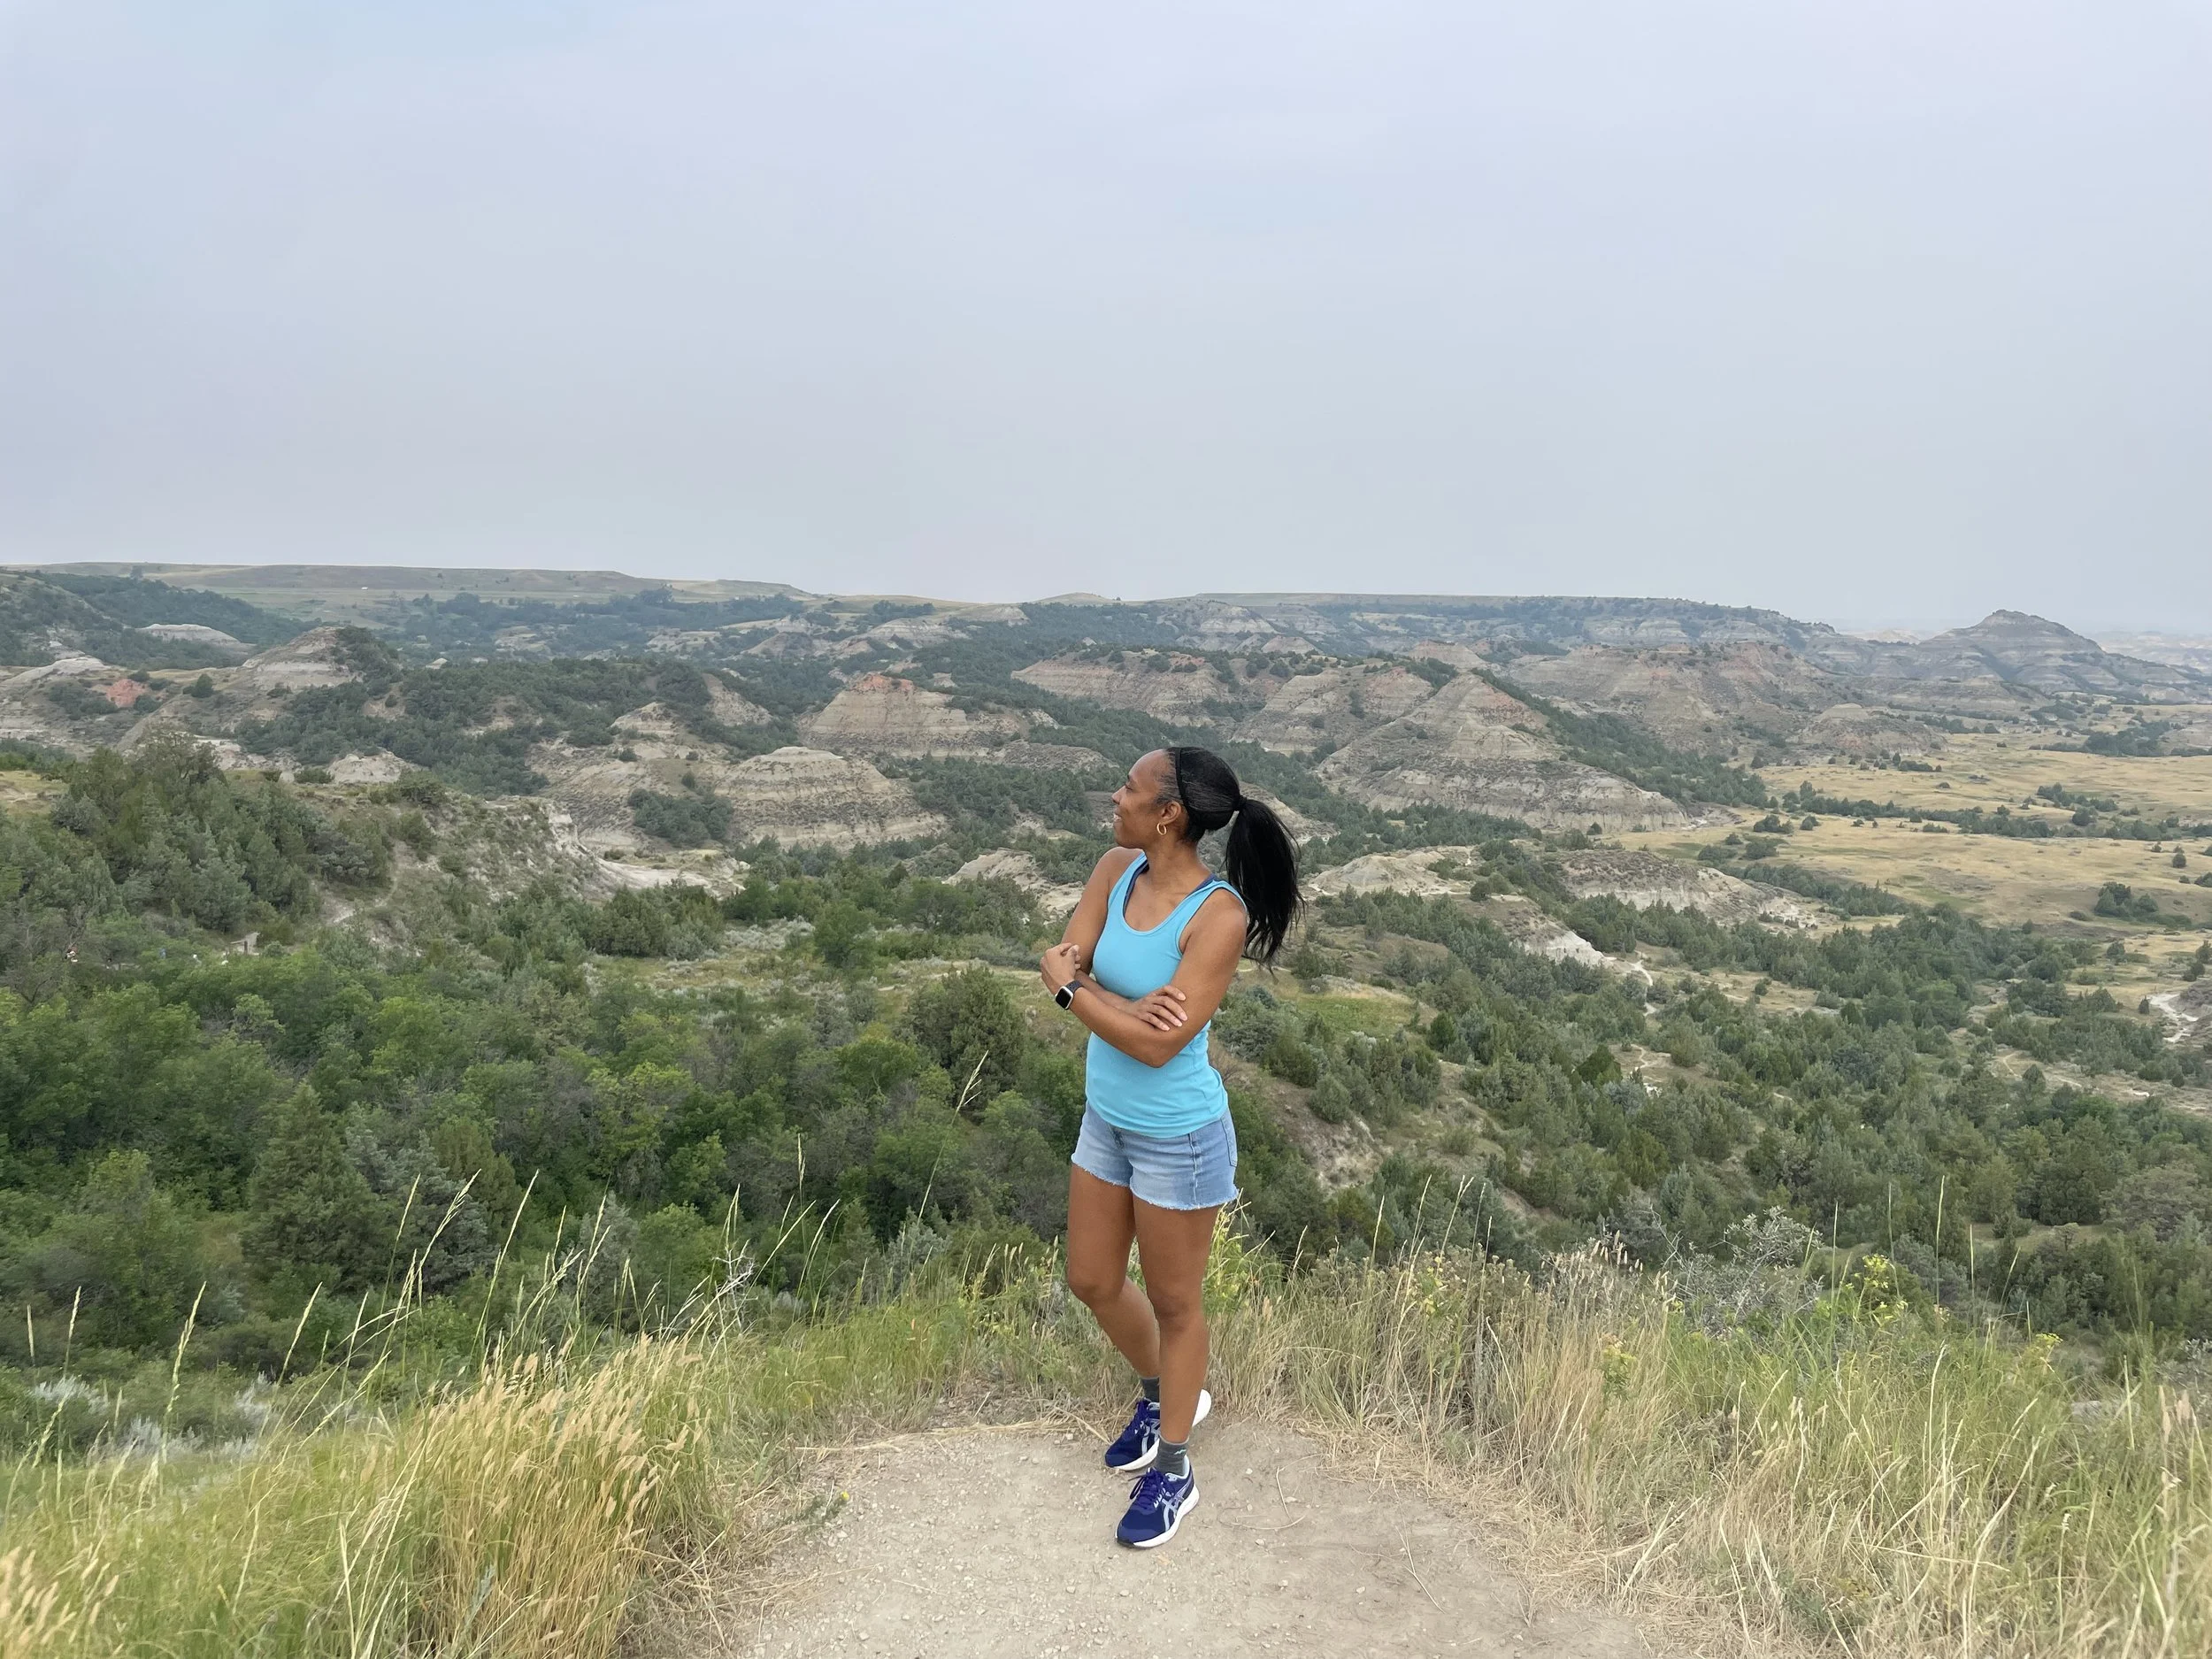
A Bit About The Park
Theodore Roosevelt National Park is the only national park named after a person—a fitting tribute to the 26th President of the United States, whose time in the North Dakota Badlands deeply influenced his conservation ethos. Covering more than 70,000 acres, the park preserves the dramatic landscapes Roosevelt fell in love with: jagged buttes, wide-open prairies, and the winding Little Missouri River.
The park is divided into three units: South Unit, North Unit, and the more remote Elkhorn Ranch Unit, where Roosevelt’s actual ranch once stood.
Top Hiking Trails in Theodore Roosevelt National Park
Whether you’re a seasoned hiker or a casual wanderer, the park has something for everyone:
Painted Canyon Nature Trail (South Unit) – A short, 0.9-mile loop with scenic views of the canyon right from the overlook. Great for beginners.
Caprock Coulee Trail (North Unit) – This moderate 4.4-mile loop is one of the best hikes in the park, offering stunning Badlands views and great opportunities to spot wildlife.
Petrified Forest Trail (South Unit) – Located in a more remote area of the park, this trail showcases ancient petrified wood and fewer crowds.
Boicourt Trail (South Unit) – A short and accessible trail (0.2 miles paved, 0.4 miles total) with a breathtaking overlook—especially beautiful at sunset.
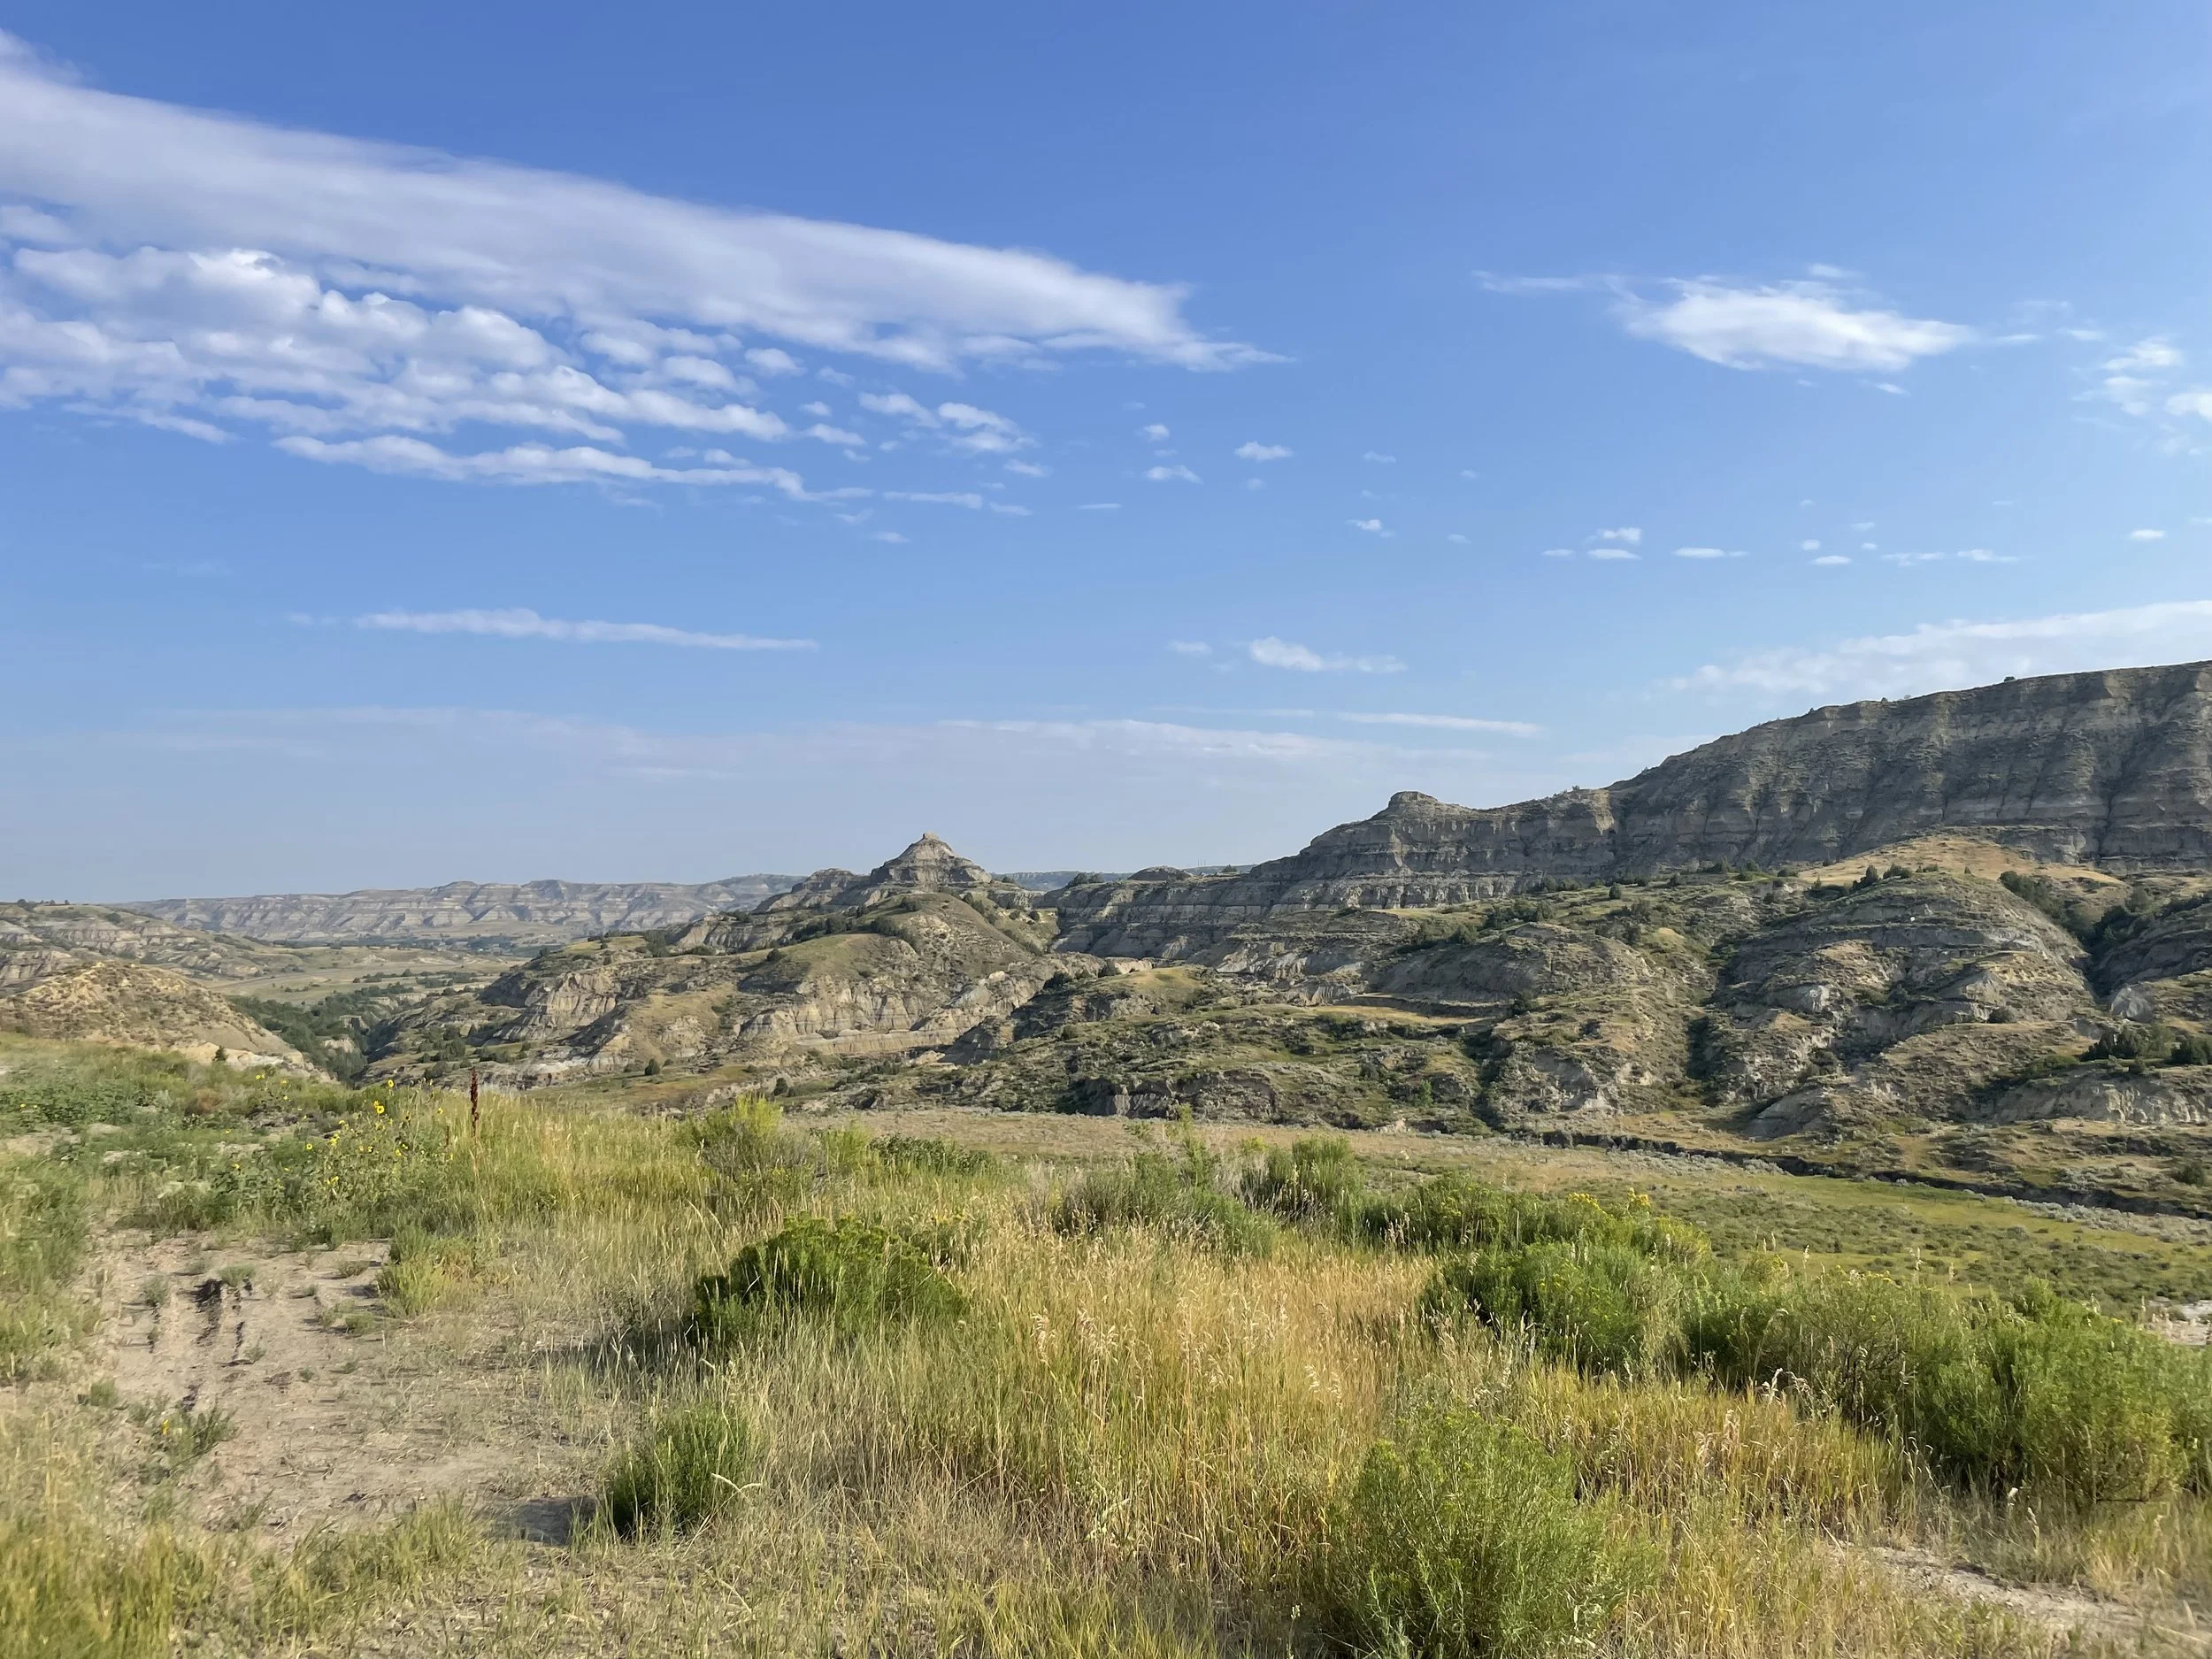
Best Photography Spots
Oxbow Overlook (North Unit) – Sweeping views of the Little Missouri River curve below—absolutely magical at sunrise or sunset.
Boicourt Overlook (South Unit) – Jaw-dropping panoramic views, with layered buttes stretching endlessly into the horizon.
Painted Canyon Overlook (South Unit, off I-94) – A fantastic stop even before entering the park, perfect for capturing classic Badlands vistas.
Wildlife Loop on the Scenic Drive – Don’t forget your zoom lens; bison, prairie dogs, wild horses, and elk are commonly seen here.
Camping in the Park
Yes, there are excellent camping options available:
Cottonwood Campground (South Unit) – Open year-round with both reservable and first-come, first-served sites. Flush toilets and drinking water available in summer.
Juniper Campground (North Unit) – More remote and quieter. First-come, first-served only. Vault toilets and no water, so come prepared.
Backcountry Camping – Free permits available at visitor centers. Be ready for primitive conditions and potential wildlife encounters.
Accessibility
The park makes an effort to provide access to all visitors:
The South Unit Visitor Center is wheelchair accessible.
Boicourt Trail offers a paved section suitable for wheelchairs.
Scenic Loop Drive allows people with limited mobility to experience breathtaking vistas without hiking.
Accessible restrooms are available at the visitor center and some campgrounds.
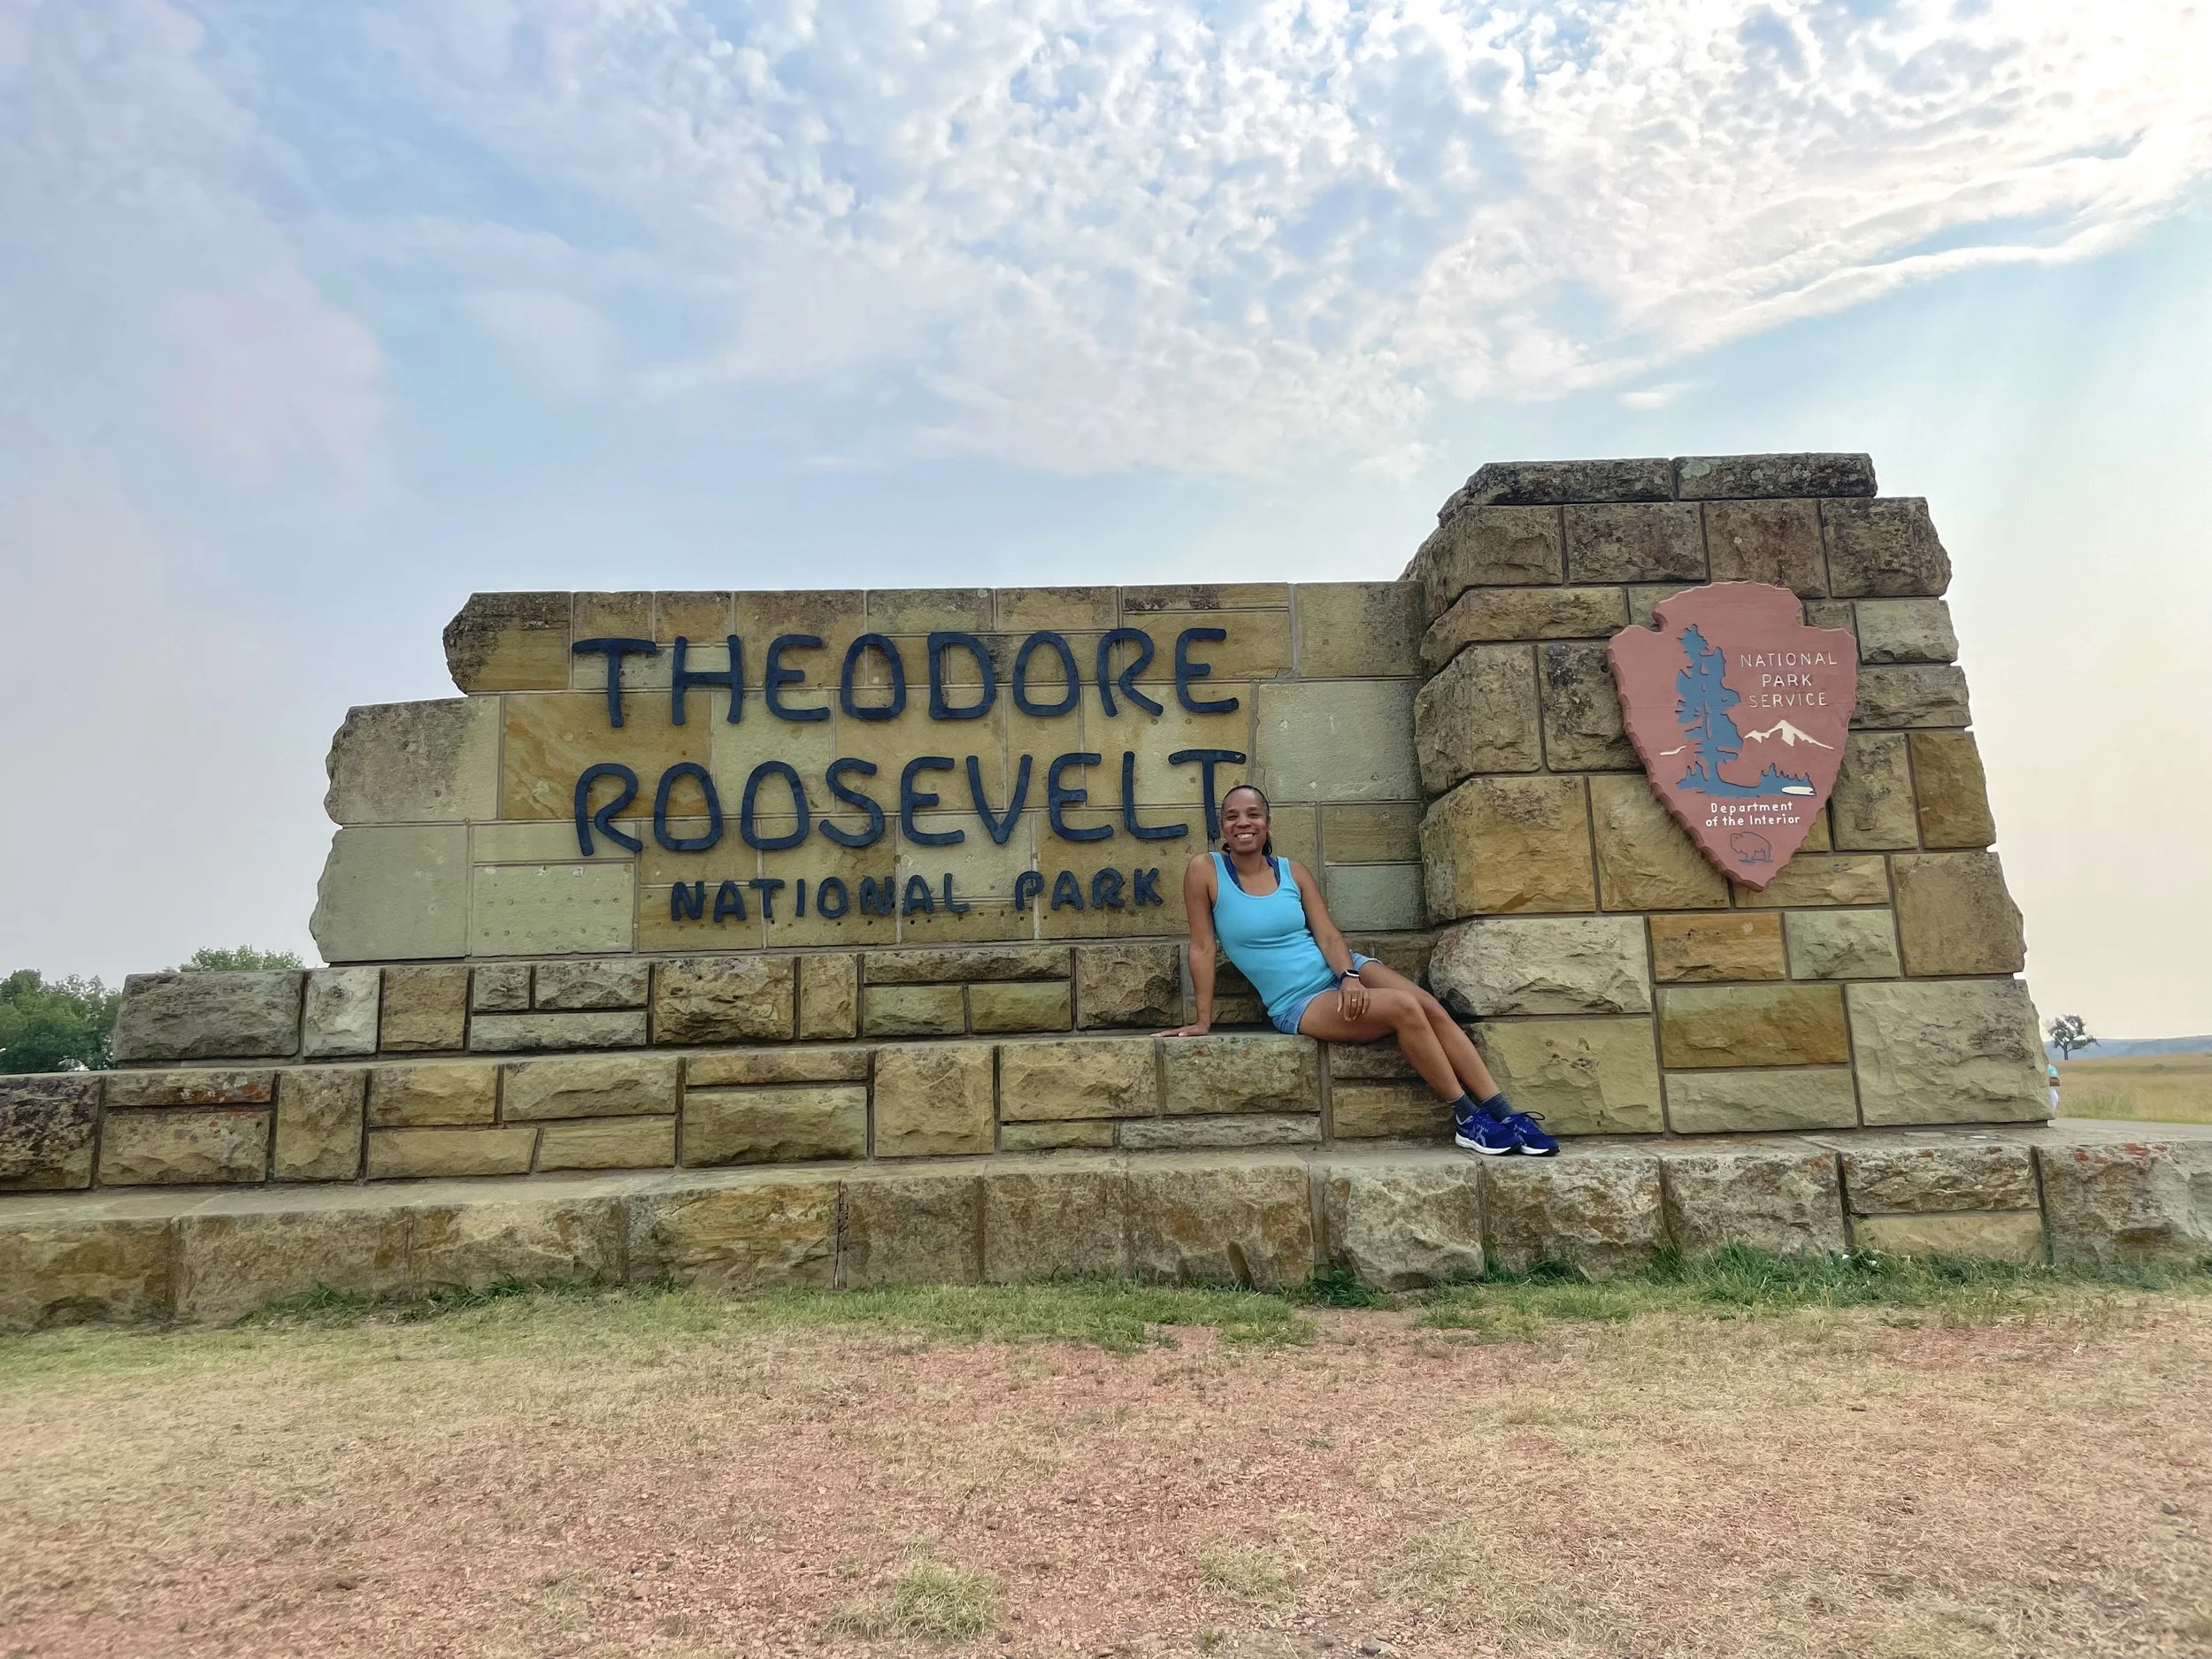
Final Thoughts
Theodore Roosevelt National Park is more than just beautiful landscapes—it’s a living tribute to the man who helped create the national parks system as we know it. With its mix of history, scenery, and solitude, this park is a must for anyone exploring America’s lesser-known gems. Whether you’re there for the hiking, the history, or the herds of bison grazing in the distance, one thing is certain: the spirit of the Badlands stays with you long after the dust settles on your boots.
#19 Wind Cave National Park, South Dakota
After a morning spent in the dramatic terrain of Badlands National Park, I decided to continue my South Dakota adventure by heading to Wind Cave National Park—my second national park of the day. The two parks are separated by about 123 miles, and the drive takes just under three hours. As I made my way south, the skies began to darken, casting a moody tone over the landscape and setting the stage for what would be a quietly awe-inspiring visit.
Wind Cave National Park, located in the Black Hills of South Dakota, is a fascinating destination known for its unique and expansive underground cave system. As one of the oldest national parks in the United States, it was established in 1903 to preserve the stunning limestone formations within Wind Cave, which is one of the longest and most complex caves in the world. The cave is famous for its intricate boxwork formations—delicate, honeycomb-like structures that are rare and found only in a few places globally. Visitors can take guided tours to explore the cave’s narrow passageways and vast chambers, learning about its geology and the history of its discovery.

Above ground, Wind Cave National Park offers a rich natural environment with mixed-grass prairies, ponderosa pine forests, and abundant wildlife. The park is home to bison, elk, prairie dogs, and bighorn sheep, which can be observed while hiking or driving the park’s scenic routes. The park’s diverse ecosystems provide opportunities for outdoor activities such as hiking, camping, and wildlife watching. With its combination of underground wonders and beautiful landscapes, Wind Cave National Park offers a unique experience that blends adventure, history, and natural beauty—making it a true hidden gem in the Black Hills.
Welcome to the Wild
My first order of business upon arrival was snapping a photo at the Wind Cave National Park sign. The overcast sky gave the scene an almost cinematic backdrop, and the soft lighting was perfect for photos. From there, I continued down the winding road toward the visitor center.
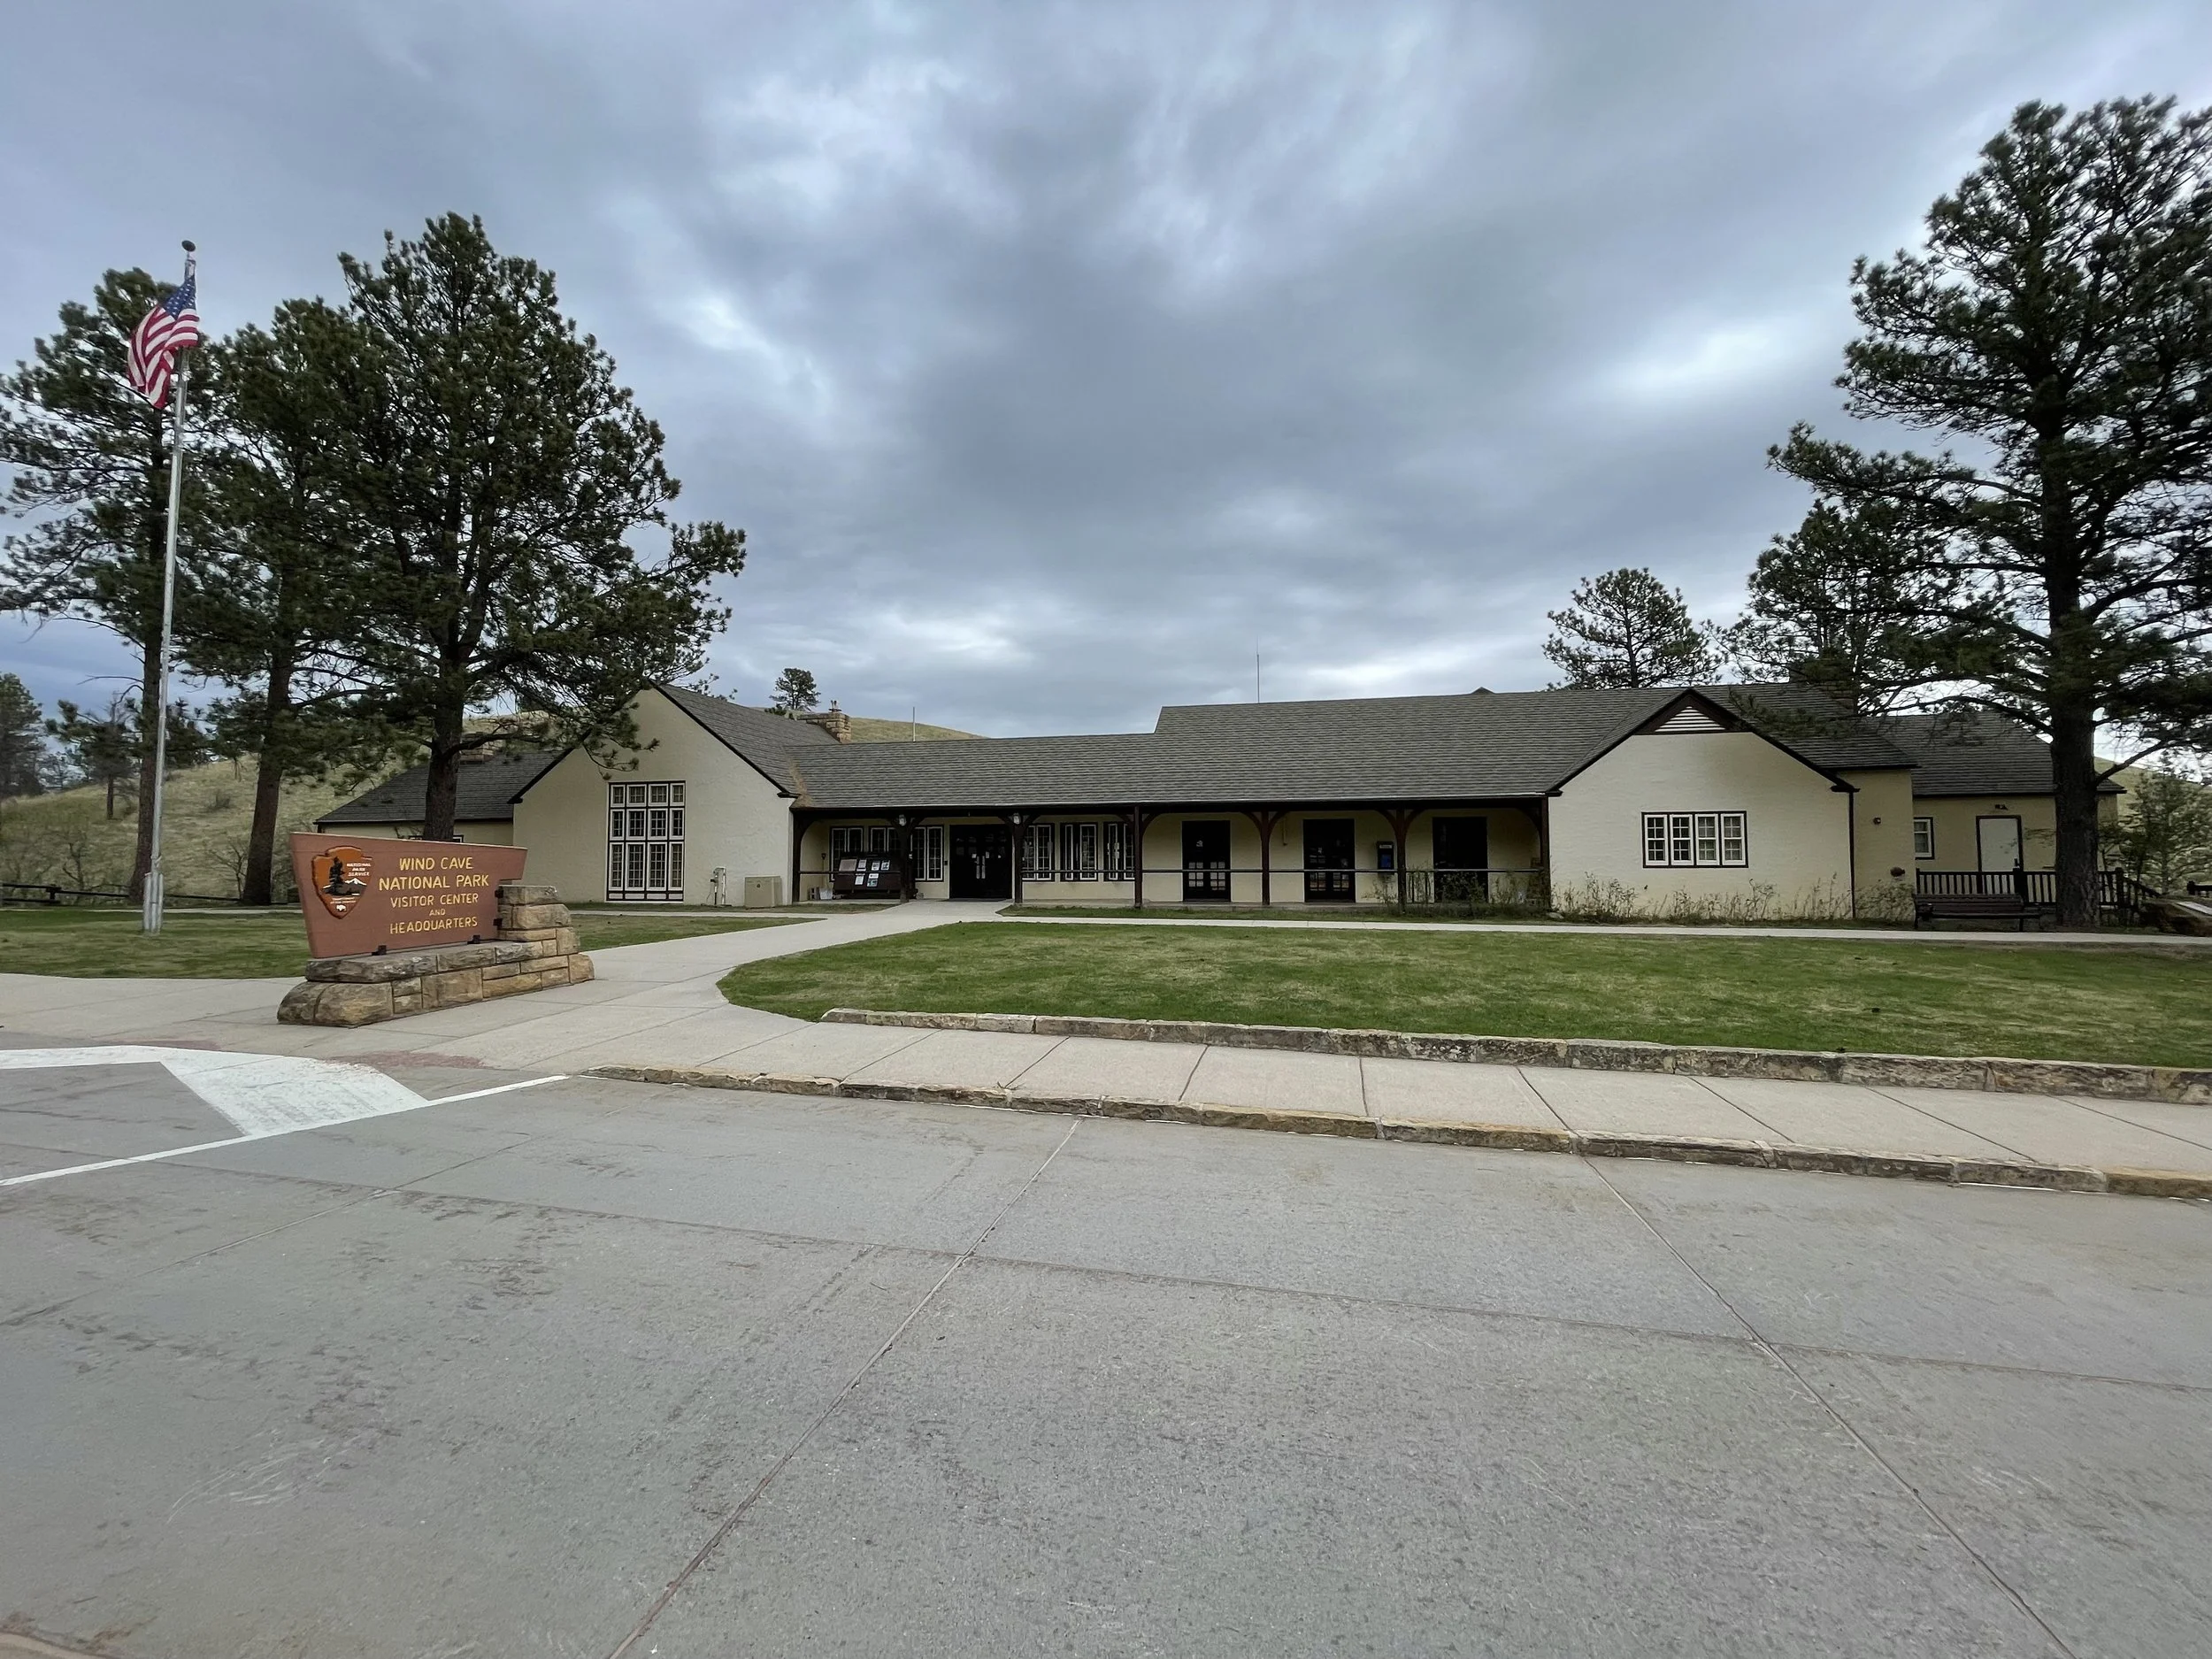
Visitor Info You’ll Want to Know
Wind Cave National Park Visitor Center
📍 26611 US Highway 385, Hot Springs, SD 57747
📞 (605) 745-4600
The visitor center is the heart of the park’s operations and a great starting point for any visit. Although it was later in the afternoon when I arrived, the center was still open. Some of the exhibits were closed for maintenance, but I was able to grab my National Parks Passport stamp.
Unfortunately, due to an elevator malfunction, access to the cave was suspended that day. While I was initially disappointed, I quickly realized that the park’s real magic doesn’t just lie below ground—it stretches across its prairies, hills, and forests, teeming with life. I walked over to the natural entrance of the cave and read about its “founders” and its significance to Native American communities.
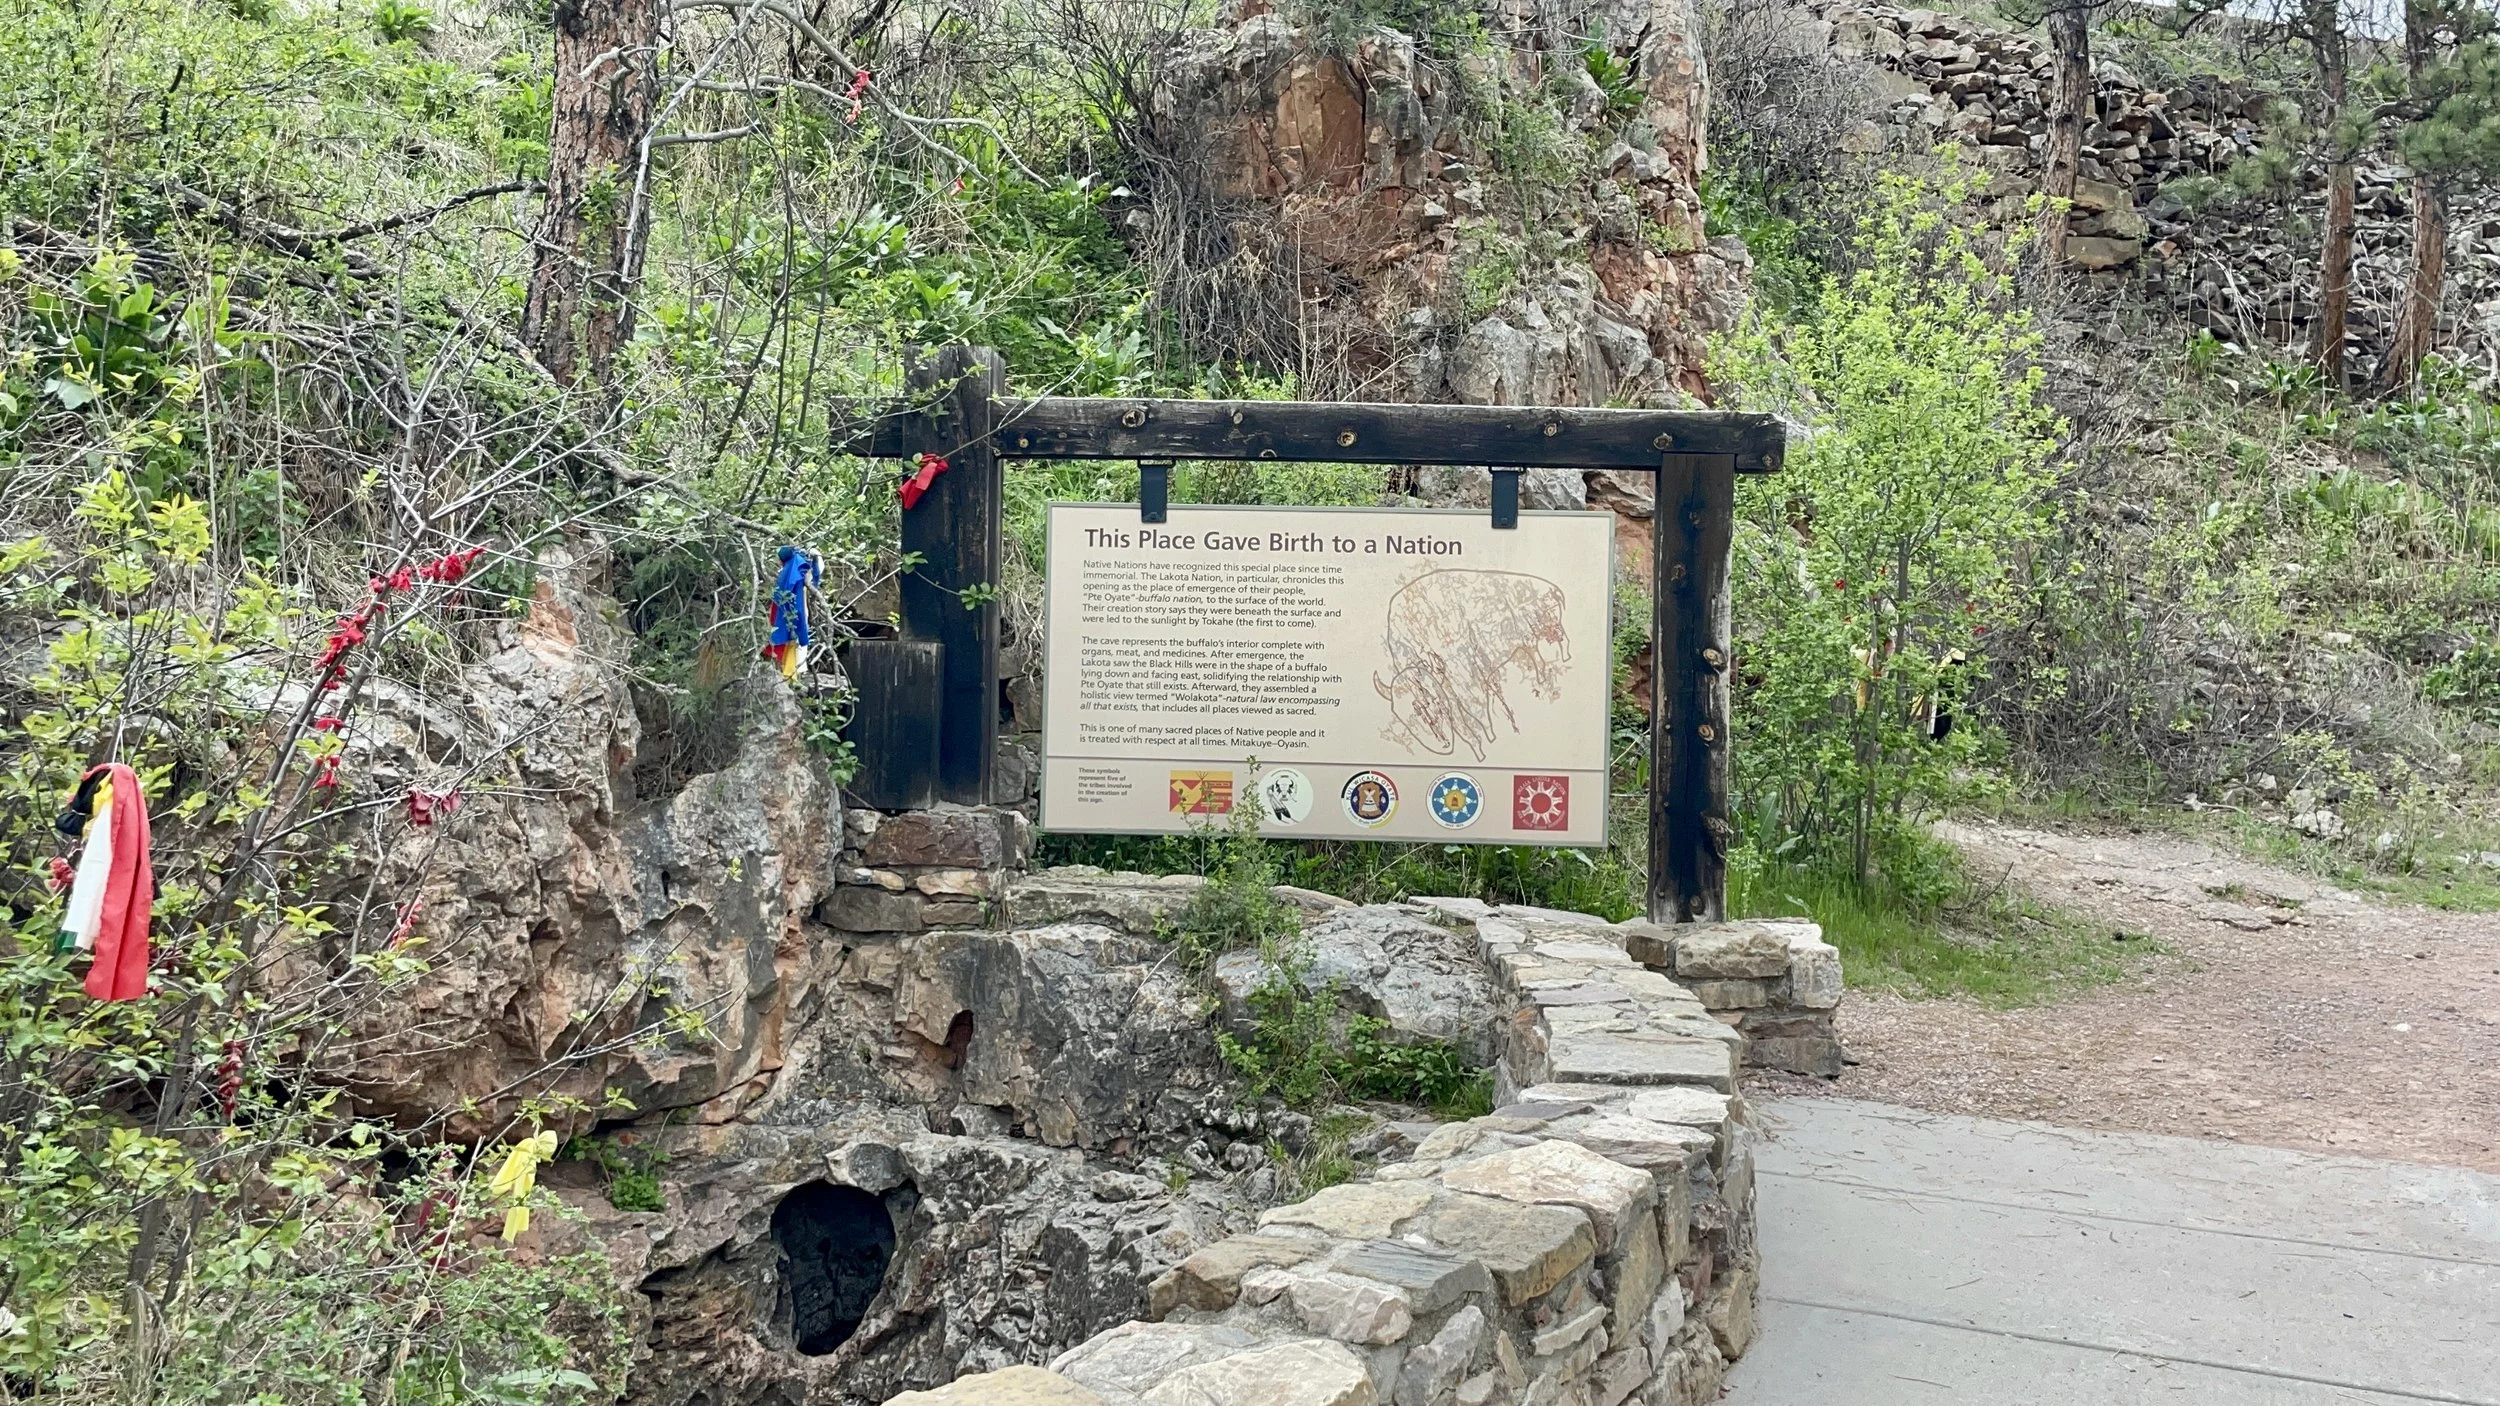
How to Book a Cave Tour at Wind Cave National Park
Wind Cave offers several types of cave tours, each designed for different interests and ability levels. While tour availability can vary due to weather or maintenance (like the elevator issue during my visit), here’s what you need to know if the tours are operating during yours:
Available Tours
Garden of Eden Tour – Easy, one-hour tour with minimal stairs. Great for families or first-timers.
Natural Entrance Tour – The park’s most popular tour. About 75 minutes with around 300 stairs.
Fairgrounds Tour – A more strenuous 90-minute tour with 450 stairs and both upper and lower cave levels.
Accessibility Tour – A 30-minute tour designed for visitors with limited mobility.
Candlelight Tour – Summer-only, 2-hour tour by candlelight through undeveloped cave sections.
Wild Cave Tour – Summer-only, 4-hour off-trail experience. Strenuous, requires gear, and must be booked in advance.
How to Reserve a Spot
Online: You can book most tours (Garden of Eden, Natural Entrance, Fairgrounds, Accessibility) via Recreation.gov up to three days in advance.
Phone: Candlelight and Wild Cave Tours must be booked by calling the Visitor Center at (605) 745-4600 up to one month ahead.
Same-Day Tickets: About half of the tickets are reserved for walk-ins, but they go fast—arrive early if you’re hoping to snag one.
Tour Tips
Arrive at least 30 minutes early to check in.
The cave stays around 54°F (12°C) year-round, so bring a light jacket and wear sturdy shoes.
No backpacks, food, drinks, or tripods are allowed inside. Flash photography is okay (except on the Candlelight and Wild Cave Tours).
Some tours are strenuous. If you have mobility or respiratory issues, the Accessibility Tour is your best bet.
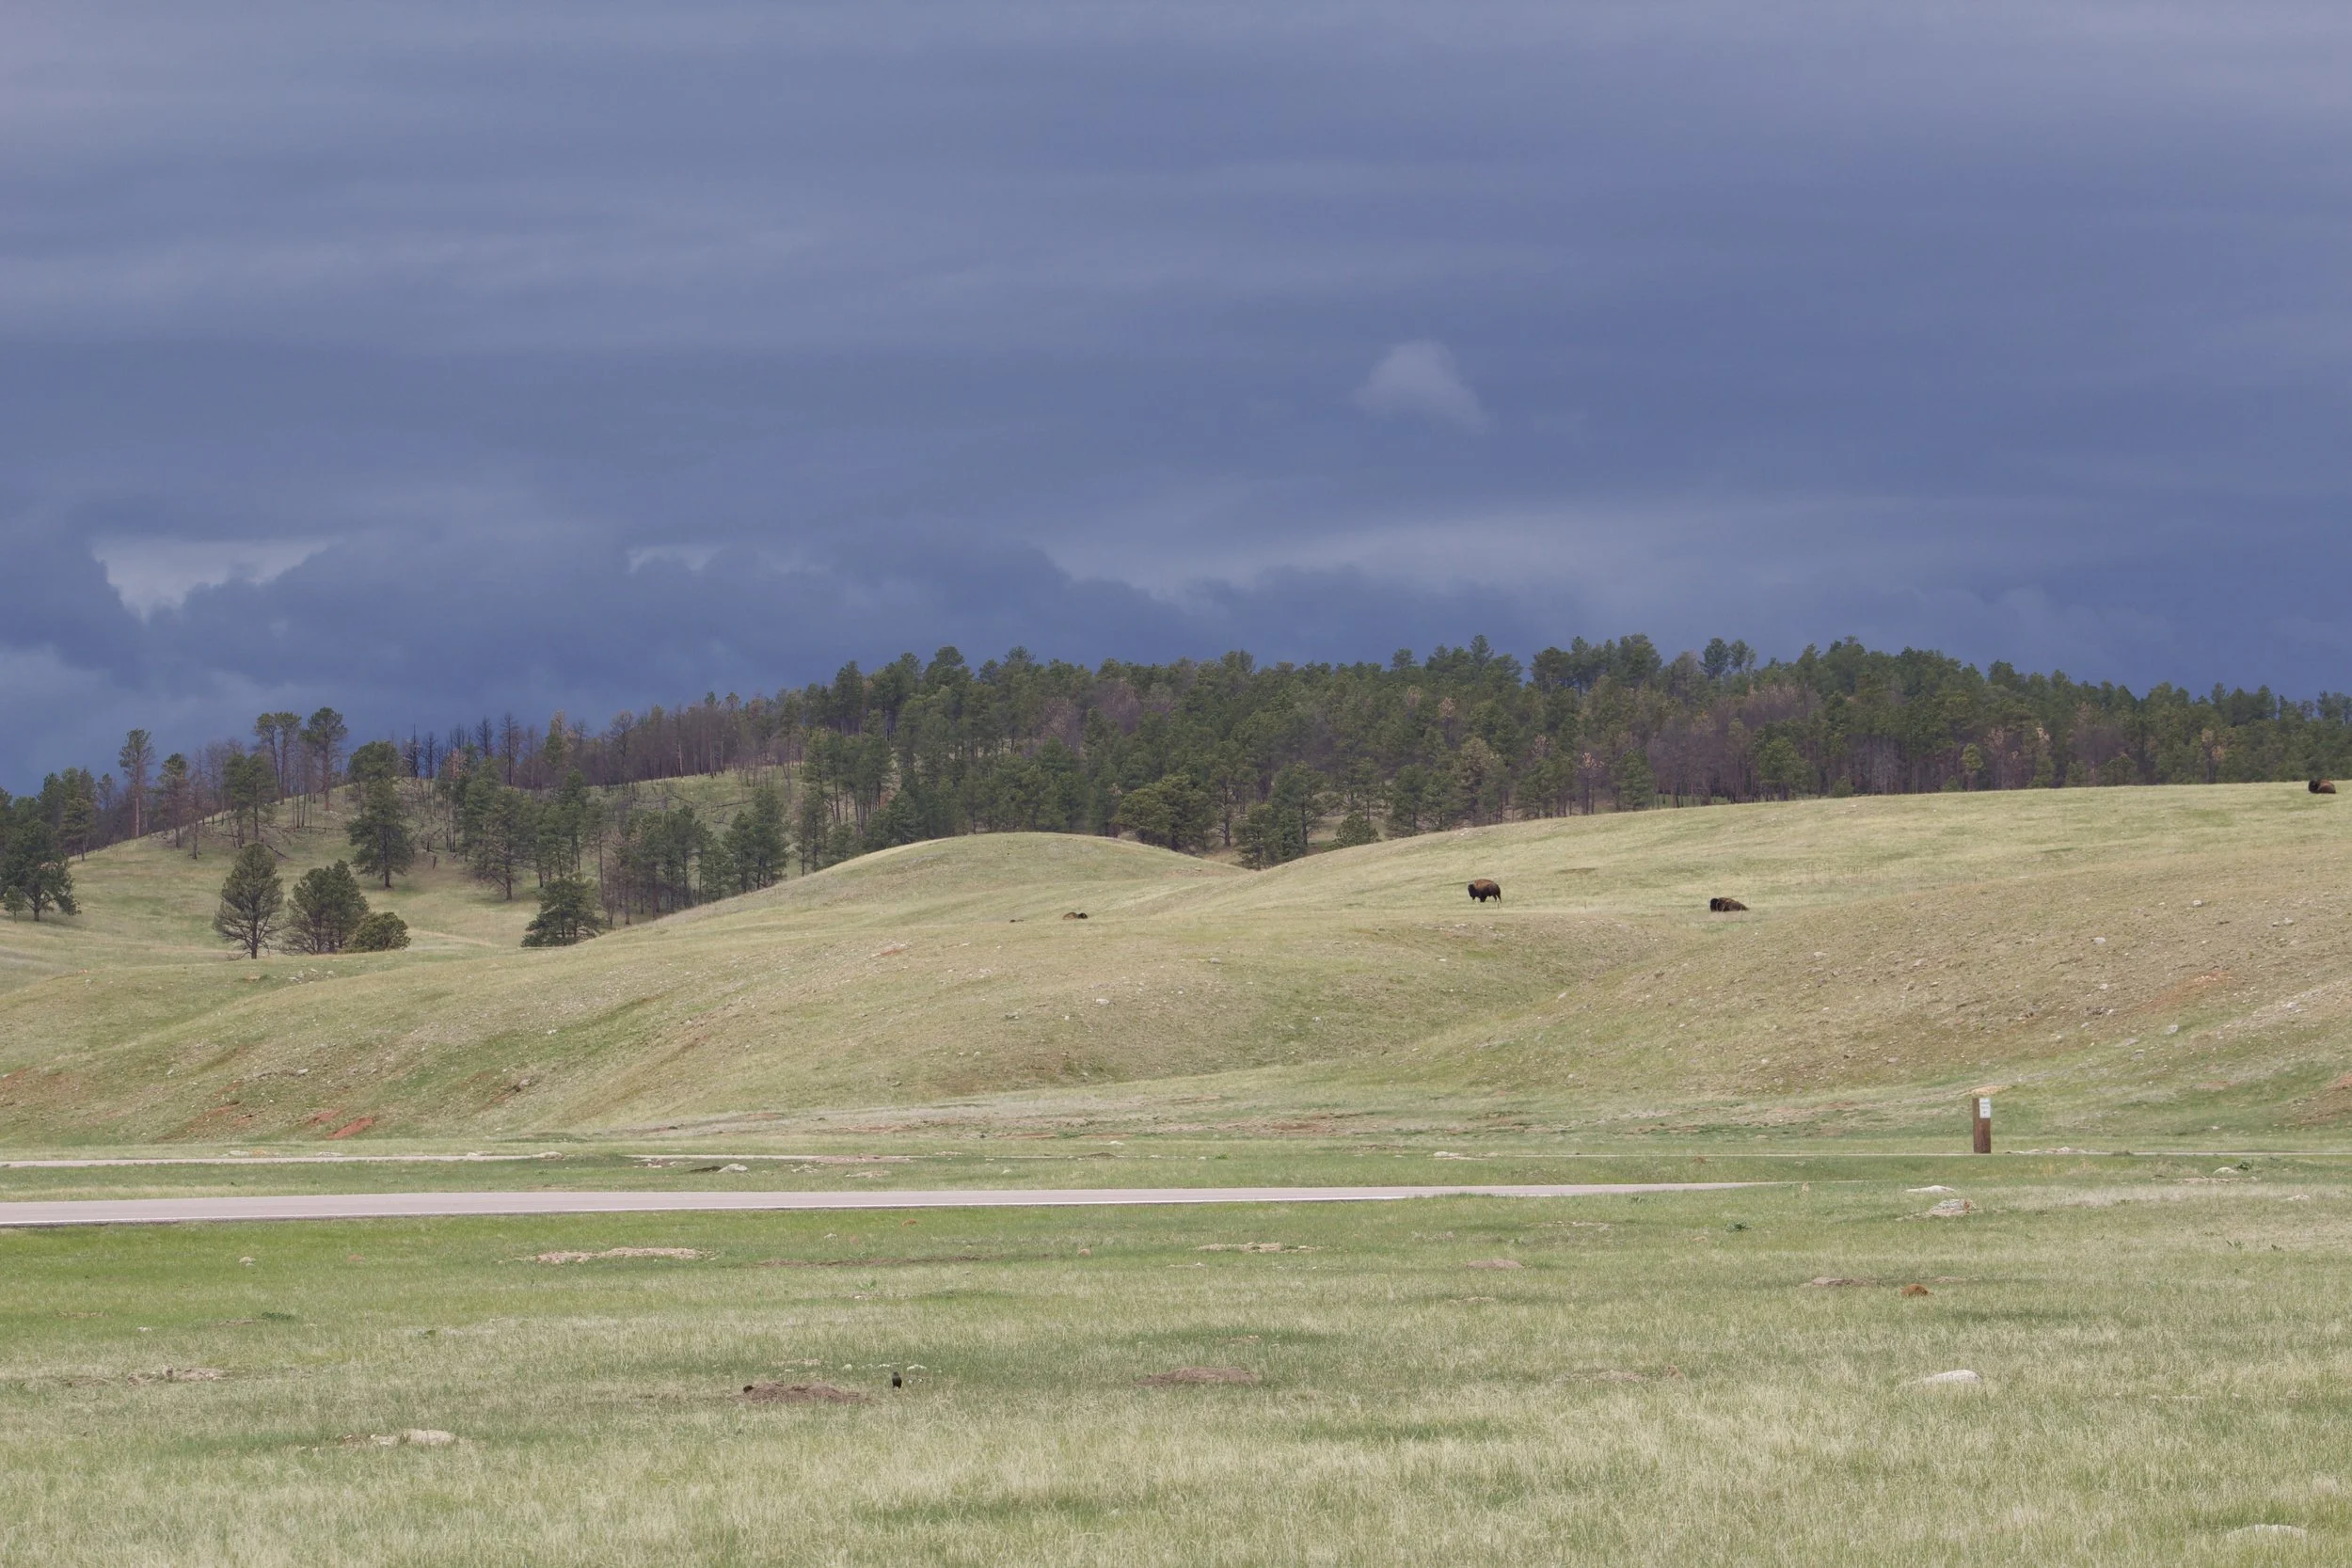
Wildlife Encounters That Stick With You
Driving through the park’s open terrain, I had one of those memorable wildlife encounters you don’t soon forget. I rounded a bend and came across some bison grazing in a nearby field. There’s something surreal about seeing these powerful animals roam freely, right where they belong. The prairie dogs were abundant too—I parked and watched them from the roadside as they chirped, popped in and out of burrows, and mingled among the grazing bison.
Just minutes later, one of those prairie dogs darted across the road in front of me. I hit the brakes hard—just barely avoiding what could’ve been a tragic moment. It was a vivid reminder of how alive this landscape is, and how careful we must be as guests in their home.
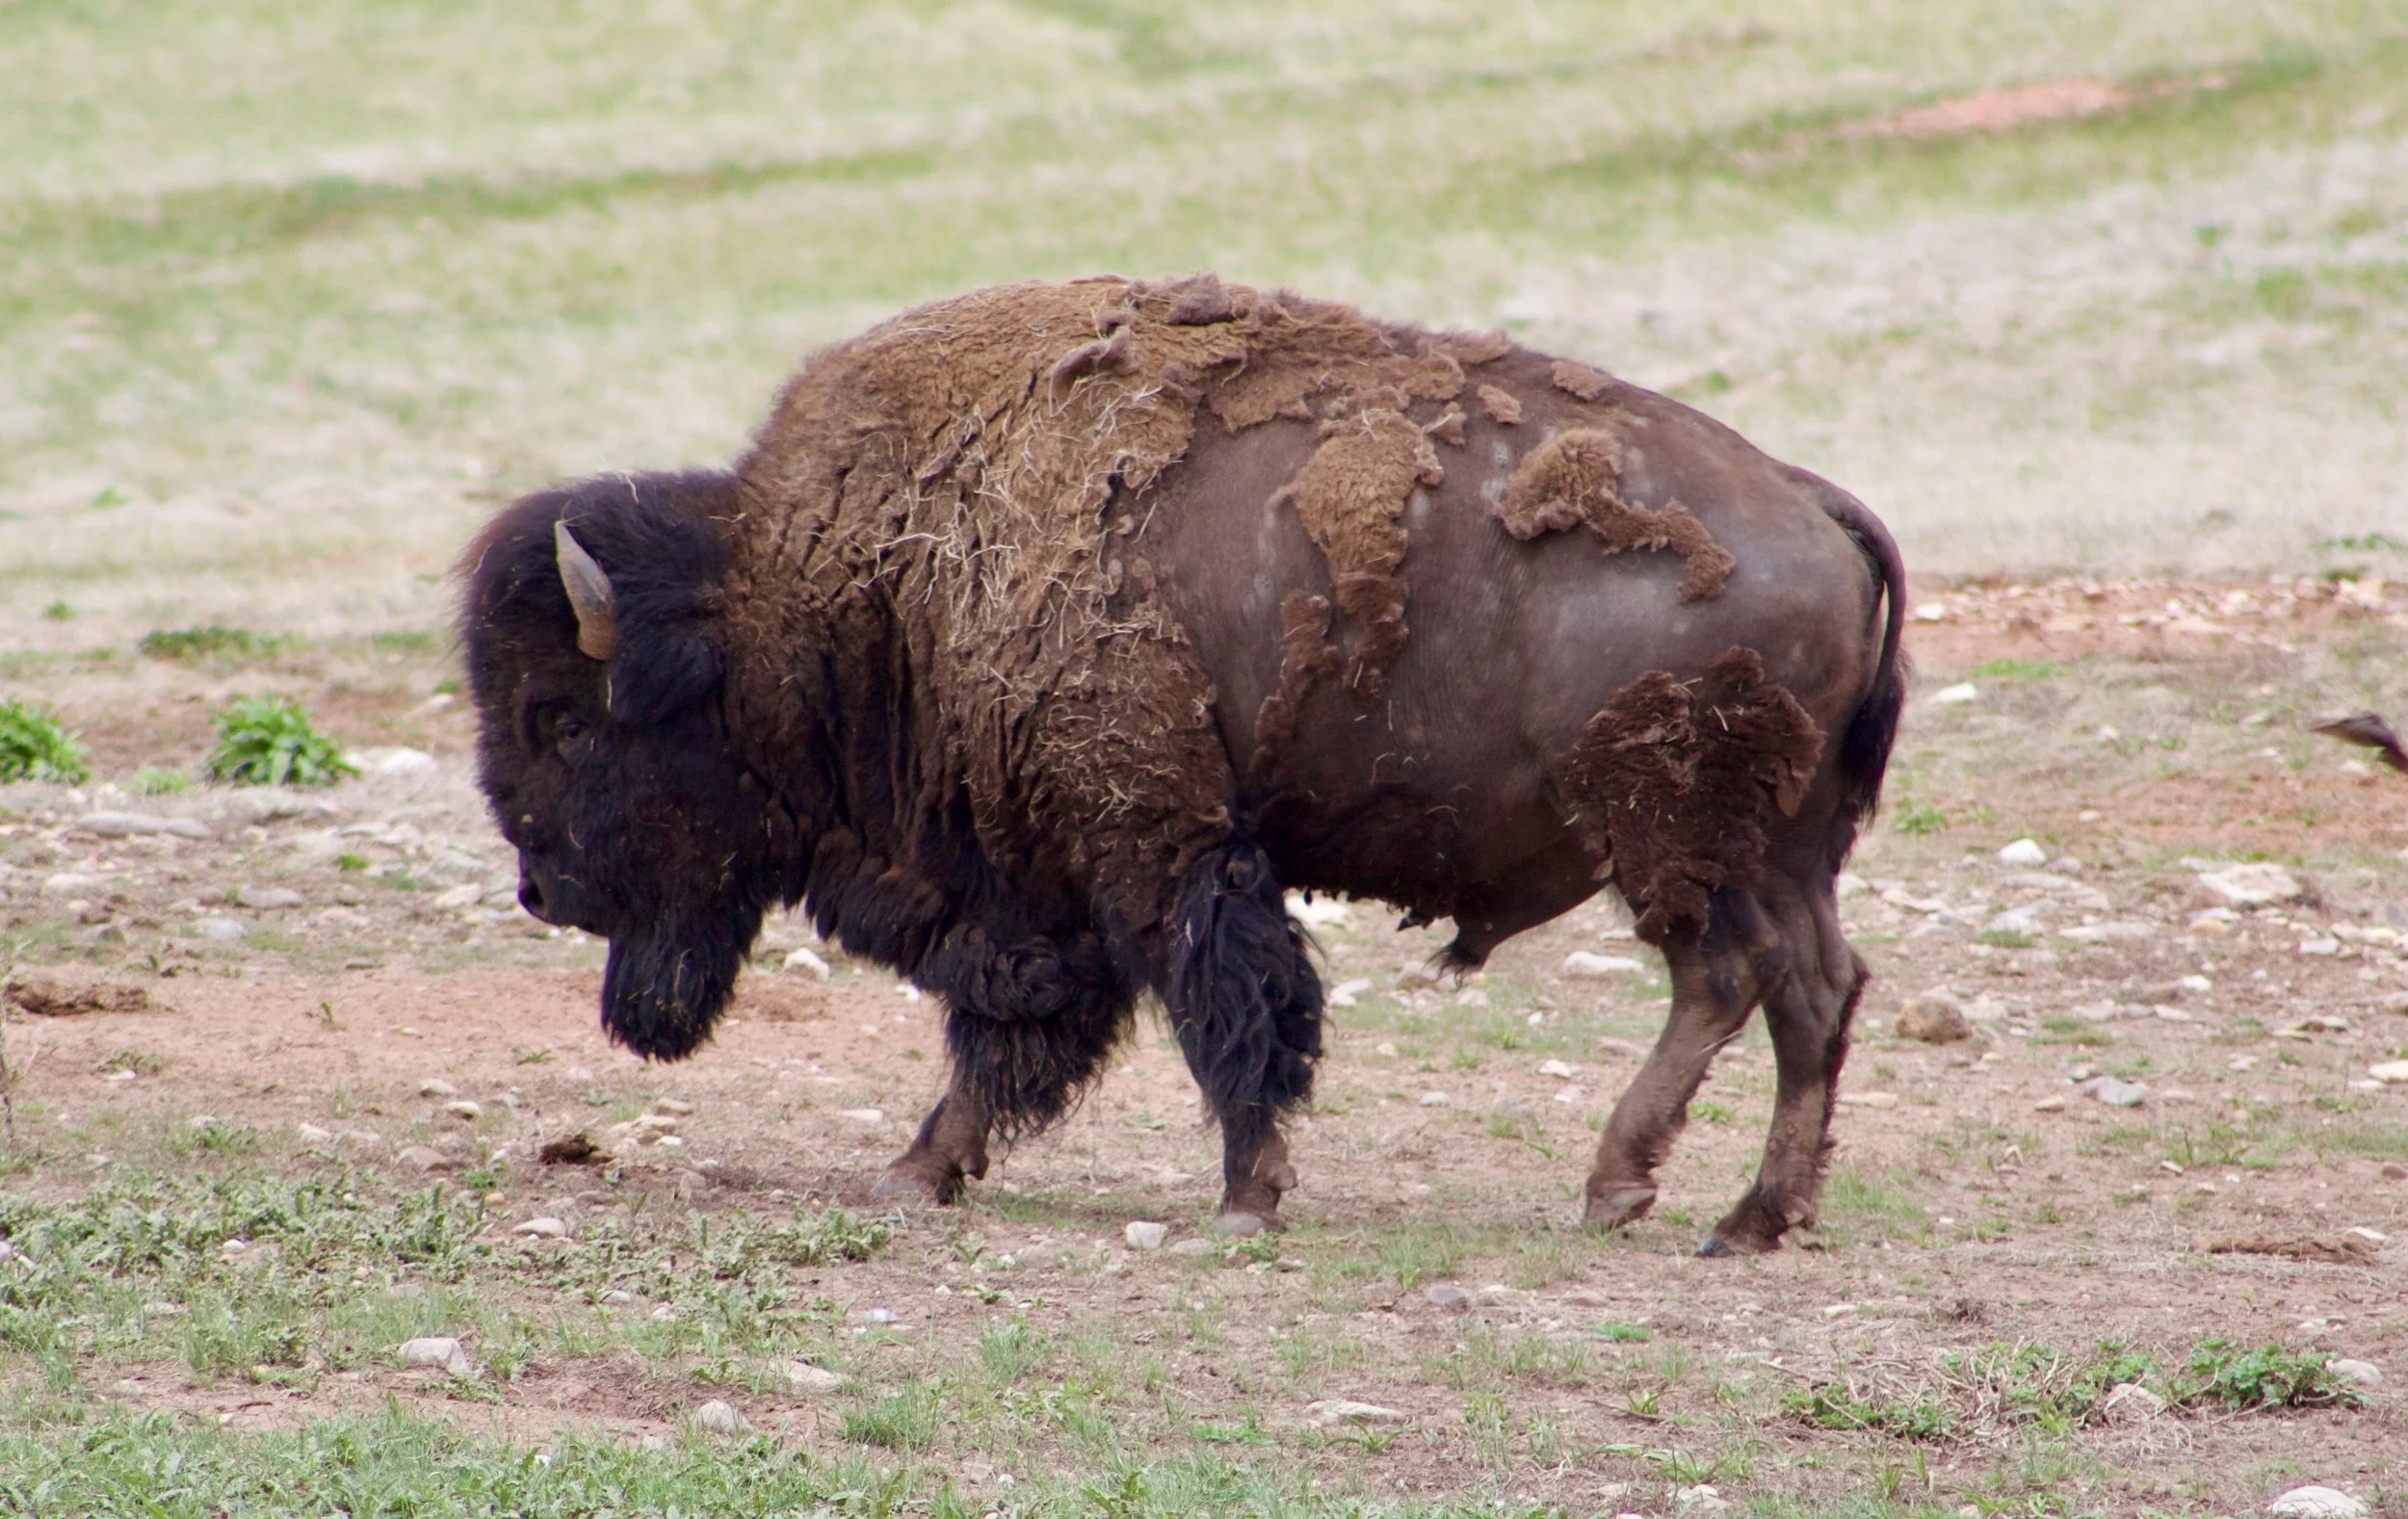
Who You Might Meet on the Prairie
Wind Cave National Park is one of the best places to experience mixed-grass prairie ecosystems and the wildlife that thrive there. Common sightings include:
American Bison – One of the few free-roaming, genetically pure herds in the U.S.
Pronghorn Antelope – Often seen grazing alongside bison in open meadows.
Elk and Mule Deer – More active at dawn and dusk in forested areas.
Prairie Dogs – Social and entertaining, their colonies are full of life.
Black-Footed Ferrets – Rarely seen, but successfully reintroduced to the park.
Plus: coyotes, foxes, and over 100 bird species.
Trails and Views Worth the Hike
Even without a cave tour, Wind Cave offers a variety of scenic hikes. Some of the best include:
Rankin Ridge Trail (1-mile loop): A short, steep trail leading to a fire lookout with sweeping views.
Lookout Point / Centennial Trail Loop (4.8 miles): A dynamic trail for wildlife sightings and photo ops.
Boland Ridge Trail (5 miles): Ideal for solitude and wide-open prairie views.
Cold Brook Canyon Trail (2.8 miles round trip): A tranquil, lesser-used canyon trail.
Many of these trails cut through bison territory and prairie dog towns, making them excellent for photography—especially in the soft light of early morning or late afternoon.
Where to Snap Your Best Shots 📸
Whether you’re into landscapes, wildlife, or documenting your national park checklist, Wind Cave delivers on visuals. Here are the best spots to capture it all:
Park Entrance Sign – Iconic and always a good place to start your photo journey.
Rankin Ridge Fire Tower – The park’s highest point, with panoramic views of the Black Hills.
Prairie Dog Towns – Bursting with activity—perfect for action shots and telephoto close-ups.
Bison Viewing Areas – Great for dramatic wildlife photography from a safe distance.
Lookout Point & Centennial Trail – Ideal for wide-angle landscape shots and potential wildlife cameos.
Cold Brook Canyon Trail – A peaceful, visually interesting trail, great for nature portraits or stills.
Natural Entrance to the Cave – Symbolic, historic, and surrounded by native vegetation.
Best Times to Shoot:
Golden Hour – Early morning and late evening light is ideal for landscape and wildlife shots.
Overcast Days – Soft, even light makes for excellent detail and texture capture.
After Rain – Dramatic skies, reflections, and richer colors.
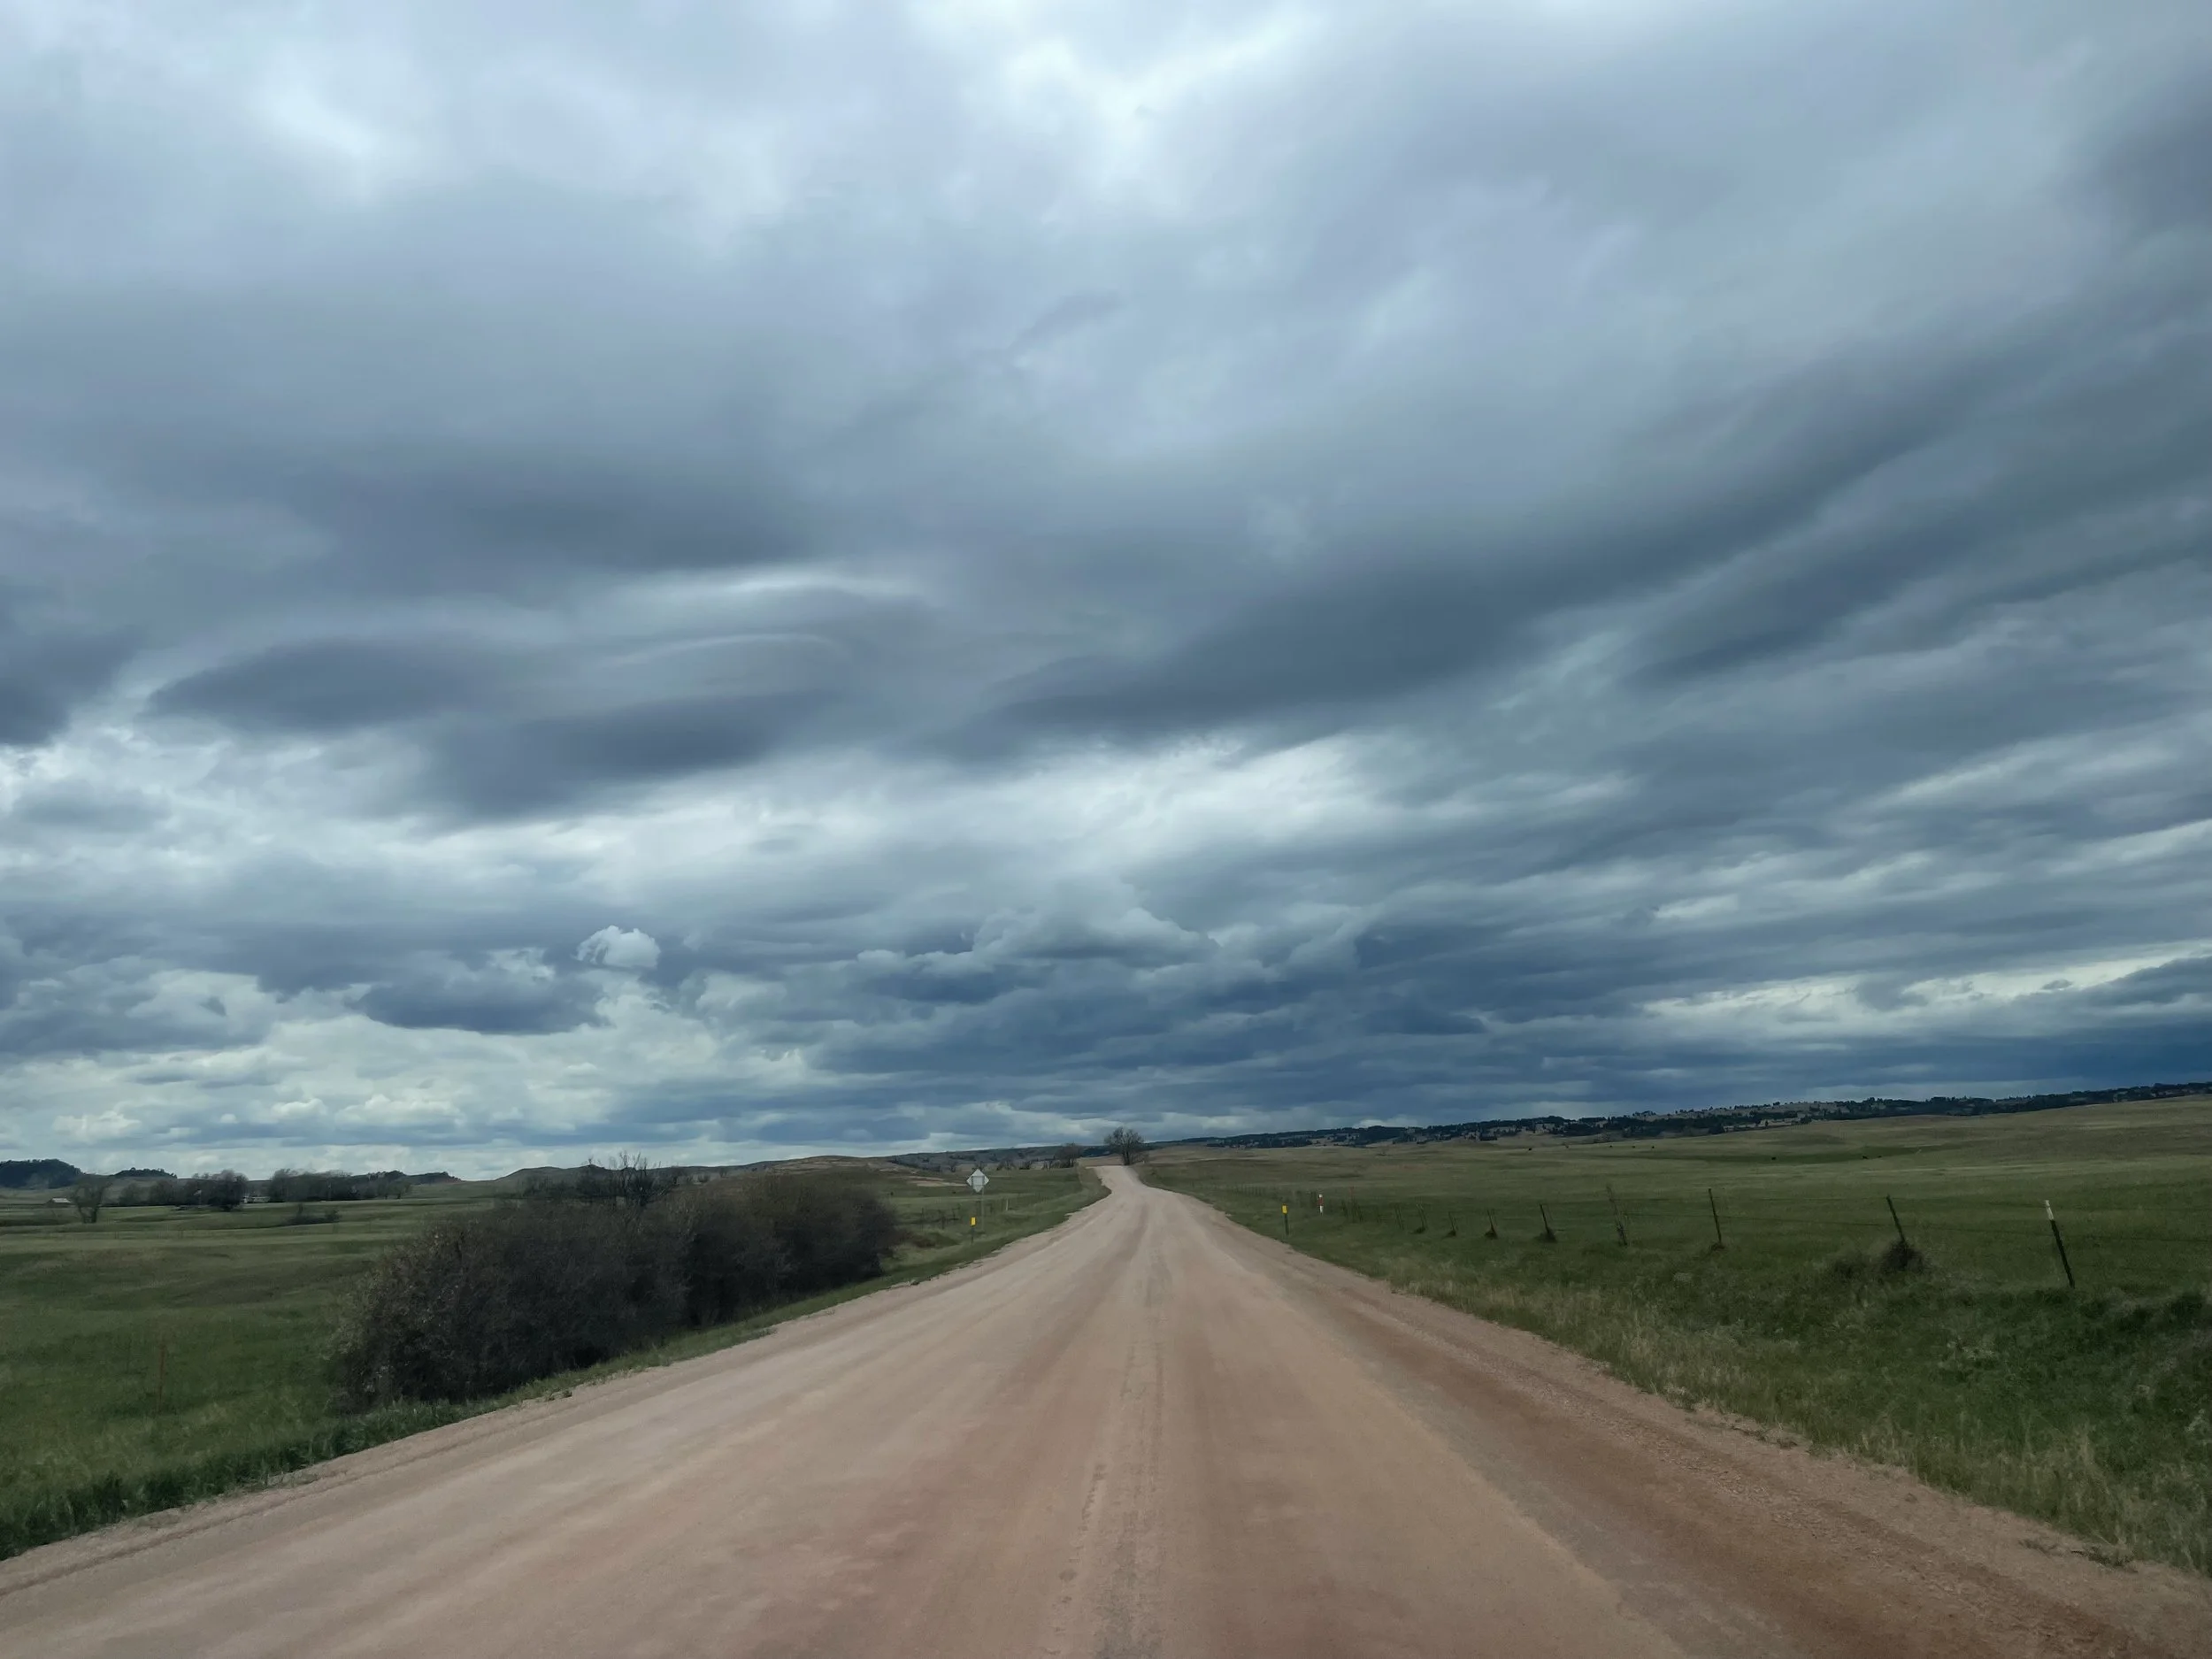
Staying the Night? Here’s Where
Just over a mile from the visitor center, Elk Mountain Campground offers 75 sites tucked among ponderosa pines. Open year-round, the campground offers both first-come, first-served and reservable spots. Book ahead on Recreation.gov if you’re visiting during peak season.
Accessibility Information
Wind Cave aims to be accessible for all visitors:
The visitor center features ramps, accessible restrooms, and parking.
Some cave tours (when operational) are wheelchair-friendly.
Nearby trails include compacted surfaces suitable for those with mobility challenges.
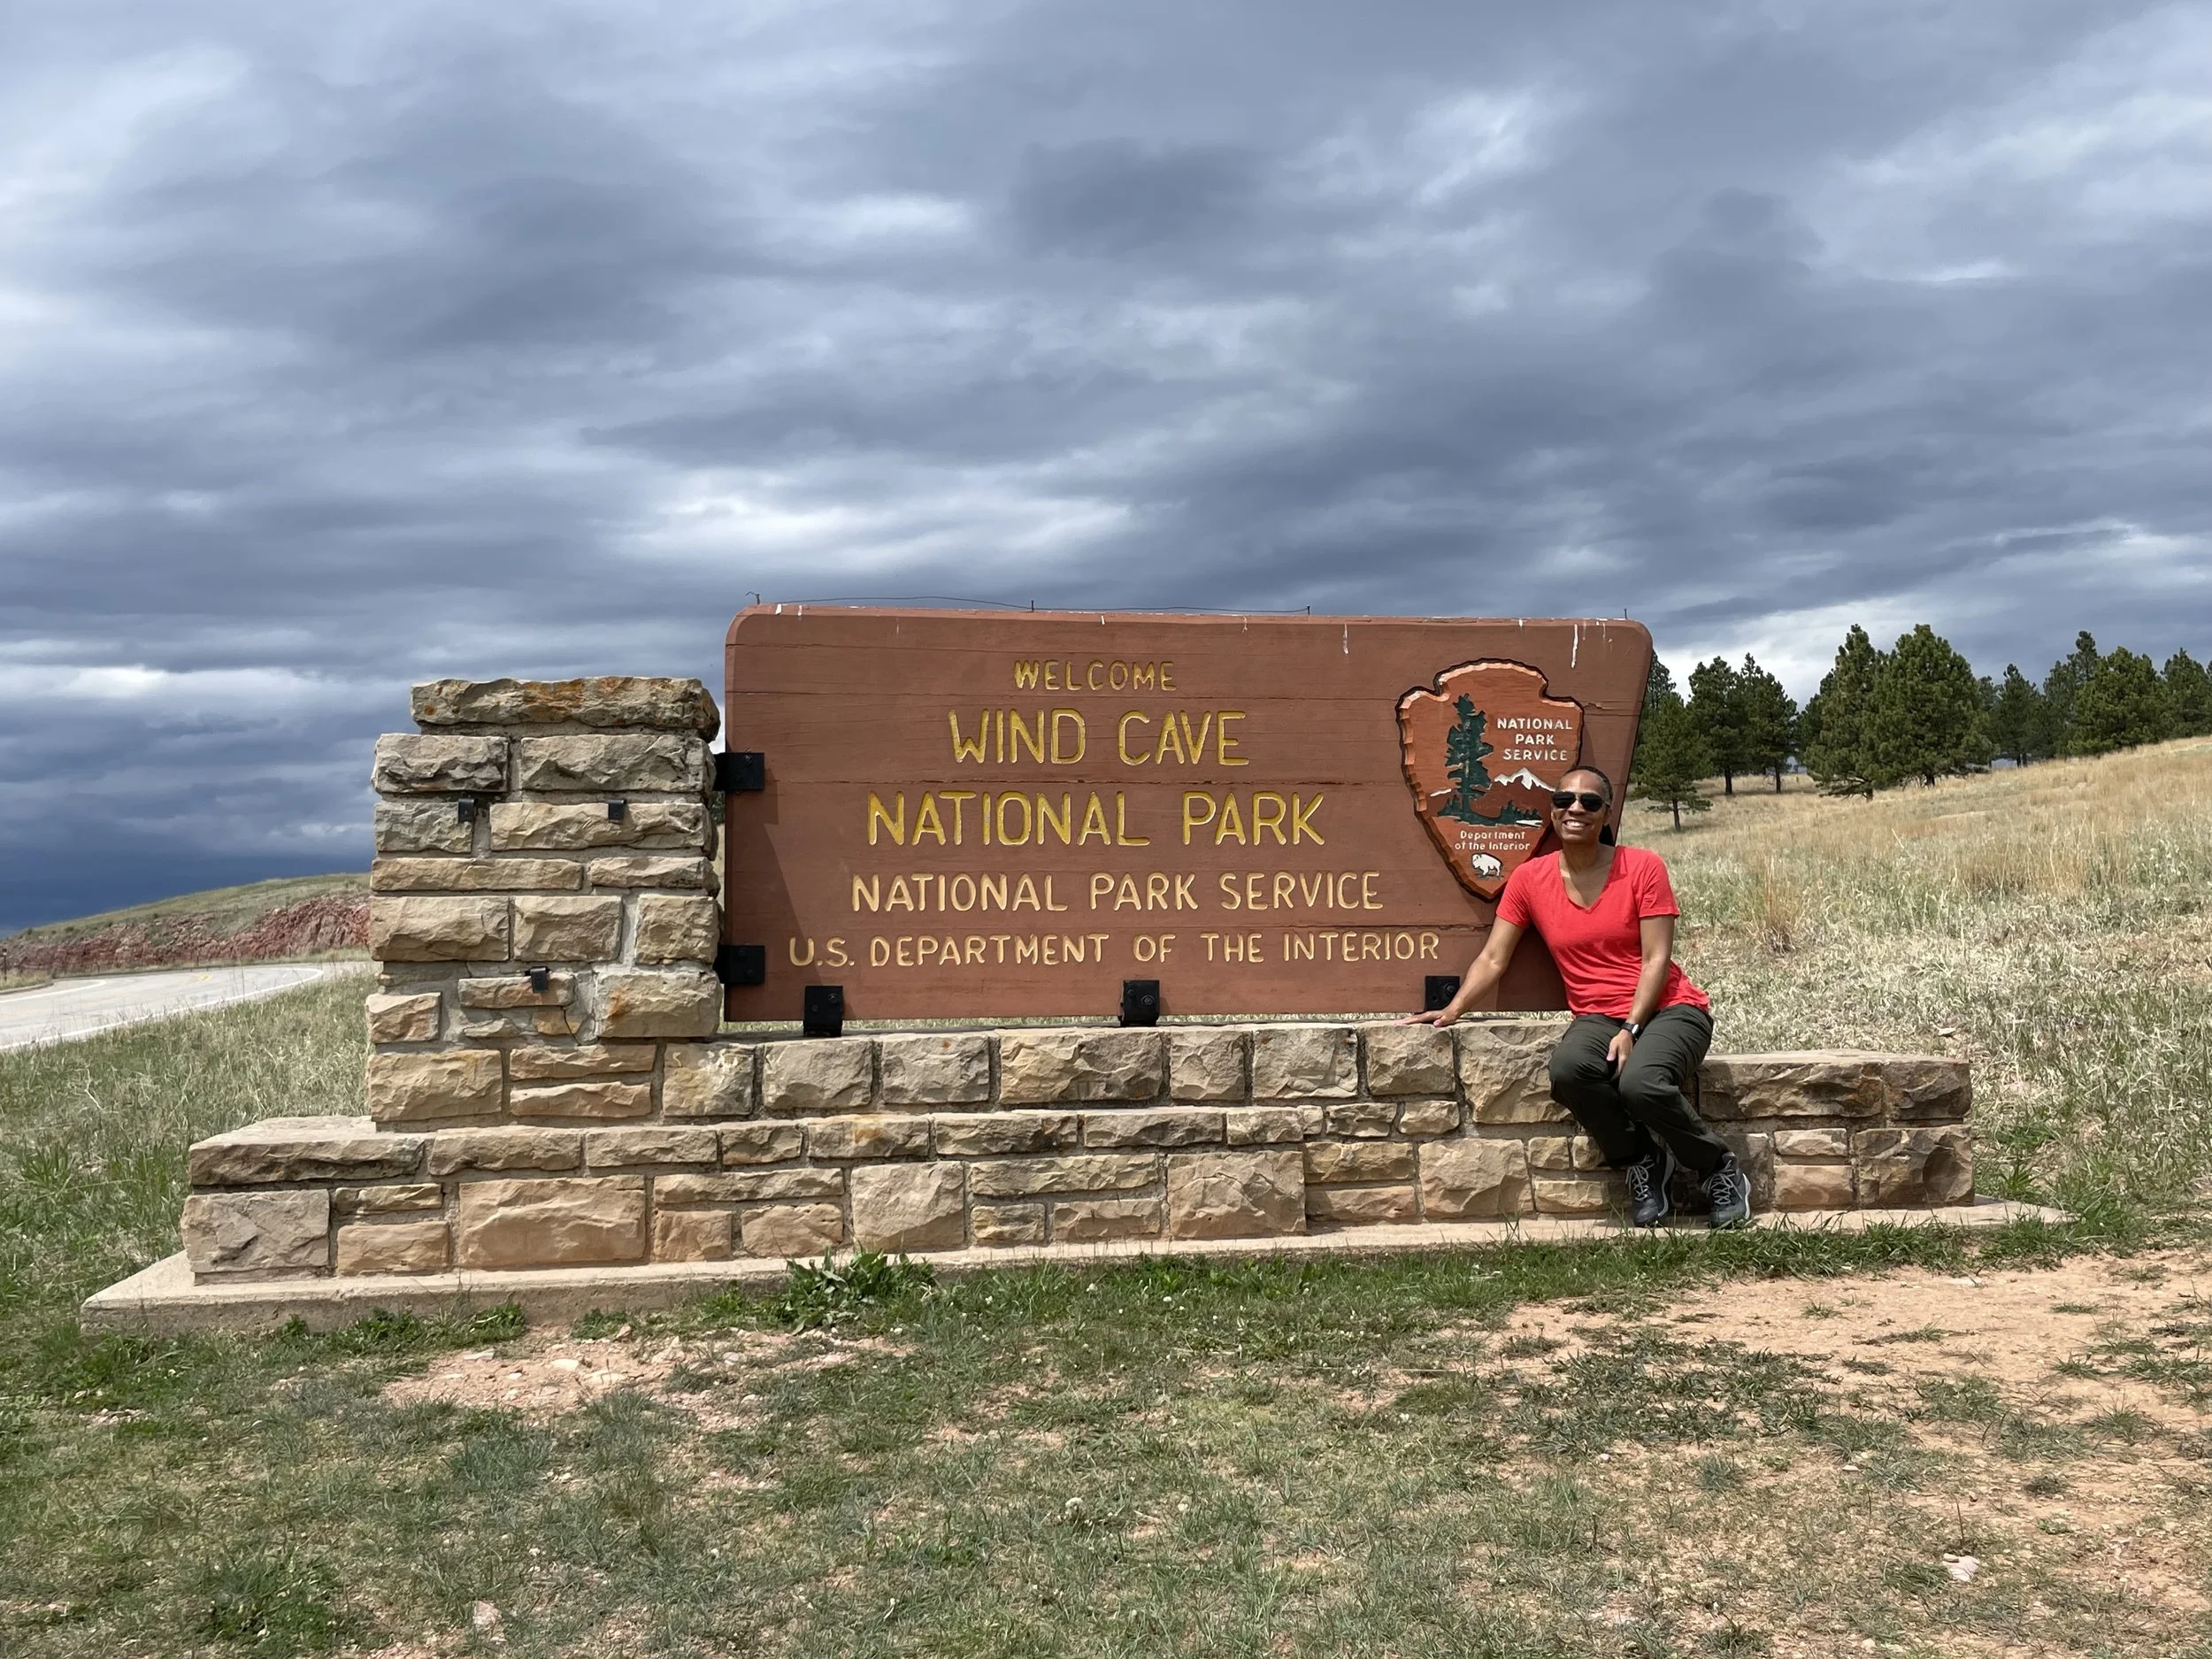
Although I didn’t make it into the cave on this visit, I left Wind Cave National Park deeply impressed. From its rich history to the rolling prairies and close-up encounters with bison and prairie dogs, this park proved that its beauty doesn’t stop at the cave entrance—it spreads across every inch of the landscape.
If you’re road-tripping through the Black Hills or ticking off national parks in South Dakota, be sure to stop here. Bring your camera, stay alert (prairie dogs are fast), and give yourself the space to slow down and soak it all in.
#18 Badlands National Park, South Dakota
Big Bend Overlook
There’s something special about setting off for an adventure before the rest of the world wakes up. On my recent trip to Badlands National Park, that early start paid off in golden light, serene roads, and the kind of beauty that stops you in your tracks.
I left Rapid City, South Dakota while the sky was still a soft navy blue. As I drove southeast, the landscape gradually transformed—open fields gave way to rising ridges, and soon, the iconic jagged formations of the Badlands began to appear. Even before I reached the park’s visitor center, I was immersed in a prehistoric landscape shaped by time, wind, and erosion. The rising sun painted the spires in hues of gold and orange. I slowed down, rolled the windows down, and simply took it in.
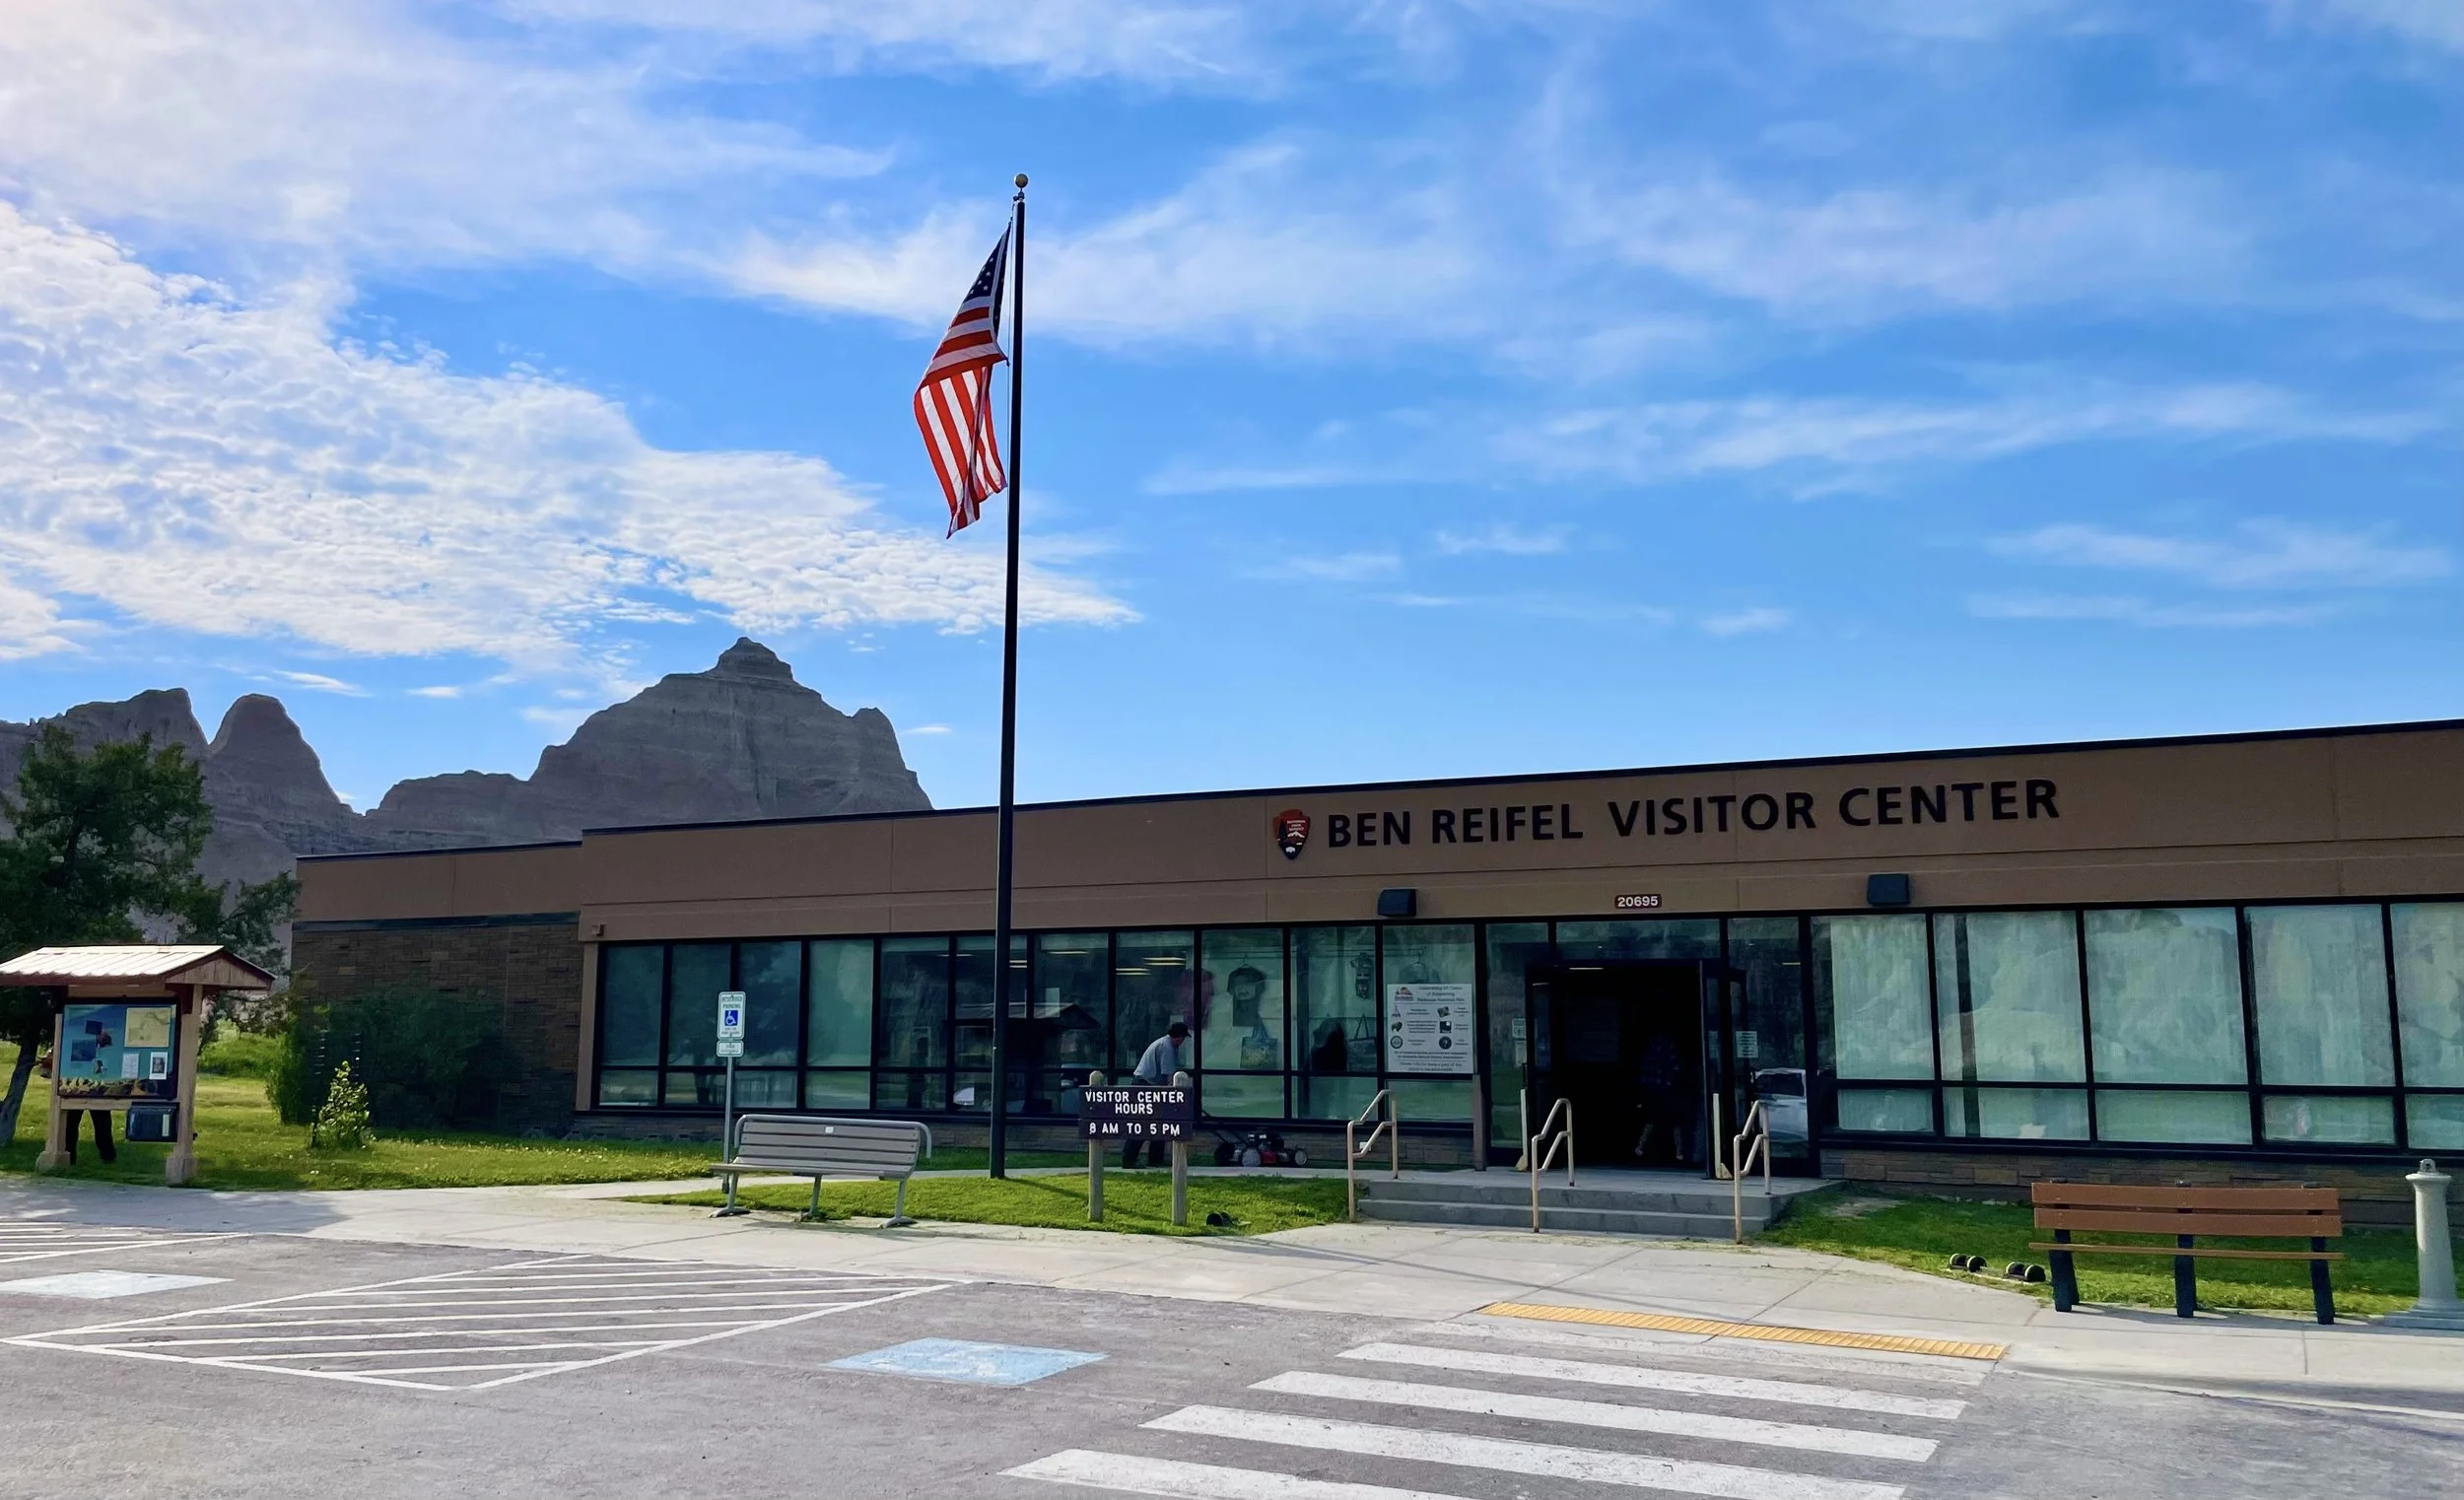
Ben Reifel Visitor Center
First Stop: Ben Reifel Visitor Center
I reached the Ben Reifel Visitor Center, located in the Cedar Pass area, before it opened. That gave me a quiet moment to walk around the grounds, snap a few early morning photos, and really take in the stillness. There’s a calm in the Badlands that you don’t often find elsewhere.
Once the visitor center opened, I went inside to grab my National Parks passport stamp—a tradition I never skip. The center itself is worth visiting: you’ll find interactive exhibits, information on the park’s rich fossil history, and a fossil preparation lab where you can watch paleontologists work in real time.
Ben Reifel Visitor Center Address:
25216 Ben Reifel Road, Interior, SD 57750
And of course, I made sure to stop by the park sign on my way in—because no national park visit is complete without that classic photo.
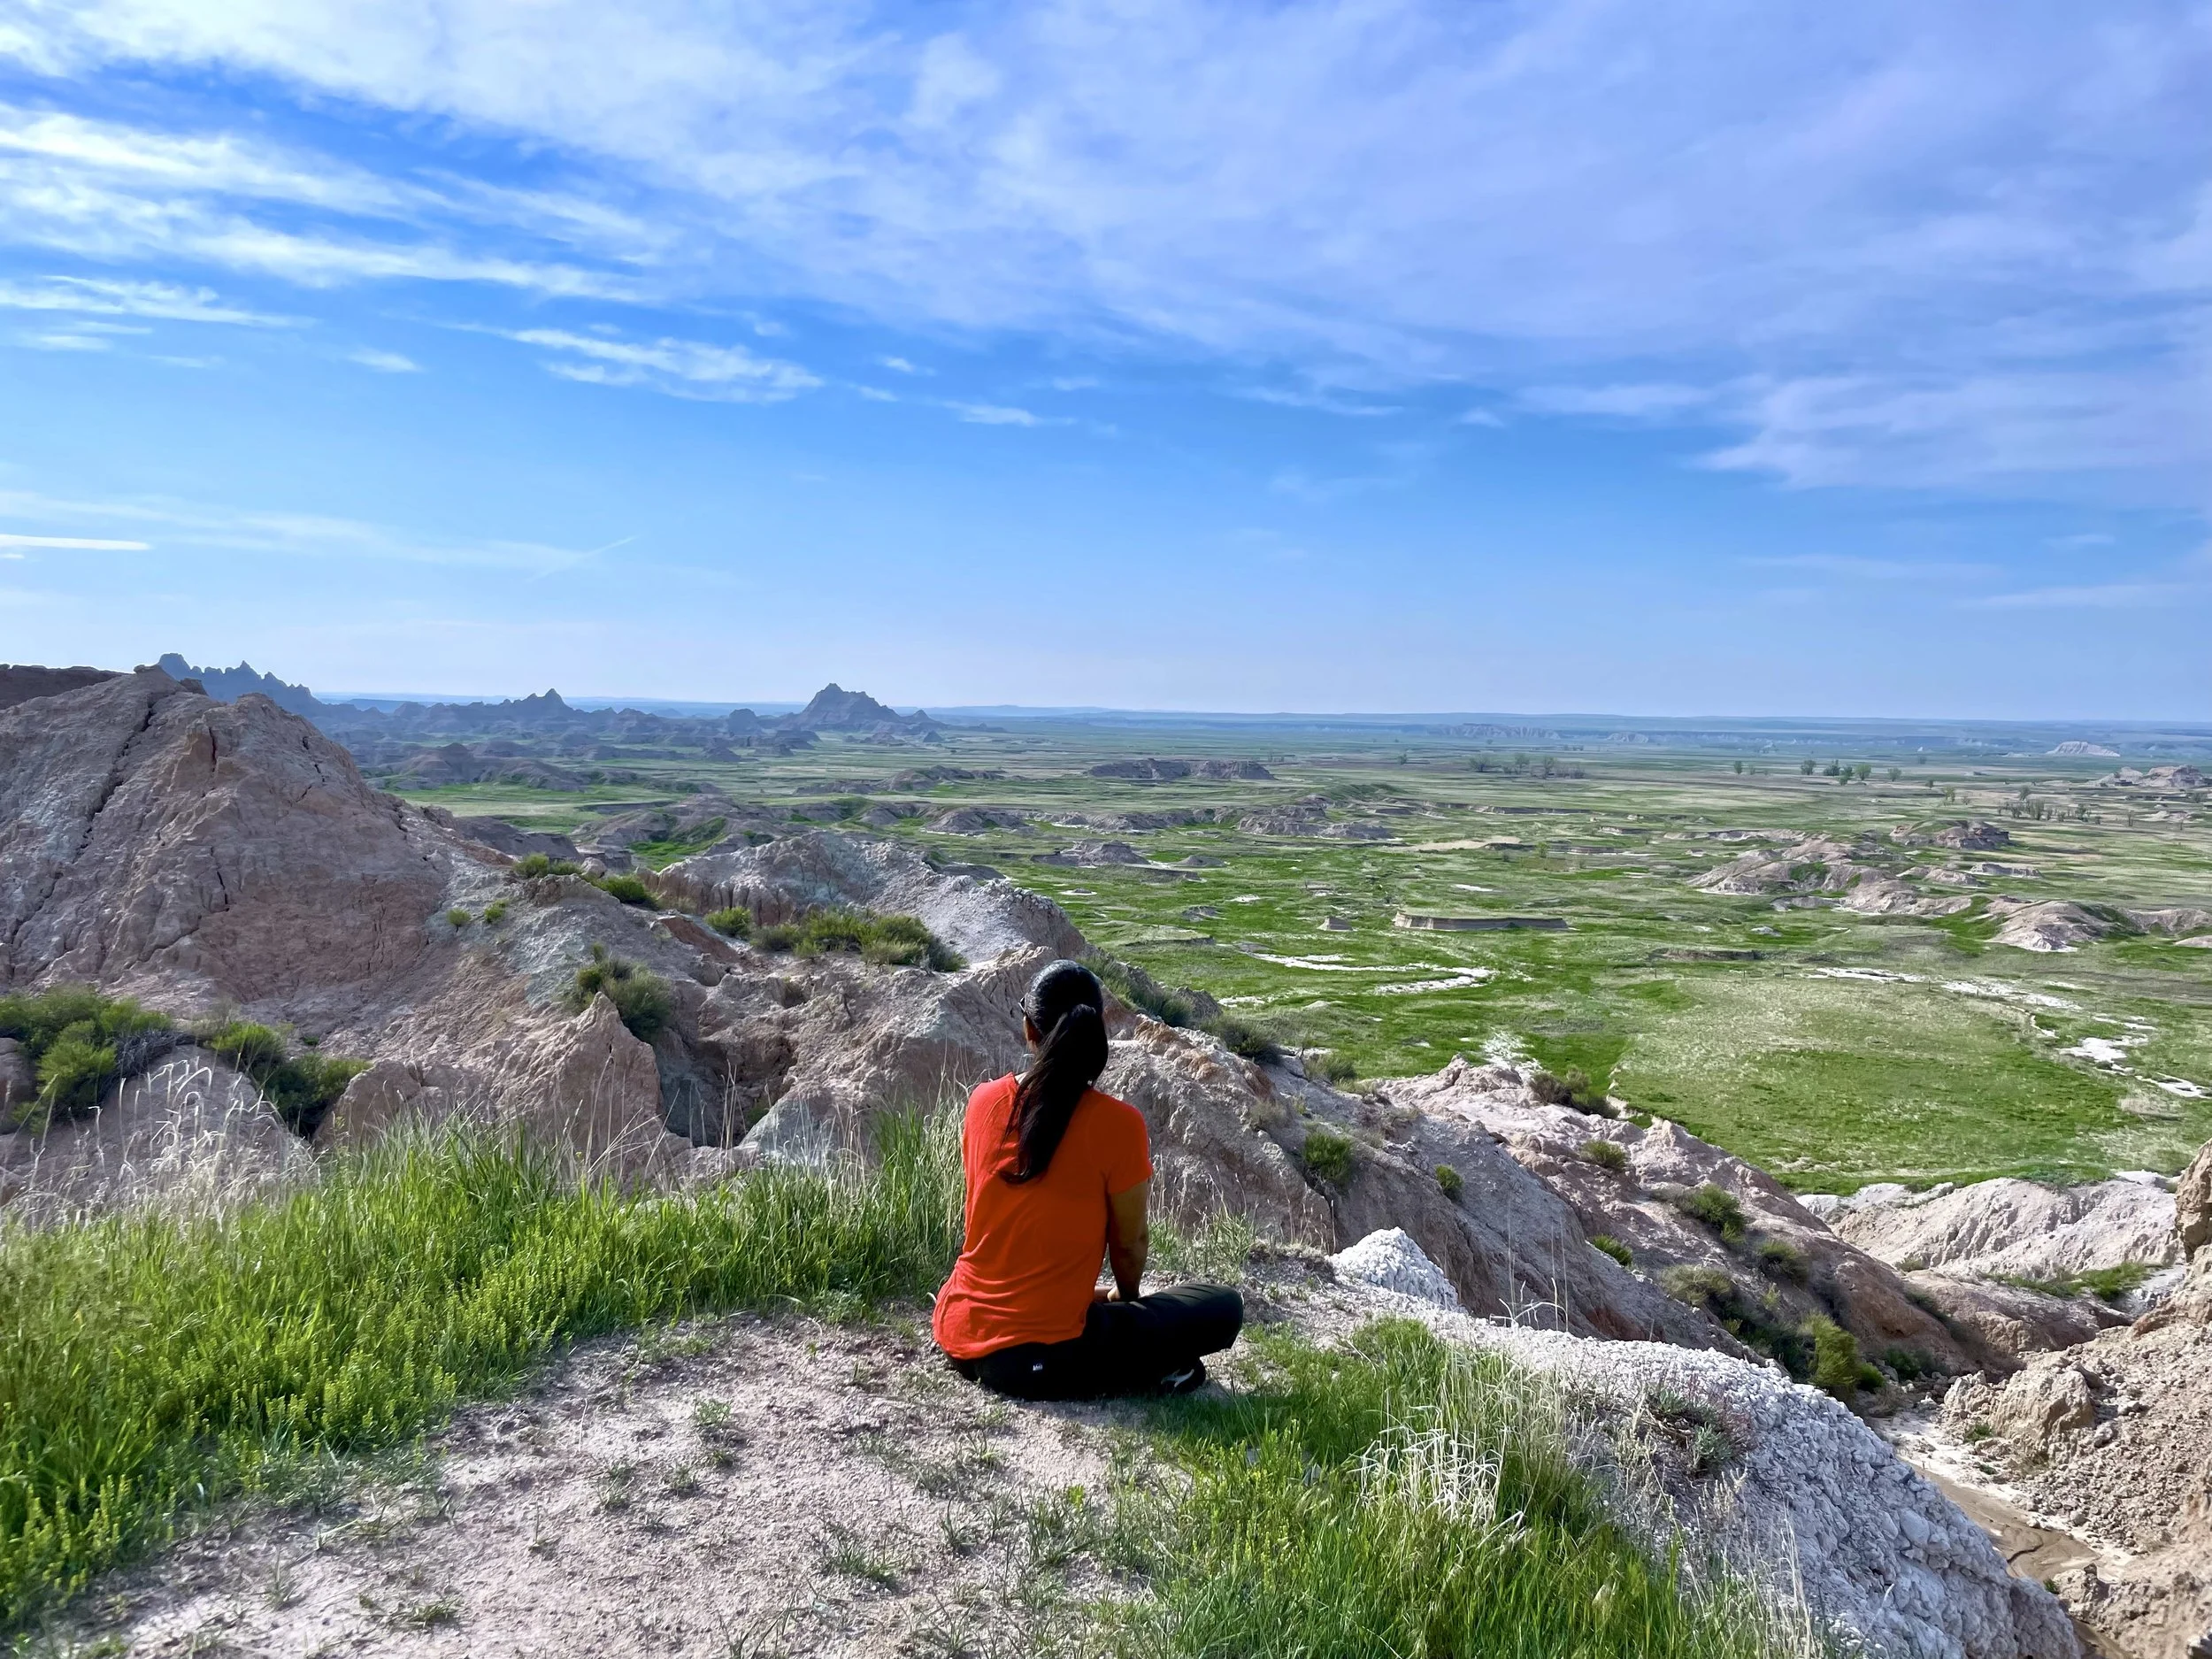
What Makes Badlands National Park Special?
Located in southwestern South Dakota, Badlands National Park spans over 240,000 acres of eroded buttes, pinnacles, canyons, and mixed-grass prairies. Its otherworldly landscape holds millions of years of history, with distinct rock layers revealing fossilized remains of long-extinct animals, including early horses, saber-toothed cats, and ancient marine life.
But Badlands isn’t just about rocks. It’s also home to a wide variety of wildlife. On a single visit, you might spot bison, bighorn sheep, prairie dogs, or even the elusive black-footed ferret. Whether you’re driving the scenic loop or stepping out onto the trails, there’s always something to see.
Entrance Fees & Pass Information
Private Vehicle (7-Day Pass): $30
Individual Entry (on foot/bike): $15
America the Beautiful Annual Pass: $80 (covers all U.S. national parks)
🔗 Check the latest entrance fee details here
Hiking in Badlands National Park
With its dramatic terrain and sweeping views, hiking in Badlands is one of the best ways to experience the park. I began with the Cliff Shelf Nature Trail, a half-mile loop trail that winds through a juniper forest with a boardwalk and stairs. The elevated views of the Badlands Wall and White River Valley in the morning light were breathtaking.
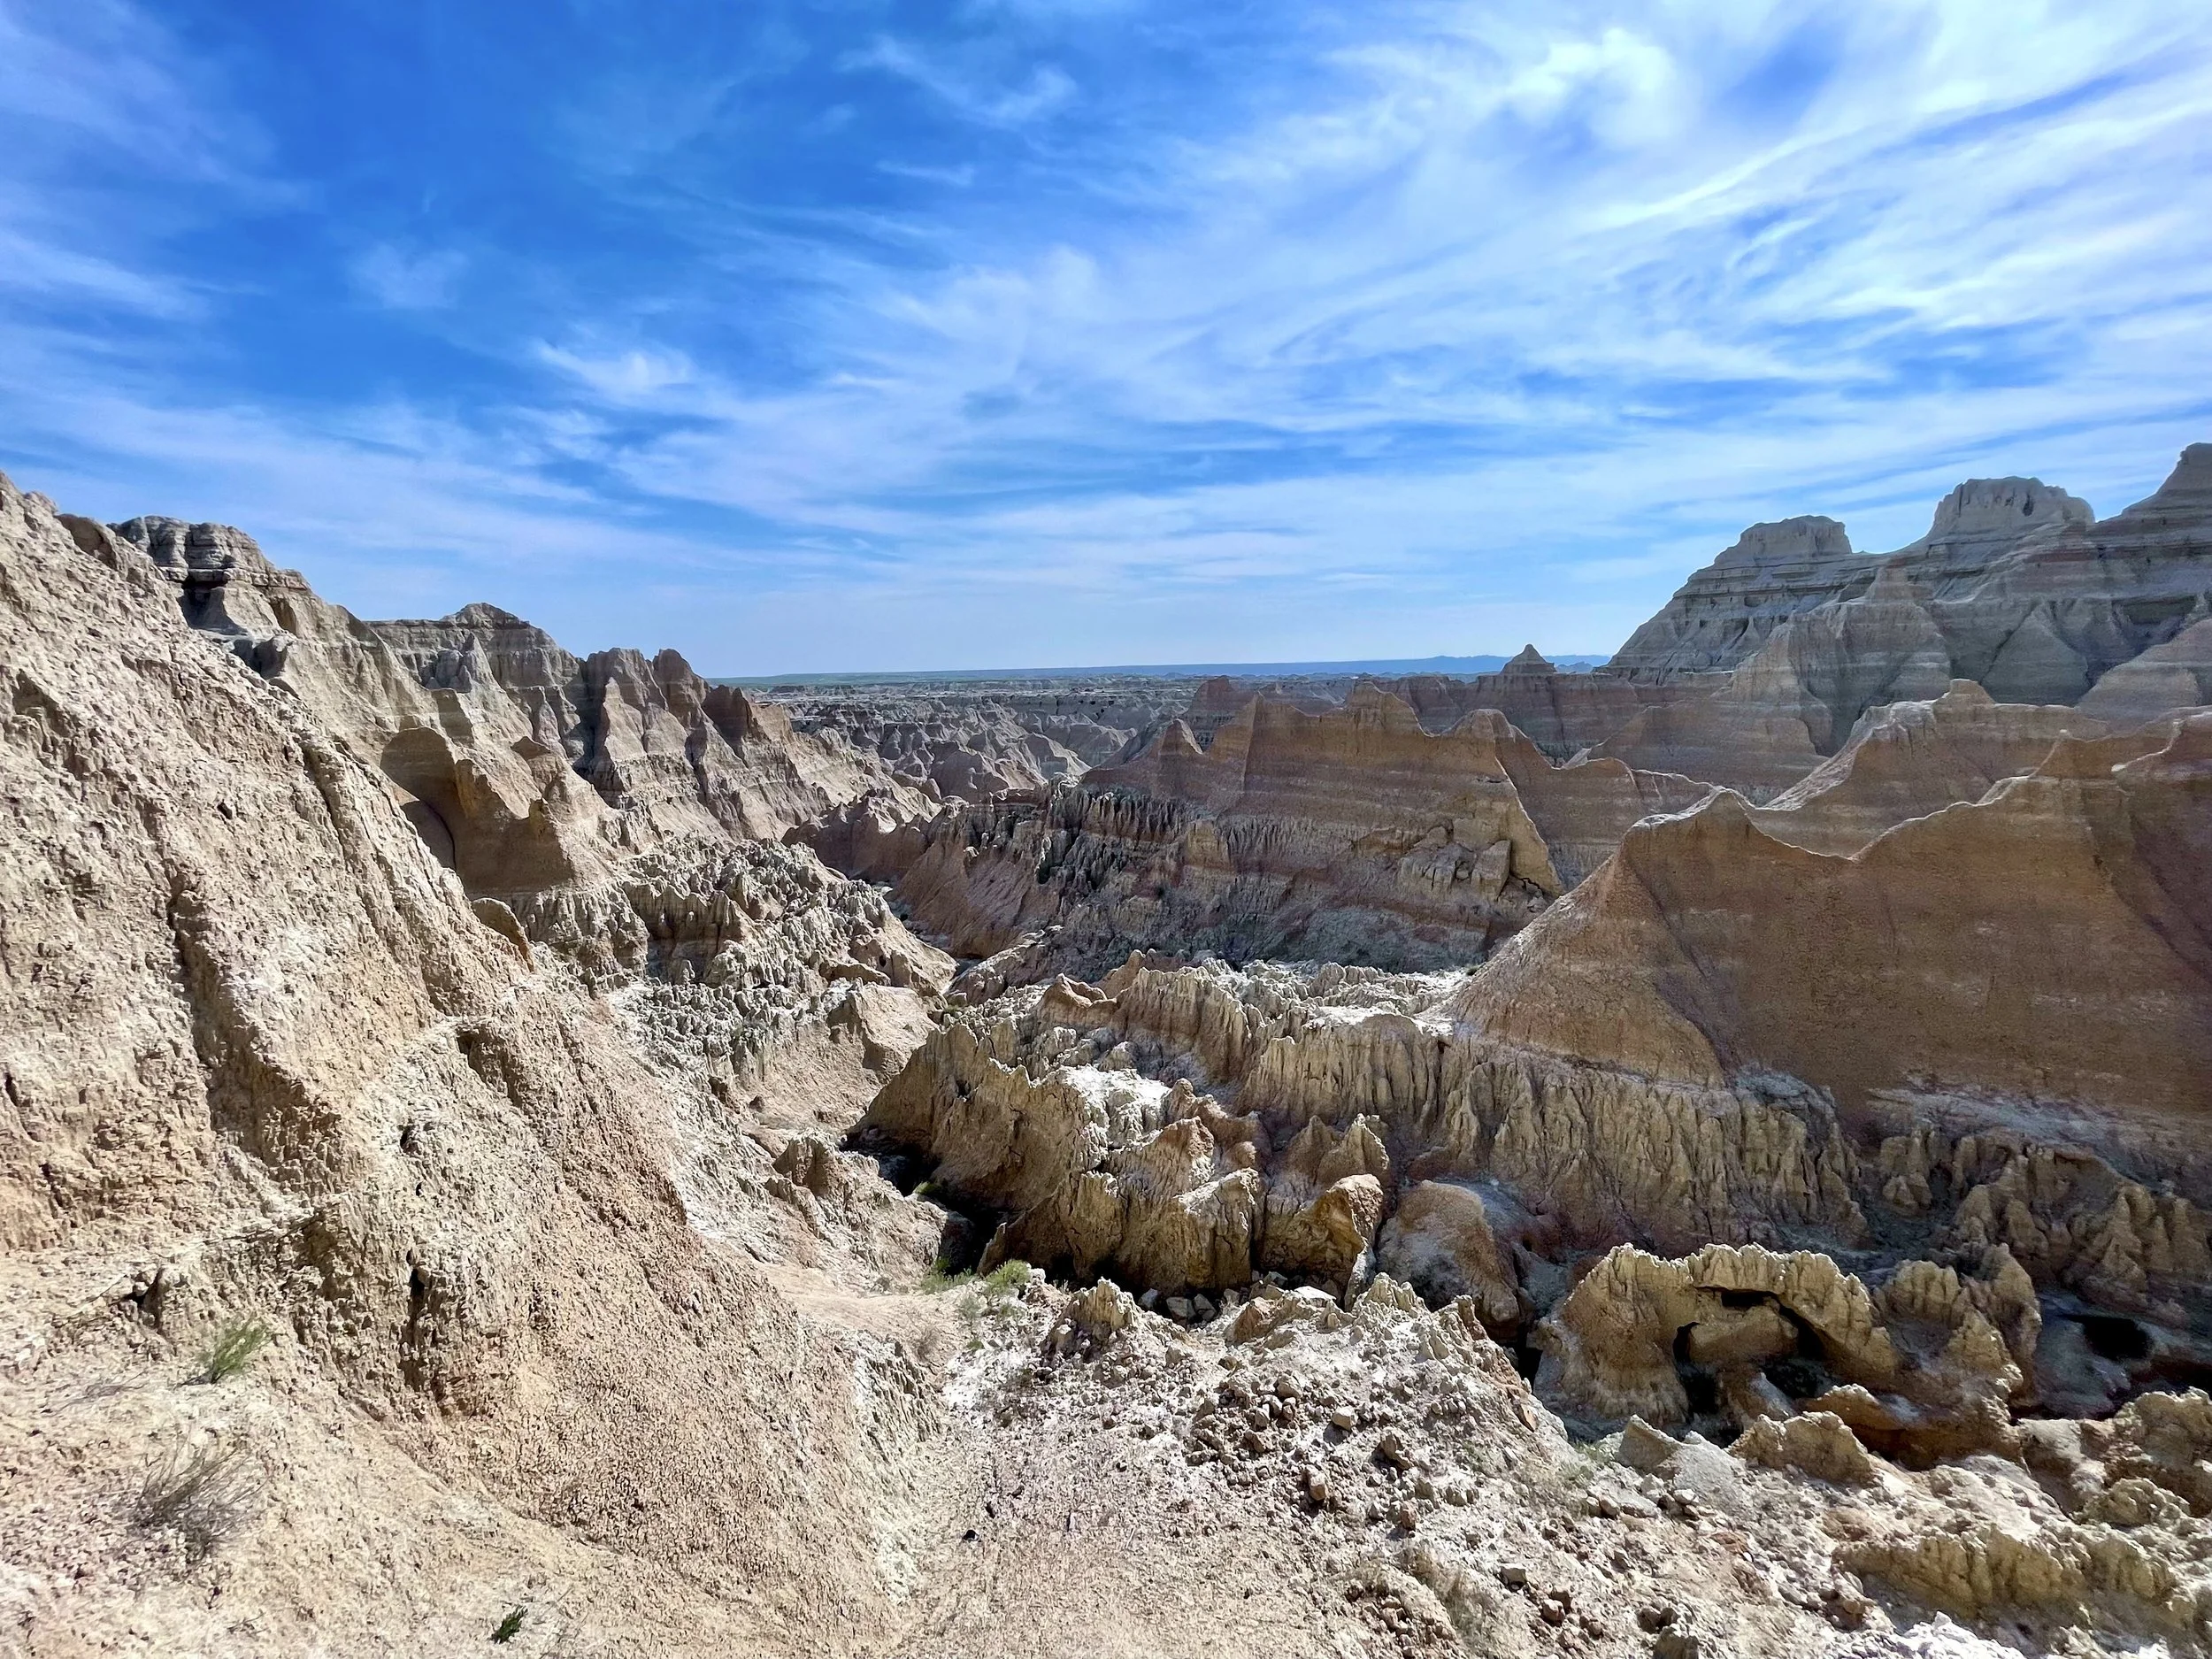
Window Trail Overlook
Next, I explored the Three Trail area near the visitor center, which features three short but rewarding hikes:
Window Trail (0.25 mi round trip): A quick walk to a natural “window” in the rock wall with panoramic views.
Door Trail (0.75 mi round trip): Leads to a dramatic break in the Badlands Wall where you can explore deeper into the formations.
Notch Trail (1.5 mi round trip): A bit more rugged, featuring a log ladder and ending with a cliff-edge view over the valley below.
Want More of a Challenge?
If you have the time and stamina, the Castle Trail is the park’s longest at 10 miles round trip, linking the Fossil Exhibit area to the visitor center. For a more peaceful route, the Medicine Root Trail offers a quieter 4-mile loop through prairie terrain.
One of the most educational and accessible options is the Fossil Exhibit Trail—a fully paved, wheelchair-accessible path that features fossil replicas and interpretive signage about the creatures that once roamed this area.
🔗 More about hiking trails here
Accessibility in Badlands National Park
Badlands has made great strides in accessibility for all visitors:
The Ben Reifel Visitor Center, Fossil Exhibit Trail, and parts of Cliff Shelf Nature Trail are accessible to visitors using wheelchairs or mobility aids.
Park rangers are available to offer additional guidance on accessible viewing points and trails.

Best Photo Spots in Badlands
If you’re into photography or just love a great view, don’t miss these top locations for capturing the park’s surreal beauty:
Big Badlands Overlook – Ideal for sunrise shots.
Panorama Point – Sweeping vistas perfect for golden hour.
Yellow Mounds Overlook – Colorful, layered hills unique to this region.
Conata Basin Overlook – A quieter, underrated gem with fantastic views.
Hidden Gems and Bonus Stops
Roberts Prairie Dog Town – A lively area to watch prairie dogs chirp, pop, and play.
Fossil Preparation Lab – Inside the visitor center, watch scientists clean and preserve real fossils found in the park.
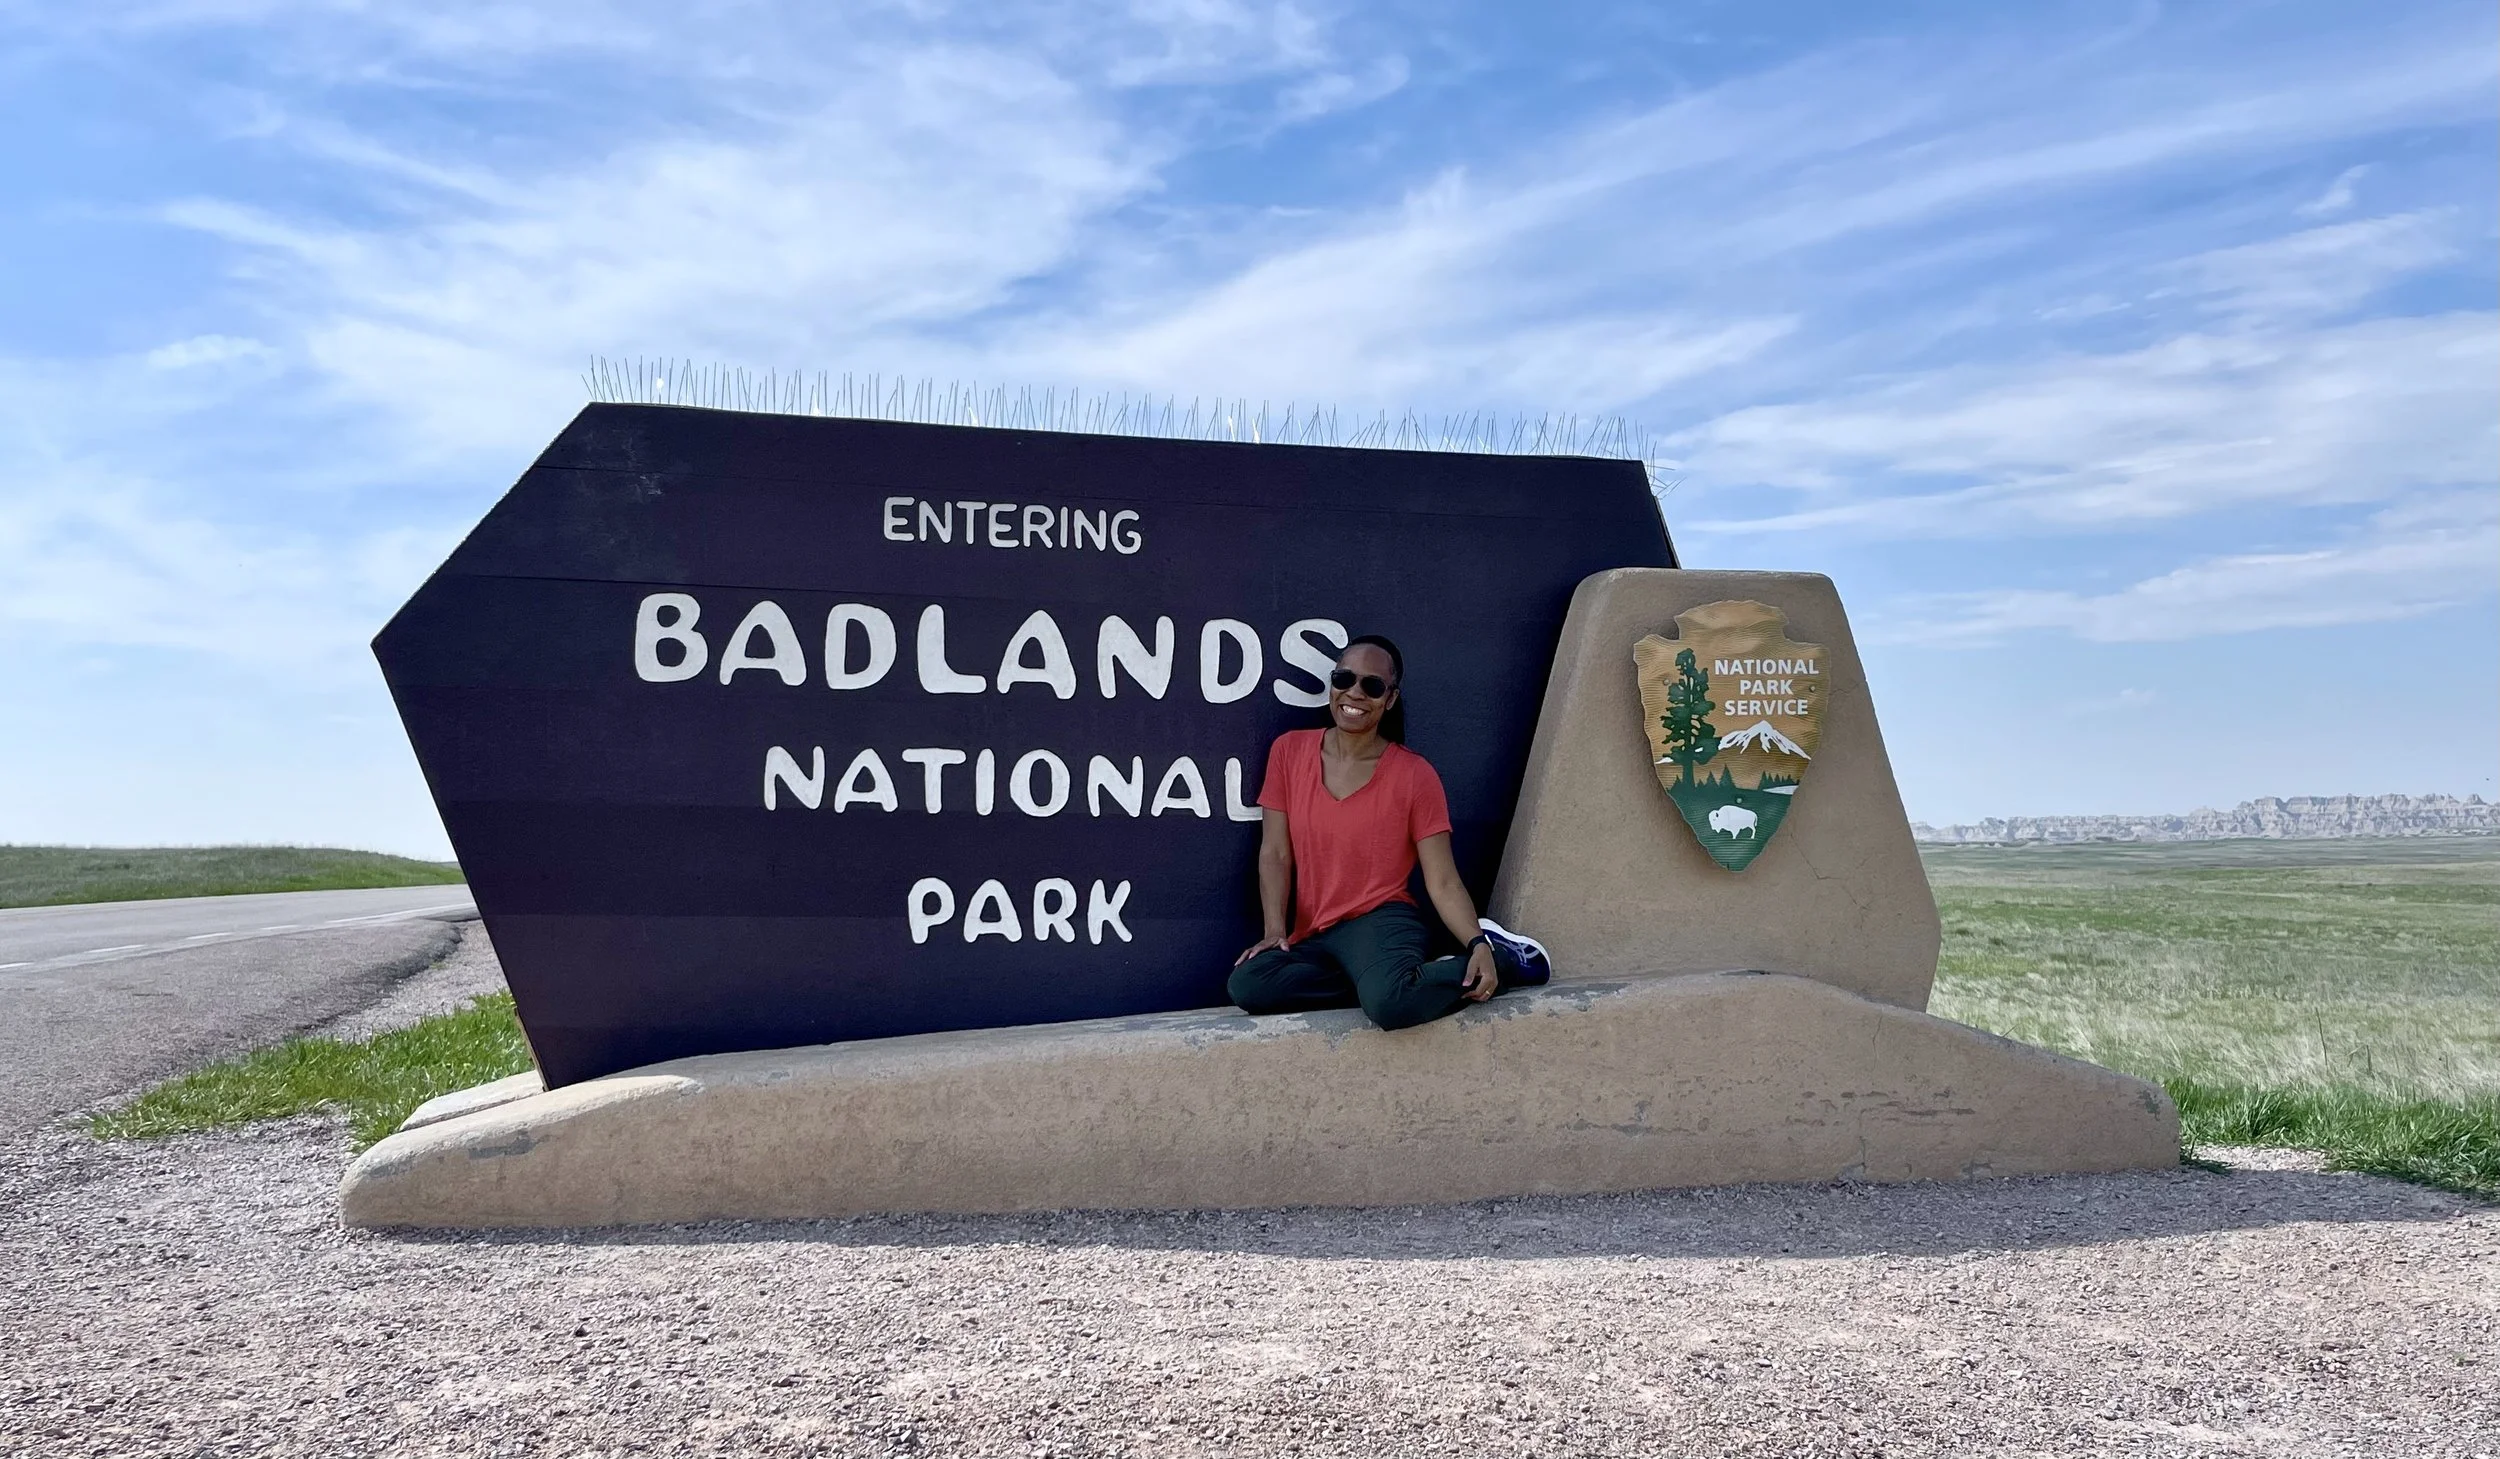
Final Thoughts: Why You Should Visit Badlands National Park
Visiting Badlands National Park felt like stepping into another world—one shaped not just by erosion, but by time itself. The contrasting textures of soft prairie grass and jagged stone, the shifting colors of sunrise and sunset, and the absolute silence in some corners of the park all add up to something unforgettable.
Whether you’re in it for the hiking, the photography, the fossils, or the pure sense of awe, the Badlands is a place that leaves a mark. If you’re planning a South Dakota road trip, this park deserves a top spot on your itinerary.
#17 Great Smokey Mountains National Park, Tennessee
I’ve visited Great Smoky Mountains National Park twice—once in late spring and again in late fall—and both times, I was struck by the sheer size and breathtaking beauty of the mist-covered peaks, dense forests, and abundant wildlife.
My first visit was during a college trip and my second was a weekend escape from the city, a much-needed retreat into nature. I set out from Chicago on an overcast November morning, eager to trade urban noise for the quiet serenity of the Smokies. However, the trip didn’t go quite as planned—a flat tire just outside of Chicago meant I had to continue the long drive on a spare. The unexpected delay added a few hours to the journey, but it only made the adventure more memorable.
Upon arriving at the park, I stopped at the visitor center, picked up my passport stamp, and asked a ranger for directions to the national park sign—a must-have photo for every visit. With that checked off, I headed back into the park, ready to hit the trails and immerse myself in the wild beauty of the Smokies.
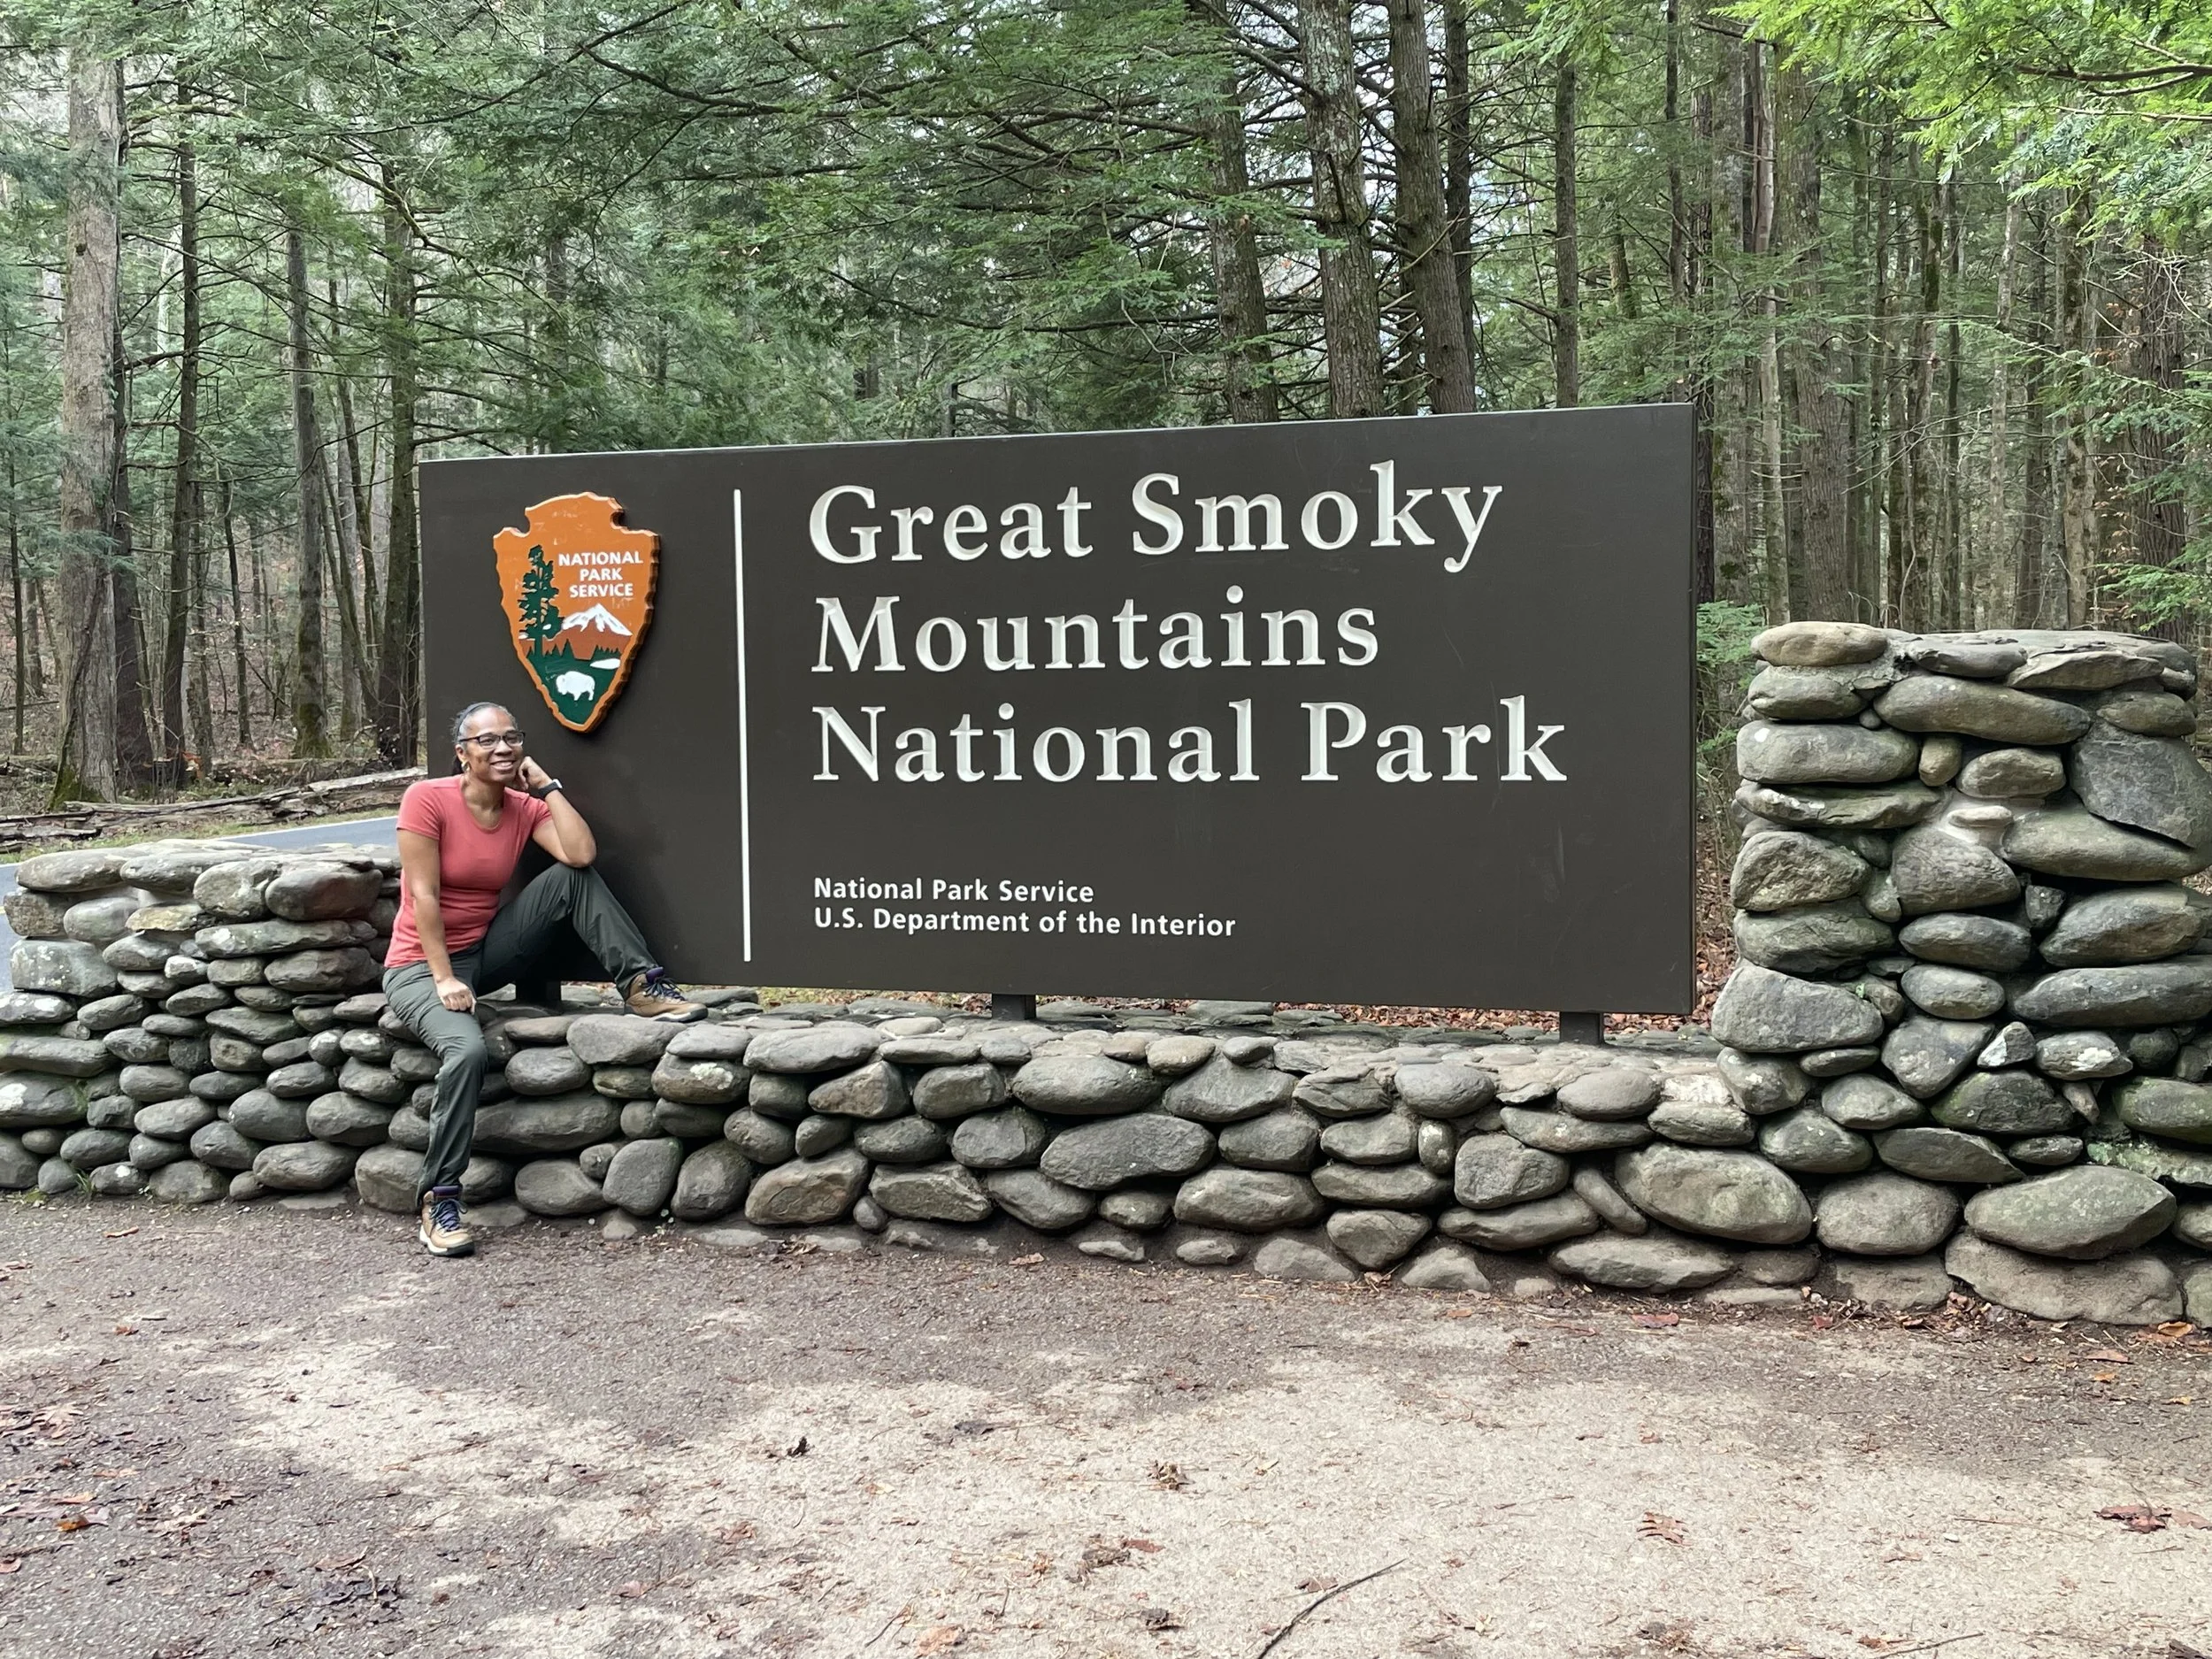
A Bit About The Park
Great Smoky Mountains National Park, straddling the border between North Carolina and Tennessee, is the most visited national parks in the United States. Renowned for its lovely landscapes, the park spans over 500,000 acres of mist-covered peaks, dense hardwood forests, tranquil streams, and wildflower-filled meadows. The Smoky Mountains, named for the ethereal fog that frequently drapes their slopes, are part of the Appalachian Range and serve as a haven for wildlife, including black bears, white-tailed deer, and over 200 species of birds. With more than 19,000 documented species and countless others yet to be discovered, the park is one of the most biologically diverse areas in North America.
The region’s history is deeply rooted in the Cherokee people, who inhabited the land for thousands of years before being forcibly removed during the Trail of Tears in the 1830s. Some Cherokee remained, forming what is now the Eastern Band of Cherokee Indians in North Carolina. By the late 19th and early 20th centuries, extensive logging operations threatened the landscape, leading conservationists and local leaders to campaign for the establishment of a national park. Their efforts, along with funding from John D. Rockefeller Jr. and contributions from Tennessee and North Carolina, culminated in the park’s official designation in 1934.
Today, visitors can explore the park’s natural and cultural wonders through scenic drives and hiking trails. The Cades Cove Loop offers a glimpse into the past with preserved pioneer cabins and churches, along with frequent wildlife sightings. The Roaring Fork Motor Nature Trail provides a scenic journey through lush forests and historic homesteads. Each season transforms the park—spring brings vibrant wildflowers, summer fills the valleys with lush greenery, fall dazzles with fiery foliage, and winter blankets the mountains in a serene layer of snow.
With its rich biodiversity, cultural heritage, and year-round recreational opportunities, Great Smoky Mountains National Park remains a beloved escape for nature lovers, hikers, and history enthusiasts.
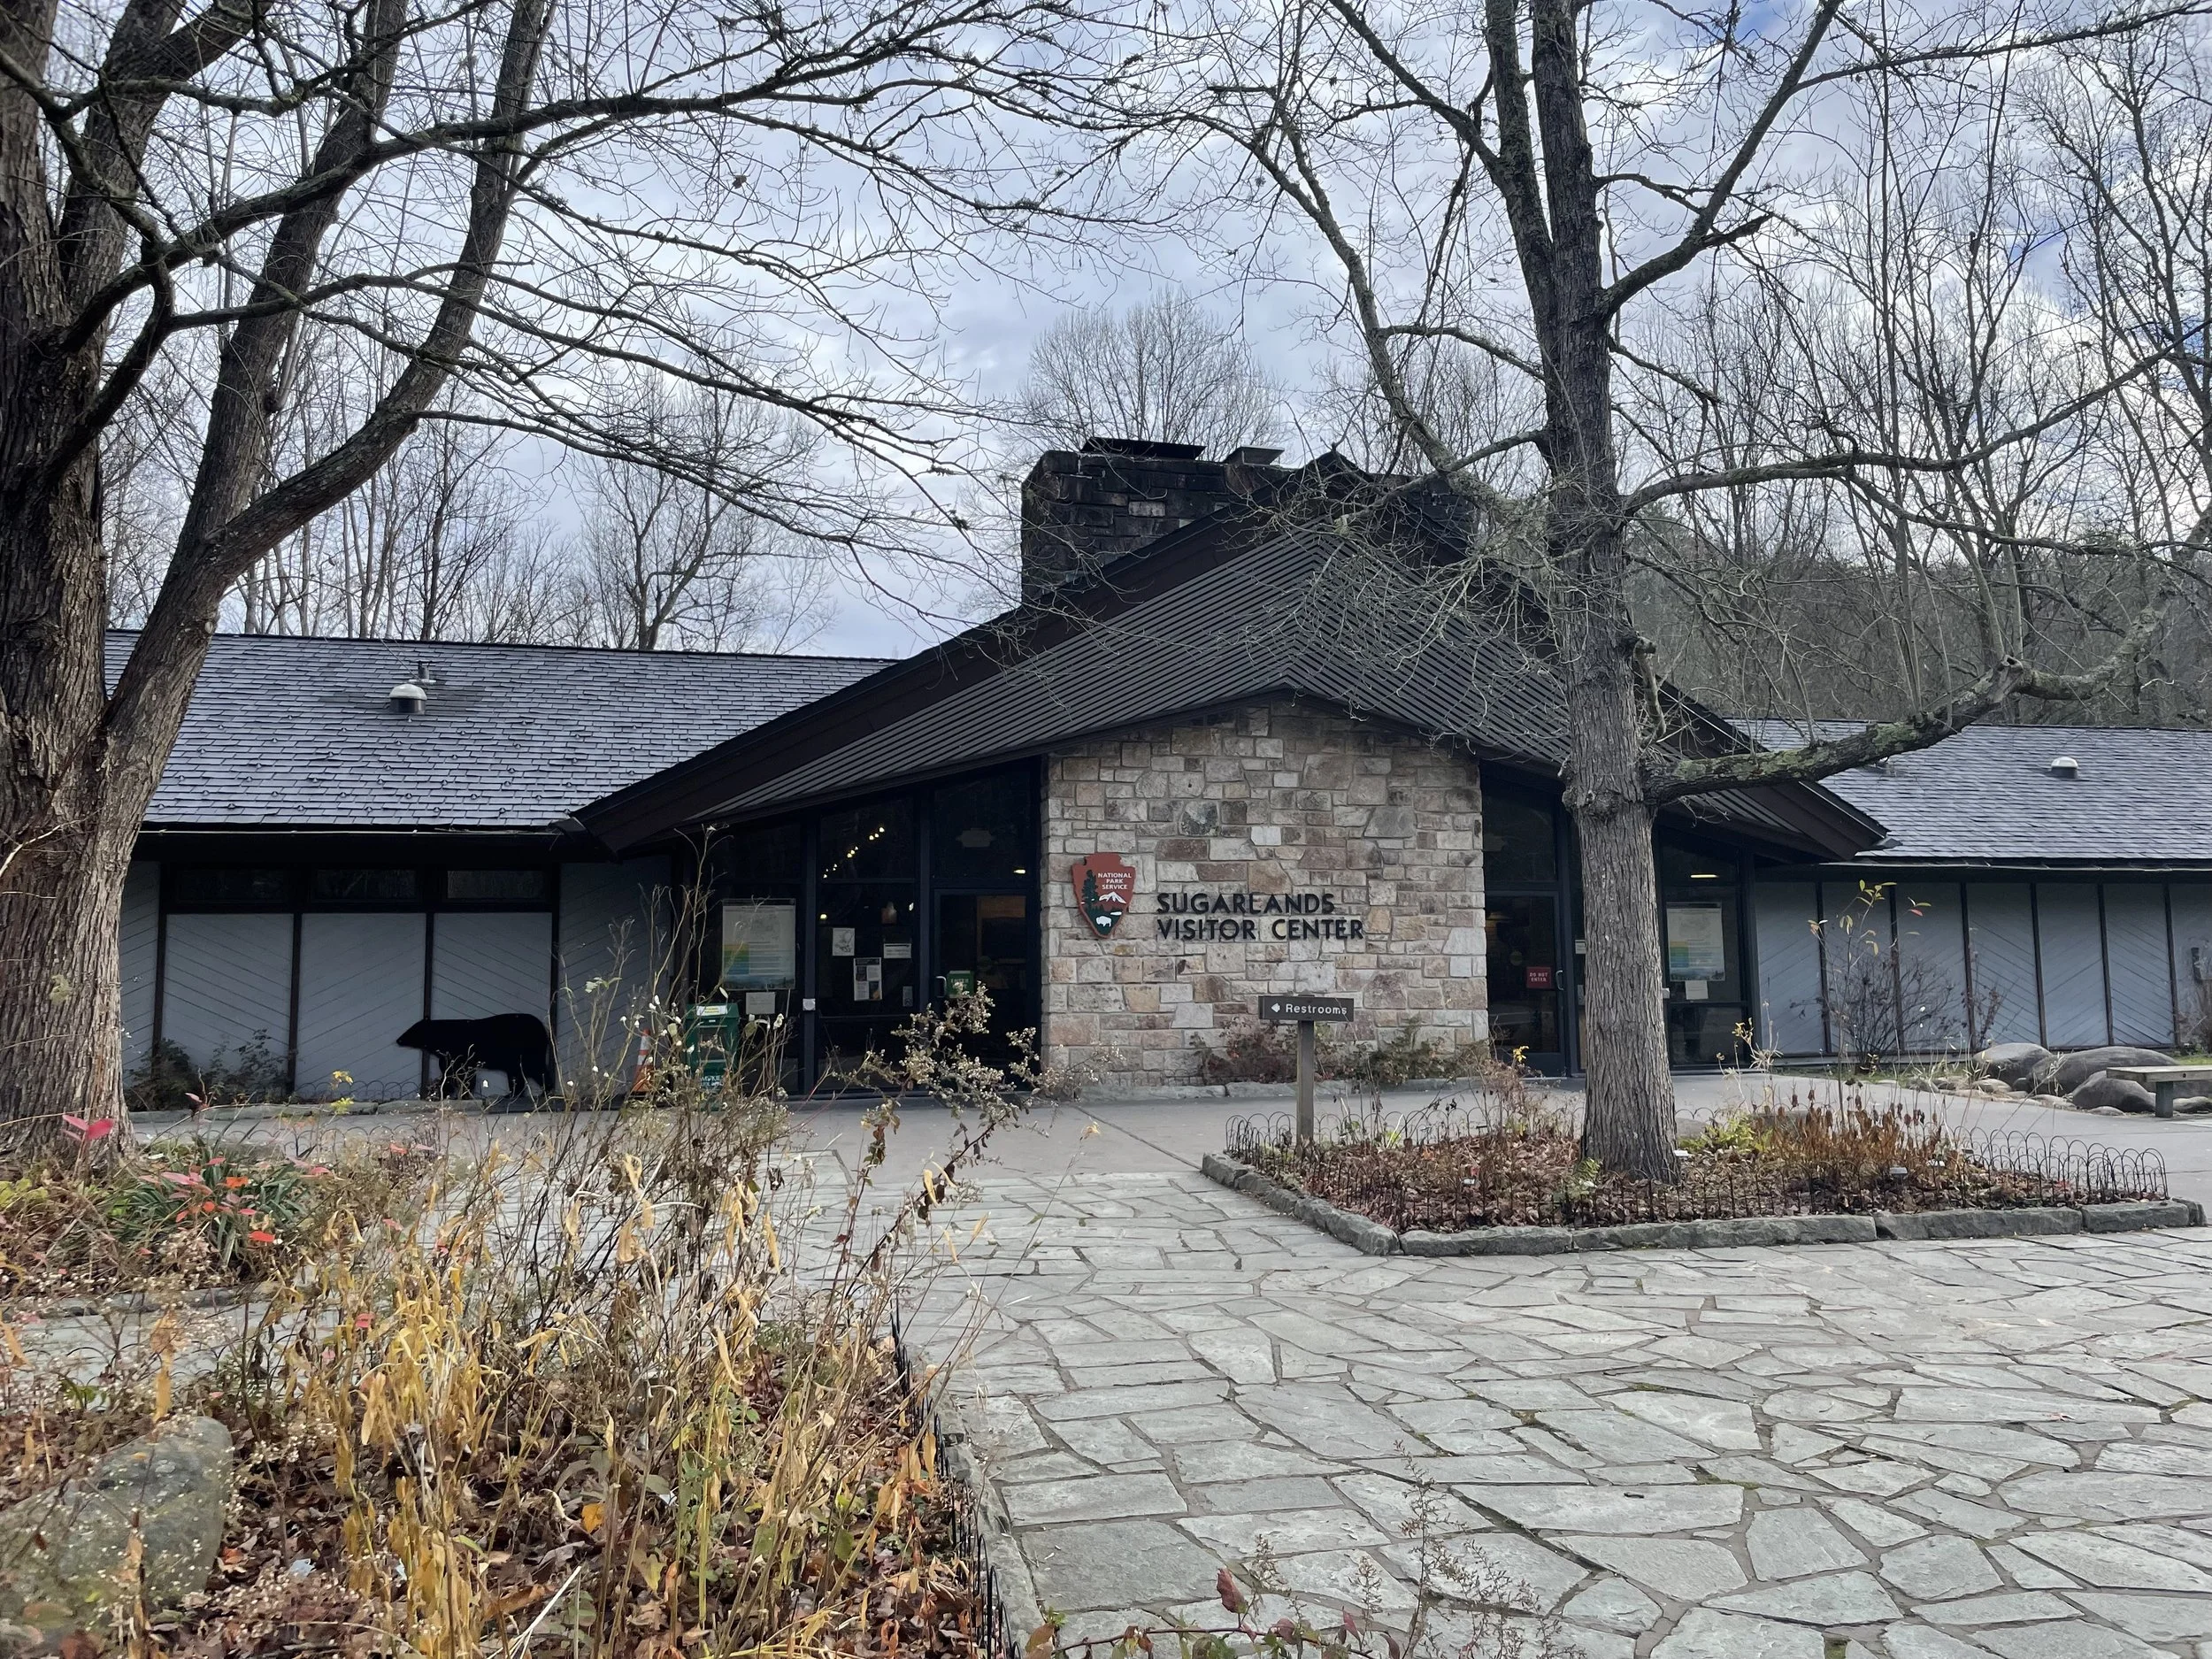
Sugarland Visitor Center
Visitor Centers
The park has four main visitor centers, offering information, maps, and exhibits:
1. Sugarlands Visitor Center (Tennessee Side)
Location: Near Gatlinburg, TN (U.S. 441)
Features: Park exhibits, film, ranger programs, bookstore
Nearby Attractions: Cataract Falls, Newfound Gap Road
2. Oconaluftee Visitor Center (North Carolina Side)
Location: Near Cherokee, NC (U.S. 441)
Features: Historical exhibits, Mountain Farm Museum, elk viewing
Nearby Attractions: Mingus Mill, Blue Ridge Parkway
3. Cades Cove Visitor Center
Location: Inside Cades Cove, near Townsend, TN
Features: 19th-century structures, hiking trails
Nearby Attractions: Abrams Falls, scenic loop road
4. Clingmans Dome Visitor Contact Station
Location: At Clingmans Dome parking area (highest point in the park)
Features: Small info center, incredible panoramic views
Nearby Attractions: Clingmans Dome Observation Tower, Appalachian Trail access
Entrances & Fees
Unlike most national parks, Great Smoky Mountains National Park does not charge an entrance fee. However, as of March 2023, a parking tag is required for any vehicle stopping for more than 15 minutes.
Main Entrances:
Gatlinburg, TN (Sugarlands Entrance) – Most popular, leads to Newfound Gap Road
Cherokee, NC (Oconaluftee Entrance) – Great for scenic drives & wildlife
Townsend, TN (Wears Valley Entrance) – Quieter, best for Cades Cove access
Cosby, TN – Lesser-known entrance, great for hiking
Parking Fees:
$5 per day
$15 per week
$40 for an annual pass
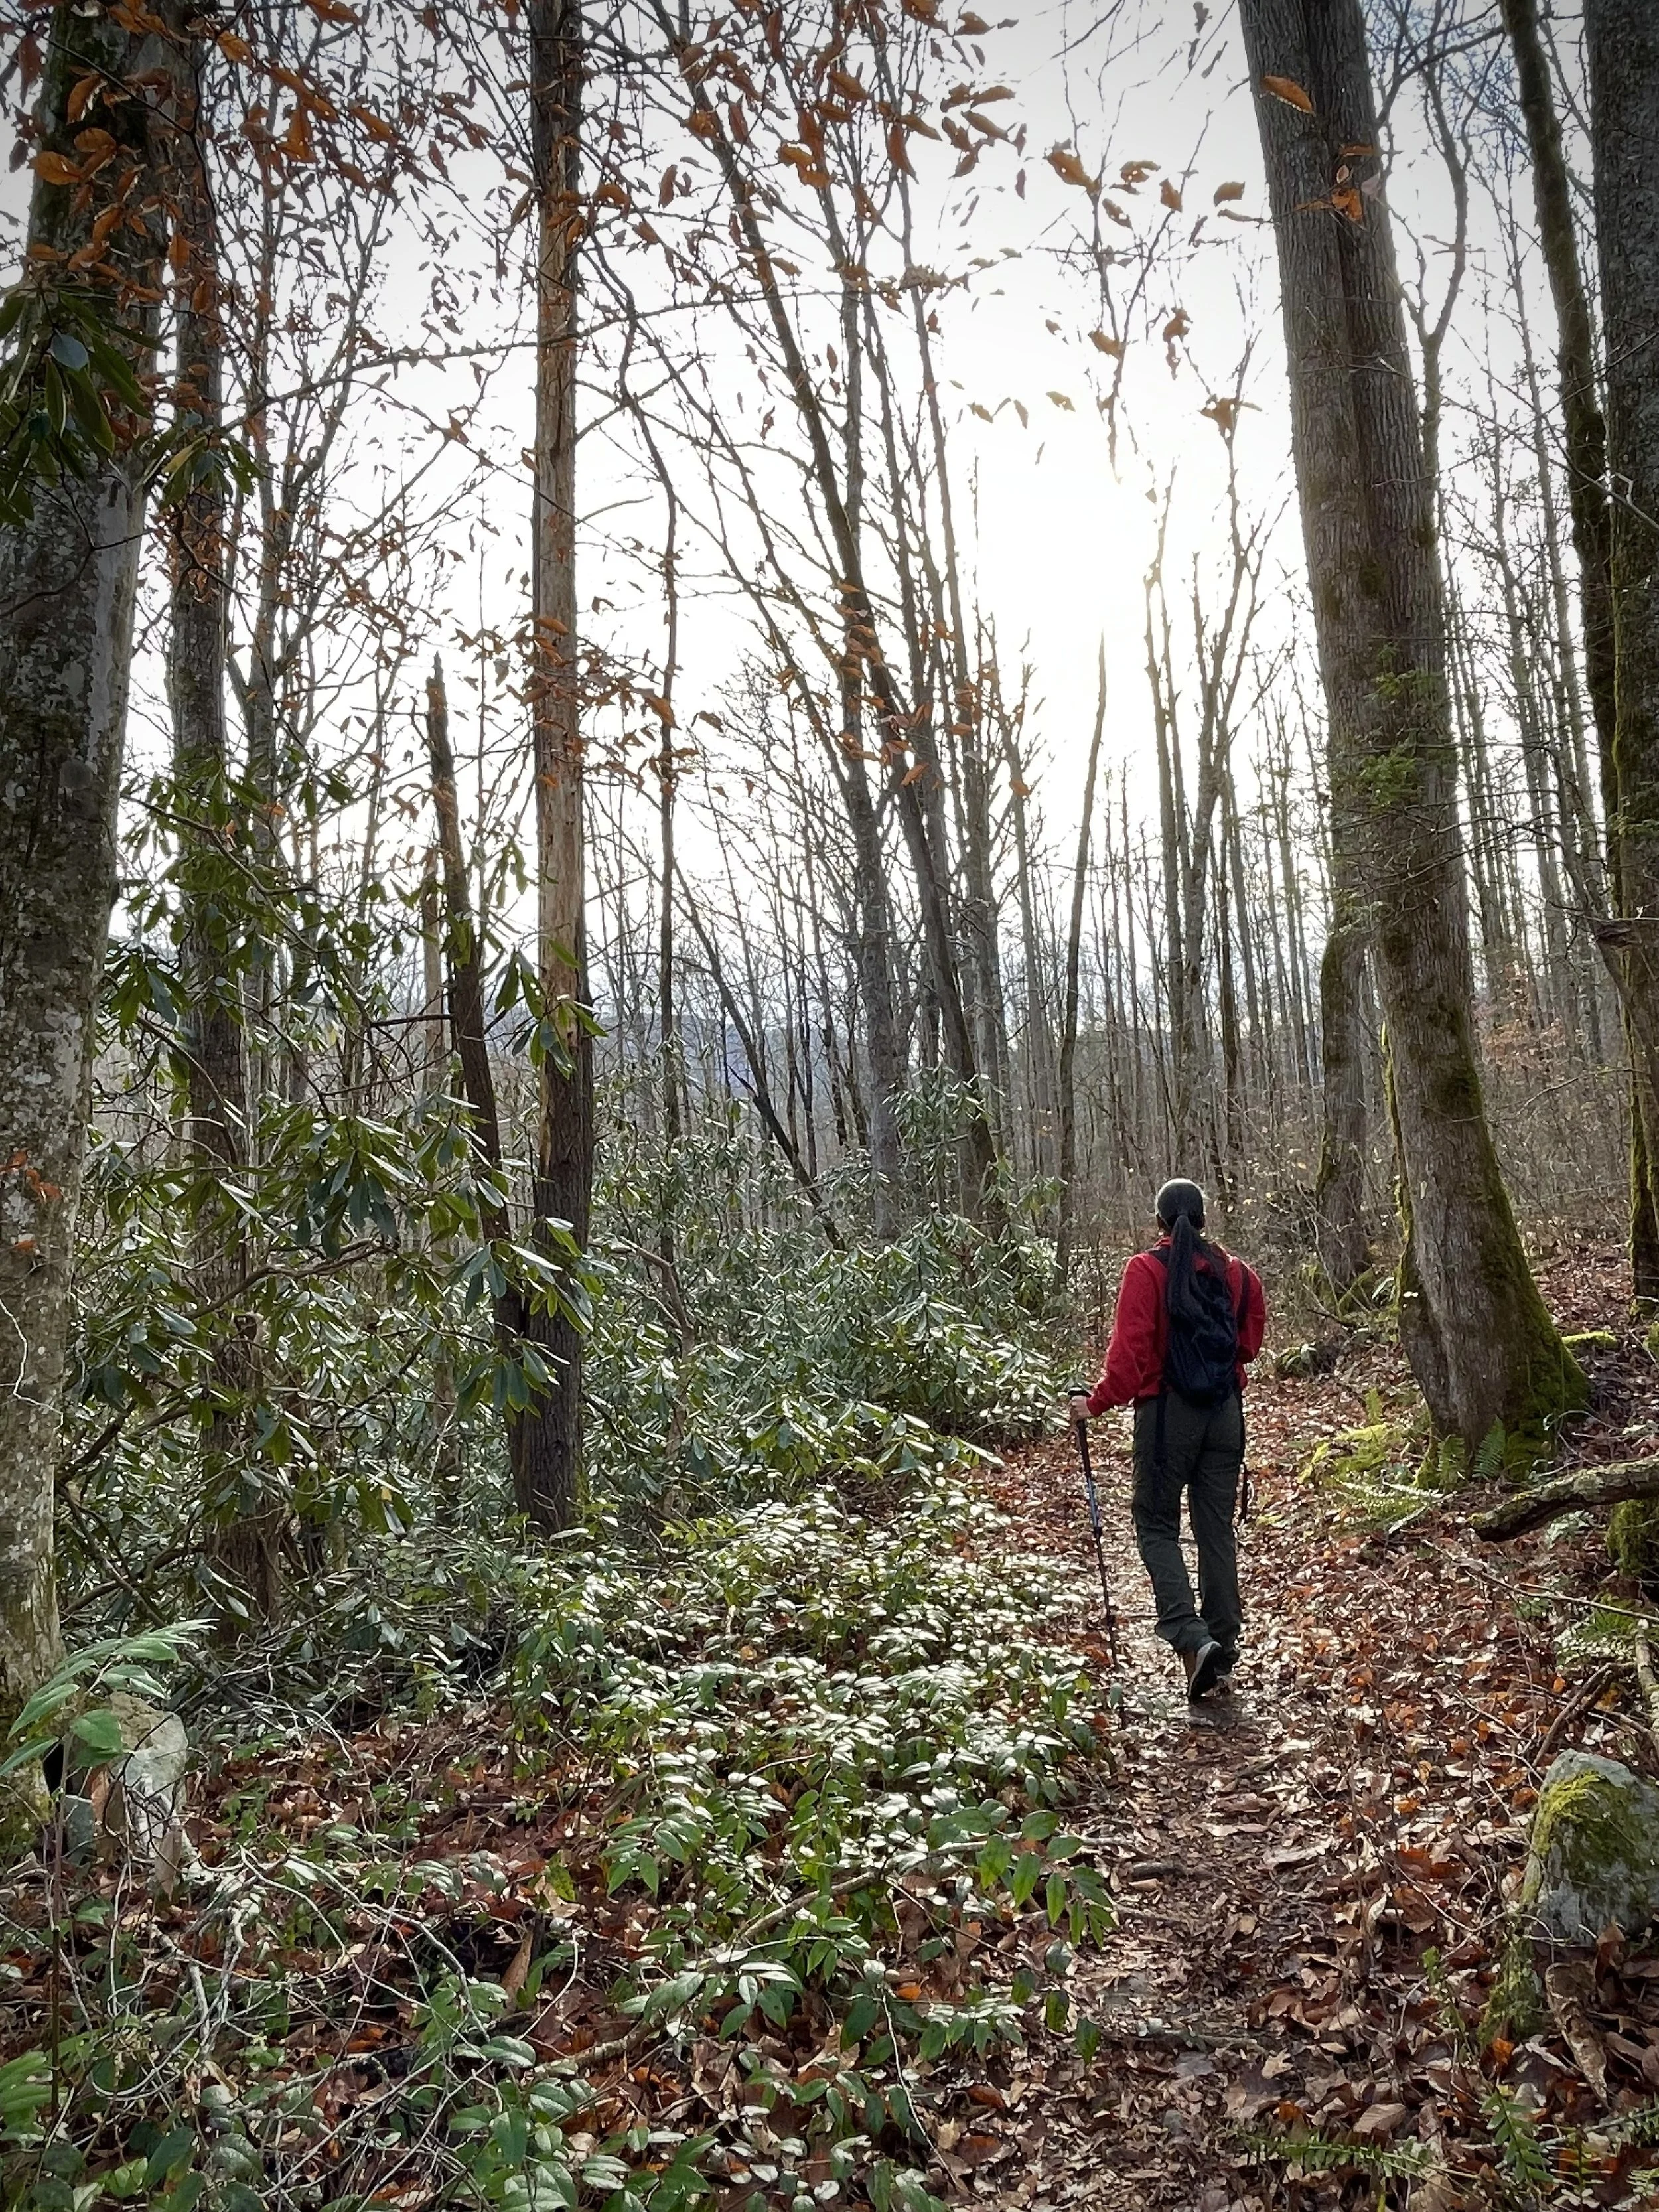
Best Hiking Trails
Tennessee Side:
Alum Cave Trail to Mount LeConte (11 miles Round Trip (RT) – Stunning cliffs, one of the best hikes in the park
Andrews Bald (3.6 miles RT) – Panoramic mountain views, accessible from Clingmans Dome
Charlies Bunion (8 miles RT) – Epic views from the Appalachian Trail
Abrams Falls (5 miles RT) – Beautiful waterfall hike in Cades Cove
Laurel Falls (2.6 miles RT) – Easy paved hike to a gorgeous waterfall
North Carolina Side:
Clingmans Dome (1 mile RT) – Short but steep, leading to the highest peak in the Smokies
Deep Creek Loop (5 miles RT) – Great for waterfalls (Tom Branch Falls, Indian Creek Falls)
Kephart Prong Trail (4 miles RT) – Historic CCC structures, peaceful hike
Boogerman Trail (7.4 miles RT) – A quieter hike through an old-growth forest
Top Tourist Attractions
1. Cades Cove (TN)
A scenic 11-mile loop road with historic cabins, churches, and abundant wildlife (bears, deer, turkeys).
2. Clingmans Dome (TN/NC)
The highest point in the park (6,643 feet) with an observation tower providing 360° views.
3. Roaring Fork Motor Nature Trail (TN)
A 5.5-mile scenic drive with old homesteads and waterfall hikes.
4. Blue Ridge Parkway (NC)
Connects to the Oconaluftee Entrance, offering breathtaking overlooks and wildflowers.
5. Newfound Gap Road (TN/NC)
The main road across the park, offering stunning mountain views and access to key sites.
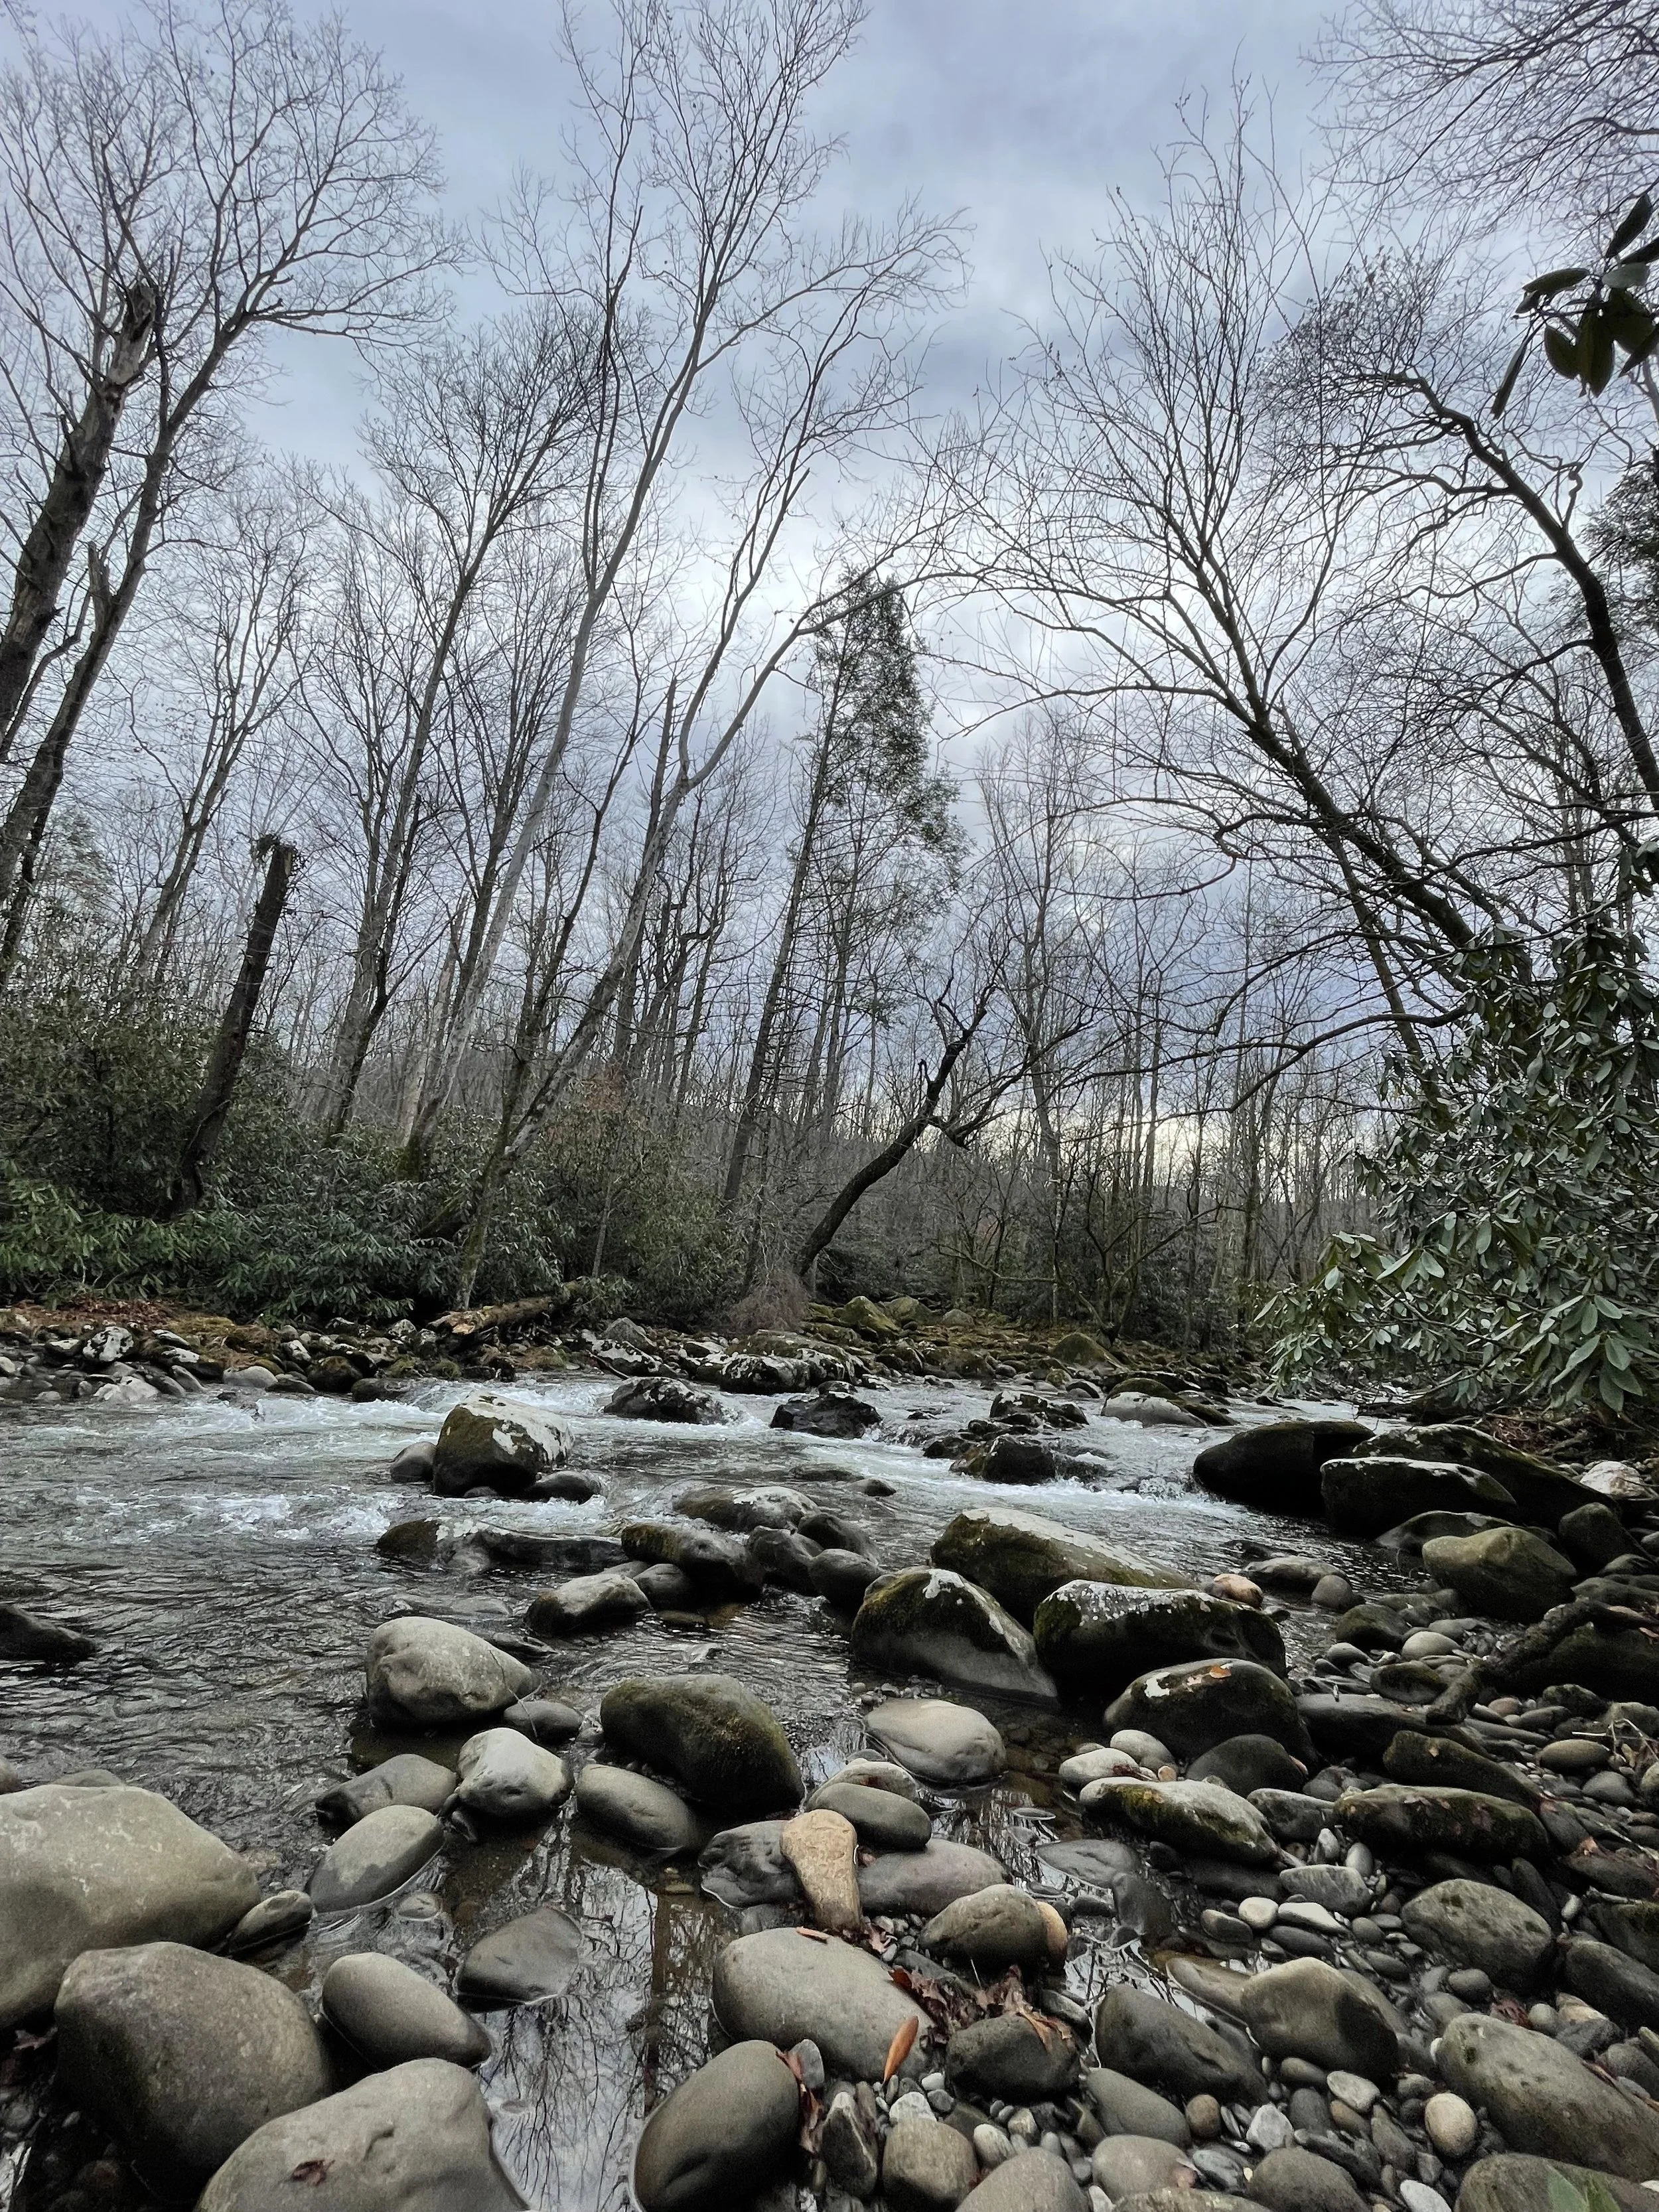
Best Place To Take Photos
Scenic Overlooks & Mountain Views
1. Clingmans Dome – The highest point in the park (6,643 feet) offers unparalleled 360-degree views of the Smoky Mountains. Sunrise and sunset are particularly stunning here.
2. Newfound Gap – A perfect roadside stop with expansive mountain views and a scenic valley backdrop. It’s especially beautiful in fall when the foliage is at its peak.
3. Morton Overlook – A popular sunset spot, with vibrant skies and layers of rolling mountains.
4. Foothills Parkway – A scenic drive with multiple pull-offs offering sweeping views of the Smokies, particularly at sunrise or sunset.
Waterfalls & Streams
5. Laurel Falls – One of the most photographed waterfalls in the park, accessible via an easy paved trail. Best visited early in the morning to avoid crowds.
6. Grotto Falls – A unique waterfall where you can walk behind the cascading water, making for a dramatic and immersive shot.
7. Abrams Falls – Though shorter in height, this waterfall is known for its powerful flow and picturesque settingsurrounded by lush greenery.
8. Ramsey Cascades – The tallest waterfall in the park, reached by a scenic (but challenging) hike, offering spectacular photos of cascading water over rugged rocks.
Historic & Iconic Locations
9. Cades Cove – A photographer’s dream, featuring open meadows, rustic cabins, historic churches, and frequent wildlife sightings (deer, bears, turkeys). Sunrise is the best time for soft lighting and misty fields.
10. Roaring Fork Motor Nature Trail – A beautiful scenic drive with historic homesteads, rushing streams, and old-growth forests. Perfect for moody woodland photography.
11. Elkmont Ghost Town – A fascinating location featuring abandoned cabins and remnants of an old resort community, great for eerie or nostalgic photography.
12. Oconaluftee Valley & Mountain Farm Museum – Located near the North Carolina entrance, this area showcases historic log cabins and barns with mountain backdrops. Elk are often seen grazing in the fields, making for fantastic wildlife shots.
Wildlife Photography Hotspots
13. Cades Cove Loop – The best place in the park to see black bears, deer, and wild turkeys, especially in the early morning or late evening.
14. Cataloochee Valley – A more secluded area known for its large elk herds, particularly during the fall rut season.
Misty & Atmospheric Photography
15. Clingmans Dome Road (at dawn) – The fog often rolls through the valleys at sunrise, creating a mystical layered mountain effect.
16. Anywhere after rainfall – The Smokies get their name from the mist that frequently blankets the mountains. After a rain shower, valleys fill with rising fog, creating dramatic and moody landscapes.
#16 Bryce Canyon National Park, Utah
While driving through Zion National Park, I noticed a sign stating the distance to Bryce Canyon was from the park. Given that it was still relatively early in the afternoon, I figured it might be nice to do a two-for-one, so I left Zion and drove the 84 miles to Bryce Canyon National Park.
The drive between the two parks was peaceful and beautiful. We passed through valleys and hills, surrounded by the stunning red rock formations that make this region so famous.
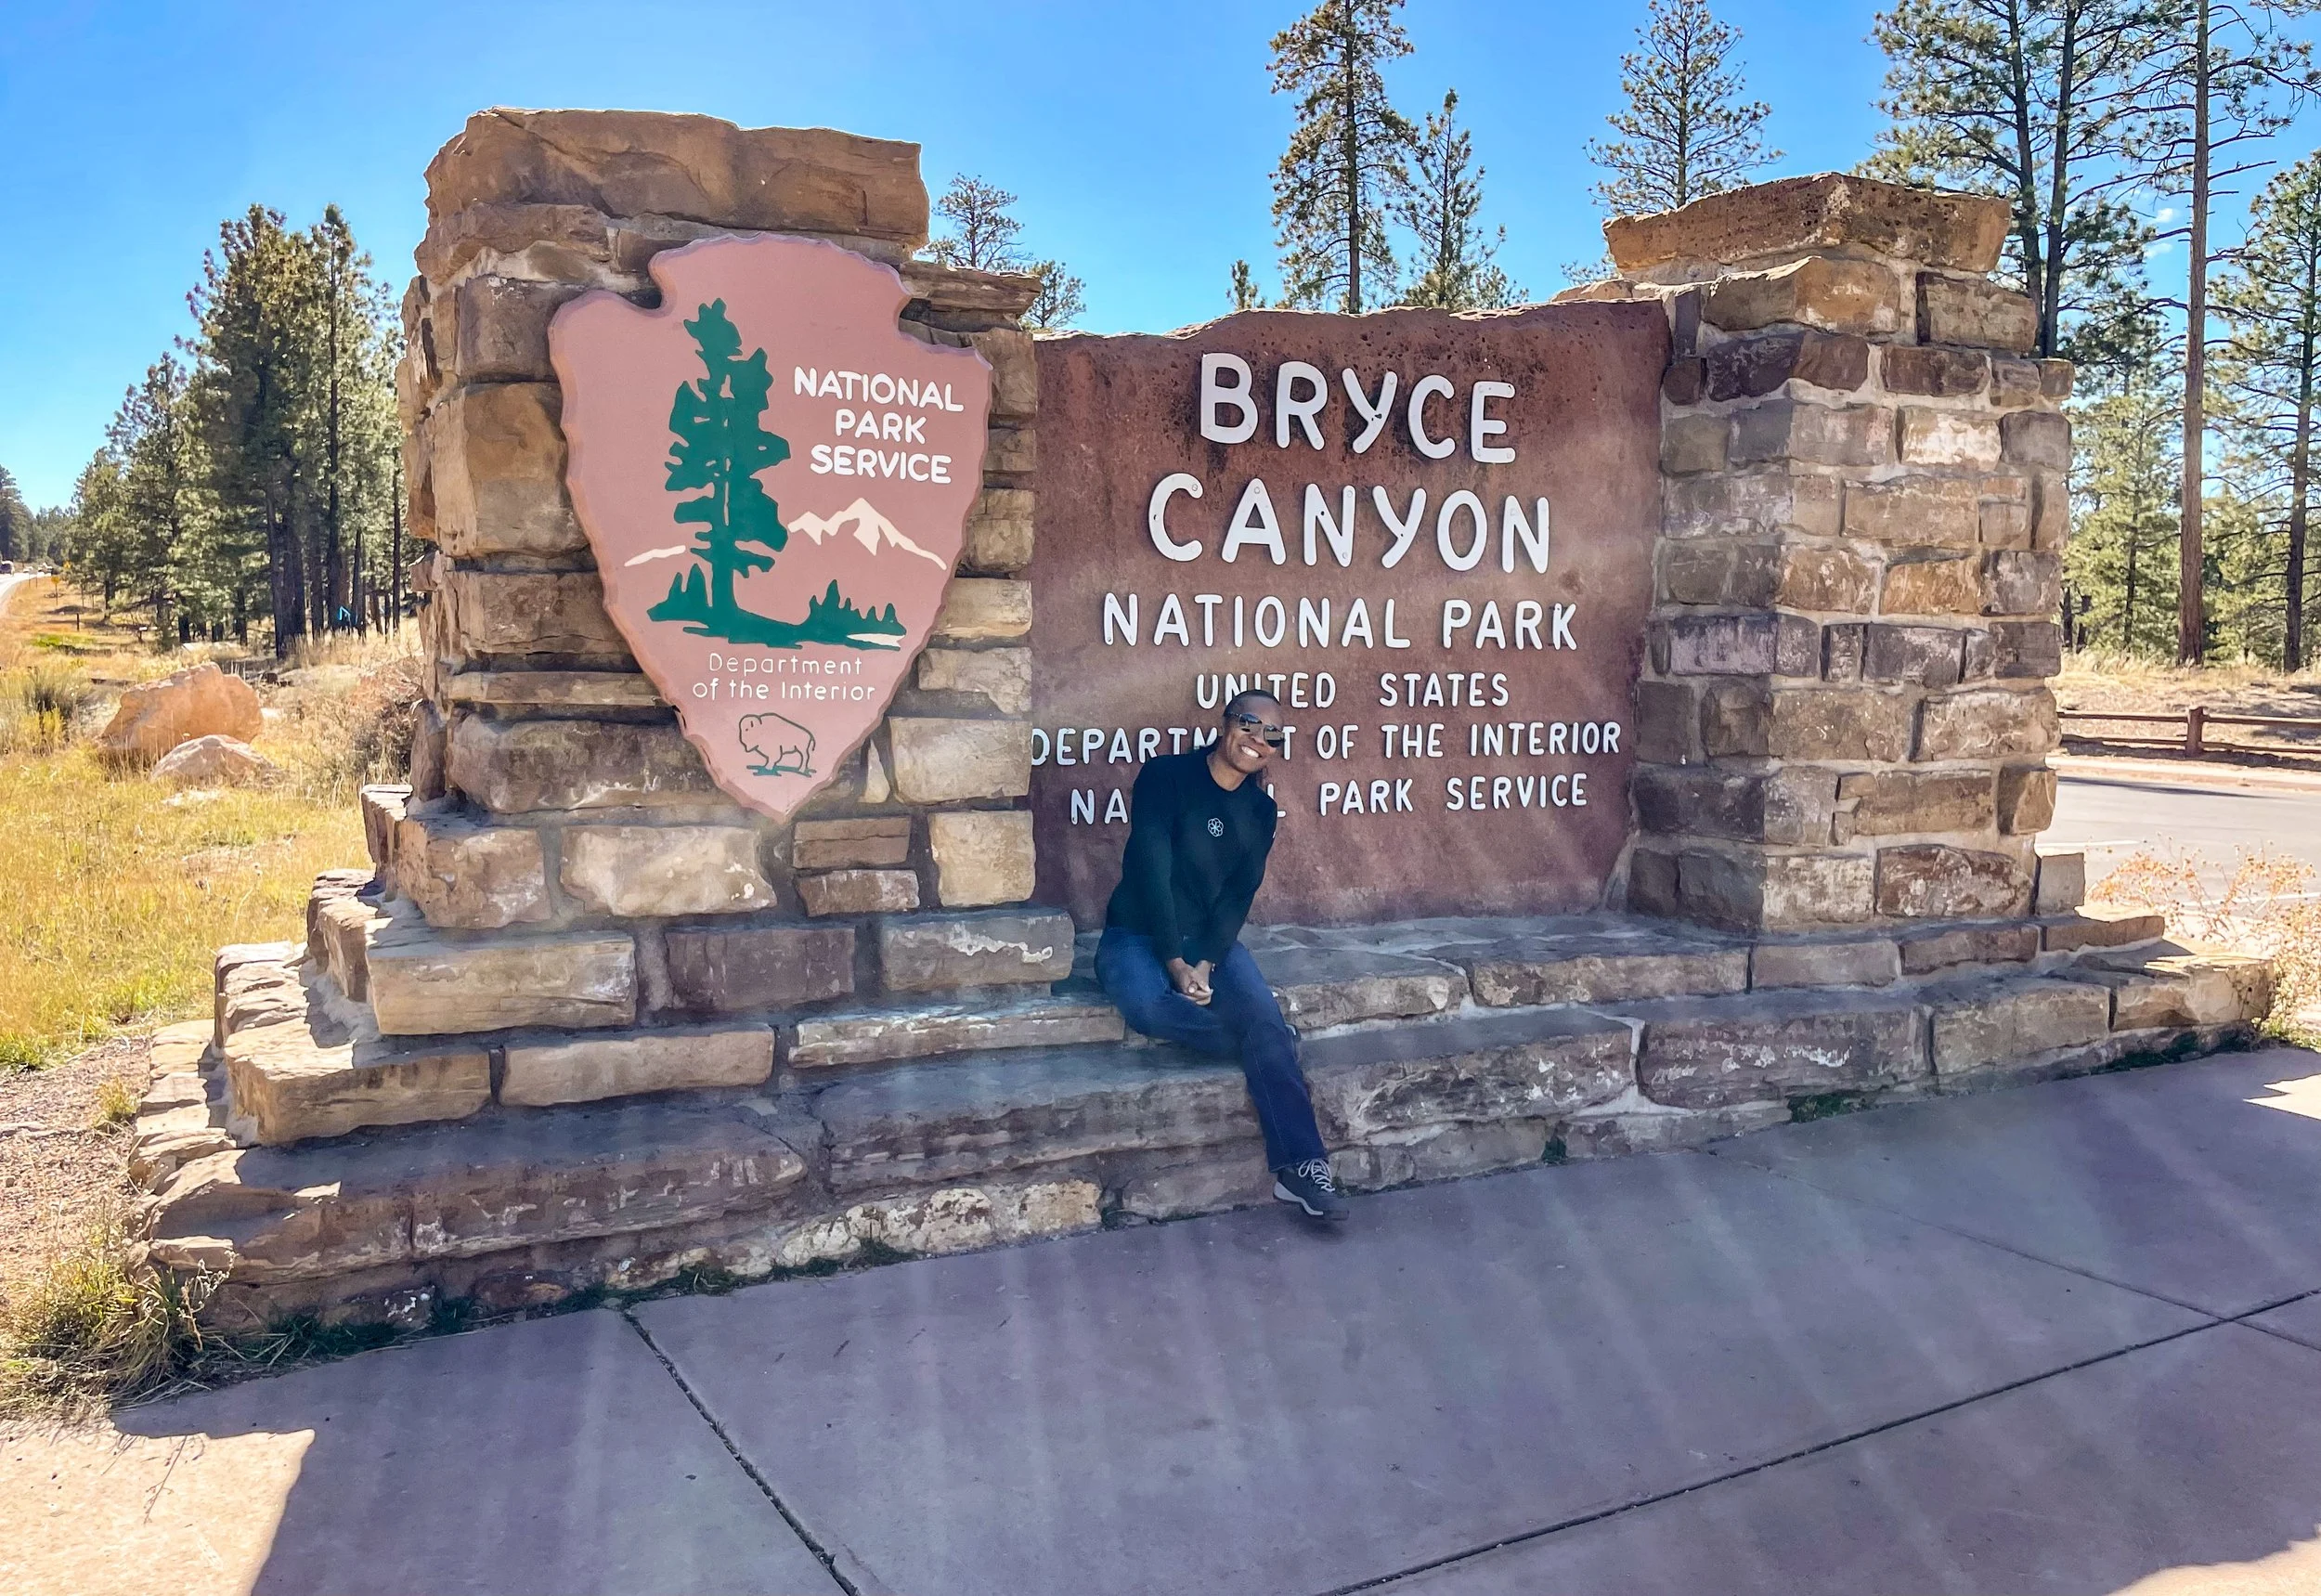
As I entered the park, I paused at the entrance sign to take a few photos. Right away, I noticed that Bryce was much quieter than Zion, which I found refreshing. The visitor center parking lot had far fewer cars, allowing me to get in and out with ease. Since Bryce had recently celebrated its centennial, I was able to collect both my usual cancellation stamp and a special centennial stamp. The weather was perfect, with the late afternoon sun casting a stunning glow over the rock formations.
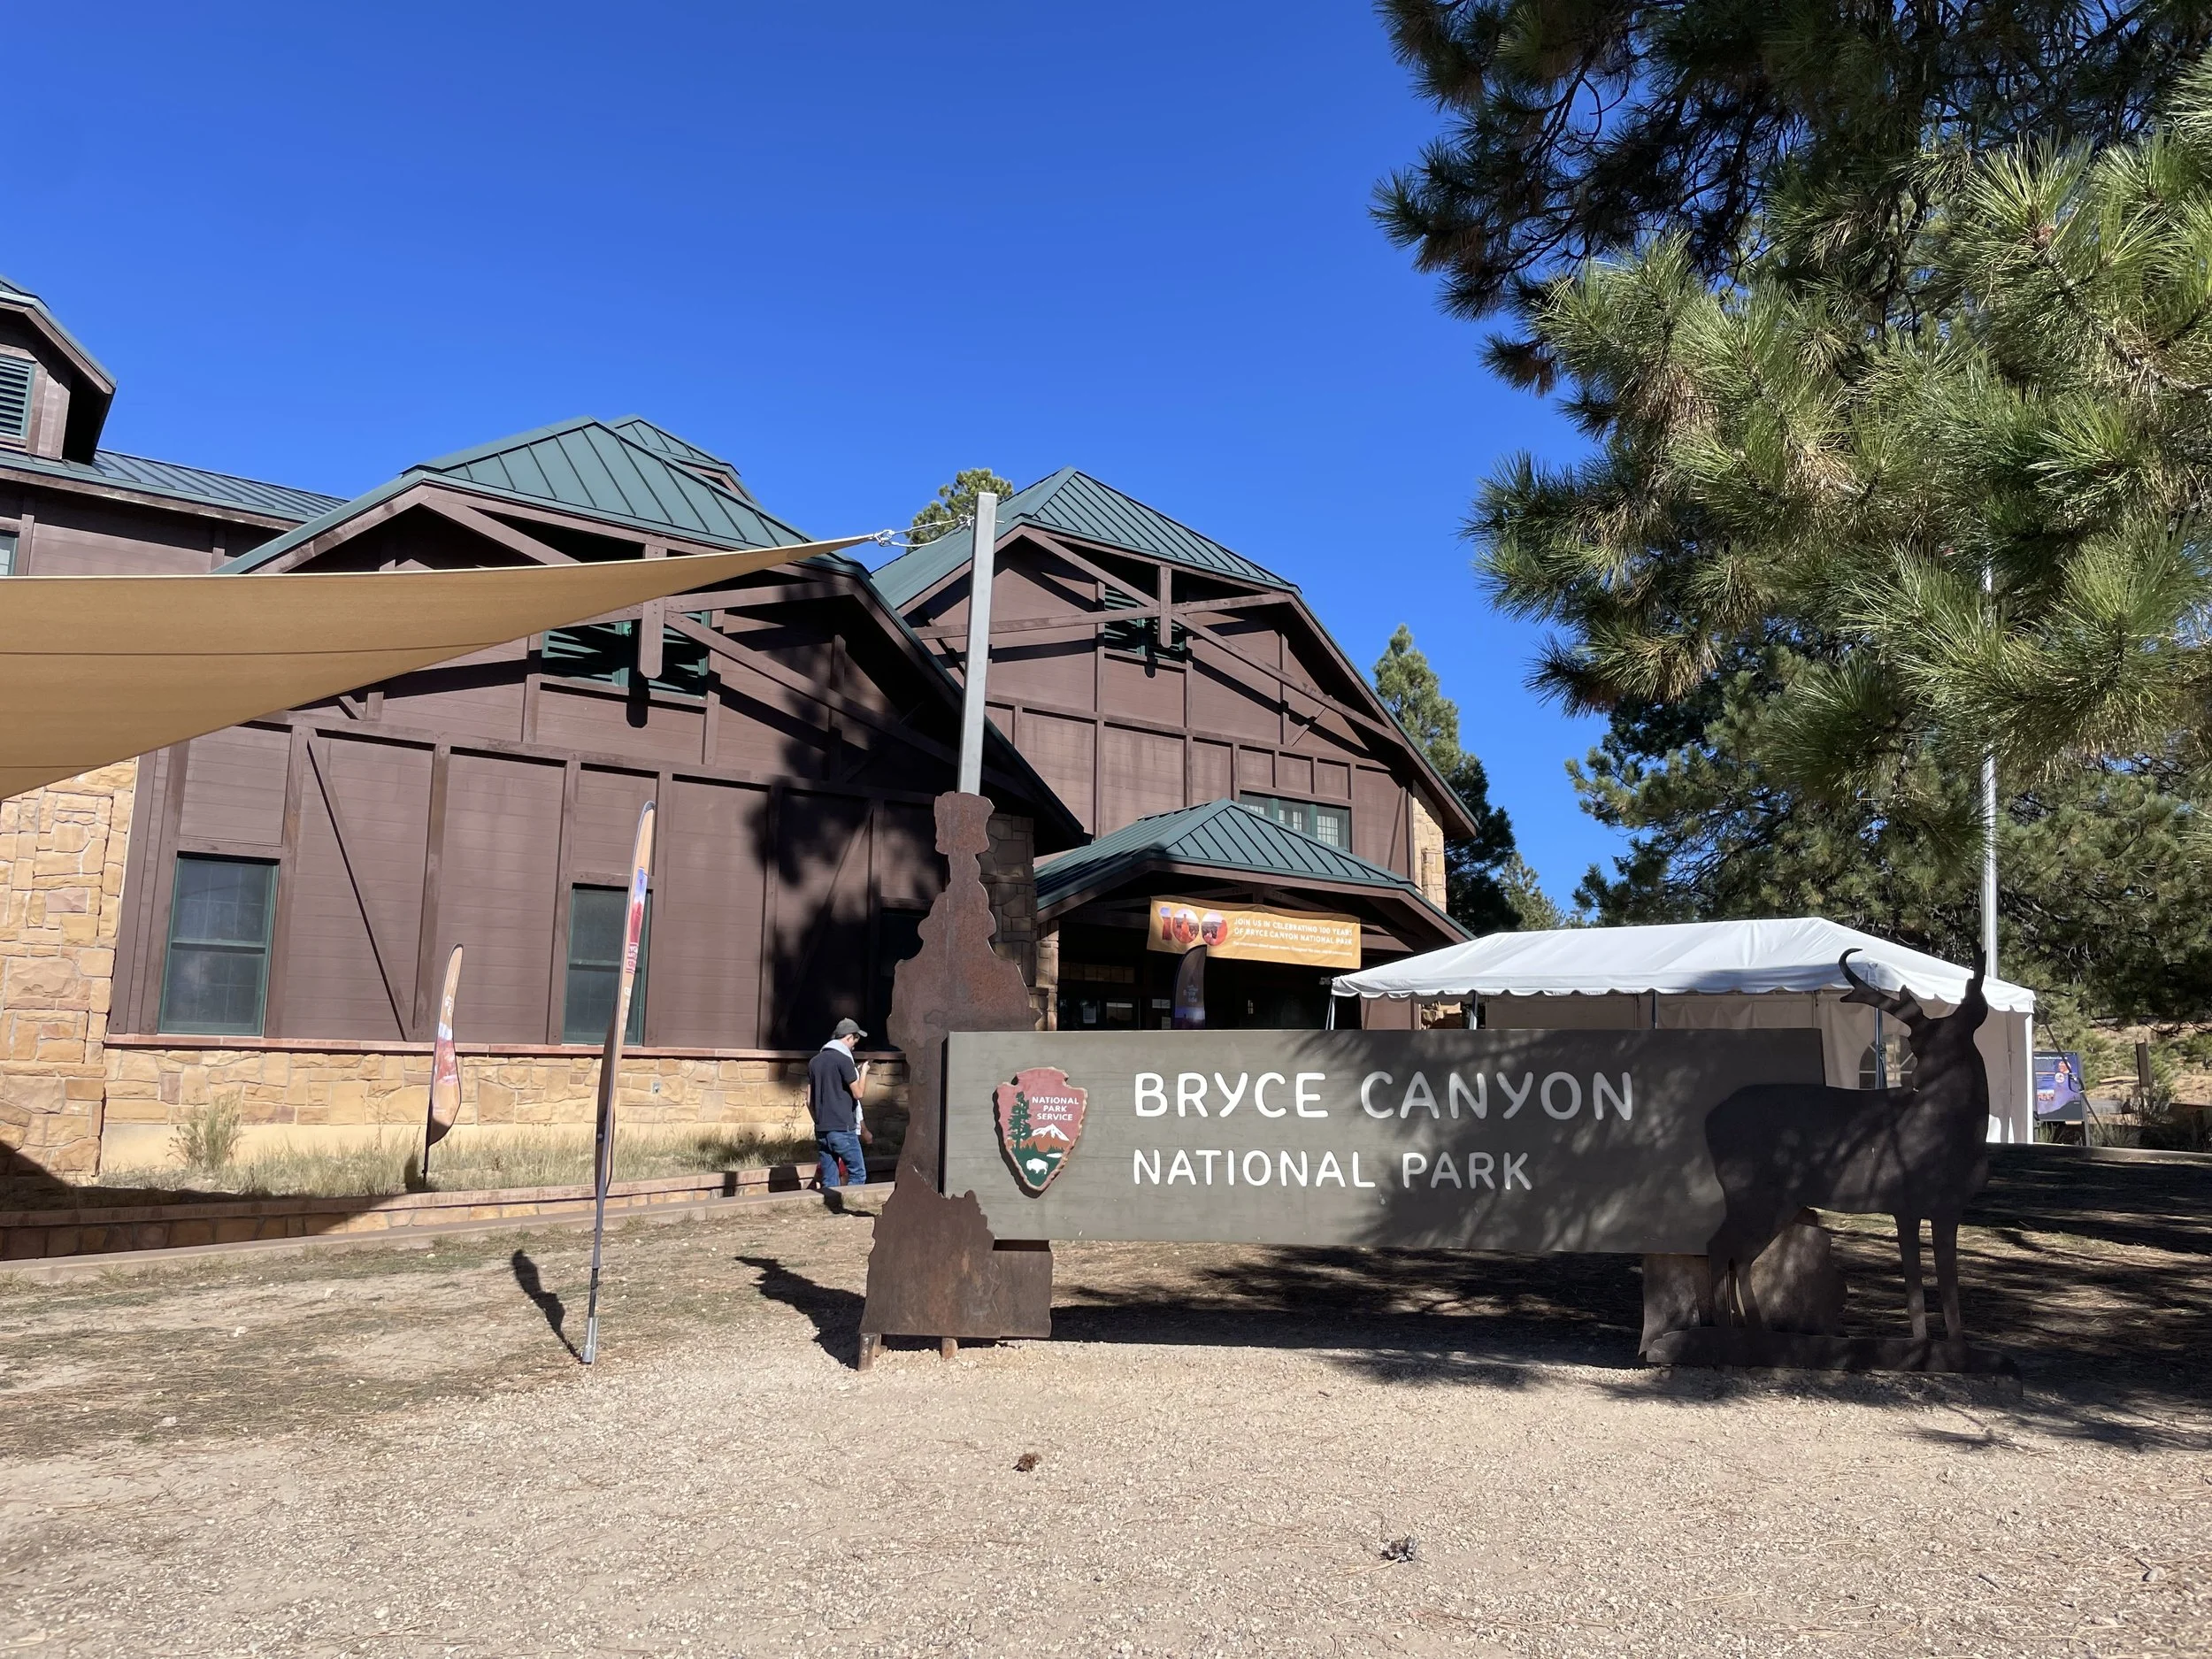
Bryce Canyon Visitor Center
Bryce Canyon is 35,835 acres (56 square miles) which makes it substantially smaller than Zion’s 146,597 acres (229 square miles) but no less mesmerizing. The canyon is famous for its hoodoos—tall, thin spires of rock formed by frost-wedging and erosion over millions of years. Unlike a traditional canyon carved by a river, Bryce is a series of natural amphitheaters eroded into the edge of the Paunsaugunt Plateau. The park’s unique geology creates a landscape filled with vibrant red, orange, and white rock formations that glow under the sunlight.
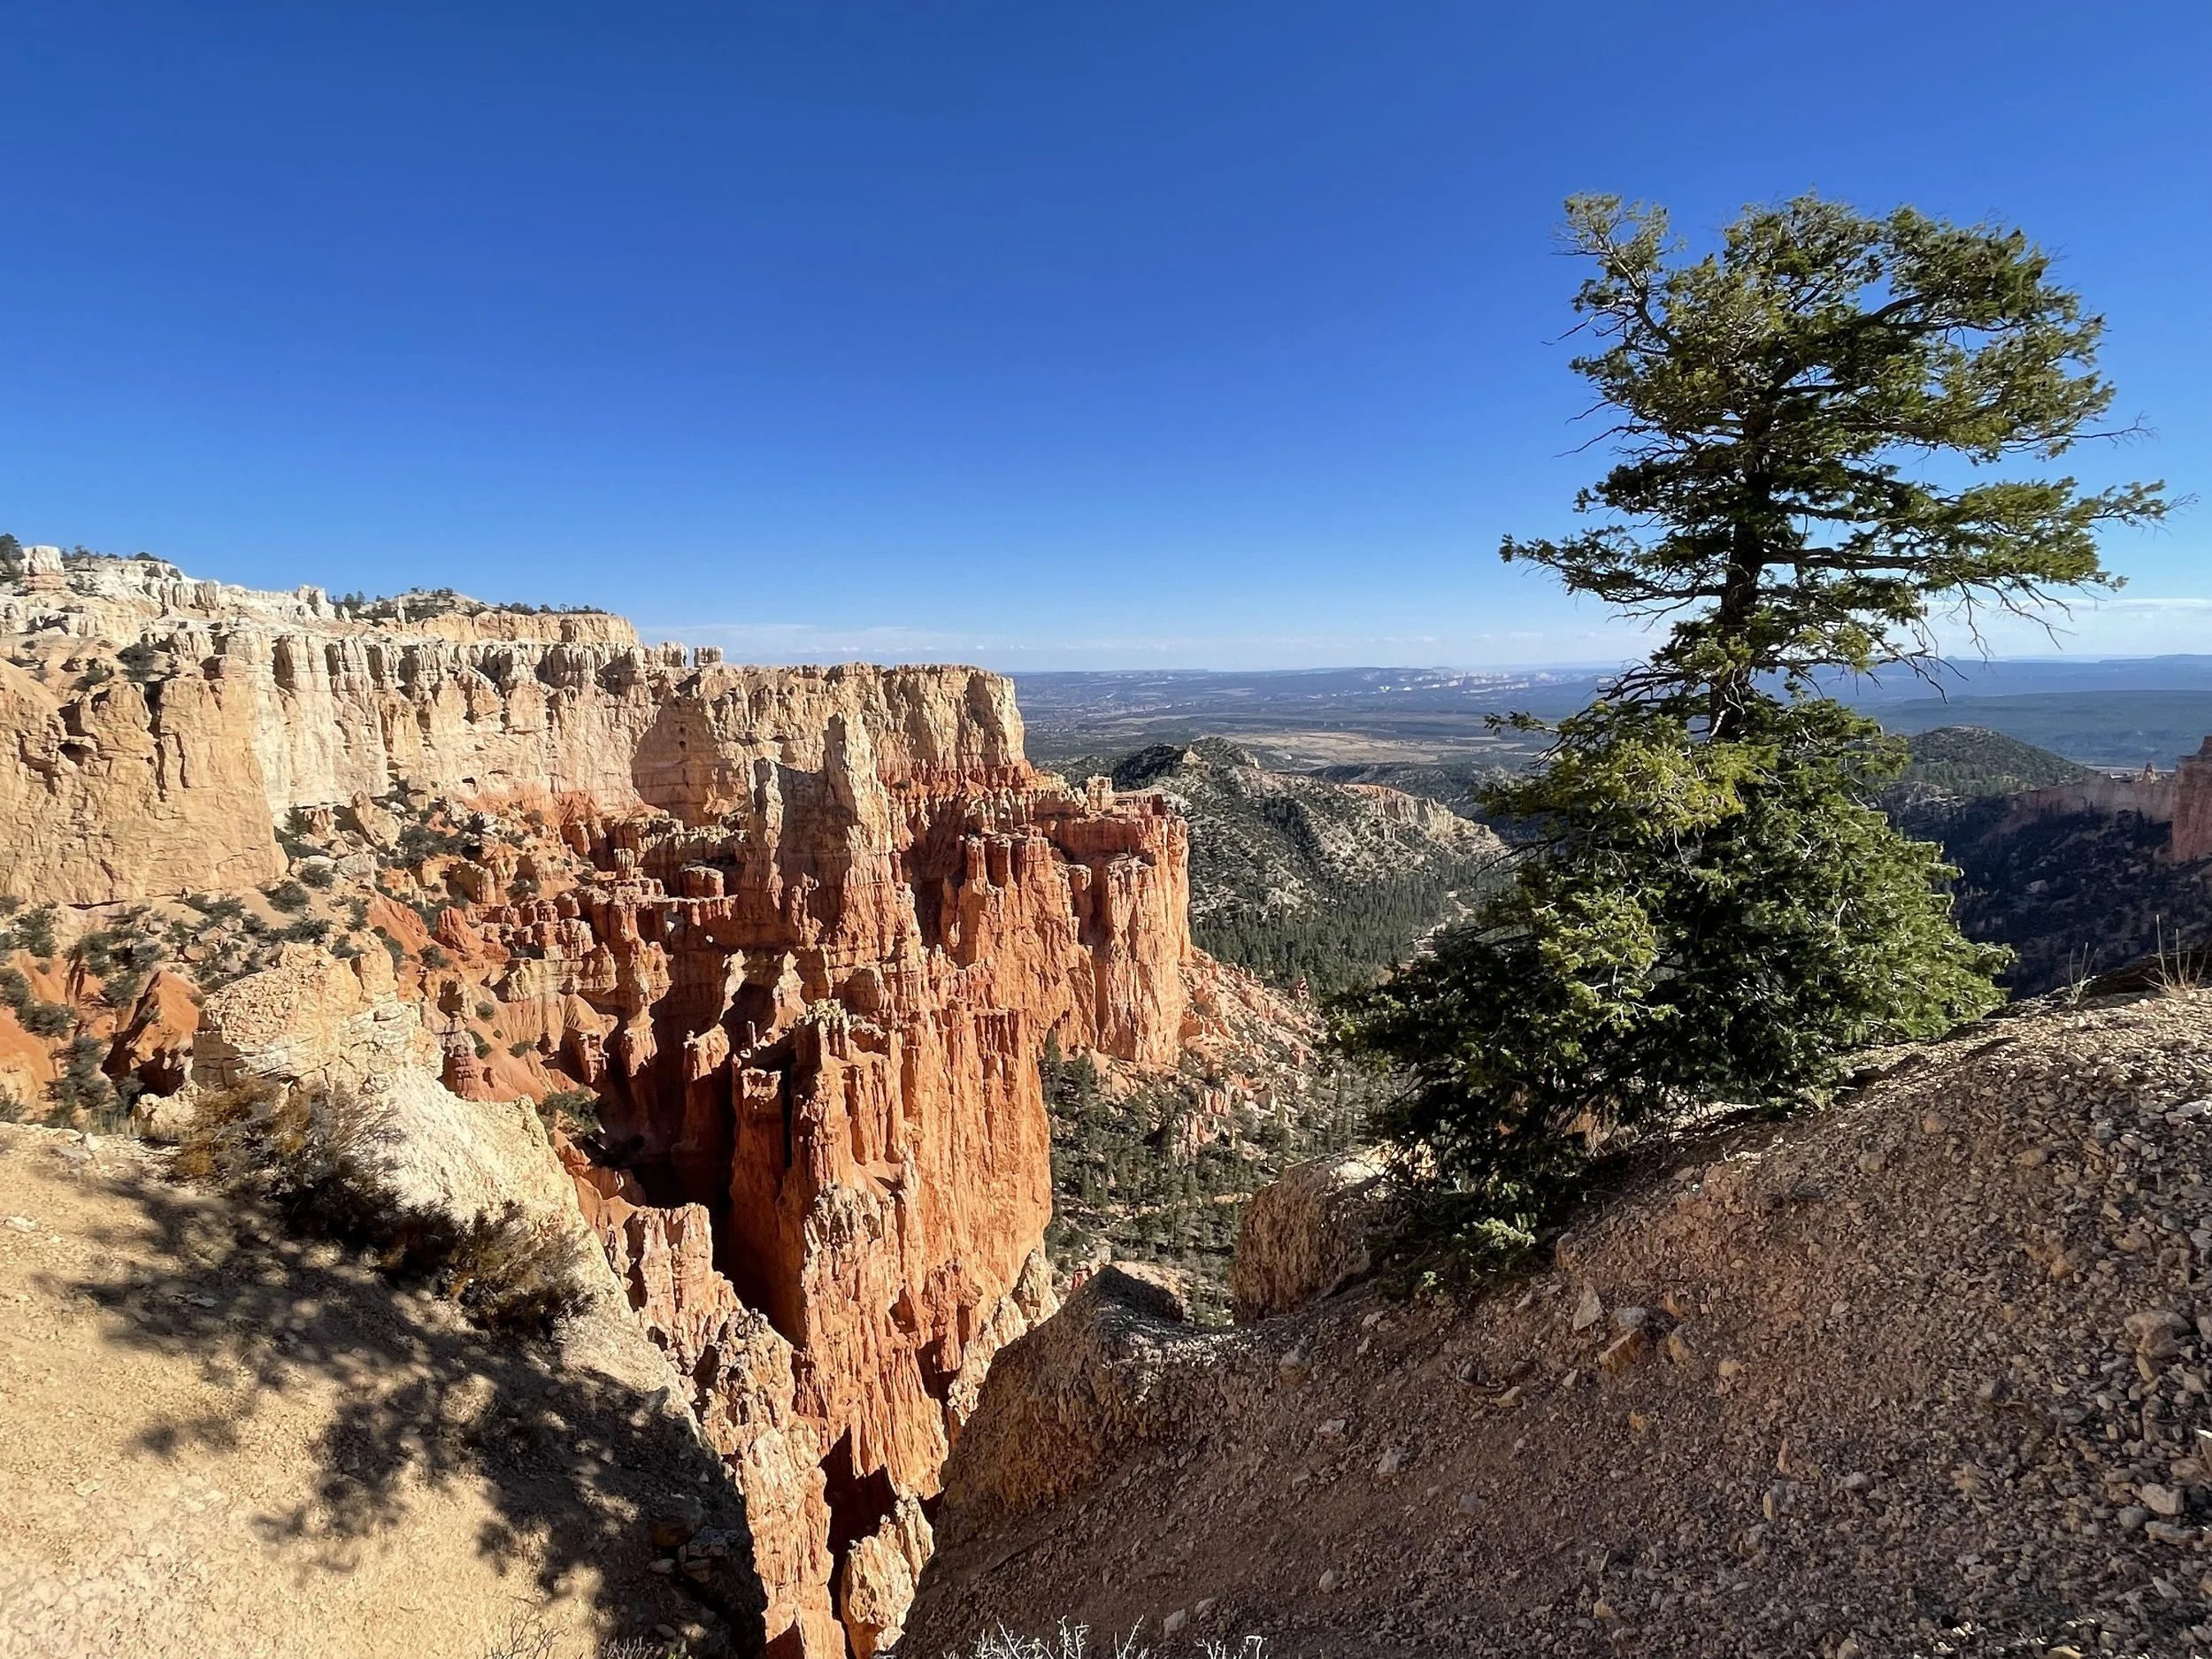
A Brief History of Bryce Canyon
Bryce Canyon was named after Ebenezer Bryce, a Mormon settler who homesteaded in the area in the 1870s. Locals referred to the amphitheater as "Bryce’s Canyon," and the name stuck. In 1923, the area was designated as Bryce Canyon National Monument before becoming a national park in 1928.
Park Information
Fees: $35 per vehicle, $20 per person (if entering on foot or bicycle), $30 per motorcycle. An annual Bryce Canyon Pass is available for $70.
Camping: The park has two campgrounds, North Campground and Sunset Campground, with a mix of first-come, first-served and reservable sites. There are also backcountry camping options with a permit.
Visitor Center: The Bryce Canyon Visitor Center is the main hub for park information, exhibits, and permits.
Best Time to Visit: Spring and fall offer the most comfortable temperatures and fewer crowds. Summer is the busiest season, while winter provides a unique and stunning snow-covered landscape.
Must-See Attractions
Bryce Amphitheater: The park’s most famous and iconic feature, filled with hoodoos and panoramic viewpoints.
Inspiration Point: One of the best viewpoints, especially for sunrise or sunset.
Sunrise Point & Sunset Point: Perfect spots for capturing the vibrant colors of the canyon.
Thor’s Hammer: A distinctive hoodoo that resembles a massive hammer balanced on a thin column.
Natural Bridge: A stunning natural arch formed through erosion.
Best Photography Locations
Sunrise Point: Ideal for capturing the first light illuminating the hoodoos.
Bryce Point: Offers an expansive view of the amphitheater and is especially great in the morning.
Inspiration Point: Best for golden-hour shots with deep shadows highlighting the rock formations.
Fairyland Point: A quieter location with spectacular views.
Popular Hiking Trails
Navajo Loop Trail (1.3 miles): A short but steep trail that descends into the amphitheater, passing through famous formations like Wall Street and Thor’s Hammer.
Queen’s Garden Trail (1.8 miles): One of the easiest ways to explore the hoodoos up close, connecting with Navajo Loop for a great combination hike.
Fairyland Loop Trail (8 miles): A longer, less crowded trail with fantastic views and up-close encounters with hoodoos.
Peekaboo Loop Trail (5.5 miles): A strenuous but rewarding hike through some of the park’s most stunning scenery.
Rim Trail (varies in length): Runs along the canyon’s edge, offering breathtaking views with little elevation change.
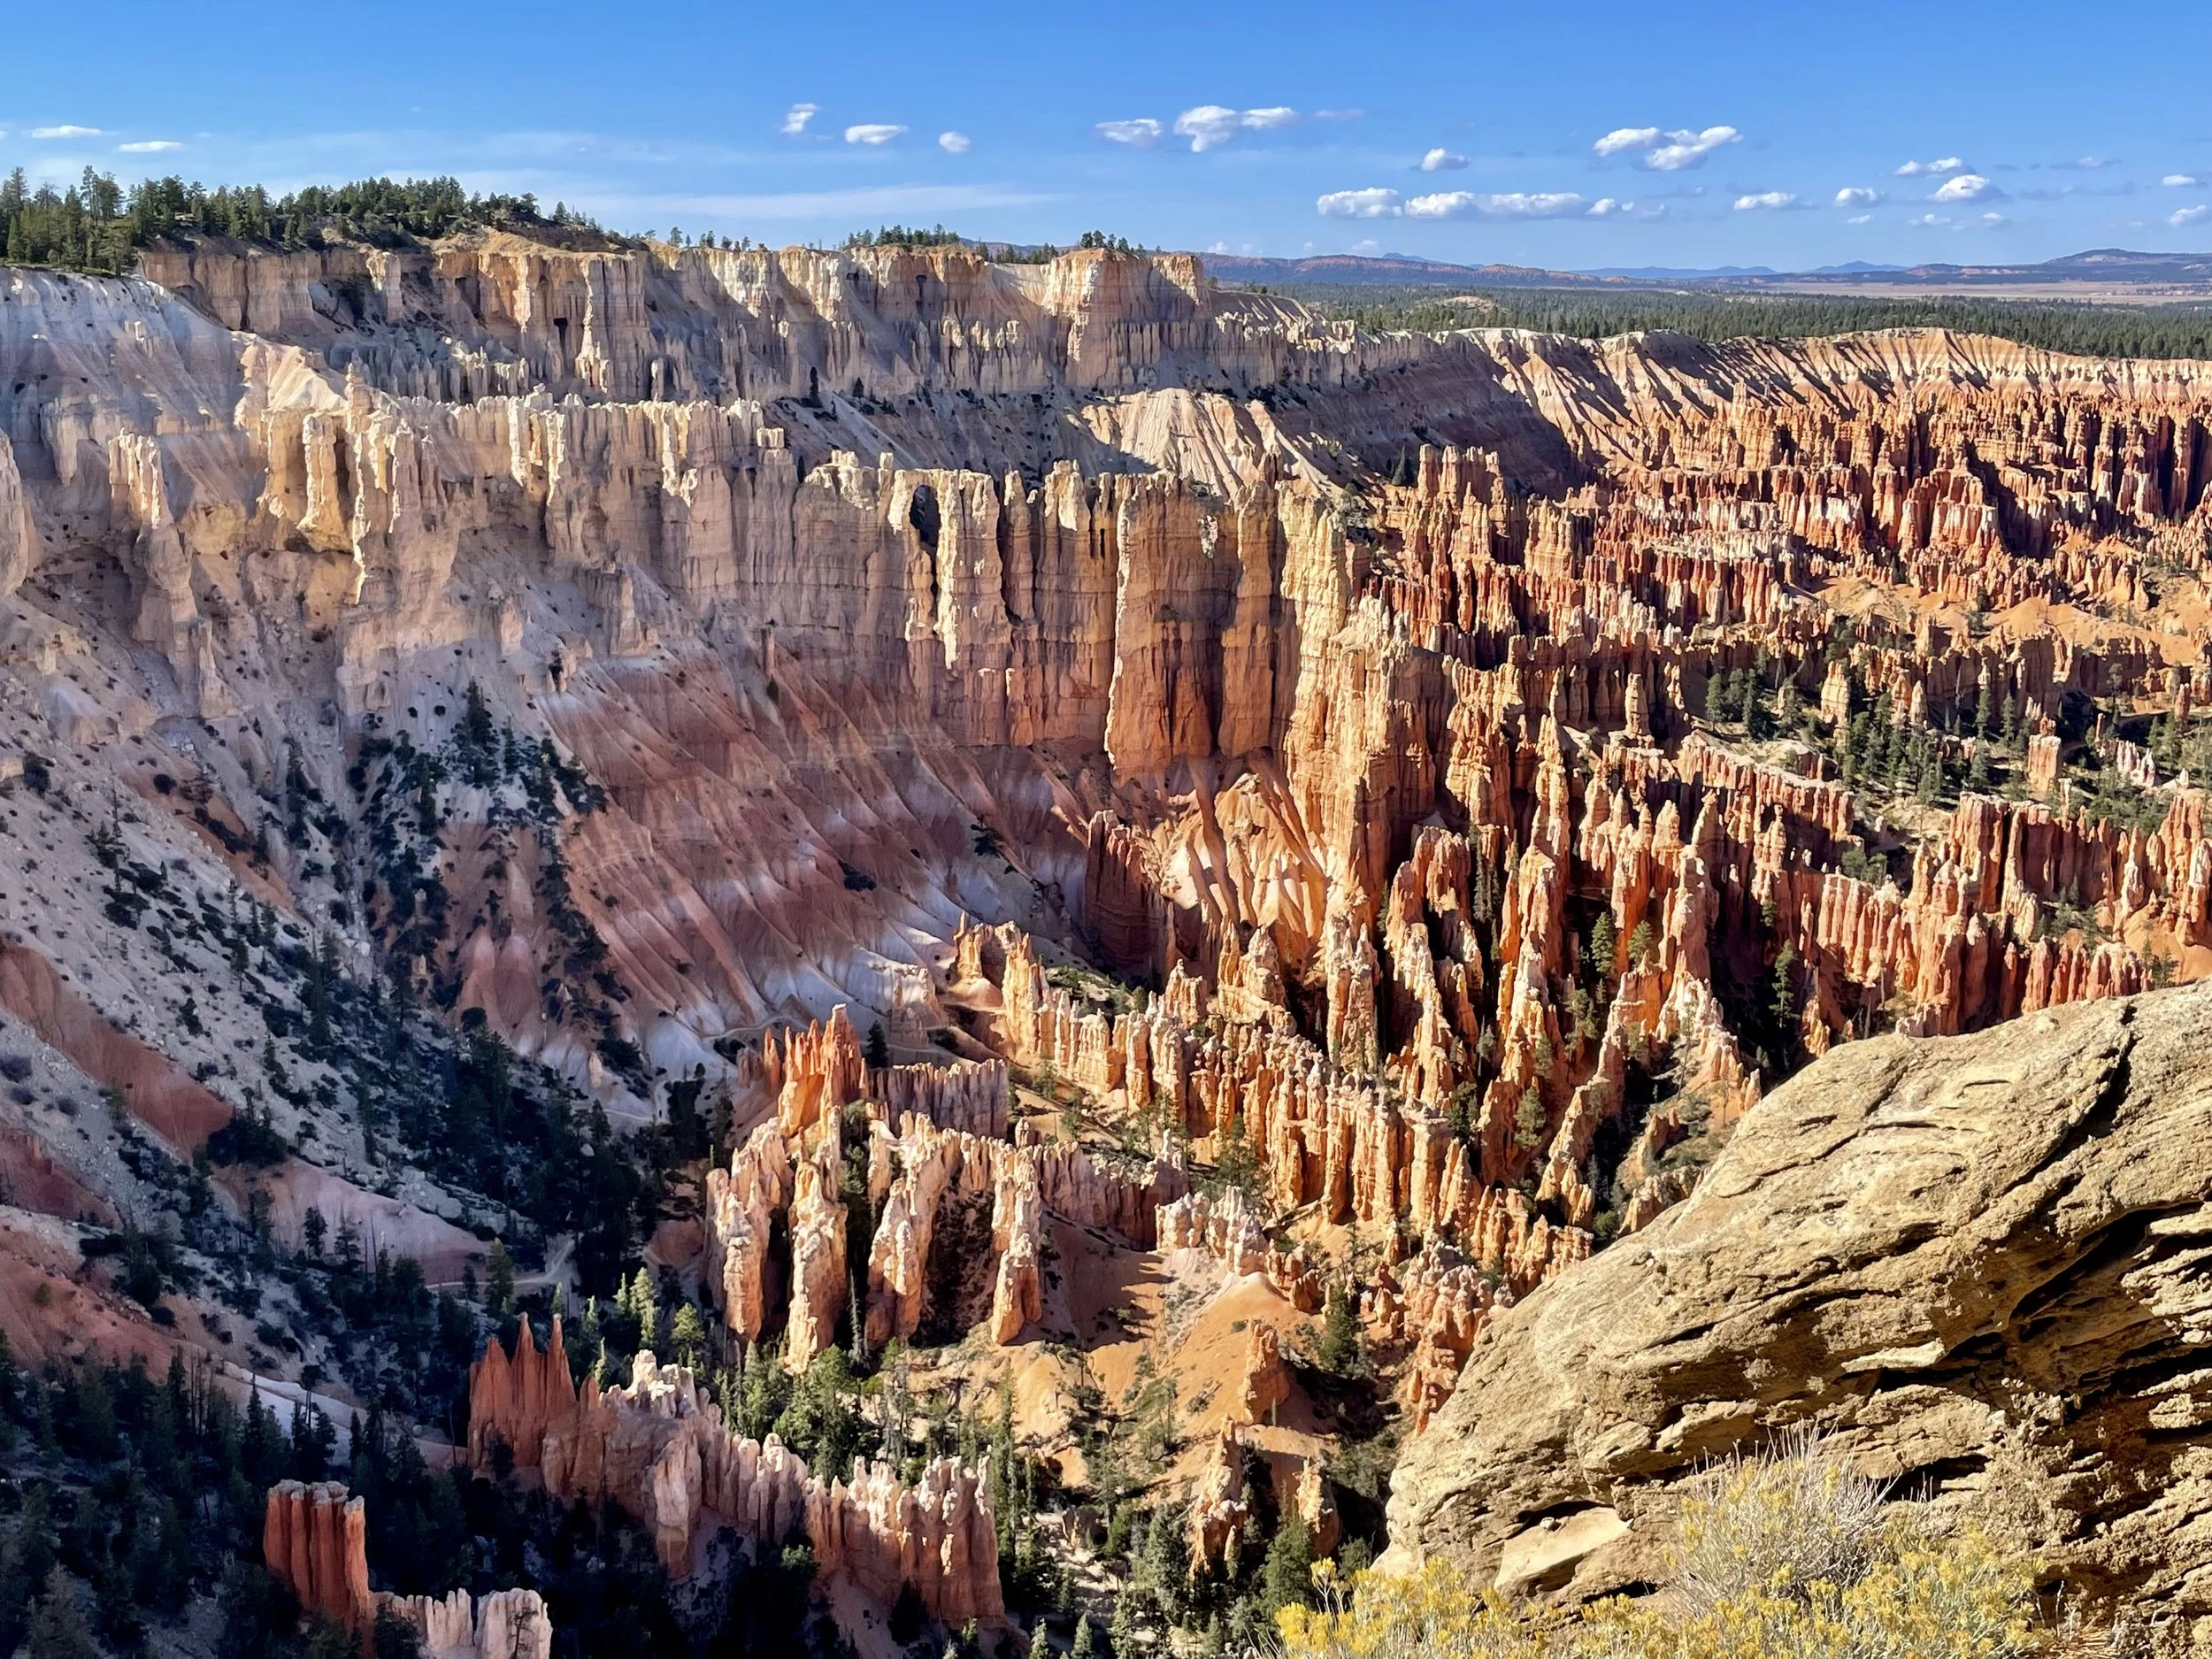
#15 Zion National Park, Utah
My visit to Zion National Park was completely unplanned. Originally, I was headed to Great Basin National Park, but a jackknifed semi-truck brought traffic to a standstill. With no sign of it clearing up anytime soon, my Dad suggested a detour—why not head to Zion instead?
That’s the great thing about Las Vegas: within just a few hours’ drive, you have access to several national parks. Zion, being one of the most well-known and accessible, became our new destination.
Once past the traffic, the journey to Zion was beatiful. We drove through canyons, small desert towns, and stretches of open road. As we neared the park, traffic thickened, confirming we were close. By the time we reached the entrance, cars were nearly at a standstill. I took advantage of the slow-moving line to hop out and snap my obligatory photo by the Zion National Park sign.
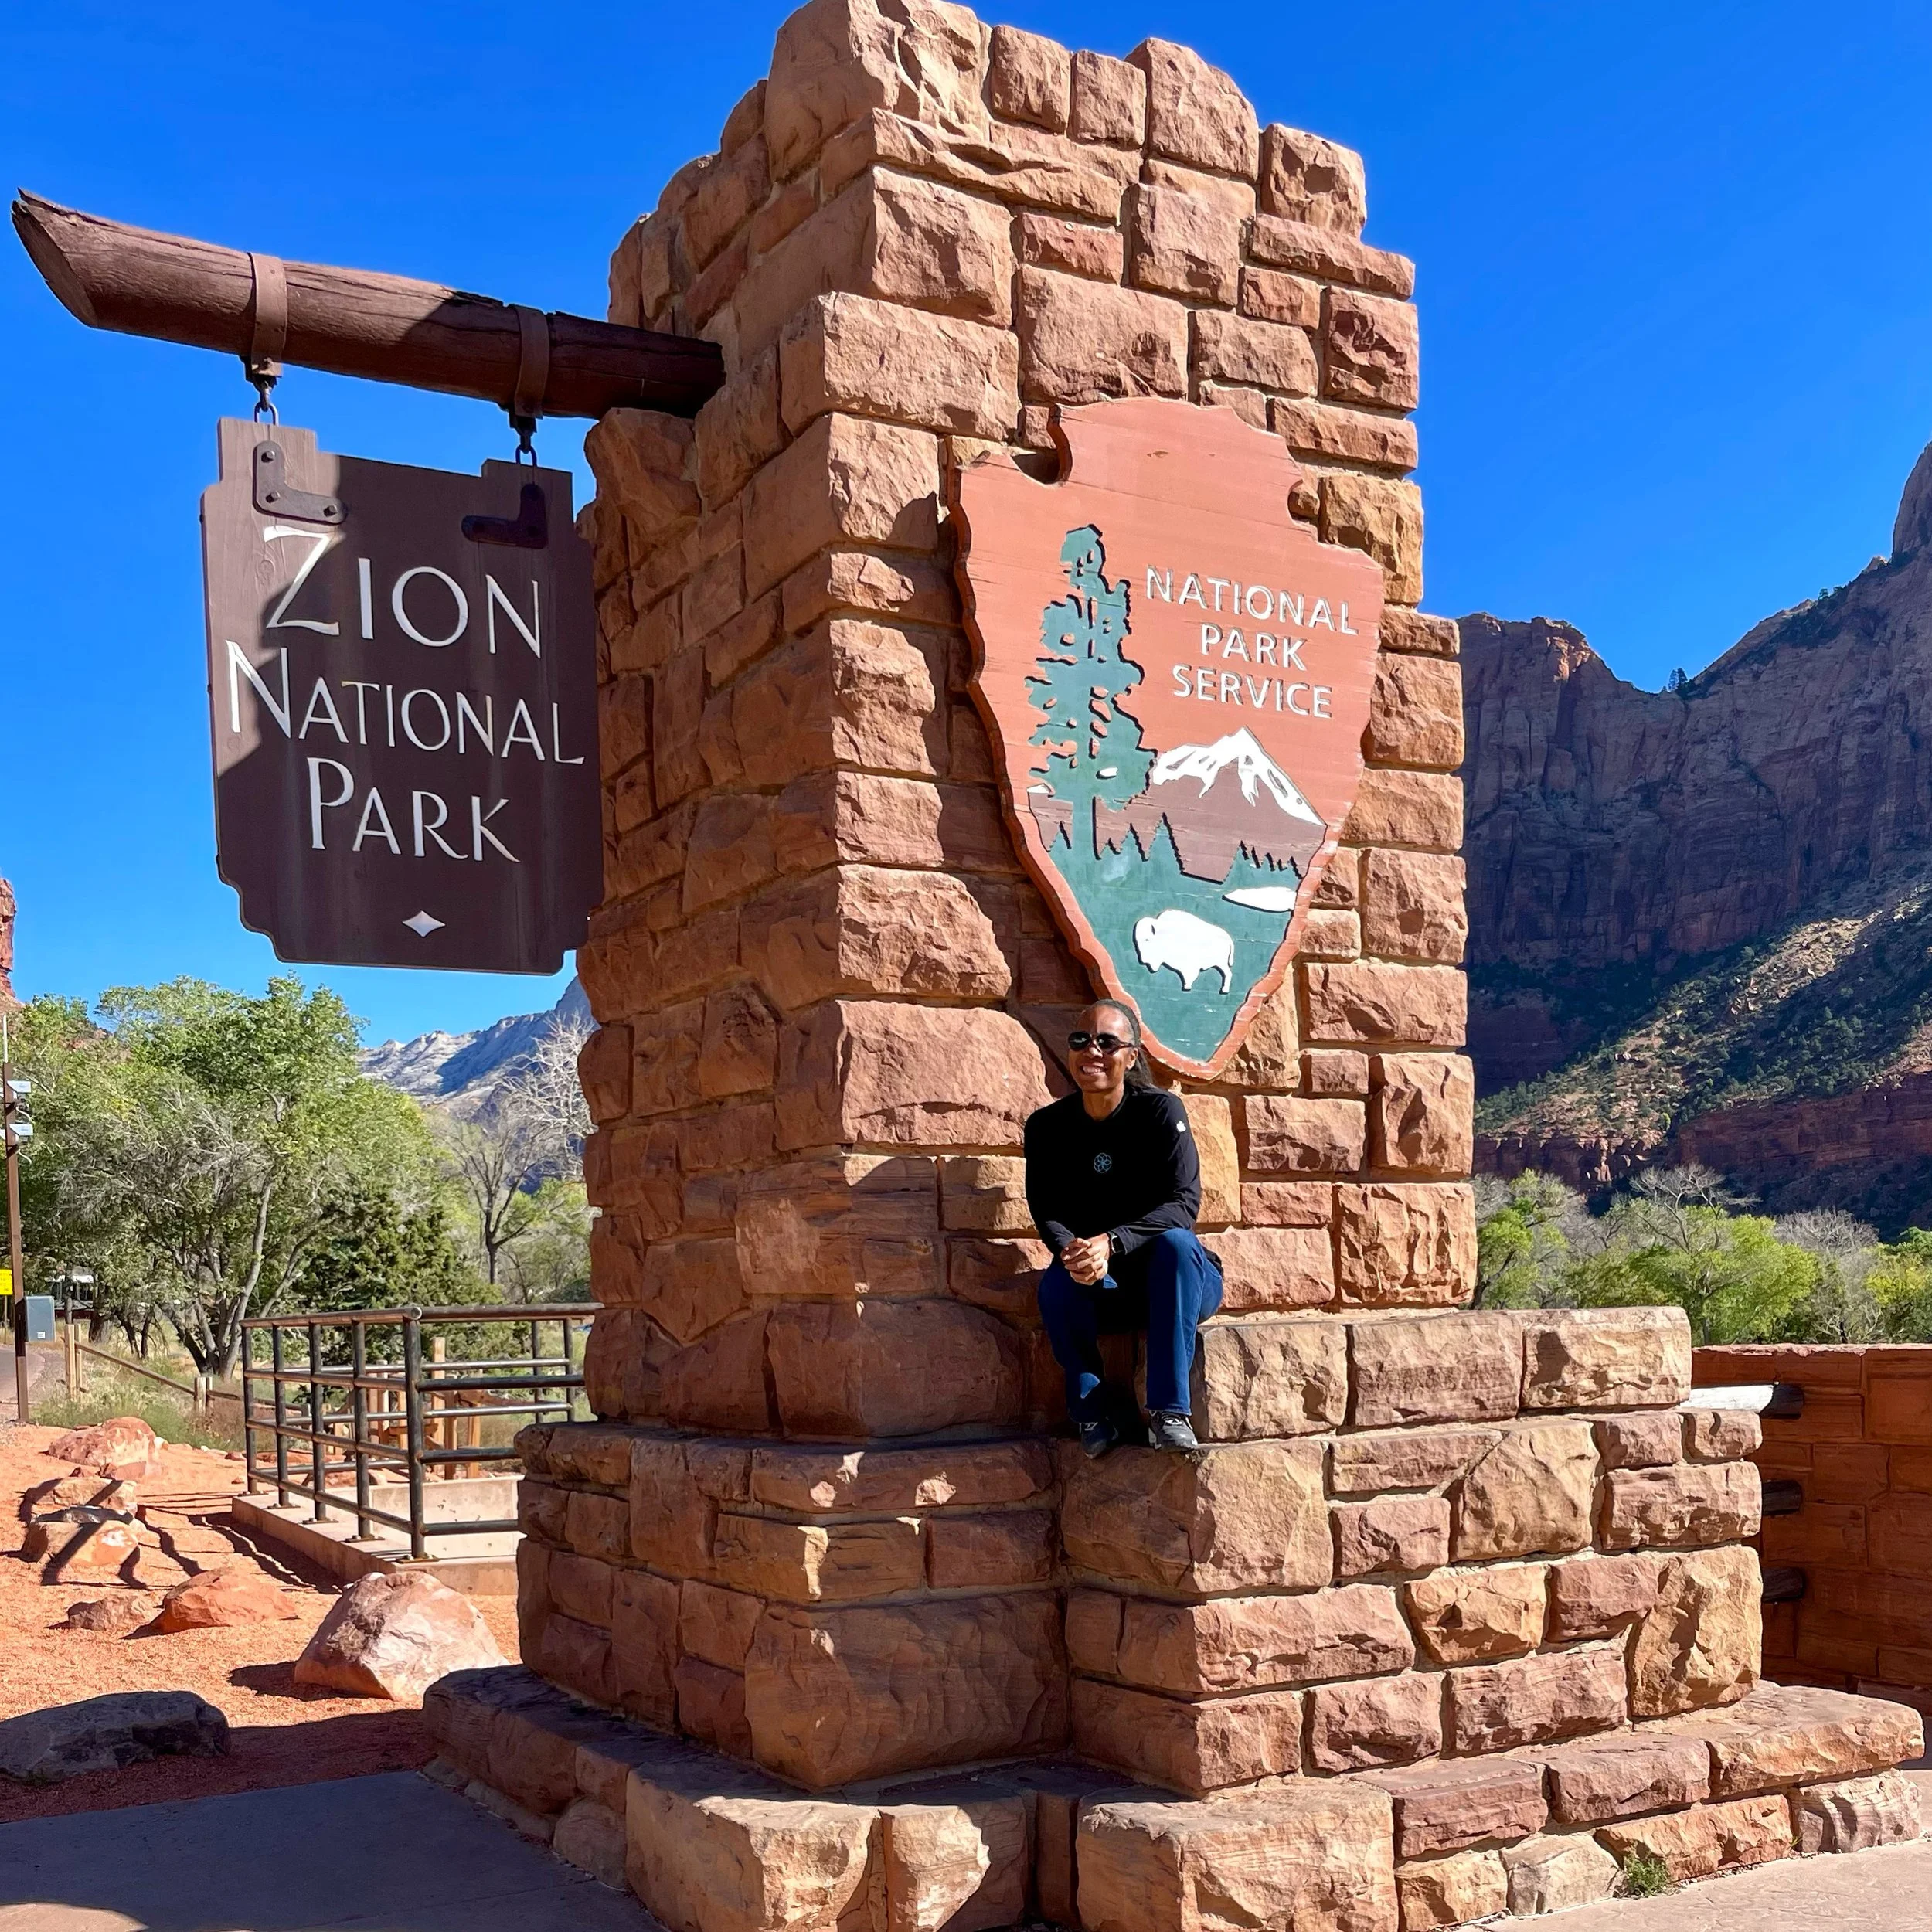
First Impressions & Visitor Center
While Zion’s beauty is undeniable, my visit wasn’t the most enjoyable. The sheer number of visitors made it difficult to truly appreciate the park’s tranquility.
It took me 45 minutes just to find parking at the Zion Canyon Visitor Center. Desperate, I had to temporarily park in a handicap spot while my Dad stayed in the car, ready to move it, if needed. Inside, the crowds persisted—there was even a long wait at the passport stamp station as one visitor meticulously stamped multiple books. I’ll admit, the experience tested my patience.
Once we escaped the congestion, we drove the scenic roads through the park, stopping at overlooks to take in the incredible views. Zion is undoubtedly stunning, but if I return, it will be during the off-season. I visited on a Tuesday in October, yet it was still overwhelmingly busy.
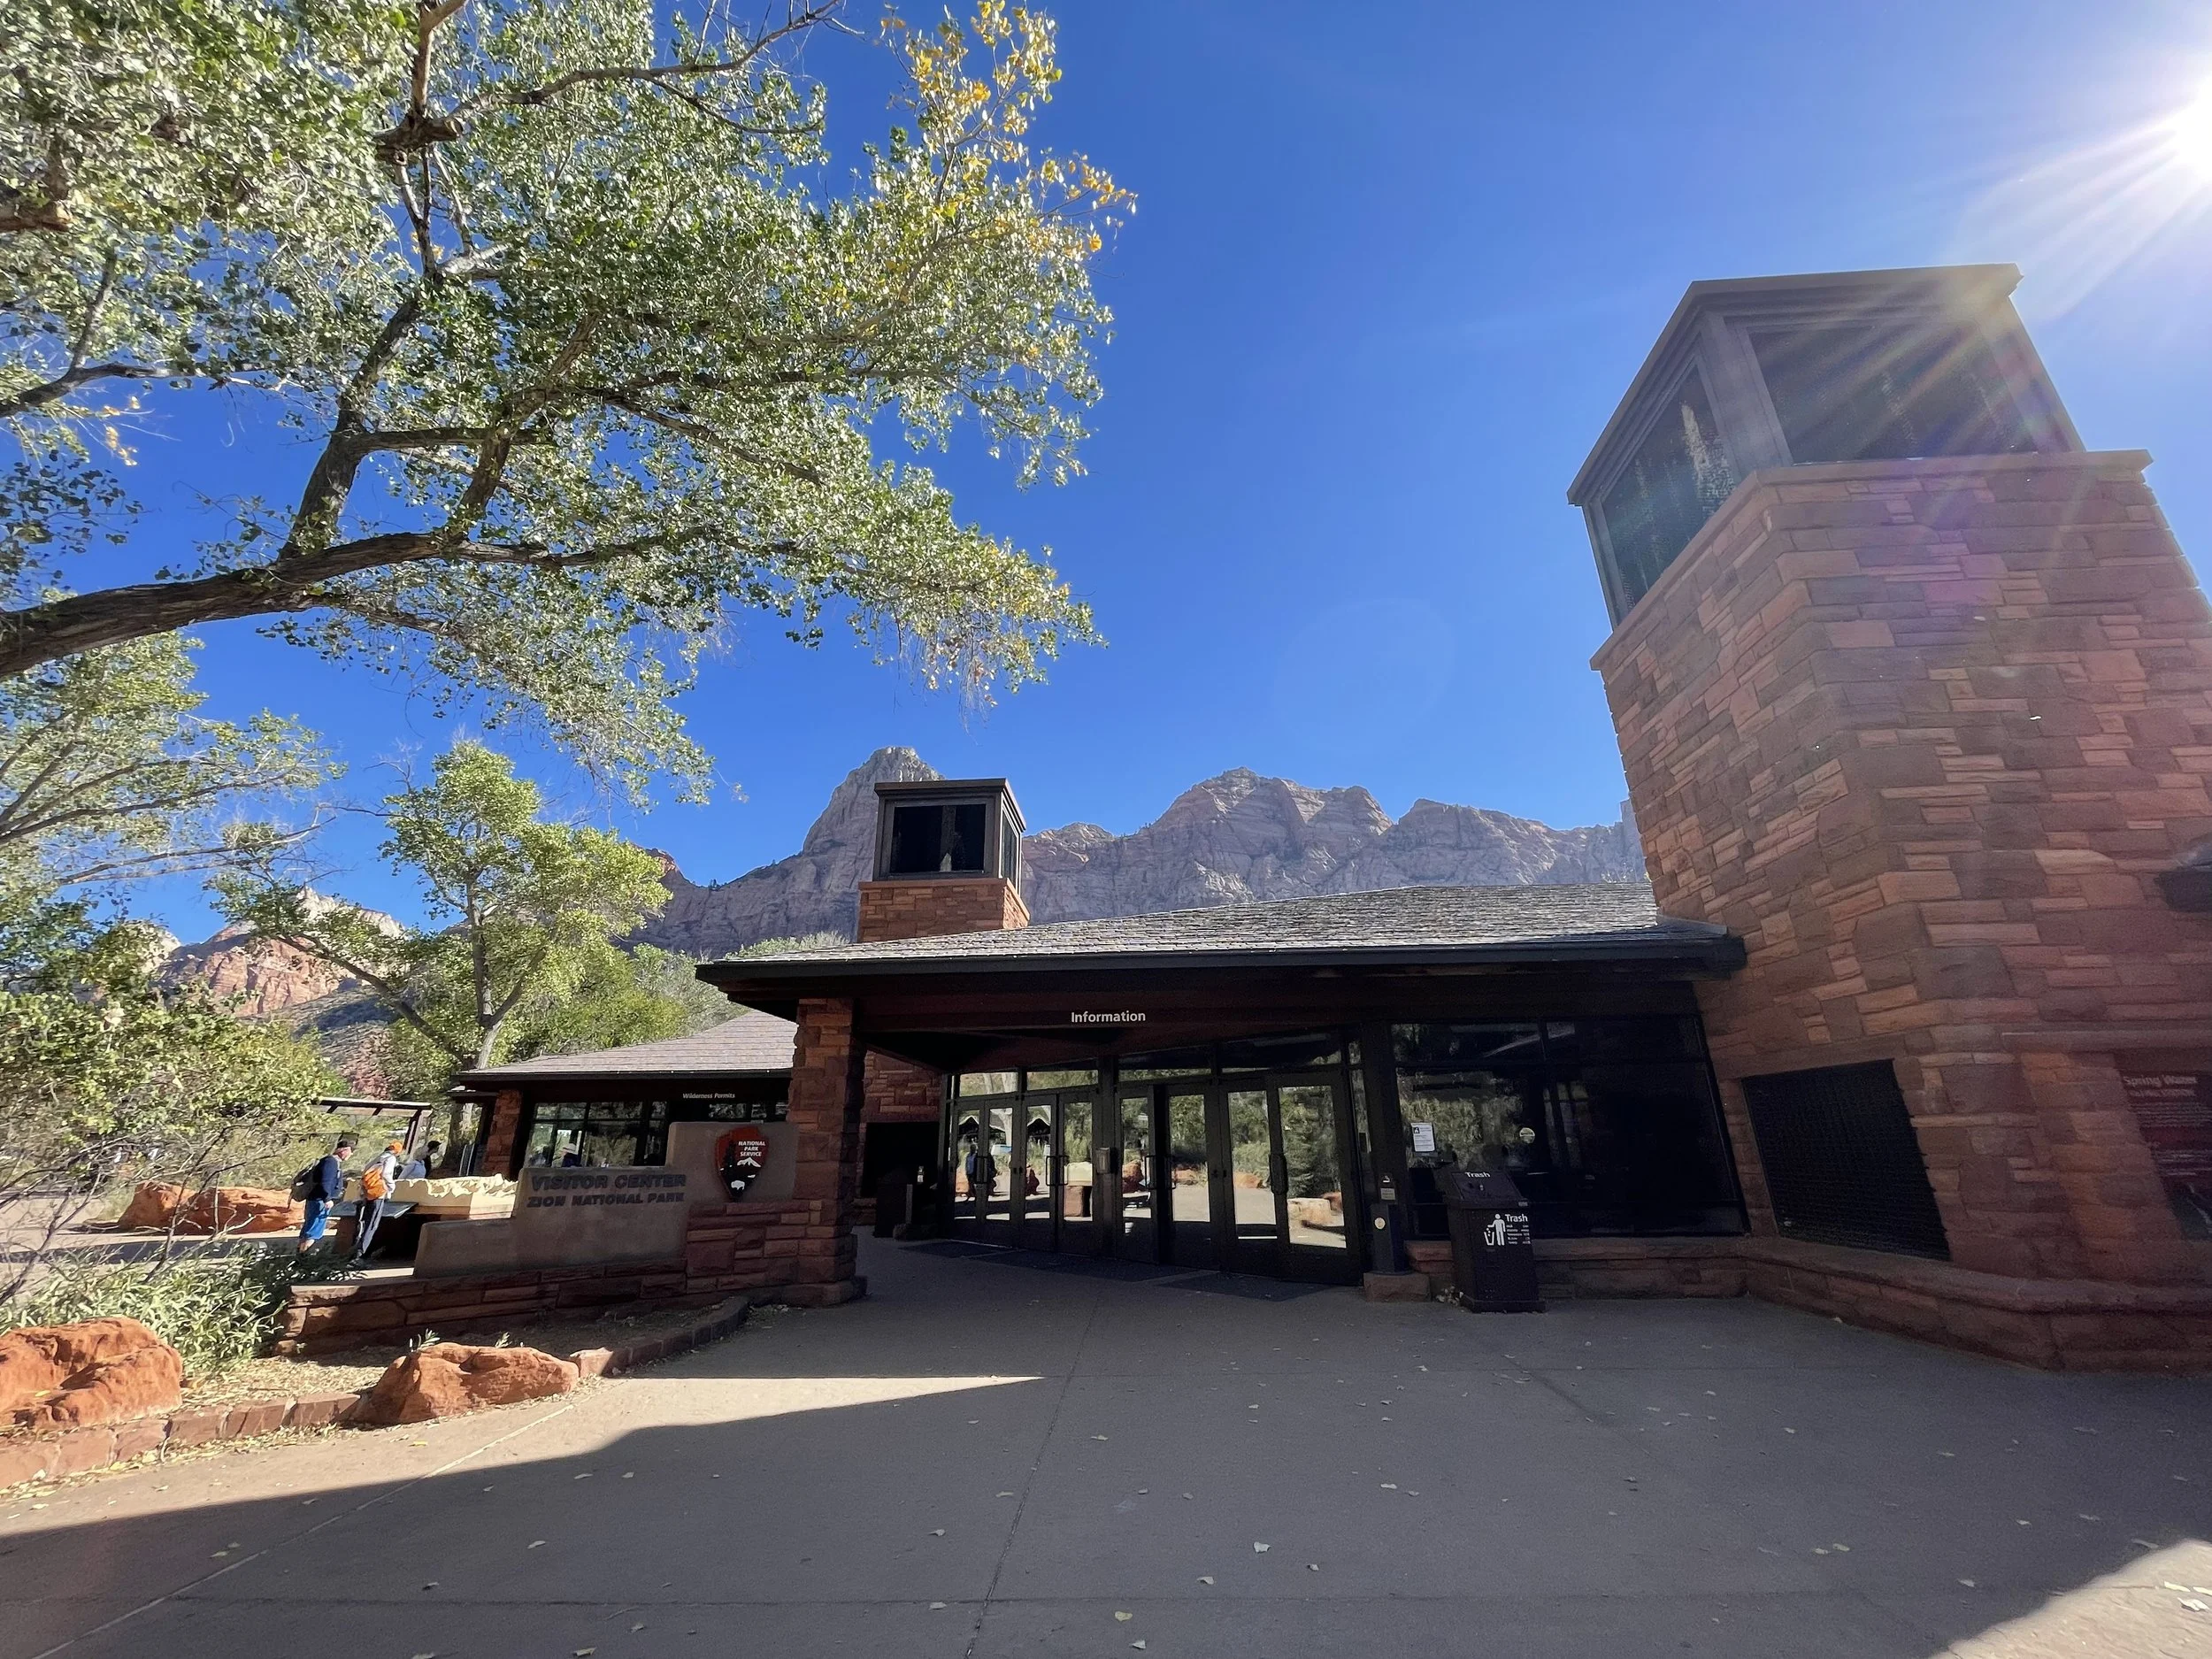
About Zion National Park
Located in southwestern Utah, Zion National Park is famed for its towering red rock cliffs, dramatic slot canyons, and scenic river valleys. Established in 1919 as Utah’s first national park, Zion spans 229 square miles (593 km²).
The park’s crown jewel is Zion Canyon, a 15-mile gorge carved by the Virgin River. With canyon walls soaring up to 2,000 feet (610 meters), it boasts some of the most spectacular landscapes in the U.S.
Popular Hikes & Attractions
Angels Landing (Permit Required)
Best for thrill-seekers and experienced hikers.
A 5.4-mile roundtrip hike featuring steep switchbacks and a narrow ridge with sheer drop-offs.
The Narrows (Best for wading through water)
A hike through the Virgin River, where you’ll walk between towering canyon walls. Water levels vary, so check conditions before setting out.
Emerald Pools (Easy to Moderate)
Great for families and casual hikers.
Leads to a series of waterfalls and pools, with the Lower Pool being the easiest and the Upper Pool requiring more effort.
Observation Point (Epic Views)
A strenuous 8-mile roundtrip hike offering panoramic views of Zion Canyon, often considered better than Angels Landing—without the crowds.
Canyon Overlook Trail (Short & Stunning)
A 1-mile roundtrip hike with one of the best viewpoints in Zion, requiring less effort than longer trails.
Park Fees & Shuttle System
Entrance Fees:
Private Vehicle: $35 (valid for 7 days)
Motorcycle: $30
Per Person (walk-in or bicycle): $20
Annual Pass: $80 (includes access to all U.S. national parks)
Shuttle System (April – November):
To reduce congestion, private vehicles are prohibited on Zion Canyon Scenic Drive during peak season. Instead, visitors must use the free shuttle system, which runs every 5–10 minutes between the Visitor Center and major trailheads.
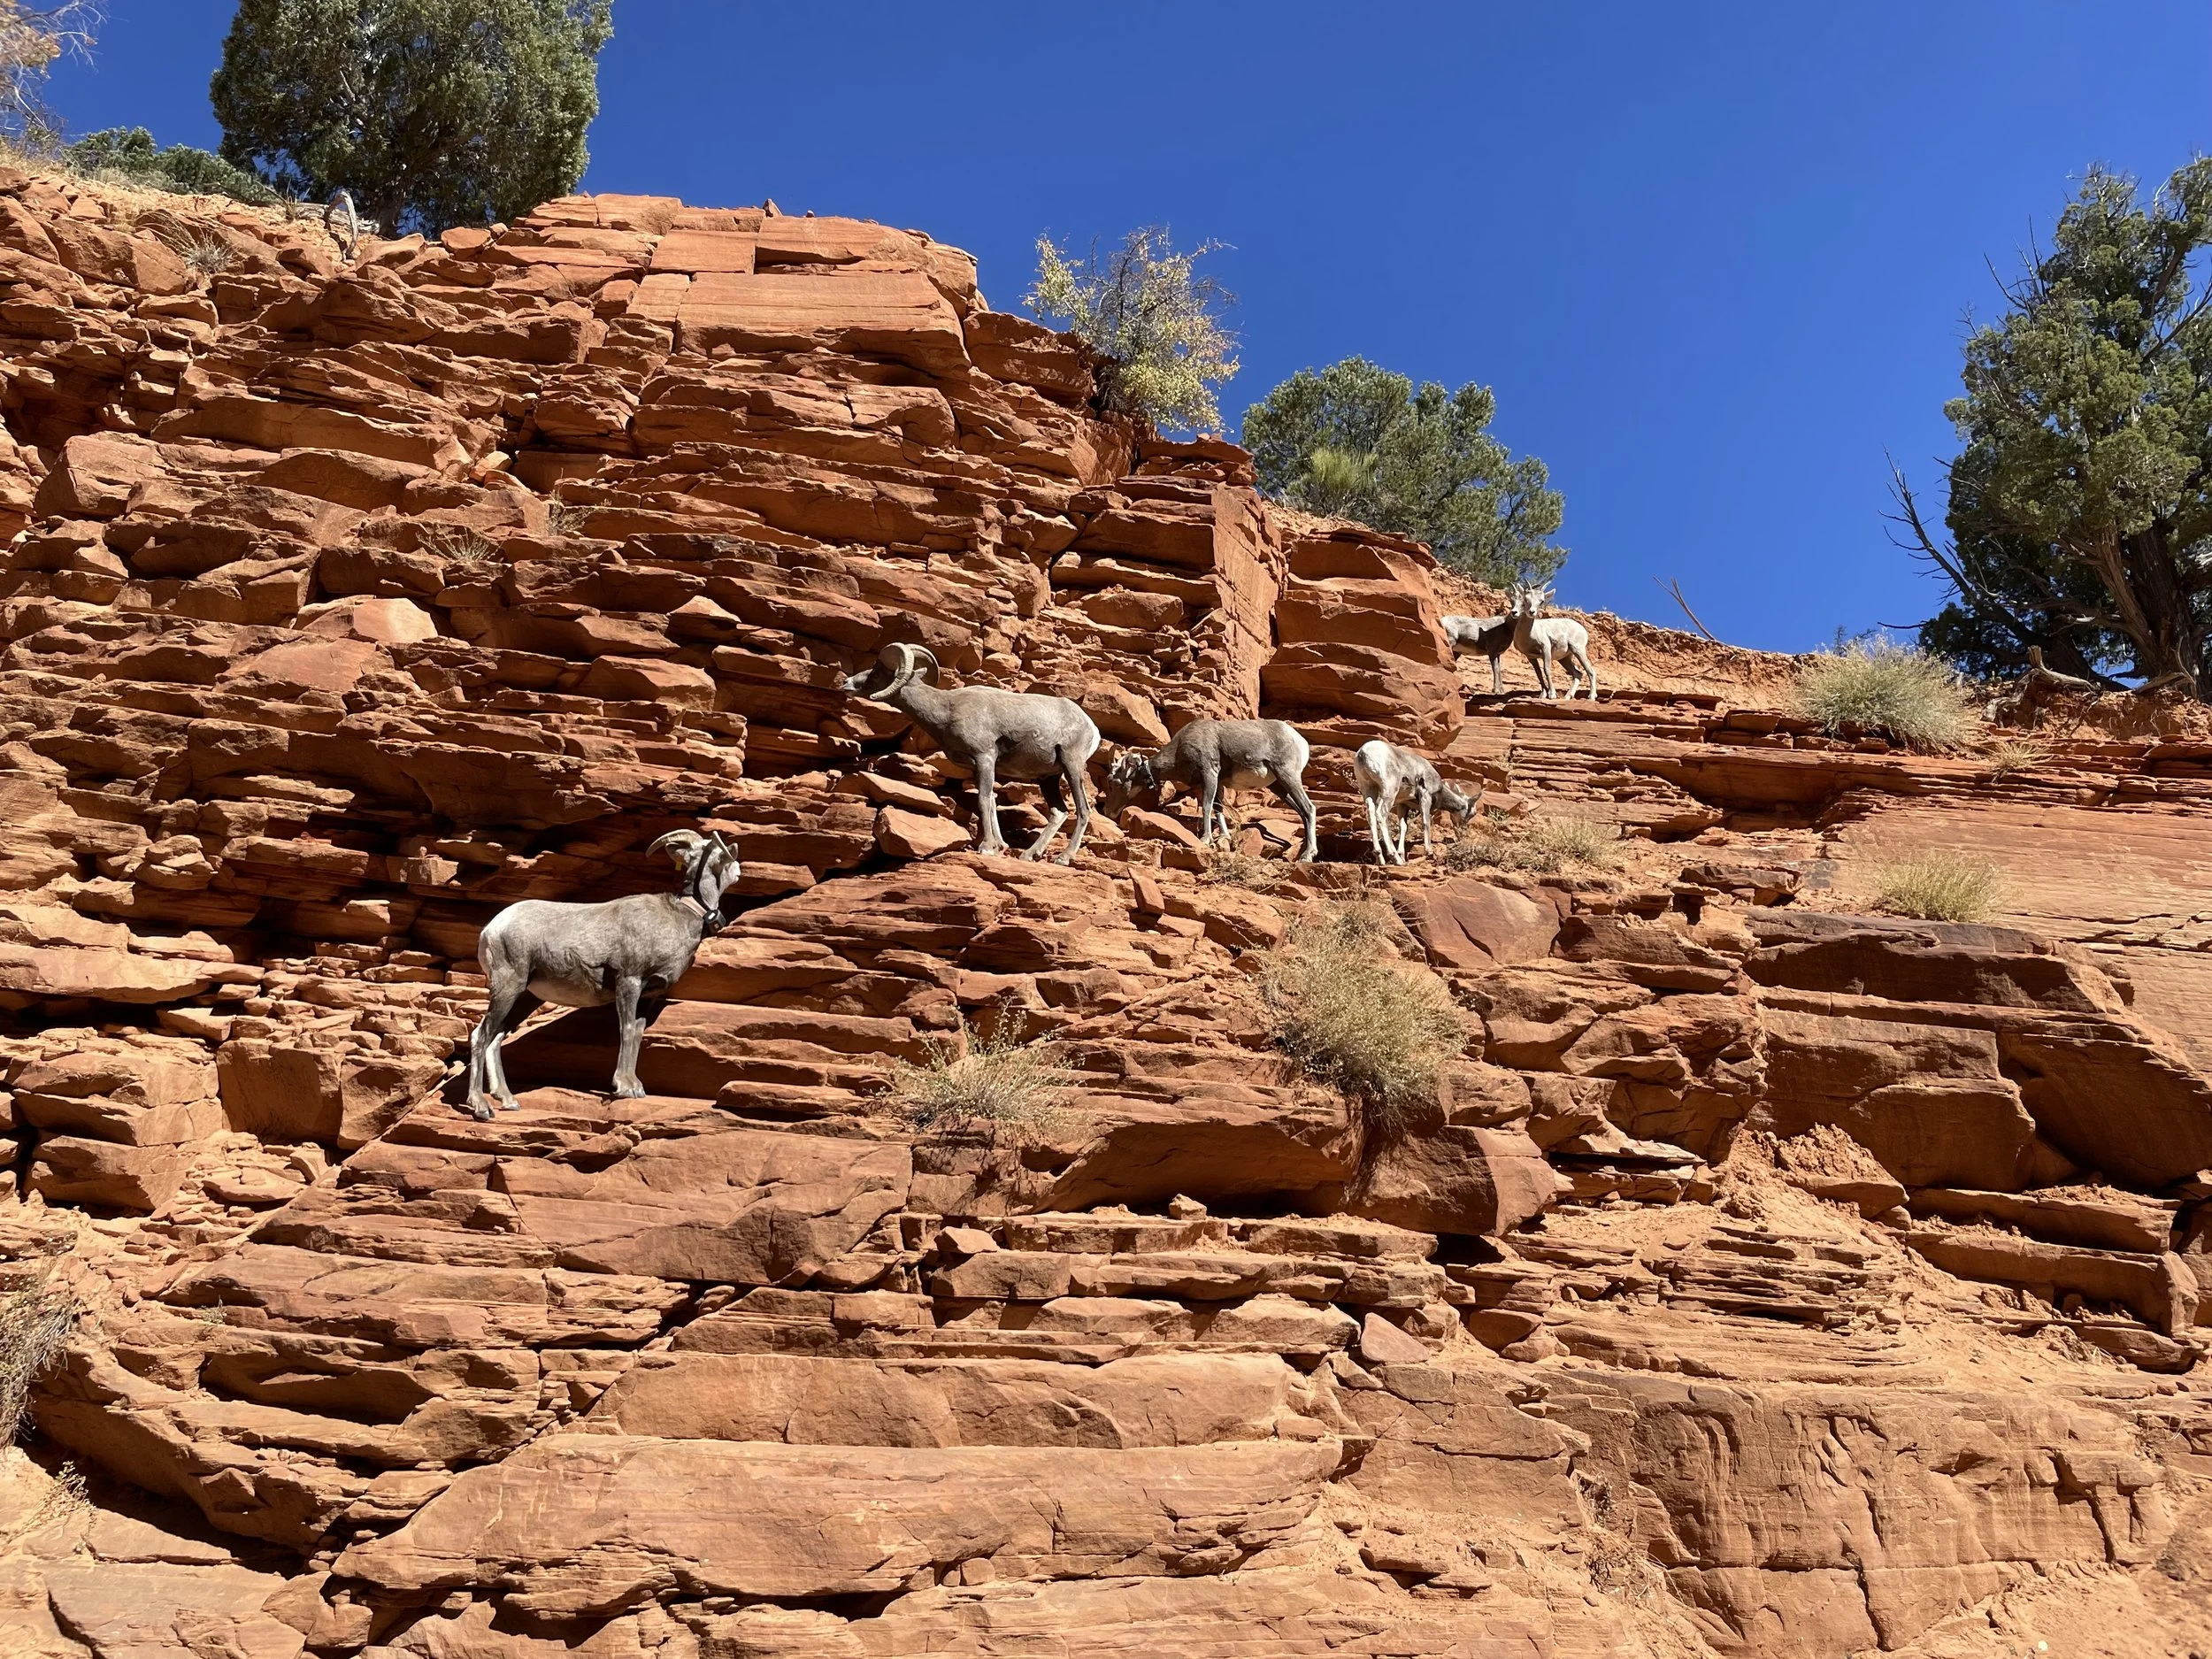
Best Photo Spots in Zion
Zion National Park Entrance Sign – A must-have photo.
Canyon Overlook Trail – Stunning panoramic views.
Angels Landing – A daring yet breathtaking summit shot.
The Narrows – Unique perspective with towering canyon walls.
Court of the Patriarchs – A quick stop with dramatic rock formations.
Zion-Mount Carmel Highway – A scenic drive featuring tunnels and switchbacks.
Where to Stay in & Around Zion
Lodging Inside the Park
Zion Lodge
The only hotel inside the park, located along Scenic Drive.
Offers cabins, hotel rooms, and suites.
Reservations fill up months in advance, especially during peak season.
Camping Inside Zion
South Campground (March – November)
Near the Visitor Center; reservations required.
Watchman Campground (Open year-round)
Offers tent and RV sites, some with electric hookups; reservations highly recommended.
Lava Point Campground (Summer only)
First-come, first-served sites; a more remote experience.
Lodging Outside the Park
Springdale, UT (5 min from Zion’s entrance)
Closest town with hotels, restaurants, and shuttle access.
Options: Cliffrose Lodge (luxury), Zion Park Motel (budget), Cable Mountain Lodge (great views).
Hurricane, UT (30 min from Zion)
More affordable hotels and vacation rentals.
Good for road-trippers visiting multiple parks.
St. George, UT (1 hour from Zion)
A larger city with hotels, dining, and shopping.
Ideal for those visiting Zion, Bryce Canyon, and the Grand Canyon.
Things to Consider When Visiting Zion
Best Time to Visit
Fall (Sept – Nov): Cooler weather, fewer crowds.
Spring (Mar – May): Beautiful wildflowers, but higher river levels.
Summer (Jun – Aug): Hot (100°F+) and extremely crowded.
Winter (Dec – Feb): Less crowded, though some trails may be icy.
How to Avoid Crowds
Visit early (before 9 AM) or late (after 3 PM).
Travel in the off-season (winter or late fall).
Explore lesser-known trails (Kolob Canyons, East Rim).
Permits & Restrictions
Angels Landing now requires a permit. Apply online in advance.
The Narrows may close after heavy rain due to flash flood risks.
No drones allowed in the park.
Safety Tips
Stay hydrated—Zion gets extremely hot.
Wear sturdy hiking shoes; trails can be steep and rocky.
Check weather conditions—flash floods are a real danger in slot canyons.
#14 Death Valley National Park, California
Zabriskie Point
I arrived at Death Valley National Park on an October day in the late afternoon. Earlier that day, I landed in Las Vegas, picked up my rental car, dropped my luggage at the hotel, picked up my Dad, and off we went into the desert. The 114 miles drive from Las Vegas to Death Valley takes about two hours, making it an easy and scenic road trip. I intentionally planned my visit for the fall—there was no way I was going to brave the park in the summer. The name “Death Valley” says it all. This is one of the hottest places on Earth, and if you’re not careful, dehydration and heat exhaustion can be serious risks. From the early 2000’s to the present there has been an average of 4 deaths per year in the park.
We entered the park in California, as most of Death Valley National Park lies within the state, though a small portion stretches into Nevada. Death Valley itself is part of the larger Basin and Range Province, a vast geological region that extends across much of the western United States. It is also the largest national park in the contiguous U.S., covering over 3.4 million acres of rugged mountains, rolling sand dunes, and deep, expansive valleys.

As soon as we arrived, I made my obligatory stop at the Death Valley National Park sign, snapped a photo, and then headed straight for the Furnace Creek Visitor Center to get my National Park Passport stamp. This is also where you can check the giant outdoor thermometer, which displays the current temperature in the valley. When I was there, it was a balmy 93°F (36°C)—and that was considered mild!
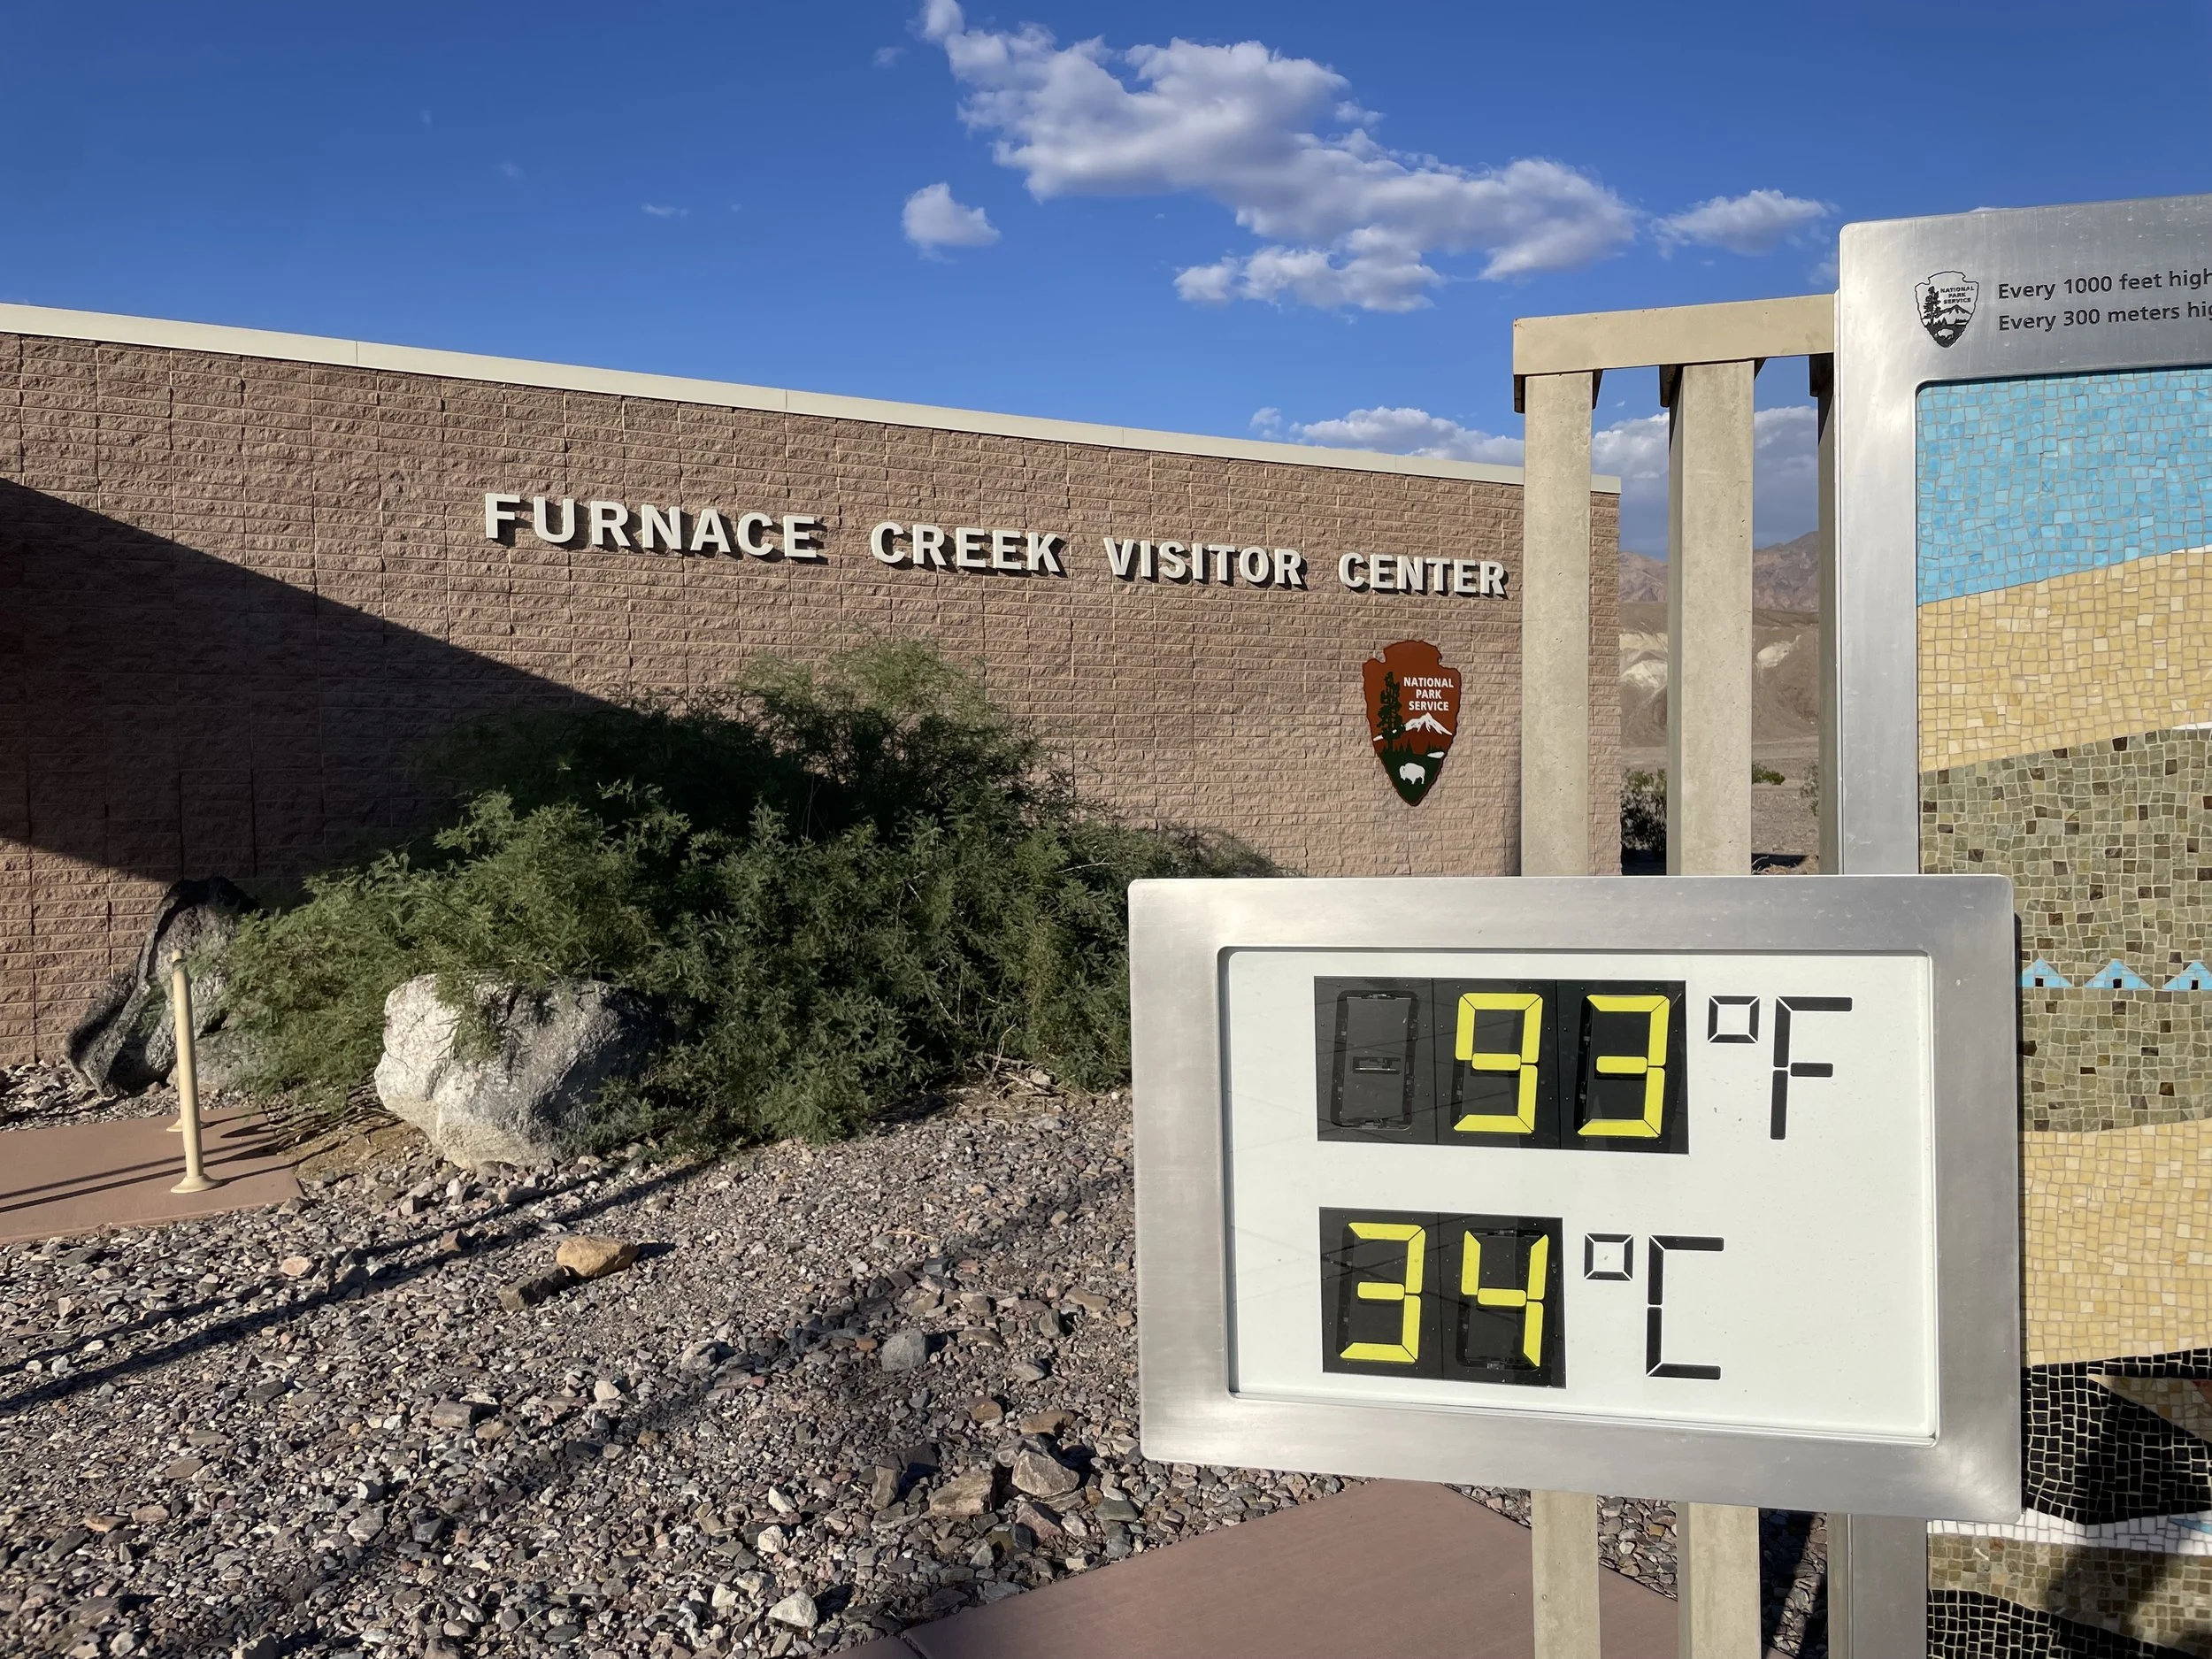
A Few Facts About Death Valley National Park
• Hottest Temperature Ever Recorded: Death Valley holds the record for the highest air temperature ever recorded on Earth—134°F (56.7°C) at Furnace Creek in 1913.
• Lowest Point in North America: The park’s Badwater Basin sits at 282 feet (86 meters) below sea level, making it the lowest point in North America.
• A Land of Extremes: The valley is bordered by towering mountain ranges, including the Panamint Range, home to Telescope Peak, which rises to 11,043 feet (3,366 meters)—a striking contrast to the low desert floor.
• Ancient History: Indigenous people, including the Timbisha Shoshone, have lived in Death Valley for at least a thousand years, surviving in one of the harshest environments on Earth. Later, in the mid-1800s, gold and borax mining brought fortune seekers to the region, many of whom struggled to survive in the valley’s unforgiving conditions.
• Rare Superblooms: On rare occasions, after heavy winter rains, the desert comes alive with wildflowers, creating a breathtaking “superbloom.”
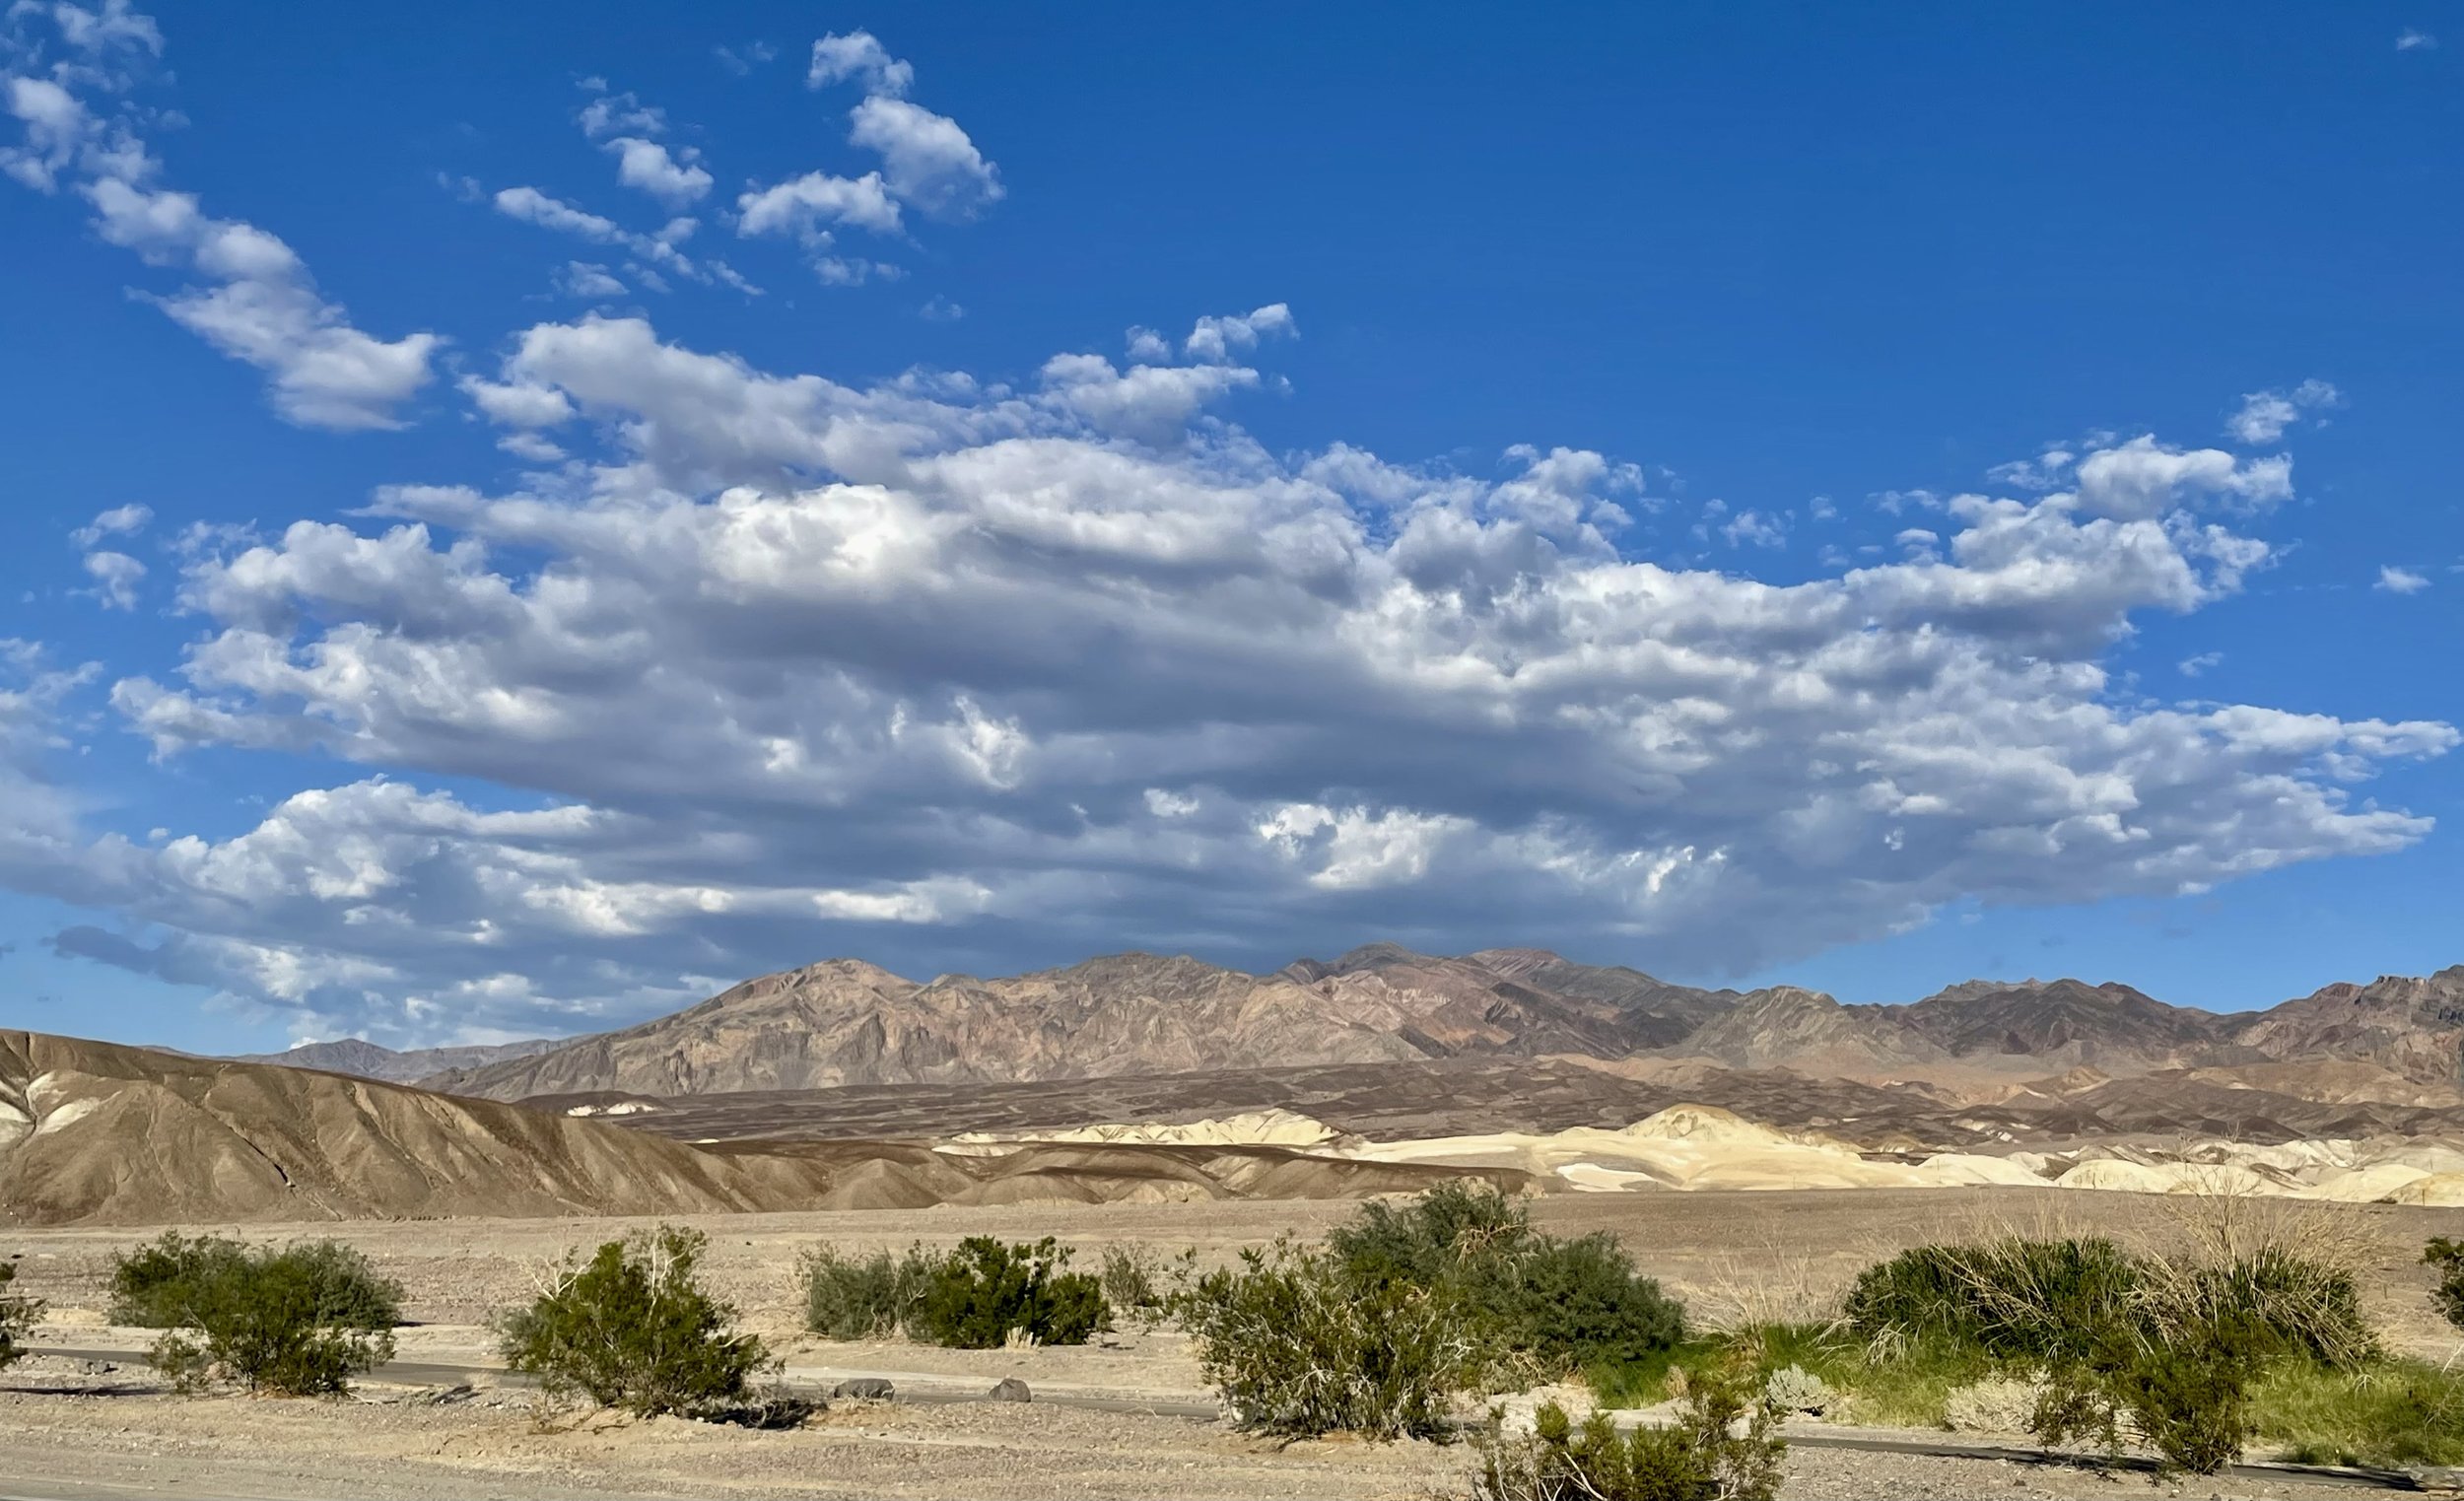
Things to Do in Death Valley
1. Visit Badwater Basin
Best for surreal landscapes and a bucket-list stop
• Walk on the vast salt flats at Badwater Basin, the lowest point in North America. The hexagonal salt formations look like another planet!
2. Watch Sunrise at Zabriskie Point
Best for stunning golden views and photography
• One of the best sunrise spots in the park, Zabriskie Point offers breathtaking views of the golden badlands and rolling hills.
3. Hike Golden Canyon & Red Cathedral
Best for an easy yet stunning hike
• This 3-mile roundtrip hike takes you through colorful rock formations to the towering Red Cathedral.
4. Explore Mesquite Flat Sand Dunes
Best for sunset and dramatic landscapes
• These wind-sculpted dunes are a great place to take photos, especially at sunrise or sunset when the shadows create amazing patterns.
5. Drive Artists Drive & Artists Palette
Best for a scenic drive with colorful rocks
• This 9-mile scenic drive takes you past vibrant hills, with mineral deposits creating hues of red, pink, yellow, and green.
6. See Dante’s View
Best for panoramic views
• At 5,476 feet, this viewpoint gives you a stunning panoramic look over the entire valley. Come for sunrise or sunset!
7. Check Out Devil’s Golf Course
Best for unique salt formations
• This jagged salt pan is so rough that “only the devil could play golf here.” The spiky formations are fascinating up close.
8. Go Stargazing
Best for dark sky lovers
• Death Valley is an official Dark Sky Park, meaning it has some of the best stargazing in the U.S.!
How to Prepare for Your Trip to Death Valley
Best Time to Visit
• Fall to Spring (October – April) is ideal, with cooler temperatures.
• Summer (May – September) is dangerously hot, often exceeding 120°F (49°C).
What to Bring
Water – At least 1 gallon per person per day. There are limited refill stations.
Electrolytes & Snacks – Helps prevent dehydration.
Sunscreen, Hat, and Sunglasses – The sun is relentless.
Proper Footwear – Hiking boots or sturdy shoes for rocky terrain.
Layers – It can be chilly in the mornings and evenings.
Paper Map – GPS can be unreliable.
Gas – Fill up in Furnace Creek or Stovepipe Wells before exploring. Rule of thumb when driving in the desert. If you have half a tank of gas, you are basically driving on empty. FILL UP!
Best Photography Spots in Death Valley
Zabriskie Point – Best for sunrise.
Badwater Basin – Unique salt flats.
Artists Palette – Vibrant colors on the rocks.
Mesquite Flat Sand Dunes – Dramatic shadows at sunrise/sunset.
Dante’s View – Best high-elevation view of the entire valley.
As always, for the most up to date information about the park visit the National Park Website.